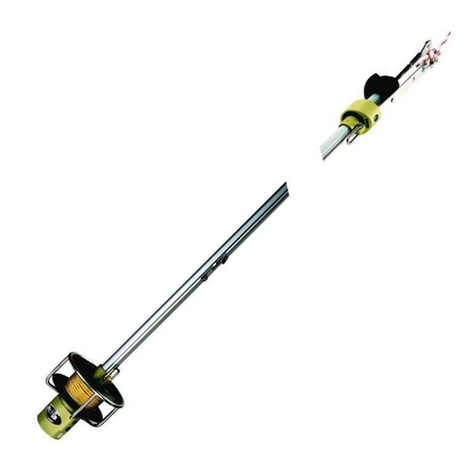
ProFurl Nex 0.9 User manual

®
nex
0.9, 1.5, 2.5, 4.0, 6.5
V ersion standard et Version Cliquet
Standard version and Ratchet version
Vous venez d’acquérir un NEX, la nouvelle génération d’emmagasineurs Profurl, nous vous remercions de la conance que vous portez dans nos produits
et espérons que ceux-ci vous apporteront satisfaction.You have purchased NEX, the new generation of Profurl ying sail furler. Thank you for your interest and
condence in our products, we hope that NEX will meet your satisfaction.
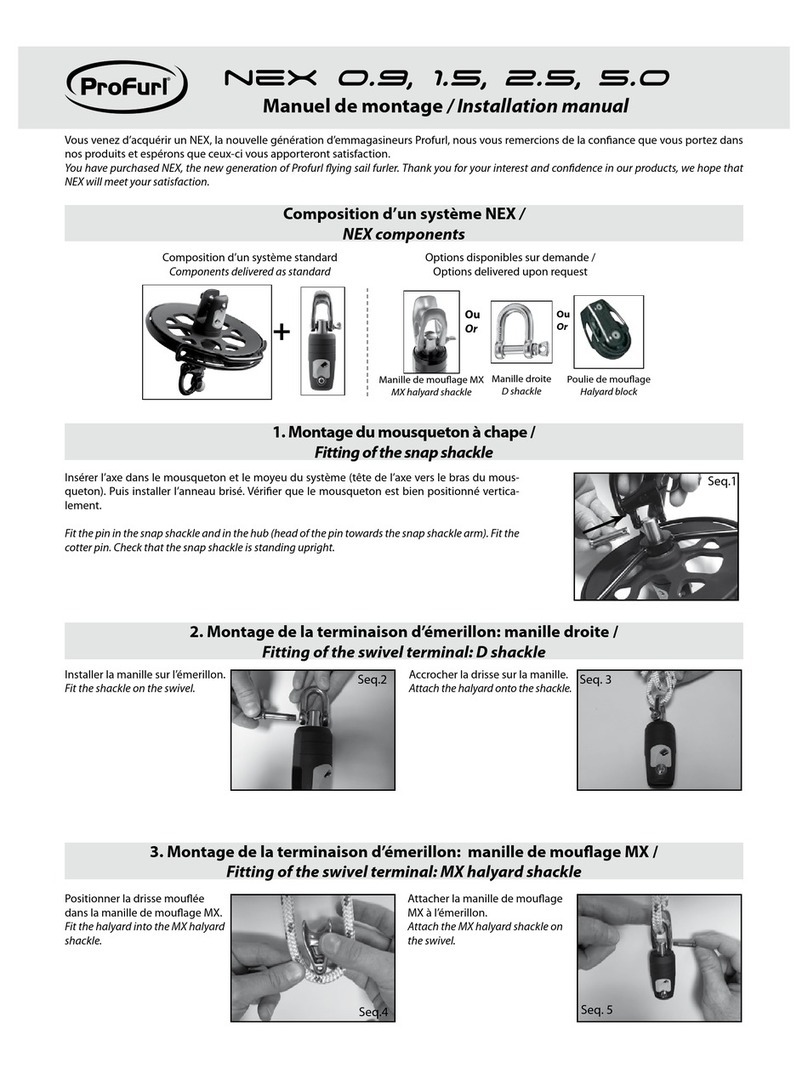
1 - 2. Montage du mousqueton à chape et de la manille droite
Fitting of the snap shackle and D shackle
Insérer l’axe dans le mousqueton et le moyeu du système (tête de l’axe vers le
bras du mousqueton). Puis installer l’anneau brisé. Vérier que le mousque-
ton est bien positionné verticalement.
Fit the pin in the snap shackle and in the hub (head of the pin towards the snap
shackle arm). Fit the cotter pin. Check that the snap shackle is standing upright.
3. Installation du cliquet (seulement pour les versions cliquet) / Ratchet tting (only for ratchet versions)
Seq.1 Seq.2
Installer la manille sur l’émerillon.
Fit the shackle on the swivel.
Insérer le cliquet comme indiqué
Fit the ratchet as shown on the picture
Attention: 1 grande vis - 1 petite vis
Warning: 1 long screw - 1 short screw
Seq.3.1 Seq.3.2 Seq.3.3
Appliquer la colle bleue sur la longue vis
Apply the blue glue on the long screw
Seq.3.4 Seq.3.5 Seq.3.6
Seq.3.7
Monter la longue vis sur le carter
Fit the long screw as shown
Monter la petite vis sur le carter
Fit the short screw as shown
Appliquer la colle bleue sur la petite vis
Apply the blue glue on the short screw
Longue vis / Long screw
Petite vis / Short screw
Réf 59300 - Index A / 2020

4. Réglage du carter / Cage adjustment
Le carter est livré monté mais non bloqué pour permettre son réglage. Orienter le carter an que la drosse
de manoeuvre soit correctement alignée. Eviter que la drosse ne frotte sur les entrées du carter. When
delivered, the cage is tted but not locked to allow adjustment. Orientate the cage so that the furling line is
properly aligned. Avoid the furling line scrapping against the sides of the cage.
5. Installation de la drosse épissée / Furling line tting
L’installation et démontage de la drosse épissée se fait facilement grâce à l’encoche situé sur la poulie crantée. Lors de ces étapes, il est nécessaire
que la voile ne soit pas attachée au mécanisme.
Thanks to the notch of the spool, the furling line can be installed and removed easily. The sail has to be disconnected to install the furling line.
Seq.4.1 Seq.4.2 Seq.4.3
Insérer la clé allen dans le carter
Insert the allen key into the slot of the
housing
Ajuster le carter
Adjust the housing
Drosse avant le réglage
Furling line before adjusting
Après le réglage - serrer la vis
After adjusting tthe housing - tighten the
screw
Seq.5.1 Seq.5.2 Seq.5.3
Seq.5.4 Seq.5.5 Seq.5.6
Insérer la drosse dans le carter
Fit the furling line into the housing
Placer un des brins dans l’encoche de la
tourelle
Placer one of the lines into the slot of the
spool
Faire tourner la tourelle dans le sens du
cliquet!!
Turn the spool in the same way of the
ratchet!!
Drosse installée
Furling line in position
Faire courir la drosse dans les loirs (non
fournis) jusqu’à l’arrière du bateau
Install the furling into the stanchion
fairleads (not provided) till the stern of the
boat
Conseil: utiliser un sandow avec un
mousqueton pour maintenir la drosse
tendue
Tip: use a bungee cord and a snap hook to
tension the furling line
INFO: PROFURL vous propose un ensemble d’accessoires permettant d’installer correctement votre drosse: loirs double, anneaux
friction etc...Contactez nous
INFO: Profurl oers a wide range of solutions to optimize the furling line installation: double fairleads, friction rings etc.. Contact us!

6. Installation de la voile / Sail tting
7. Installation des options: MXEVO / MXEVO tting
8. Installation des options: poulie de mouage / Halyard block tting
Seq.6.1 Seq.6.2
Ouvrir l’axe de la tourelle en tirant sur les 2 garcettes
Open the pin by pulling on the 2 lanyards
Positionner la cosse dans la chape et refermer l’axe
Place the thimble into the fork and close the pin
Seq.7.1 Seq.7.1
Ouvrir la MXEVO et positionner la drisse
Open the MXEVO halyard shackle and t the halyard
Installer la MXEVO sur l’émerillon
Install the MXEVO halyard shackle on the swivel
Seq.8.1 Seq.8.2 Seq.8.3 Seq.8.4
Seq.8.5 Seq.8.6 Seq.8.7 Seq.8.8
Seq.8.9 Seq.8.10
Dévisser la vis à l’aide d’une clé TORX (non fournie) - Retirer l’axe et
la clavette
Unscrew the screw with a TORX key (not provided) - Remove the pin
and the key
Sortir le réa et le palier et installer la drosse sur le réa
Remove the sheave and the bearing - Install the halyard on the sheave
Installer le réa et le palier - Appliquer la colle sur la vis et l’insérer
Fit the sheave and the bearing - Apply the glue on the screw and the t
the screw
Monter la poulie sur l’émerillon - Installer l’axe dans la poulie
Install the block onto the swivel - Fit the pin on the block
Si nécessaire mettre de la colle sur le letage de la vis OU sur le taraudage de la clavette - Installer la clavette sur la poulie - Visser la vis
If necessary apply the glue on the screw thread OR on the thread - Fit the key on the block - Tighten the screw

9. Installation des options: oeil emerillon / Eye tting
10. Installation des options: palan friction / solid sheave
Entretien - Garantie / Maintenance - Warranty
Les emmagasineurs NEX ont été conçus pour fonctionner sans entretien pendant de nombreuses années. Cependant un rinçage à l’eau claire des
mécanismes peut être réalisé autant de fois que nécessaire. NE JAMAIS UTILISER DE LUBRIFIANT TYPE WD40 (ou équivalent). Les emmagasineurs NEX sont
garantis 3 ans. En cas de questions, contacter notre service technique (coordonnées ci-dessous).
Your NEX ying sail furler requires no special maintenance. You can rinse it with fresh water as often as necessary to remove salt and dirt from components. NEVER
USE WD40 (or similar) on the seals in the mechanisms as it will permanently damage them. In case of questions, contact our hotline (see contact details below).
The NEX ying sail furler benets from a 3 year world-wide limited warranty.
www.profurl.com
ATTENTION: ne jamais utiliser l’émerillon soit pour monter au mât soit pour hisser une charge.
WARNING: never use the swivel either to climb the mast or to lift a load.
WICHARD France
Hotline / Support technique / SAV
Z.A Pornichet Atlantique
16 rue du Gulf Stream
44380 Pornichet
France
Tel +33 (0)2 51 76 00 35
Fax +33 (0)2 40 01 40 43
Seq.9.1 Seq.9.2 Seq.9.3
Dévisser la vis de l’oeil émerillon
Unscrew the screw
Appliquer la colle sur le taraudage de l’oeil
Apply the glue on the thread of the eye
Monter l’oeil et serrer la vis
Fit the eay and tighten the screw
Seq.10.1
Ouvrir l’axe du palan pour l’installer sur la tourelle
Open the solid sheave pin to install it on the spool
Refermer l’axe du palan
Close the pin of the solid sheave
This manual suits for next models
4
Other ProFurl Marine Equipment manuals