manuals.online logo
Brands
  1. Home
  2. •
  3. Brands
  4. •
  5. Promet
  6. •
  7. Lock
  8. •
  9. Promet PLS-2.2 User manual

Promet PLS-2.2 User manual

Digital Safe Lock PLS-2.2 USER MANUAL
www.safe.ru
Ver.1/1 02.02.2022
DIGITAL SAFE LOCK
PLS-2.2
USER MANUAL
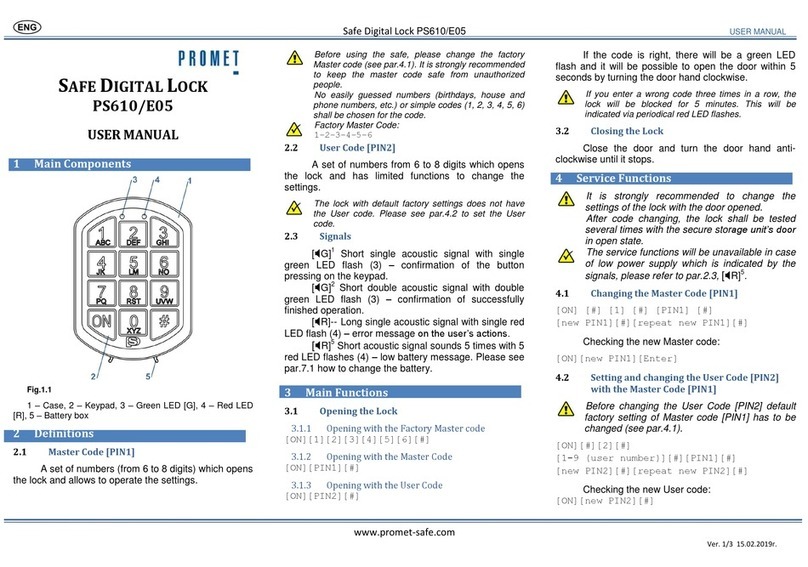
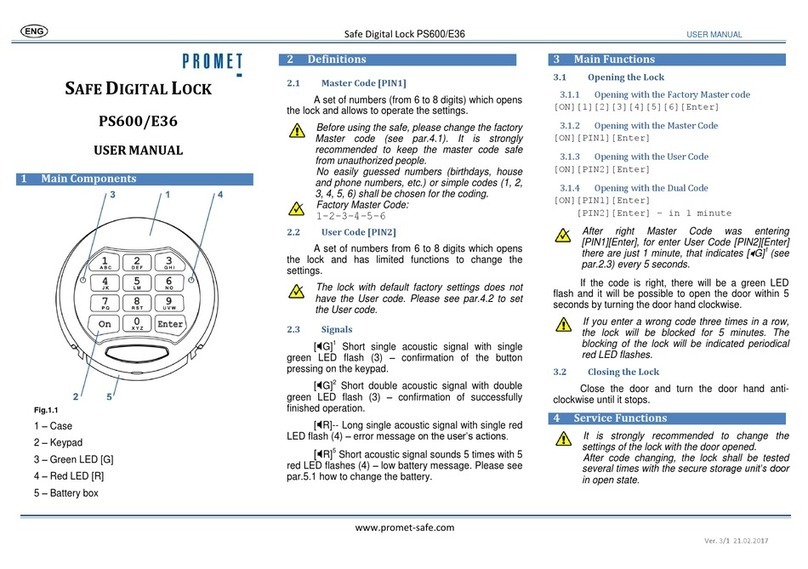
1Main Components
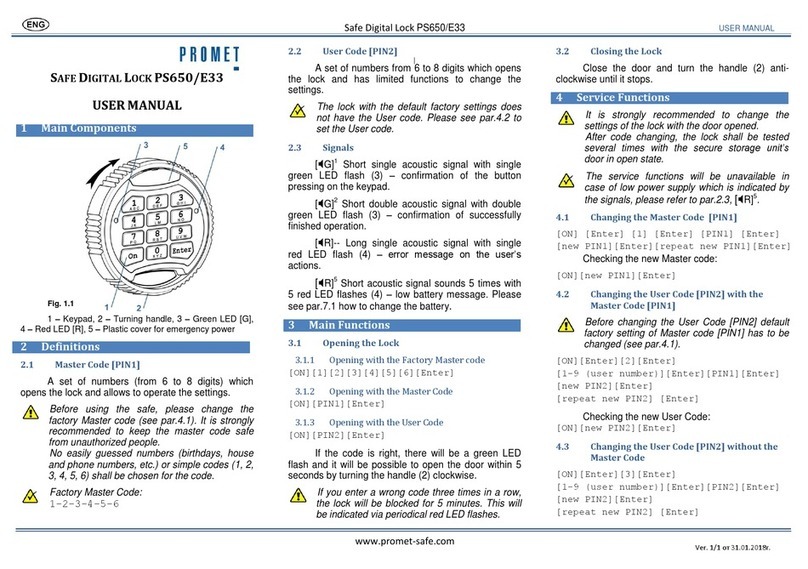
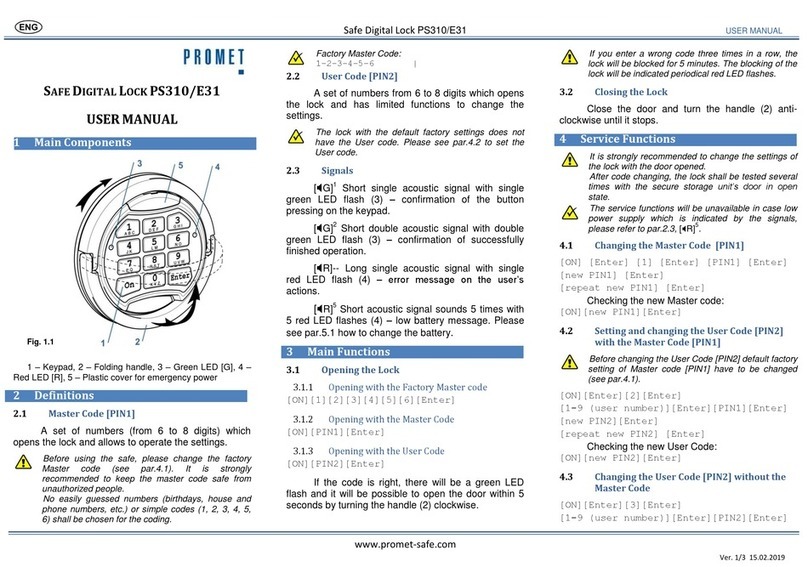
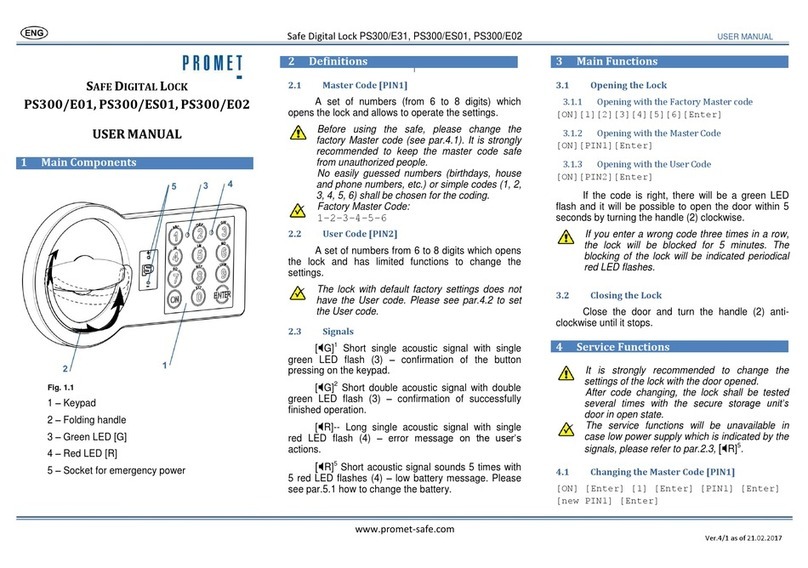
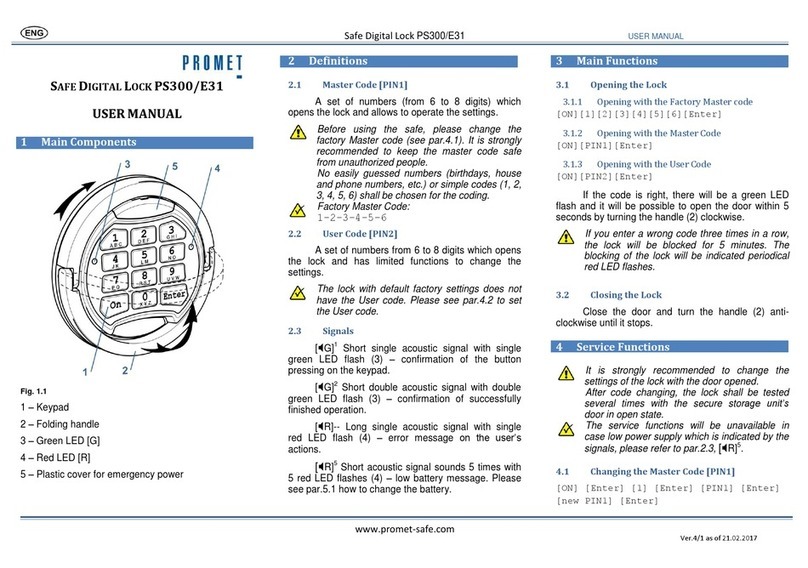
Fig. 1.1
1 –Keypad, 2 –Display, 3 –Cover for emergency
opening, 4 –Turning handle, 5 –Backup power contacts
2Definitions
2.1 Master Code [PIN1]
A set of 6 numbers which opens and closes the
lock and allows to operate the settings.
Before using the safe, please change the
factory Master code (see par.4). It is strongly
recommended to keep the master code safe
from unauthorized people.
Factory Master Code:
1–2–3–4–5–6
2.2 User Code [PIN2]
A set of numbers from 4 to 6 digits which
opens/closes the lock and has limited functions to
change the settings. Assigned by the user when the
safe is closed.
A new user code is assigned by the user each time
the safe is closed.
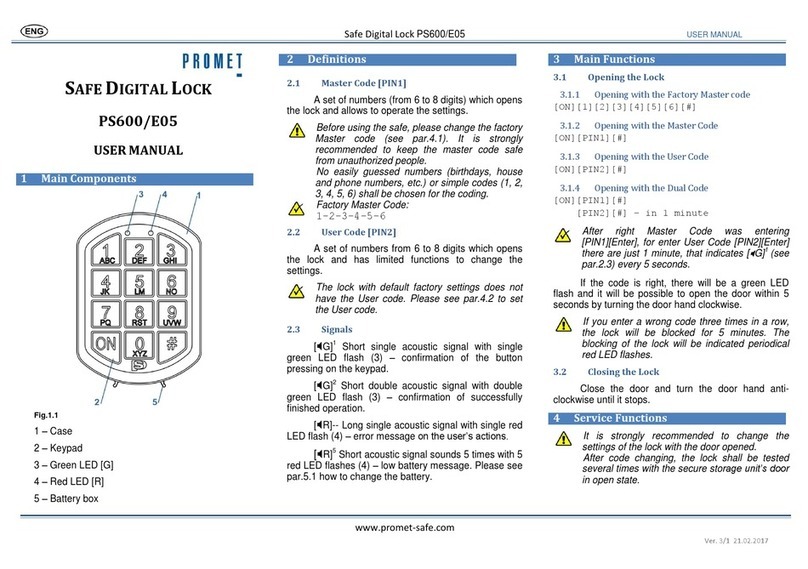
2.3 Signals
[D]1Short single acoustic signal with indication
of the entered character on the display (2) –
confirmation of the button pressing on the keypad.
You can delete an incorrectly entered character
using the key «*».
[D]2Short double acoustic signal with indication
of the entered character on the display (2) –
confirmation of successfully finished operation.
[D]3Short triple acoustic signal with indication
«ERROR»on the display (2) –error message on the
user’s actions
[D] Indication «BA-LO»on the display (2) –low
battery message. Please see par.5.2 how tochange the
battery.
3Main Functions
3.1 Opening the Lock
3.1.1 Opening the New Lock
[#][1][2][3][4][5][6][#]
3.1.2 Opening with Master Code
[#][PIN1][#]
3.1.3 Opening with User Code
[PIN2][#]
If the code is right, there will be indication
«OPEN»on the display (2) and it will be possible to
open the door within 5 seconds by turning the handle
(4) clockwise.
If you enter a wrong code three times in a row,
the lock will be blocked for 5 minutes. This will
be indicated via «BLOC»indication on the
display (2)
3.2 Closing the Lock
Closing the Lock:
[PIN2][#]
Close the door and turn the handle (4) anti-
clockwise until it stops. There will be «CLOSED»
indication on the display (2)
If within 5 seconds after entering the code the
mechanism of the locking bolts of the safe is not
activated, the lock will remain open, the code will not
be stored and the closing procedure must be
restarted.
4Service Functions
It is strongly recommended to change the
settings of the lock with the door opened.
After code changing, the lock shall be tested
several times with the secure storage unit’s
door in open state.
The service functions will be unavailable in
case of low power supply which is indicated by
the signals, please refer to par.2.2, [D].
4.1 Changing the Master Code [PIN1]
[#][#][PIN1][#][new PIN1][#]
[repeat new PIN1][#]
Checking the New Master Code:
[#][new PIN1][#]
Digital Safe Lock PLS-2.2 USER MANUAL
www.safe.ru
Ver.1/1 02.02.2022
4.2 Delete the User Code [PIN2]
Before deleting the User Code [PIN2] default
factory setting of Master code [PIN1] have to be
changed (see par.4.1).
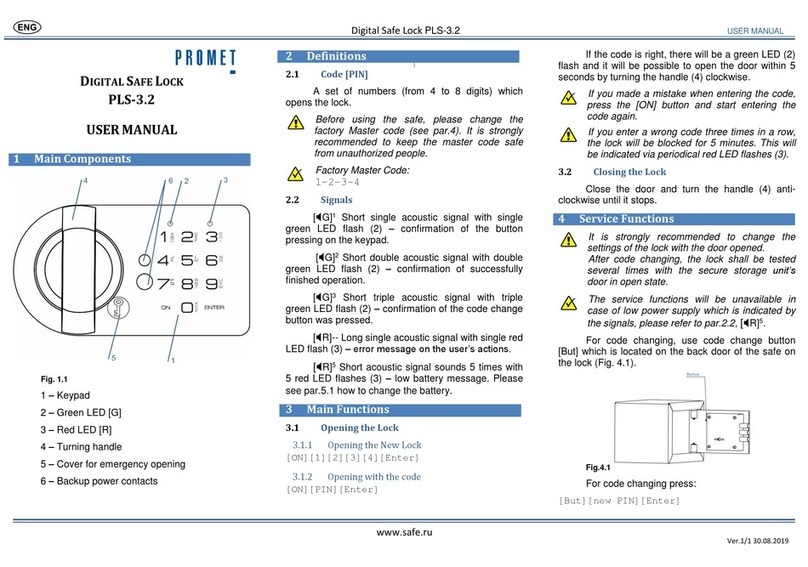
For code changing, use code change button [But]
which is located on the back door of the safe on the lock
(Fig. 4.1). Press and hold the button until the locking
mechanism is activated (see Fig.4.1). The display will
show «OPEN»,and remain on for 3 seconds. The
device then will go into standby mode.
Turn the handle (4) clockwise and open the lock.
Fig.4.1
5Servicing
The battery supplied with the lock is designed
for the initial check of operability. Before using
the lock, it is recommended to change battery
on new one.
5.1 Checking The Battery Level
At any time, the battery level can be checked by
pressing the "*" button twice.
There are two possible states of the batteries:
-BAT-HI when the voltage falls to 7.2V;
-BAT-LOW when the voltage falls below 7.2V.
With the battery off, the code remains in
memory.
5.2 Changing the Battery
The battery is located on the inner side of the door.
Open the cover of the battery box (Fig.5.1).
Fig. 5.1
Change battery on new one (9V, Alkaline, type
6LF22, 6LR61, 6LP3146).
Take the cover back to its location.
5.3 Opening the lock when the Battery is Flat
Take out the cover for emergency opening (5)
(Fig.5.2).
Fig. 5.2 Fig. 5.3
Insert the key against the stop (key’s flag on the
right) and turn it anti-clockwise until it stops (Fig.
5.3).
Open the door and change the discharged battery,
see par. 5.1.
5.4 Opening the lock when the Battery is
Discharged
Take a new battery (9V, Alkaline, type 6LF22,
6LR61, 6LP3146).
Press the new battery to emergency power pins (6)
and fix it in this position (see Image 5.4)
Fig. 5.4
Enter the valid code on the keypad (1).
Disconnect the emergency battery, turn the
handle and open the door and change the
discharged battery, see par. 5.1.

Other Promet Lock manuals

Promet PS550/E33 User manual

Promet

Promet PS550/E33 User manual

Promet PS650/E33 User manual

Promet

Promet PS650/E33 User manual

Promet PS600/E31 User manual

Promet

Promet PS600/E31 User manual

Promet PS610/E36 User manual

Promet

Promet PS610/E36 User manual

Promet PLS-3 User manual

Promet

Promet PLS-3 User manual

Promet PS600/E05 User manual

Promet

Promet PS600/E05 User manual

Promet PS310/E31 User manual

Promet

Promet PS310/E31 User manual

Promet PS310/E01 User manual

Promet

Promet PS310/E01 User manual

Promet PLS-3.2 User manual

Promet

Promet PLS-3.2 User manual

Promet PS300/ES01 User manual

Promet

Promet PS300/ES01 User manual

Promet PS300/E31 User manual

Promet

Promet PS300/E31 User manual

Promet PS610/E05 User manual

Promet

Promet PS610/E05 User manual

Promet PS600/E36 User manual

Promet

Promet PS600/E36 User manual

Popular Lock manuals by other brands

TownSteel e-Genius 2000 Series Installation

TownSteel

TownSteel e-Genius 2000 Series Installation

Reer DesignLine 71011 instruction manual

Reer

Reer DesignLine 71011 instruction manual

Soca GL-200P installation instructions

Soca

Soca GL-200P installation instructions

Proxess CX Series Service manual

Proxess

Proxess CX Series Service manual

CISA aPH3 installation instructions

CISA

CISA aPH3 installation instructions

Assa Abloy Abloy EL648 manual

Assa Abloy

Assa Abloy Abloy EL648 manual

COMPX Tinmberline CB-244 instruction sheet

COMPX

COMPX Tinmberline CB-244 instruction sheet

Kit-Lock KL20 Installation and operating instructions

Kit-Lock

Kit-Lock KL20 Installation and operating instructions

Waferlock C760 user manual

Waferlock

Waferlock C760 user manual

VITRA Dial Lock operating instructions

VITRA

VITRA Dial Lock operating instructions

Gianni Industries GEM EM-NH2300 specification

Gianni Industries

Gianni Industries GEM EM-NH2300 specification

XLOCK 142 installation guide

XLOCK

XLOCK 142 installation guide

Philips EasyKey 7100 user manual

Philips

Philips EasyKey 7100 user manual

HES 4500 series installation instructions

HES

HES 4500 series installation instructions

Mesa MSL-300 operating instructions

Mesa

Mesa MSL-300 operating instructions

S&G Z03 D-Drive operating instructions

S&G

S&G Z03 D-Drive operating instructions

Magic 105 manual

Magic

Magic 105 manual

Dorma Studio Classic Installation instruction

Dorma

Dorma Studio Classic Installation instruction

manuals.online logo
manuals.online logoBrands
  • About & Mission
  • Contact us
  • Privacy Policy
  • Terms and Conditions

Copyright 2025 Manuals.Online. All Rights Reserved.