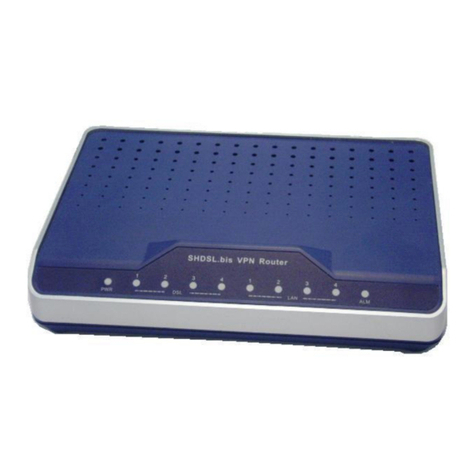
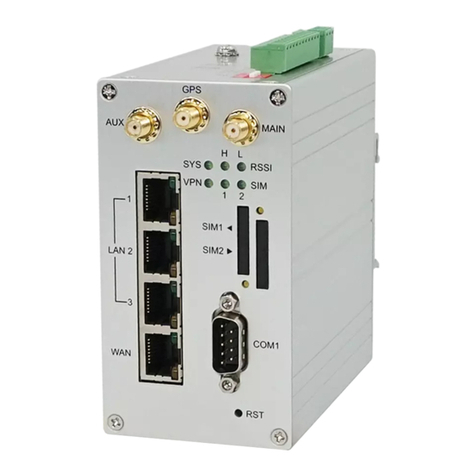
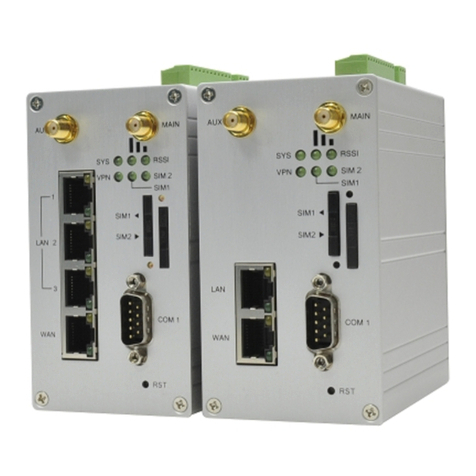
Proscend 5200N Series User manual

G.SHDSL .bis Router
User Manual
User ManualUser Manual
User Manual
Version 0.04

G.SHDSL .bis Router User Manual V0.04
1
Table of Contents
1
DESCRIPTIONS ................................................................................................................................. 4
1.1
F
EATURES
........................................................................................................................................ 4
1.2
S
PECIFICATION
.................................................................................................................................. 5
2-WIRE G.SHDSL.BIS EFM ROUTER WITH 4 LAN PORT ............................................... 7
4-WIRE G.SHDSL.BIS EFM ROUTER WITH 4 LAN PORTS ............................................ 7
8-WIRE G.SHDSL.BIS EFM ROUTER WITH 4 LAN PORTS ............................................ 7
1.3
A
PPLICATIONS
................................................................................................................................... 8
2
GETTING TO KNOW ABOUT THE ROUTER ........................................................................................ 9
2.1
F
RONT
P
ANEL
................................................................................................................................... 9
2.2
R
EAR
P
ANEL
................................................................................................................................... 10
2.3
SHDSL.
BIS
L
INE
C
ONNECTOR
............................................................................................................ 11
2.4
C
ONSOLE
C
ABLE
.............................................................................................................................. 11
3
INSTALL THE ROUTER ..................................................................................................................... 12
3.1
C
HECK
L
IST
.................................................................................................................................... 12
3.2
I
NSTALL THE
SHDSL.
BIS
R
OUTER
........................................................................................................ 14
4
CONFIGURATION VIA WEB BROWSER ............................................................................................ 15
4.1
B
ASIC
S
ETUP
.................................................................................................................................. 17
4.1.1
Reference diagram ................................................................................................................. 20
4.2
STATUS ........................................................................................................................................ 22
4.2.1
Information ............................................................................................................................ 23
4.2.2
NETWORKING ........................................................................................................................ 23
4.2.3
PACKET TATI TIC ................................................................................................................. 24
4.2.4
G. HD L ................................................................................................................................. 24
4.3
A
DVANCED
S
ETUP
........................................................................................................................... 25
4.3.1
HD L.bis ............................................................................................................................... 25
4.3.2
WAN ....................................................................................................................................... 26
4.3.3
LAN ........................................................................................................................................ 28
4.3.4
DN ........................................................................................................................................ 28
4.3.5
DHCP ...................................................................................................................................... 29
4.3.6
VLAN ...................................................................................................................................... 30
4.3.7
Qo ........................................................................................................................................ 31
4.3.8
RIP .......................................................................................................................................... 33
4.3.9
NAT/DMZ ............................................................................................................................... 34
4.3.10
Virtual erver .................................................................................................................... 35
4.3.11
DDN ................................................................................................................................. 35
4.3.12
FIREWALL .......................................................................................................................... 36
4.3.13
Content Filter .................................................................................................................... 37
4.3.14
IGMP ................................................................................................................................. 37
4.3.15
NTP .................................................................................................................................. 38
4.4
ADMIN ........................................................................................................................................ 39

G.SHDSL .bis Router User Manual V0.04
2
4.4.1
ecurity .................................................................................................................................. 39
4.4.2
Management ......................................................................................................................... 40
4.4.2.1
SNMP .......................................................................................................................................... 40
4.4.2.2
WWW ......................................................................................................................................... 41
4.4.2.3
TELNET ........................................................................................................................................ 41
4.4.2.4
SSH ............................................................................................................................................. 42
4.5
U
TILIT
......................................................................................................................................... 42
4.5.1
Y TEM LOG ........................................................................................................................... 43
4.5.2
ystem Tool ............................................................................................................................ 44
4.5.3
Upgrade ................................................................................................................................. 44
4.5.4
Restart ................................................................................................................................... 45
4.6
LOGOUT ...................................................................................................................................... 45
4.6.1
LAN-to-LAN connection with bridge Mode ............................................................................ 46
4.6.1.1
CO side ....................................................................................................................................... 46
4.6.1.2
CPE Side ...................................................................................................................................... 47
4.6.2
LAN to LAN connection with routing mode ........................................................................... 48
4.6.2.1
CO Side ....................................................................................................................................... 48
4.6.2.2
CPE side ...................................................................................................................................... 49
5
CONFIGURATION VIA SERIAL CONSOLE OR TELNET ........................................................................ 52
5.1
I
NTRODUCTION
............................................................................................................................... 52
5.1.1
erial Console ........................................................................................................................ 52
5.1.2
Telnet ..................................................................................................................................... 52
5.2
M
AIN MENU
.................................................................................................................................. 53
5.3
K
E
CLI
C
OMMAND TREE OVERVIEW
................................................................................................... 54

G.SHDSL .bis Router User Manual V0.04
3
Change Note:
Date
Editor
Description
Version Note
2016/4 Vincent Initial Draft v0.01 v0.01
2016/5 Charlie Revise Web GUI information
Revise wording errors
v0.02
2016/5 Venti Revise VLAN GUI v0.03
2016/6 Venti Revise Basic, WAN, VLAN, Admin/Security,
Syslog , Information, MGMT GUI
Revise Syslog server setting
V0.04

G.SHDSL .bis Router User Manual V0.04
4
1
1
D
De
es
s
r
ri
ip
pt
ti
io
on
ns
s
Proscend 5200N Series 2/4/8-Wire SHDSL.bis EFM Bridges/Routers comply with the latest
G.SHDSL.bis technology standards and supports symmetric data rate up to 15.3Mbps/Pair under
TC-PAM 128. Up to four pairs can be bonded together for aggregated bandwidth over 61 Mbps.
It provides a secure and symmetrical high-speed connectivity over existing copper-line
infrastructure that is ideal for service providers as well as SOHO and SME users.
5200N supports back to back connectivity for long reach Ethernet extension. Users can make a
direct connection between two SHDSL.bis routers by using a standard telephone cable, and
configure one as CO and the other as CPE. The connection offers a cost effective solution for
service providers and SME users who need high-speed dedicated network applications.
The SHDSL.bis EFM routers are integrated with high-end Bridging/Routing capabilities that
support flexible traffic management policies and Quality of Service, enabling business-class
Ethernet services with flexibility of mapping user traffic into Ethernet flows. The unit can be
managed by different ports and applications including comprehensive command-line interface
(CLI), Telnet, user-friendly GUI-based Web Browser Interface and SNMP.
The SHDSL.bis routers help customers to meet their growing data communication needs by the
latest broadband technologies. Through the power of SHDSL.bis products, you can access
superior manageability and reliability.
1
1.
.1
1
F
Fe
ea
at
tu
ur
re
es
s
Symmetrical high-speed Ethernet service with SHDSL.bis, backward compatible with SHDSL
EFM bonding up to 61 Mbps (8-Wires, TC-PAM 128)
Support both EFM mode and ATM mode(1 PVC)
Support point to point connectivity
Support dying gasp

G.SHDSL .bis Router User Manual V0.04
5
1
1.
.2
2
S
Sp
pe
ec
ci
if
fi
ic
ca
at
ti
io
on
n
WAN Interface
SHDSL.bis: ITU-T G.991.2 (2004) Annex A/B/F/G supported
Support EFM Bonding and SHDSL M-Pair mode
Encoding scheme: TC-PAM 16/32/64/128
Data Rate:
N x 64 Kpbs (N=3~89) using TC-PAM 16/32
Max. 5.696Mbps (1-Pair)
Max. 11.392Mbps (2-Pair)
Max. 22.784Mbps (4-Pair)
N x 64 Kbps (N=3~239) using TC-PAM 64/128
Max. 15.296 Mbps (1-Pair)
Max. 30.592 Mbps (2-Pair)
Max. 61.184 Mbps(4-Pair)
Impedance: 135 ohms.
Compliant with IEEE 802.3ah
LAN Interface
4-Ports 10/100M Switch, Auto-negotiation for 10/100Base-TX and Half/Full Duplex,
Auto-MDIX Supported.
Bridging
Up to 1024 MAC address learning bridge
IEEE 802.1D transparent learning bridge
IEEE 802.1Q/1P VLAN Port-based/Tagging
QoS Class-based (Prioritization/Traffic/DSCP Mark), Rate Limiting, Up to 8 priority
queues
Routing
Support IP/TCP/UDP/ARP/ICMP/IGMP protocols
IP routing with static routing and RIPv1/RIPv2 (RFC1058/2453)
IP multicast and IGMP proxy (RFC1112/2236)
Network address translation (NAT/PAT) (RFC1631)
DHCP server, client and relay (RFC2131/2132)
DNS relay/proxy and caching (RFC1034/1035)
Dynamic DNS
IP precedence (RFC 791)
ATM
Multiple Protocols over AAL5
Ethernet over ATM (RFC 2684/1483)
1 PVC
EFM
EFM mode compliant to IEEE 802.3,
PPP over Ethernet (RFC2516)

G.SHDSL .bis Router User Manual V0.04
6
Support of OAMPDU information and functionality ( ITU-T Y.1731)
OAMPDU Event Notification, Variable Request, Variable Response, Loopback Control
VLAN base QOS (802.1P/Q), Priority Queue
Network Protocol
VoIP(SIP) pass-through
IPv4 (ARP/RARP, TCP/UDCP, ICMP)
SNTP (Time Zone/ Daylight Savings)
Security
Natural NAT/PAT firewall
DMZ host
Virtual server mapping (RFC1631)
Advanced stateful packet inspection (SPI) firewall Denial of Service (DoS)
Application level gateway for URL and keyword blocking (Content Filter)
Access Control List (ACL)
Support PAP/CHAP/MS-CHAP client
Management
Web-based GUI for quick setup, configuration and management
Command-line interface (CLI) for local console and Telnet/SSH access
Password protected management and access control list for administration
Remote management via WWW/SSH/Telnet local/remote
Real-time system log logging
SNMP SNMPv1/SNMPv2 (RFC 1157/1901/1905) and MIB-II (RFC 1213/1493)
Software upgrade via Web-browser/CLI, supported TFTP/FTP
Dying Gasp
Diagnostics/Monitoring
Routing Table
Packet Statistics
Hardware Interface
WAN: RJ-45 x 1
LAN: RJ-45 x 4
Console Port: RS232 female
Reset Button: Load factory default
Power Jack
Indicators
System: PWR, ALM
WAN 1~4: LNK/ACT
LAN 1~4: LINK/ACT
Physical / Electrical
Dimensions: 18.7 x 3.3 x 14.5cm (WxHxD)
Power: 100~240VAC (via power adapter)
Power Consumption: 9 watts Max

G.SHDSL .bis Router User Manual V0.04
7
Operating Temperature: 0~45°C
Storage Temperature: -20°C~70°C
Humidity: 0%~95%RH (non-condensing)
Memory
128MB Flash Memory, 64MB DDR2 DRAM
Regulatory
CE
FCC Part 15 Class A
VCCI
EN60950
*
Proscend reserves the right to change specifications without prior notice.
Order Information
5210N 2-Wire G.Shdsl.bis EFM Router with 4 LAN Port
5220N 4-Wire G.Shdsl.bis EFM Router with 4 LAN Ports
5240N -Wire G.Shdsl.bis EFM Router with 4 LAN Ports

G.SHDSL .bis Router User Manual V0.04
8
1
1.
.3
3
A
Ap
pp
pl
li
ic
ca
at
ti
io
on
ns
s
Combination with EFM or ATM DSLAM
Point-to-point connection
.

G.SHDSL .bis Router User Manual V0.04
9
2
2
G
Ge
et
tt
ti
in
ng
g
t
to
o
k
kn
no
ow
w
a
ab
bo
ou
ut
t
t
th
he
e
r
ro
ou
ut
te
er
r
This chapter introduces the main features of the router.
2
2.
.1
1
F
Fr
ro
on
nt
t
P
Pa
an
ne
el
l
The front panel contains LEDs which show status of the router.
LED status of SHDSL.bis Router
LEDs Active Description
PWR On The power adaptor is connected to this device
DSL
LINK 1
On SHDSL.bis line 1 connection is established
Blink SHDSL.bis line 1 handshake
Transmit or received data over SHDSL.bis link 1
LINK 2
On SHDSL.bis line 2 connection is established
Blink SHDSL.bis line 2 handshake
Transmit or received data over SHDSL.bis link 2
LINK 3
On SHDSL.bis line 3 connection is established
Blink SHDSL.bis line 3 handshake
Transmit or received data over SHDSL.bis link 3
LINK 4
On SHDSL.bis line 4 connection is established
Blink SHDSL.bis line 4 handshake
Transmit or received data over SHDSL.bis link 4
LAN
LINK/ACT1 On Ethernet cable is connected to LAN 1
Blink Transmit or received data over LAN 1
LINK/ACT2 On Ethernet cable is connected to LAN 2
Blink Transmit or received data over LAN 2
LINK/ACT3 On Ethernet cable is connected to LAN 3
Blink Transmit or received data over LAN 3
LINK/ACT4 On Ethernet cable is connected to LAN 4
Blink Transmit or received data over LAN 4
ALM
On SHDSL.bis line connection is dropped
Blink SHDSL.bis self-test
Off No Alarm

G.SHDSL .bis Router User Manual V0.04
10
2
2.
.2
2
R
Re
ea
ar
r
P
Pa
an
ne
el
l
The rear panel of SHDSL.bis router is where all of the connections are made.
Connectors Description of
SHDSL.bis
Router
DC-IN
LAN (1,2,3,4)
Power adaptor inlet: Input voltage 12VDC
Four Ethernet10/100BaseT auto-sensing and auto-MDI/MDIX for LAN ports
(RJ-45)
CONSOLE RS- 232C (DB9) for system configuration and maintenance
LINE SHDSL.bis interface for WAN port (RJ-45)
RST Reset button for reboot or load factory default
!
The reset button can be used only in one of two ways.
(1) Press the Reset Button for 1 second to make the system reboot.
(2) Pressing the Reset Button for 4 seconds will make the system load the factory default
settings and lose your existing configuration. When you want to change its configuration but
forget the user name or password, or if the product is having problems connecting to the
Internet and you want to configure it again by clearing all configurations, press the Reset
Button for 4 seconds with a paper clip or sharp pencil.

G.SHDSL .bis Router User Manual V0.04
11
2
2.
.3
3
S
SH
HD
DS
SL
L.
.b
bi
is
s
L
Li
in
ne
e
C
Co
on
nn
ne
ec
ct
to
or
r
Below figure show the SHDSL.bis line cord plugs pin asignment:
2
2.
.4
4
C
Co
on
ns
so
ol
le
e
C
Ca
ab
bl
le
e
Below figure show the cosole cable pins asignment:
Pin Number
Description
Figure
1 No connection
12345
6789
2 RxD (O)
3 TxD (I)
4 No connection
5 GND
6 No connection
7 CTS (O)
8 RTS (I)
9 No connection

G.SHDSL .bis Router User Manual V0.04
12
3
3
I
In
ns
st
ta
al
ll
l
t
th
he
e
R
Ro
ou
ut
te
er
r
This chapter will guide you to install the SHDSL.bis Router via Web Configuration and Serial
Console. Please follow the instructions carefully.
Note: There are three methods to configure the router: Serial console, Telnet or Web Browser.
Only one configuration method is used to setup the Router at any given time. Users have to
choose one method to configure it.
For Web configuration, you can skip item 3.
For Serial Console Configuration, you can skip item 1 and 2.
3
3.
.1
1
C
Ch
he
ec
ck
k
L
Li
is
st
t
(1) Check the Ethernet Adapter in PC or NB
Make sure that Ethernet Adapter had been installed in PC or NB used for configuration of the
router. TCP/IP protocol is necessary for web configuration, so please check the TCP/IP protocol
whether it has been installed.
(2) Check the supported Web Browser in PC or NB
In order to set up the routeter by Web Configuration, your PC or notebook computer needs to
install the supported web browser
(3) Check the Terminal Access Program
For Serial Console and Telnet Configuration, users need to setup the terminal access program
with VT100 terminal emulation.
(4) Determine Connection Setting
Users need to know the Internet Protocol supplied by your Service Provider and determine the
mode of setting.
Protocol Selection
RFC1483 Ethernet over ATM
RFC1577 Classical Internet Protocol over ATM
RFC2364 Point-to-Point Protocol over ATM
RFC2516 Point-to-Point Protocol over Ethernet

G.SHDSL .bis Router User Manual V0.04
13
The difference Protocols need to setup difference WAN parameters. After knowing the Protocol
provided by ISP, you have to ask the necessary WAN parameters to setup it.
Bridge EoA
Route EoA
IPoA
PPPoA
PPPoE
VPI:
VCI:
Encapsulation:
IP Address:
Subnet Mask:
Gateway:
DNS Server:
VPI:
VCI:
Encapsulation:
Gateway:
Host Name:(if applicable)
VPI:
VCI:
Encapsulation:
IP Address:
Subnet Mask:
Gateway:
DNS Server:
VPI:
VCI:
Encapsulation:
User Name:
Password:
DNS Server:
Host Name: (if applicable)
VPI:
VCI:
Encapsulation:
User Name:
Password:
DNS Server:
Host Name:(if applicable)

G.SHDSL .bis Router User Manual V0.04
14
3
3.
.2
2
I
In
ns
st
ta
al
ll
l
t
th
he
e
S
SH
HD
DS
SL
L.
.b
bi
is
s
R
Ro
ou
ut
te
er
r
!
To avoid possible damage to this Router, do not turn on the router before Hardware Installation.
Connect the power adapter to the port labeled DC-IN on the rear panel of the product.
Connect the Ethernet cable.
Note: The router supports auto-MDI/MDIX switching so both straight through and cross-over
Ethernet cable can be used.
Connect the phone cable to the router and the other side of phone cable to wall jack.
Connect the power adapter to power source inlet.
Turn on the PC or NB, which is used for configuration the Router.
SHDSL.bis 4-ports router with complex network topology

G.SHDSL .bis Router User Manual V0.04
15
4
4
C
Co
on
nf
fi
ig
gu
ur
ra
at
ti
io
on
n
v
vi
ia
a
W
We
eb
b
B
Br
ro
ow
ws
se
er
r
OVERVIEW
The web configuration is an HTML-based management interface for quick and easy set up of the
SHDSL.bis Routers by using an Internet browser.
After properly connecting the hardware of SHDSL.bis router as previously explained. Launch
your web browser and enter http://192.168.0.1 as URL
The default IP address and sub net-mask of the Router is 192.168.0.1 and 255.255.255.0.
Because the router acts as DHCP server in your network, the router will automatically assign IP
address for PC or NB in the network.
Type User Name root and Password root and then click OK.
The default user name and password both is root. For the system security, suggest changing them
after configuration.
Note: After changing the User Name and Password, strongly recommend you to save them
because another time when you login, the User Name and Password have to be used the
new one you changed.

G.SHDSL .bis Router User Manual V0.04
16
Function Listing
Below is the full function list of G.Shdsl.bis router
BASIC
STATUS
•Information
•Networking
•Packet Statistics
•G.SHDSL
ADVANCED
•SHDSL.bis
•WAN
•LAN
•DNS
•DHCP
•VLAN
•QoS
•RIP
•NAT/DMZ
•Virtual Server
•DDNS
•Firewall
•Content Filter
•IGMP
•SNTP
ADMIN
•SECURITY
•MGMT
UTILITY
•SYSTEM LOG
•SYSTEM TOOL
•UPGRADE
•RESTART
LOGOUT

G.SHDSL .bis Router User Manual V0.04
17
4
4.
.1
1
B
Ba
as
si
ic
c
S
Se
et
tu
up
p
OVERVIEW
Basic setup includes Bridge and Routing operation modes. User can use it to setup the Shdsl.bis
router quickly. After completing it successfully, you can access Internet or use a pair of Shdsl.bis
Routers as LAN extenders. This is the easiest and quickest way to setup the router.
Click BASIC for basic installation.
G.SHDSL

G.SHDSL .bis Router User Manual V0.04
18
Item Descri tion
Transfer Mode Click on the drop-down list and select Transfer Mode as ATM(Asynchronous
Transfer Mode) or PTM(Packet Transfer Mode).
ATM uses asynchronous time-division multiplexing, and encodes data into
small, fixed-sized packets called cells.
SHDSL interfaces support Packet Transfer Mode (PTM). In PTM, packets (IP,
PPP, Ethernet, MPLS, and so on) are transported over DSL links as an
alternative to using Asynchronous Transfer Mode (ATM). PTM is based on the
Ethernet in the First Mile (EFM) IEEE 02.3ah standard.
*Note: This mode is changed, the system will need to reboot.
Pair Mode
Click on the drop-down list and select Pair Mode as Pair-1, Pair-2 or Pair-4.
Pair-1 for 2-Wire Shdsl.bis Router
Pair-2 for 4-Wire Shdsl.bis Router
Pair-4 for 4-Wire Shdsl.bis Router
STU Mode Click on the drop-down list and select STU Mode as STU-C or STU-R
STU-C means the terminal of central office and STU-R means customer
premise equipment. For point to point application, STU-C is the
server/master unit while STU-R is the client/slave unit.
Multi lexing Click on the drop-down list and select Multiplexing used by your ISP as VC or
LLC.
VC-mux (VC-based Multiplexing): Each protocol is assigned to a specific
virtual circuit. VC-based multiplexing may be dominant in environments
where dynamic creation of large numbers of ATM VCs is fast and economical.
LLC (LLC-based Multiplexing): One VC carries multiptle protocols with
protocol identifying information being contained in each packet header.
Deapite the extra bandwidth and processing overhead, this method may be
advantagrous if it is not practical to have a sepatate VC for each carried
protocol.
*This is available only when you select ATM as Transfer Mode.
VPI Enter the VPI(Virtual Path Identifier) range from 0 to 255.
*This is available only when you select ATM as Transfer Mode.
VCI
Enter the VCI(Virtual Channel Identifier) range from 32 to 65535.
*This is available only when you select ATM as Transfer Mode.
WAN
Item Descri tion
Mode Click on the drop-down list and select Mode as Routing or Bridge
Choose Routing if your ISP provides you with only one IP address and you
need several computers to use the same Internet account. Choose Bridge
when your ISP provides you with more than one IP address and you need
several computers to get individual IP address from your ISP’s DHCP server.
When Bridge is selected, NAT, DHCP server and Firewall become unavailable.
*Note: This mode is changed, the system will need to reboot.
Enca sulation
Click on the drop-down list and select Encapsulation used by your ISP as
PPPoE or RFC14 3
WAN-IP
Item Descri tion
IP Address Ty e Click on the drop-down list and select IP Address Type as Static or Dynamic
A static IP address is a fixed IP provided by your ISP. A dynamic IP address
is different every time when you connect to the Internet.
IP Address Enter IP address for WAN when select Static IP address Type.
Submask Enter a subnet mask in dotted decimal notation when select Static IP address
Type.

G.SHDSL .bis Router User Manual V0.04
19
Gateway IP Address Enter a gateway IP address provided by your ISP when select Static IP
address Type.
LAN
Item Descri tion
IP Address Enter IP address for LAN
Subnet Mask
Enter a subnet mask in dotted decimal notation when select Static IP
address Type.
When select PPPoE as Encapsulation, you are required to enter the User Name and Password provided by your
ISP.
PPPoE
Item Descri tion
User Name Enter User Name provided by the ISP for PPPoE
Password Enter Password provided by the ISP for PPPoE
Click on Apply to save the parameters or Cancel to start configuring this page from beginning.
This manual suits for next models
3
Table of contents
Other Proscend Network Router manuals

Proscend
Proscend 120 User manual

Proscend
Proscend 6200-2W User manual

Proscend
Proscend M302-L User manual

Proscend
Proscend 130 User manual

Proscend
Proscend M300 User manual

Proscend
Proscend M331 User manual

Proscend
Proscend M350 Series User manual

Proscend
Proscend M331 User manual

Proscend
Proscend M366 User manual

Proscend
Proscend M330 Series User manual