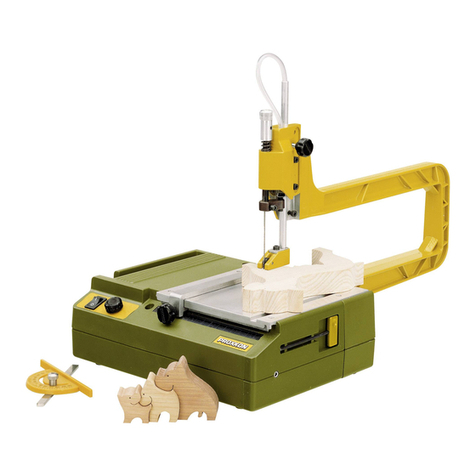
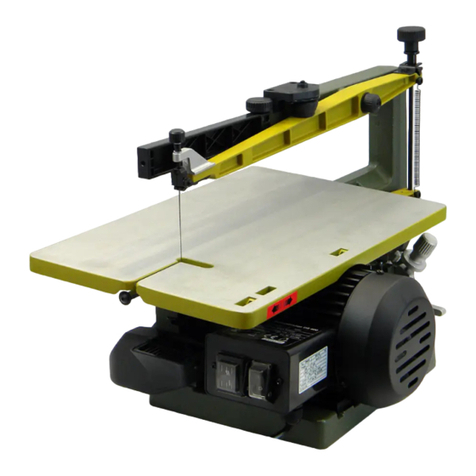
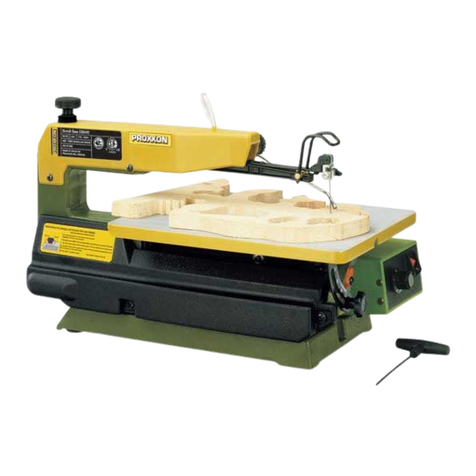
Proxxon DSH User manual

@
@
@
DSH
O
@
@
@
@
@
@
I
Manual

Foreword
Dear
customerl
ThePROXXON
scroll
saw
DSH
is
amachine
with
avery
high
cuüing
performance
especially
suitable
for
mould
ma-
king,
precision
mechanics,
modelmaking
and
toolmanufac-
turing.The
ideal
toolfor
curved
cutsinwood,
plastic
material
andnon-ferrous
metals.
This
manual
comprises:
' saletyregulations
. operating
andmaintenance
instructions
. spare
parts
list.
Pleasg
observet
Using
thismanual
will
. help
you
tounderstand
themachine,
. avoldmalfunctions
caused
by
unexpert
operation,
o increase
the
lifetime
ofthe
machine.
Keep
thismanual
always
close
athand.
Donot
operate
the
machine,
unless
you
are
fully
lamiliar
with
it.Follow
theseinstructions.
PROXXON
shallnot
assume
tiabitity
for
safefunctioning
. if
themachine
is
usedin
away
which
does
not
comply
with
the
usualmodes
ofoperation,
o ifitis
usedfor
purposes
other
than
thosementioned
in
theseinstructions,
. if
the
safetyinstructions
arenot
observed.
Nowarranty
claims
can
be
lodged
for
damage
resulting
lrom
. operating
errors,
o insutficientmaintenance.
Please
observe
the
safetyregulations
for
your
ownsafety.
Use
only
original
PROXXON
spare
parts.
Wereserve
theright
for
technical
modifications
without
prior
notification.
Wewish
you
much
success
with
your
new
scroll
saw.
Safety
regulations
Please
read
andawly trc following
safety
regutations
beforestatting
towok wih themadtine,
inorder
toavoid
injufies
or starting
a fire.
. Keep
theworking
area
clean
and
ticty.
. Do
not
wearloose
clothes
or
jewellery.
r Examine
themachine
for
any
obvious
faults
belore
starting
towork.
Replace
ddective
parts.
. Donol
use
electrical
tools
inrain,
underwet
conditions,
near
inllammable
liquids
or
gases.
r Before
starting
themachine
make
sure
thatall
toolshave
been
removed.
. Avoid
contact
with
grounded
parts
such
aspipes,
radiators,
cookers
andrefridgerators.
. Keep
children
awayfrom
theworking
area.
. Donot
use
tooweak
toolslor
too
hard
work.
. Donot
overload
themachine.
r Store
unused
toolsin
alocked
uproom
out
ofthereach
ofchildren.
. Replace
blunt
saw
blades.
. Do
not
carry
themachine
by
theelectric
cable.
. Protect
the
power
cable
against
heat
and
sharp
edges.
lf
necessary
have
itreplaced
by
aspecialist.
. Clean
themachine
thoroughly
afterlinishing
wok.
. Pull
themains
plug
outwhen
carrying
out
maintenance
work,
when
changing
the
saw
blade
or
when
repairing
themachine.
. Repairs
in
the
electrical
system
must
only
becarried
out
byaspecialist.
Use
only
accessories
and
spare
parts
which
are
recommended
in
theseinstructions
or
bythe
manufacturer.
Wear
protective
goggles.
Use
apushing
rod.
Fasten
themachine
securely
betore
starting
work.
Always
keep
the
operating
instructions
in
asafe
place.
Protect
themains
supply
cable
against
being
damaged.
a
a
a
a
a
PROXXON
GmbH

Legend(Fig. t)
1. Quick
tensionerfor
saw
blade
tension
2. Storage
place
lor
saw
blades(not
visible)
Sawing
arm
Upper
saw
blade
holder
Air
nozzle
ON
-OFF
switch
Installing
theairnozzle
1' Unpack
the
machine
and
take
alr
parts
for
theair
nozzre
instailation
out
of
the
bag.
2. Screw
the
knurled
screw
1
(Fig.
2)
with
the
ctamping
pieces
to
the
sawing
arm.
3. Insert
the
air
nozzle
3(Fig.
2)into
the
bore
in
the
opened
clampingpieces
2,
aligne
the
tube
and
tighten
the
knurled
screw
lightly.
4. Push
the
airhose
4(Fig.2)
onto
the
tube
3and
the
nipple
5.
1. Place
asoft
mat
(plastic
or
cork)
between
machine
and
work
bench
as
anoise
insulation.
2. Fasten
the
machine
with
two
screws
of
s 6mm
on
a
srong
work
bench.
Adjusting
theangle
indicator
1. Loosen
the
knurled
screw
1
(Fig.
3)lighily
and
adjust
the
working
table
exactly
90.
to
the
saw
OtaOL
by
using
an
angle.
Retighten
the
knurled
screw.
2. Check
the'zERo'Lposition
of
the
pointer
2(Fig.
3),
if
necessary
correct
it
atter
loosening
the
fastening
screw.
tr@
For
precise
cuningperform
a rc$ cut.
3. Test
the
accuracy
by
cutting
apiece
of
wood.
if
necessary
adjust
the
sawing
table
3and
the
pointer
2
(Fig.
s).
Assembly
of saw
3.
4.
Ä
6.
7. Cutting
speed
regulator
8. Clamping
screw
for
work
table
inclination
9. Socket
for
vacuum
cteaner
Descriptionof machine
The
PROXXON
scroll
saw
DSH
is
theright
tool
,or
the
use
in
mould
construclion,
precision
mecnanlcs,
model
making
and
the
manufacturing
of
toys.lt
therefor
meets
therequiä
ments
of
designers,
architects
(model
making)
and
joiners.
The
scroll
saw
cuts
soft
wood
up
to
athickness
ol
50
mm,
plastic
materials
up
to
30
mm
and
non_ferrous
metats
up
lo
10
mm.
lt
can
also
be
used
for
problem-free
cutting
of
plexig_
lass,glass
fiber
reinforced
plastic
material,
foamed
material,
rubber,
leather
and
cork.
A
bellow
with
adjustable
nozzteprovides
unrestricted
vision
t0
the
cutting
tine.
The
base
housing
is
made
of
cast
steel.
This
ensures
stability
and
vibration
free
operation.
Thestrong
working
table
is
made
ol
die
cast
aluminium
and
can
be
adjusted
tor
mitre
cuts
of
up
to45".
The
standard
saw
blades
are
quickly
to
change
and
can
be
stored
in
the
storing
compartment
on
the
sidJot
the
machine.
Technicaldata
Fastening
thesaw
t
r
Fastening
mateialsanddamping
mat
do not
come
with
the
machine.
Number
of
strokes:
Length
of
stroke:
Max.
cutting
depth:
(in
wood)
under
45.:
Length
of
saw
blade:
Noise
level:
Vibration:
Dimensions:
Table:
Throat:
Motor:
Voltage:
Power
draw:
KB
30
-
short
time
operation
For
indoor
use
only:
990
and1500/min
19
mm
S0
mm
25
mm
j27mm(5,,)
<70
dB(A)
=2.5
^/"2
362x180
mm
400
mm
220/240
Vott,
60Hz
approx.
145/205W
tet
machine
cool
down
after
30min.
of
operation
A
L:T
-9-

Conn*tlng a vacuumcleaner
1. Plug
thesuctionhose
(Fig.
4)
ofthevacuum
cleanerinto
theconnection
socket
(2).
2. Switchthevacuum
cleaner
onbefore
startingtowork,
to
make
sure
thatallchips
aresucked
otf
andtoavoid
blockage
ofthe
suction
tacility.
Changtngthe sawblade
Installing
thesawblade
Wih thePROXXON
saw
blade
holder
youmayuse
conventional
sawbladeswithcross-pins,
aswell
ashand
sawbladeswithout
cross-pins.
Handsawbladesmust
betightly
clampedusingthe
attachedAilen
key(Fig.
5a).Saw
bladeswithcross-pins
mayonly
befastened
as shown
in(Fig.5b).
1. lnsert
thesaw
bladethroughthe
openingin
thetable
with
theteelh
pointing
downwards
andattachittothe
lower
holder2(Fig.
7).
2. Press
lheupperarm
(Fig.
7)lightly
downand
attachthe
sawblade
totheupperholcter
(1).
r@
lnsufficient
or excessivetensionmay
break
thesaw
blade.
3. Turn
the
quick
lensioner
1
(Fig.
8)untila
minimum
pretension
isreached.
Fold
the
quick
tensioner
downto
adjust
thecorrectsawblade
tenson.
4. Check
the
fastening
olthesaw
blade
in
the
upper
1
(Fig.
6)and
lower
guide(2),
reduce
thesaw
blade
tensionifnecessary.
nt
IThetollowing
factorsmayciruse
breakageof the
sawblade:
Excessive
orinsutficienl
sawbladetension
Overloading
oltheblade
bytoo
tast
advancing
thework
piece.
Bending
ortorsionalstrain,
e.g.
il
the
blade
hasnot
been
correctlyinstalled.
lf
the
max.litetime
ofthesawbladeisreached.
lf
sawbladeswith
cross-pins
areadditionallyfastened
with
the
screws.
Removing
the
sawblade
1. Fold
the
quick
tensionerup.Loosen
the
sawblade
in
the
holder
andtake
it
out.
Worffingwith the saw
@
Secure
andexact
workisonlypossibte
if themachine
is
properly
fastenedl
m
-
The
scrollsawismainly
usd forsawing
cuves. To
achieve
best
rcsults
youshould
alwaysobserue
thefpilowing
points:
1. When
sawing
press
the
work
piece
firmly
ontothework
plate
(Fig.
9);advance
the
work
piece
carefully
and
with
only
little
force;
applymoreforce
tothework
plate
and
lessforce
tothe
sawblade.
Use
only
good
sawblades.
Always
pull
themains
plug
out
when
carrying
out
maintenance.
Donotlet
themachine
run
unattended.
The
sawdoesnotcutthewok piece
by itself
,you must
guide
thework
piecetowards
thesawblade.
The
cuningteethwill
onlycutduring
the
downwards
stroke.
2. Guidethework
piece
slowly
againstthe
sawblade,
especiallywhen
using
alhinbladewith
fine
toothing
or
if
the
work
piece
is
very
thick.The
teethwiil
throw
outthe
sawdustonly
during
thedownwards
stroke.
3. Bestresultswill
beachievedif
thethickness
ofthewood
isless
than25mm.
4. For
wood
thicknesses
ofmore
than25mm
you
must
guide
the
work
piece
eritremelycarefully
to
prevent
the
sawblade
lrom
being
damagedbykinking,
bending
or
twisting.
Replace
bluntsawblades
indue
time.
5. Alwaysremember
thatthe
sawbladewill
try
to
foltow
the
grain
in
the
wood
when
cuningexact
cuts
(applies
particularly
for
thin
sawblades).
a
a
a
a
a
a
I
10-

Inside
cuning
@E!
Always
pullthe mains
plugoutbeforeremoving
the saw
blade.
1. Drill
ahole
into
theinner
section
ofthe
part
to
be
cutout.
Choosing
thesaw
blade
Spacing
teetMnch
approx.10
approx.
l8
approx.
25
Materlal
wood
from
6mm
up
to50mm
fine
work,
wood
upto
6mm
Plaslic
material,
glass
fiber
reinforced
plastic
material,
non-ferrous
metals.
plexiglass
EC
Declaration
ol Conformity
We
declare
in
soleresponsibility,
that
this
product
is
in
accordance
with
thefollowing
Ec-regulations:
. EG-EMV
regutation
89/336,
reptaced
by
93/68
. EG-fow
vollage
regulation
73/23,
replaced
by
9U6g
. EG-machine
regulation
g9/992,
replaced
by
91/36g,
9U44
and
93/68
Dipl.
Ing.
Martin
Faßbender
,A Qr\*ann
PROXXON
S.A.
Department
"Equipment
safety"
Wereserve
theright
for
technical
modifications
without
prior
notilication.
Choosing
themotor
speed
Step Materlat
1 900
strokes steel,
brass,non-ferrous
metals,
glassfiber,
reinf
orced,
plastic
material,
2 1500
strokes
aluminium,
wood,
styrene,
rubber,
leather,
cork
Reduce
the
saw
blade
tension
until
the
saw
blade
can
be
easily
unhooked.
Place
thework
piece
onto
thework
table
with
the
oore
above
the
openingin
thetable.
Insert
the
saw
blade
through
the
bore
(Fig.
10).
Reattach
the
sawbtade
at
thetop
and
the
bottom
andretension
itcorrecfly.
Cut
the
opening.
Maintenance
Always
pullthe mains
plugoutbefore
carrying
out
maintenance
andrepair
woks.
After
working
with
themachine
clean
offallsaw
dust
with
a
brush
or
asoft
cloth.
2.
4.
5.
-
11

B
v
>i
A
v
\\I
>l
Fig.4
-3-

Ersatzteilliste
St- Lö
f: "!S
',\ü r)f
\,\.6\- ]!Hq
/)v-*
// ro co
//rJ)La
(o (\ N@
@ @ t'-N
Nro/
f,z
l\
145
9t
/ ^*
t --
--€4
'tr-.
d-3
rn
- c')
{@
{@
@-0--,
!l
;l
sr ,&
'(Y
/r\ c9
'@(4@
,\
\V ,il+
/g-@
/V/s i
\.4 iPX
ir^-r
t-O
O
\IW
I

ErsaEteilliste
Telle-Nr.:
28092
-01
28092
-03
28092
-05
28092
-08
28092
-09
28092
-10
28092
- 11
28092
-13
28092.15
28092.16
28092
- 1
9
28092
-20
28092
-
21
28092
-23
28092
-27
28092
-28
28092
-29
28092
-32
28092.33
28092
-
34
28092
-
35
28092
-36
28092
-38
28092
-39
28092
-40
28092
-41
28092
-42
28092
-43
28092
- 45
28092
-46
28092
-48
28092
-49
28092
-50
28092
-51
28092
- 52
28092
.53
28092
. s4
28092
-55
l
28092
. 56
"28092
-57
28092
-s8
,28092
-
59
:28092
-60
28092
.61
28092
-62
28092
-63
Telle-Nr.:
28092
- 64
28092
-65
28092
-66
28092
-69
28092
- 71
28092
- 72
28092
- 73
28092
-75
28092
-78
28092
-77
28092
-78
28092
-79
28092
-80
28092
-81
28092
-82
28092
-83
28092
-84
28092
-85
28092
-86
28092
-87
28092
-88
28092
-89
28092
-90
28092
-
91
28092
-92
28092
-93
28092
-98
28092
-99
28092
-100
28092
-101
28092
- 102
28092
-103
28092
- 104
28092
-105
28092
-106
28092
- 107
28092
-108
28092
-109
28092
-1
10
28092-111
28092
- 112
28092
-113
28092
- 114
28092
-115
28092
-116
28092
-'t17
Benennung
Maschinenfuß
Schraube
Putfer
Lagerbolzen
Sechskanlmutter
Feclening
Ttille
Htilse
Klemmstück,
oben
Klemmstück,
unlen
Feder
Haltestück
I
nnensechskantschraube
Oberer
Sägearm
Sägeblatt
(Zubehör,
sieheKatatog)
I
nnensechskantschraube
Federring
Winkel
Selbstschneidende
Schraube
Unterer
Sägearm
Buchse
Kugellager
Sechskantmutter
Sechskantschraube
Lagerung
Scheibe
Typenschild
Kreuzschlitzschraube
Gegengewicht
Gewindestitt
Luttschlauch
Innensechskantschraube
Druckfeder
Scheibe
Sechskantmutter
Sägetisch
Innensechskantschraube
Hattewiriketmit
Skata
Luttdüse
Stemgritf
Selbstschneidende
Schraube
Scheibe
Klemmstück
Kreuzschlitzschraube
Zeiger
Halter
Benennung
Fedening
Innensechskantsch
raube
lnnensechskantschraube
Rändelschraube
Federring
Verkleidung
Faltenbalg
Motor
Anschlußkabel
Ein-Aus-Schalter
Wahlschalter
Kondensalor
Absaugkanal
Schraube
Schaltergehäuse
Lütterabdeckung
Reduzierstück
f
ürStaubsauger
Sägeblanhalter(Adapre0
\
Anschlag
für
Sägeblatt
Schraube
Scheibe
Federring
T-Gritf
Adaptersatz
kpl.
(2
stück)
Schlattchanschluß
Befestigungsschraube
Artikelverpackung
Bedienungsanleitung
Mutler
Verbindungsstange
Rohr
Putfer
Unterlegscheibe
Bolzen
sritt
Hebel
Gehäuse
Abdeckung
ftJr
Sägearm
Halteclip
f
ürlmbusschlüssel
Schraube
Scheibe
Mutter
Schraube
Schraube
Abdeckblech
Scheibe
)
)
)
)
)
D
-45-
Other manuals for DSH
2
Table of contents
Other Proxxon Saw manuals

Proxxon
Proxxon FET User manual

Proxxon
Proxxon FET User manual

Proxxon
Proxxon Micromot 230/E User manual

Proxxon
Proxxon DS 230E User manual

Proxxon
Proxxon FET User manual

Proxxon
Proxxon KT 70 User manual

Proxxon
Proxxon MBS 240/E User manual

Proxxon
Proxxon DS 460 User manual

Proxxon
Proxxon KG 50 User manual

Proxxon
Proxxon KGS 80 User manual

Proxxon
Proxxon KGS 80 User manual

Proxxon
Proxxon KGS 80 User manual

Proxxon
Proxxon FET User manual

Proxxon
Proxxon MICRO User manual

Proxxon
Proxxon FET User manual

Proxxon
Proxxon MBS 240 / E User manual

Proxxon
Proxxon DSH Quick guide

Proxxon
Proxxon DS 460 User manual

Proxxon
Proxxon DSH/E User manual

Proxxon
Proxxon FET User manual