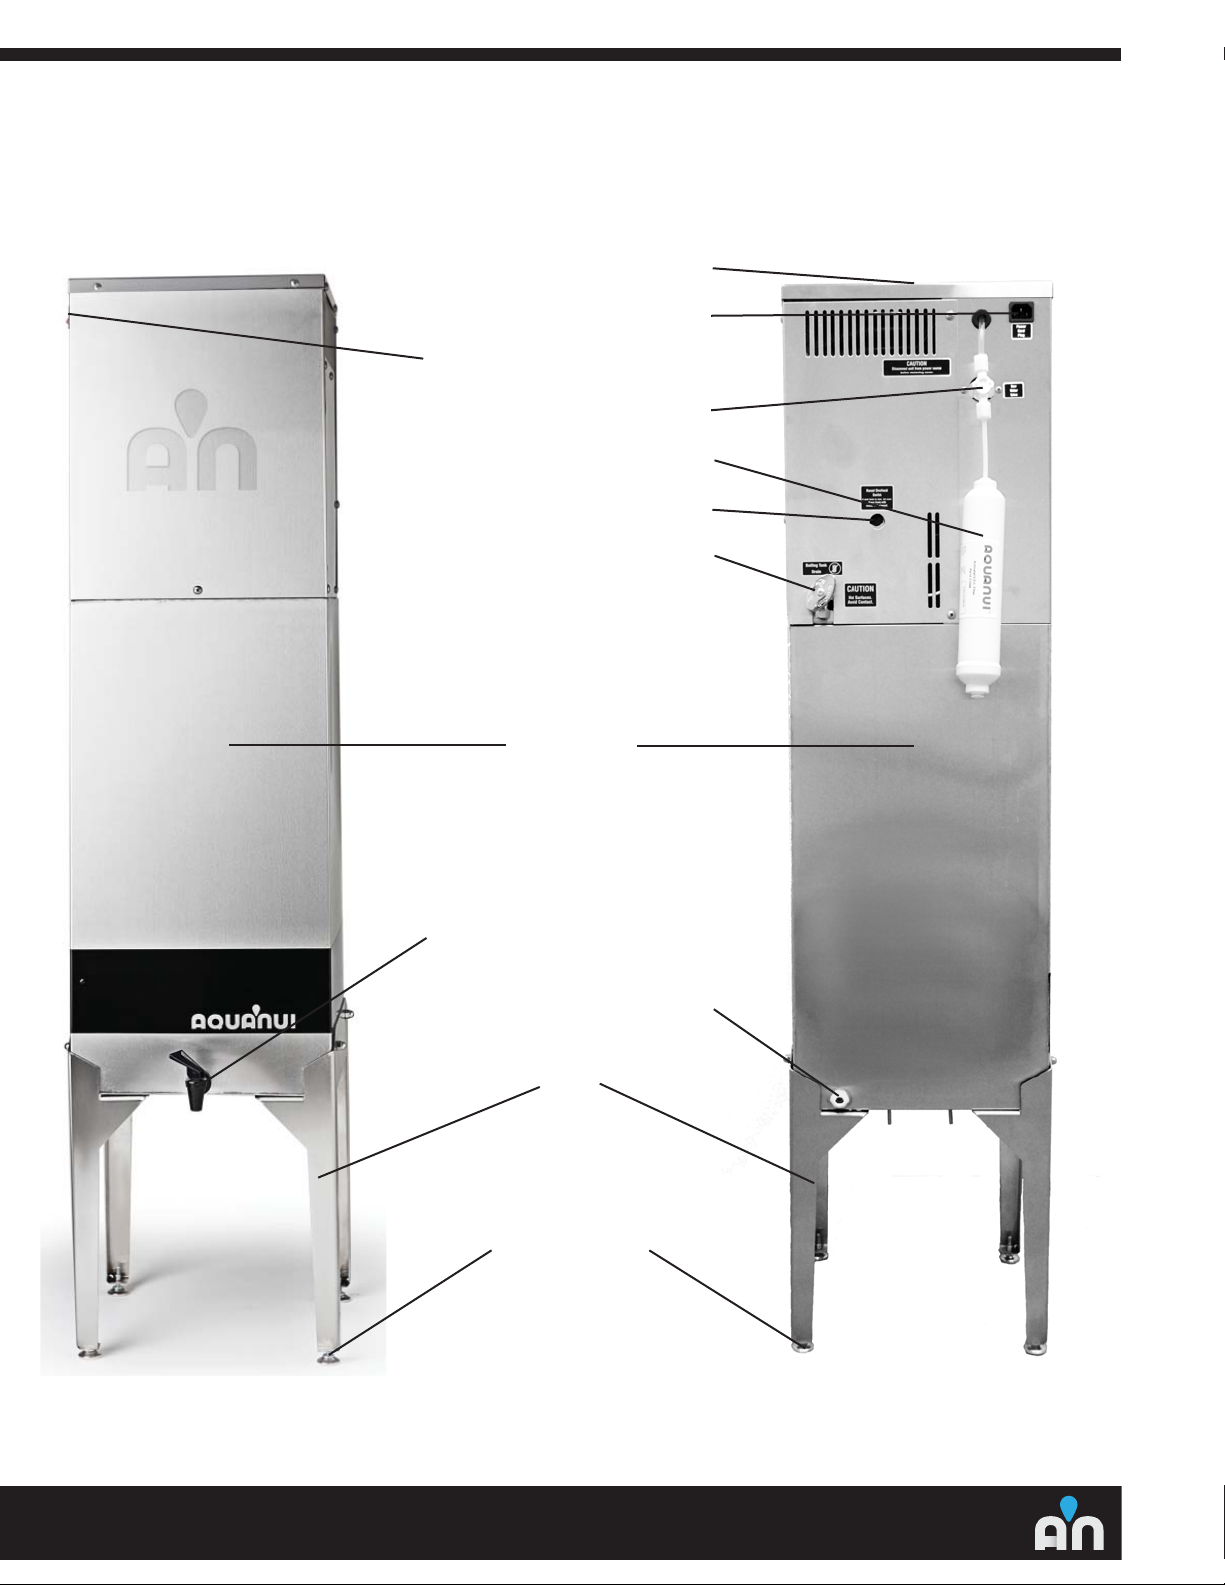
Aqua-Nui Distiller Parts List
Item # 100V 120 V 240V Description
1 21005 21005 21005 PANEL, TOP, AQUANUI
2 9029 9029 9029 SCREW, #10-16 X 1/2”, SHT.MTL.
3 9019 9019 9019 SCREW, #8-32 X 3/4”,PHD, PLPS
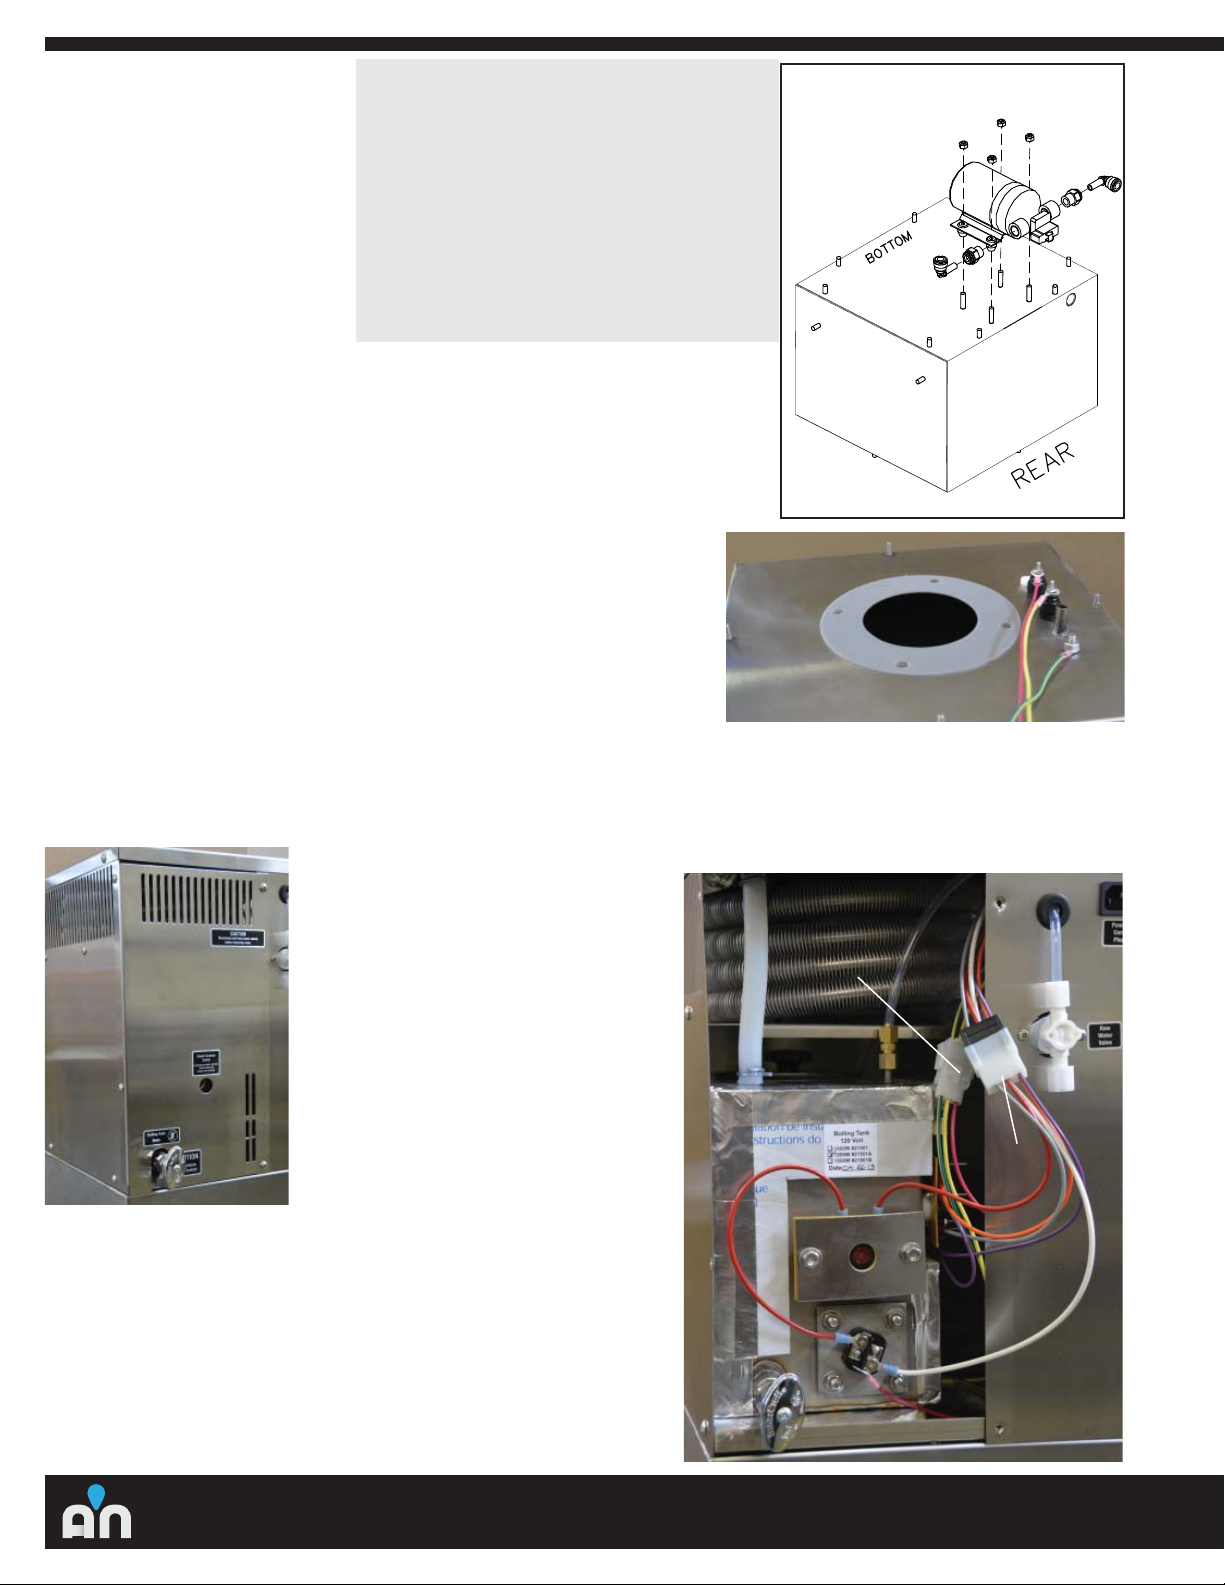
4 9342 9342 9342 GUARD, FAN, 6”, METAL
5 9344BJ 9344B 9344B FAN, AXIAL, 170CFM, 110/220V
6 9003 9003 9003 NUT, #8-32, NYLOCK, HEX, S.S.
7 21020 21020 21020 COIL, CONDENSING, AQUANUI
8 7246 7246 7246 TIE, CABLE, HIGH TEMP 14.7” BLK
9 9111 9111 9111 BLOCK, TERMINAL, 3 X 2 X 4
10 7206 7206 7206V RELAY, POWER, SPDT, 120VAC 15A
11 9106 9106 9106 RELAY, LIQUID LEVEL CONTROL
12 21503J 21503 21503V TRAY, ELECTRICAL, AQUANUI, COMPLETE
13 7276 7276 7276 CORD, POWER, IEC, 15 AMP
14 7275 7275 7275 CONNECTOR, IEC FEMALE, SNAP-IN
15 7232 7232 7232 SWITCH, LIGHTED, RED
16 7228 7228 7228 SWITCH, ON/OFF, W/O BEZAL, 15A
17 21006 21006 21006 CLADDING, WRAPAROUND, AQUANUI
18 21059 21059 21059 TUBING, HIGH TEMPERATURE, 1/4”
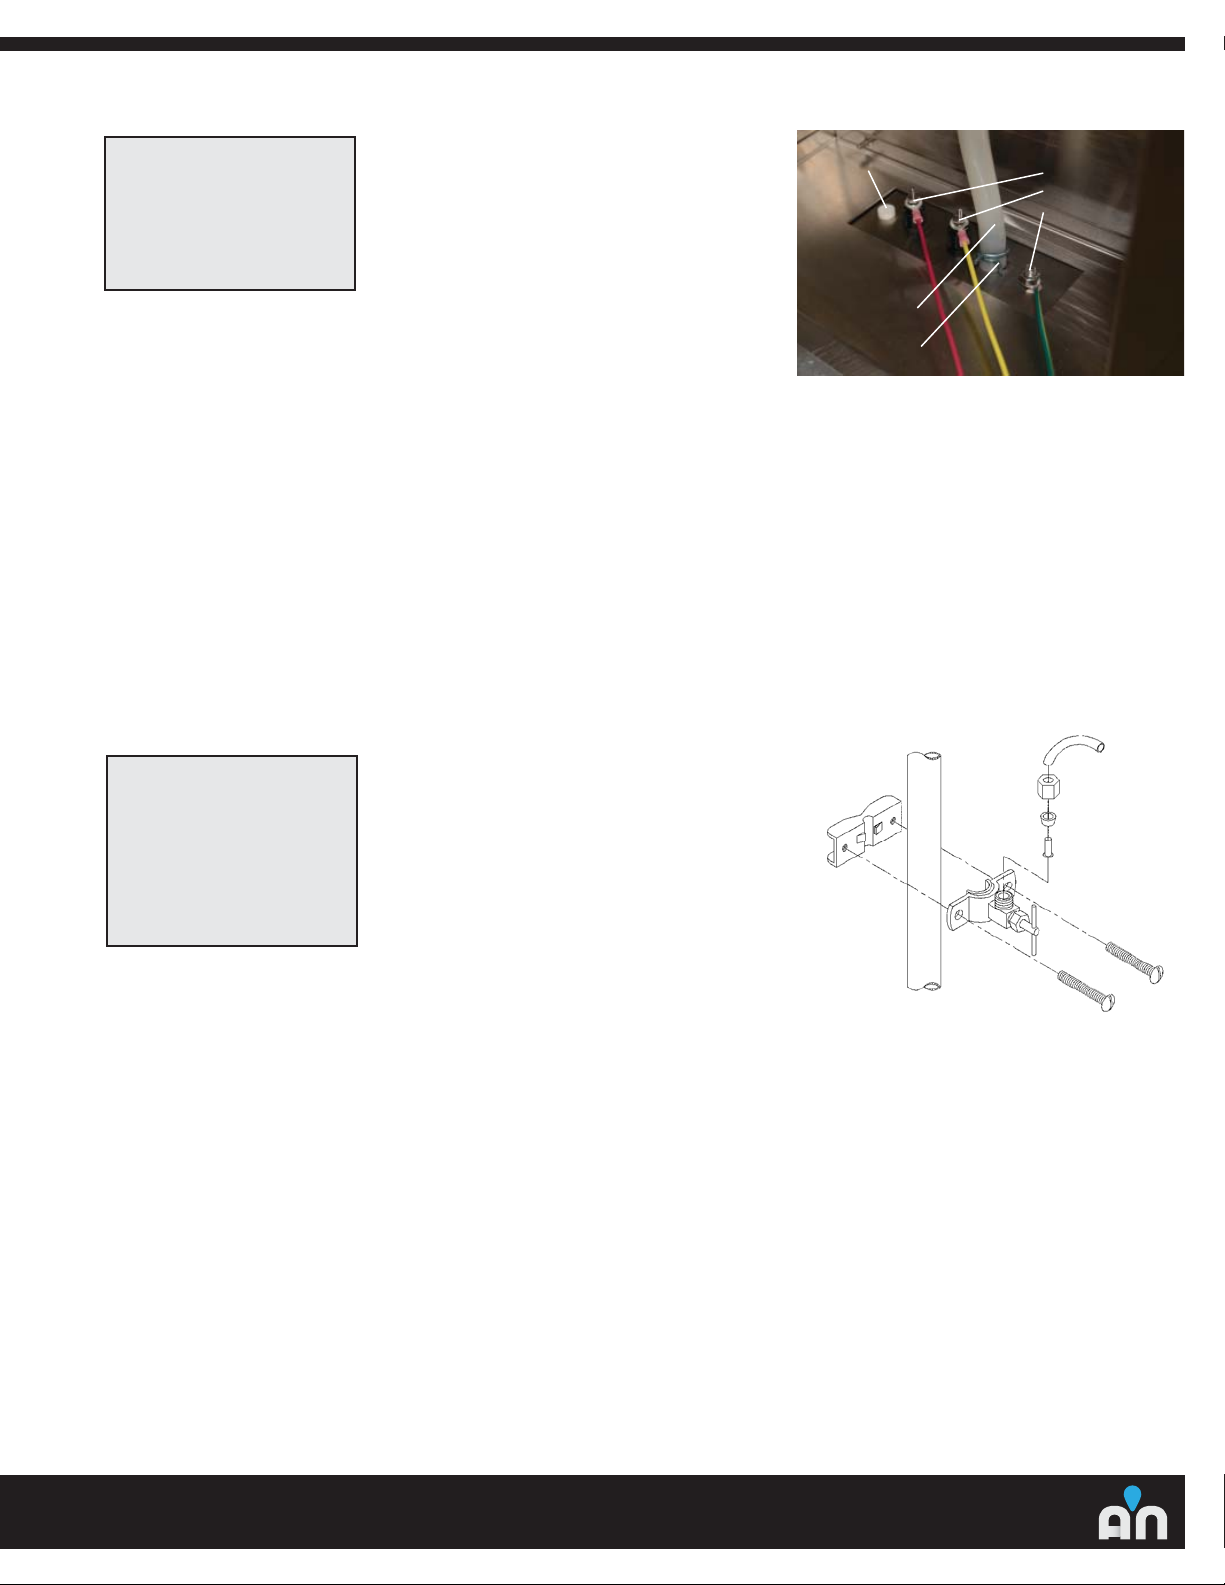
20 63419 63419 63419 UNION, BRASS, 1/4” COMP (USE DELRIN SLEEVES)
21 9550 9550 9550 NUT, COMP, 1/4”, PLASTIC
22 9019 9019 9019 SCREW, #8-32 X 3/4”,PHD, PLPS
23 7197 7231 70106 VALVE, SOL, 1/4”COMP, N/C
24 21048 21048 21048 FILTER, VOC, AQUANUI PREFILTER
25 9541 9541 9541 TUBING, 5/8” OD x 3/8” ID
26 9921 9921 9921 CLAMP, HOSE, WIRE SPRING, 5/8”
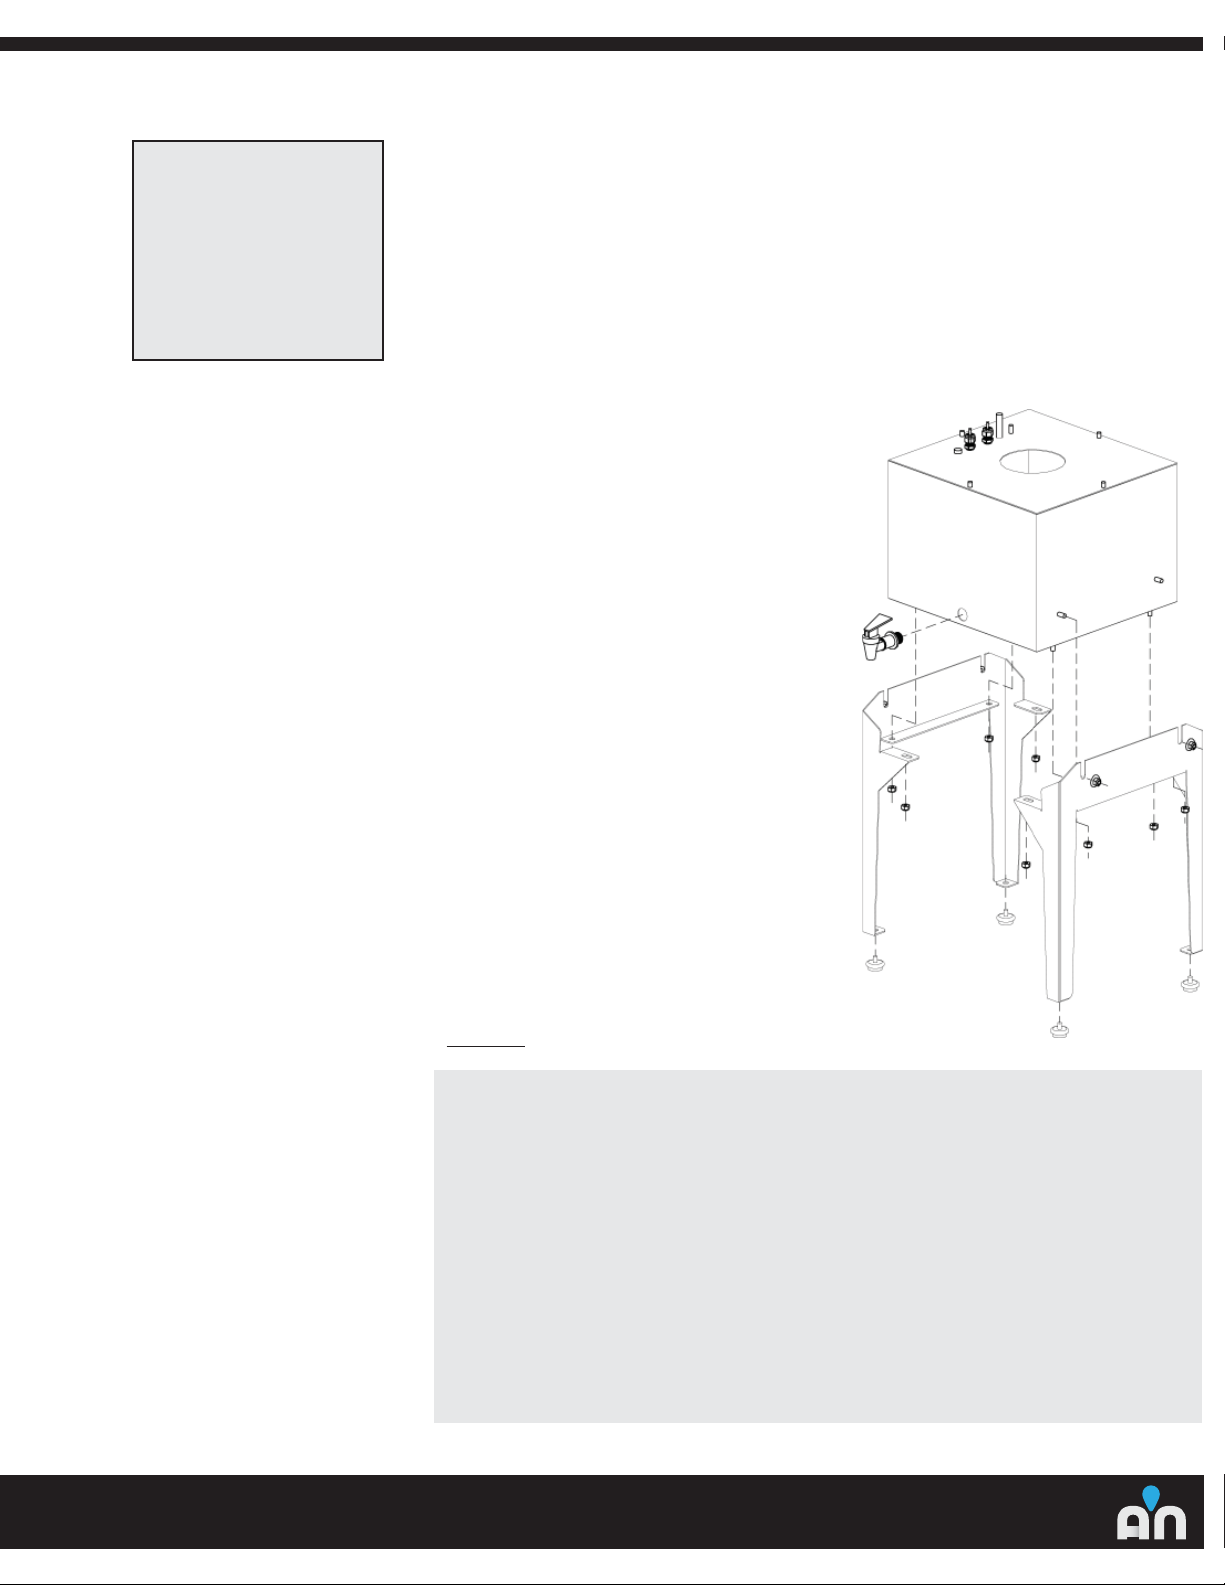
27 21007-02 21007-02 21007-02 PAN, BOTTOM, STUDDED
28 654 654 654 MICROSWITCH KIT
29 21063 21063 21063 FLOAT AND ACTUATING ARM KIT
30 406 406 406 BOILING TANK LID KIT
34 633J 633 633V 1000 WATT HEATER KIT
34 738J 738 738V 1200 WATT HEATER KIT
34 764J 764 764V 1500 WATT HEATER KIT
35 7069 7069 7069 RESET, 66T, 220F(+8F/-0)
36 510 510 510 PLATE, RETAINER, RESET, PC
37 424A 424A 424A ASSY., RESET RETAINER PLATE
38 9009 9009 9009 WASHER, 1/4” X 5/8”OD, FLAT
39 9045 9045 9045 NUT, 1/4-20, HEX, S.S.
40 21501-02 21501-02 21501-02 TANK, STUDDED, BOILING AQUANUI
41 9508 9508 9508 VALVE, DRAIN, BRASS STEM, 1/2”
42 611 611 611 TUBE, DRAIN EXTENSION
43 21009 21009 21009 PANEL, BACK, AQUANUI
44 21041 21041 21041 GROMMET, 1/2” ID BLACK RUBBER