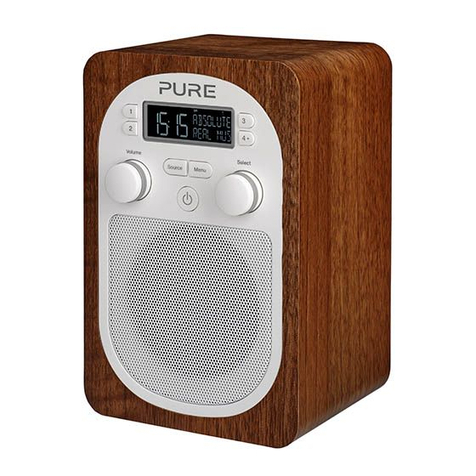
PURE Elan II User manual

Owner’s manual
IT
DE
Bedienungsanleitung
Manuale dell’utente
Manuel de l’utilisateur
Brugsvejledning
Manual de instrucciones
DK
ES
FR
EN

Safety instructions
Keep the radio away from heat sources, such as naked flames or candles.
Ensure that the unit has adequate ventilation (at least 10cm space all round).
Do not use the radio near water.
Avoid liquids dripping or splashing onto the radio.
Do not place any objects containing liquids on the unit, such as vases.
When plugged in, ÉlanII remains connected to mains power, even in standby with the display backlight off.
To disconnect completely, unplug from the mains socket.
Ensure that the mains plug is readily accessible in case isolation from the mains is required.
Do not remove screws from or open the radio casing.
Damage to hearing can occur with consistent exposure to high volume when using headphones.
Sicherheitsanweisungen
Halten Sie das Radio fern von Hitzequellen wie etwa offenen Flammen oder Kerzen.
Vergewissern Sie sich, dass das Gerät ausreichend Freiraum für einen angemessenen Luftaustausch hat (mindestens 10 cm auf allen Seiten).
Nutzen Sie das Radio nicht in der Nähe von Gewässern.
Vermeiden Sie den Kontakt des Radios mit tropfenden oder spritzenden Flüssigkeiten.
Stellen Sie keine Gegenstände mit Flüssigkeiten (wie zum Beispiel Blumenvasen) auf dem Gerät ab.
Wenn das Netzkabel des ÉlanII eingesteckt ist, besteht eine aktive Verbindung zum Stromnetz. Dies gilt auch für den Stand-by-Modus mit
ausgeschalteter Display-Beleuchtung. Um das Gerät vollständig vom Netz zu lösen, muss es von der Netzsteckdose getrennt werden.
Vergewissern Sie sich, dass der Netzstecker leicht zugänglich ist, damit die Verbindung zum Netz jederzeit unterbrochen werden kann.
Lösen Sie keine Schrauben vom Gehäuse des Radios.
Bei der Verwendung von Kopfhörern kann das Hören von Musik in hoher Lautstärke dauerhafte Hörschäden verursachen.
Instructions de sécurité
Maintenir l'appareil éloigné des sources de chaleur, telles qu'une flamme nue ou une bougie.
S'assurer que l'appareil est correctement ventilé en laissant au moins 10 cm de vide tout autour.
Ne pas utiliser l'appareil à proximité d'un point d'eau.
Éviter que des liquides ne gouttent sur l'appareil ou ne l'éclaboussent.
Ne pas déposer d'objets contenant du liquide (comme un vase) sur l'appareil.
Lorsqu'il est branché, le ÉlanII reste alimenté au secteur, même en mode veille et avec son écran éteint. Pour assurer une déconnexion complète,
débrancher l'appareil de la prise de courant.
Veiller à ce que la prise de courant soit facilement accessible, pour le cas où l'on aurait besoin d'isoler la chaîne du réseau électrique.
Ne pas retirer les vis du boîtier de l'appareil et ne pas ouvrir le boîtier de l'appareil.
Toute exposition prolongée à des niveaux élevés de volume, avec des écouteurs, peut entraîner une atteinte définitive de l'ouïe.
Istruzioni di sicurezza
Tenere la radio lontana da fonti di calore come fiamme vive o candele.
Assicurarsi che l'unità riceva una ventilazione adeguata (almeno 10cm di spazio libero).
Evitare il contatto con l'acqua.
Evitare lo sgocciolamento di liquidi sulla radio.
Non collocare oggetti contenenti liquidi (es. vasi) sull'unità.
Una volta inserito nella presa, ÉlanII resta connesso alla rete elettrica anche quando si trova in standby e con la luce del display spenta. Per
disconnettere completamente l'unità, staccare la spina dalla rete elettrica.
Assicurarsi che la spina di alimentazione principale sia facilmente accessibile in caso si renda necessaria la disconnessione dalla rete di
alimentazione principale.
L'esposizione prolungata a suoni ad alto volume connessa all'uso delle cuffie può provocare danni all'udito.
Sikkerhedsanvisninger
Beskyt radioen mod varmekilde som for eksempel åbne flammer eller lys.
Sørg for, at enheden ventileres tilstrækkeligt (mindst 10 cm plads hele vejen rundt).
Undlad at bruge radioen i nærheden af vand.
Undgå, at der drypper væske ned på radioen.
Undlad at anbringe genstande med væsker som for eksempel vaser på enheden.
Når du slutter ÉlanII til strømforsyningen, forsynes den med strøm i standbytilstand, også selvom baggrundsbelysningen i displayet er slukket. Hvis du
vil afbryde strømmen helt, skal du tage stikket ud af stikkontakten.
Kontroller, at netstikket er let tilgængeligt, såfremt der kræves afbrydelse fra el-nettet.
Du må ikke fjerne skruer fra eller åbne radiokabinettet.
Der kan ske skade på hørelsen ved vedvarende udsættelse for høj lydstyrke, når der bruges hovedtelefoner.
Instrucciones de seguridad
Mantenga la radio alejada de fuentes de calor como llamas o velas.
Asegúrese de que la unidad esté adecuadamente ventilada (10 cm como mínimo en todo su perímetro).
No utilice la radio cerca del agua.
Evite derramar o salpicar líquidos sobre la radio.
No ponga ningún contenedor de líquido encima de la radio como vasos o jarras.
Cuando está enchufada, la ÉlanII está conectada a la red eléctrica, incluso en modo de espera con la luz trasera de la pantalla apagada. Para
desconectar completamente, desconéctela de la toma de la red eléctrica.
Asegúrese de se pueda obtener fácil acceso a la clavija eléctrica en caso de que se tenga que aislar la unidad de la red eléctrica.
No retire los tornillos ni abra el alojamiento de la radio.
Si se utilizan auriculares, los oídos pueden sufrir daños debido a una exposición prolongada a un volumen de audición alto.
Getting started .................................................................... 2
Setting up...........................................................................................2
Controls at a glance.............................................................................3
Rear connectors ..................................................................................3
Connecting an auxiliary device..............................................................3
Listening to radio................................................................. 4
Switching between DAB,FM and AUX......................................................4
Changing stations................................................................................4
Using Presets ......................................................................................5
Changing the information displayed on screen .......................................5
Using textSCAN™to pause and control scrolling text ...............................5
Intellitext®..........................................................................................6
ReVu™− pause and rewind live radio .....................................................6
Setting the alarm & timers ................................................... 7
Setting the alarm.................................................................................7
Setting the kitchen timer ......................................................................8
Setting the sleep timer.........................................................................8
Options and settings ............................................................ 9
DAB options ........................................................................................9
Autotune......................................................................................................9
Intellitext options .........................................................................................9
FM options..........................................................................................9
General options...................................................................................9
Backlight .....................................................................................................9
Audio ..........................................................................................................9
Clock...........................................................................................................9
Energy saving.............................................................................................10
Software upgrade .......................................................................................10
Using a ChargePAK™..........................................................................10
Help and specifications .......................................................11
Secondary and inactive stations .........................................................11
Hints and tips....................................................................................11
Technical Specifications .....................................................................12
Contents

2Getting started
Wait for Élan II to complete an Autotune, which finds all available DAB stations (this
takes about a minute). When the Autotune is complete, a station will be selected.
Getting started
ALift the aerial from the clip on the top of the radio and fully extend it.
Insert the connector of the supplied mains adapter into the socket on the rear of the
radio.
Plug the mains adapter into the mains supply and wait for the radio to switch on.
A
C
B
4]TaVh
bPeX]VT]PQ[TS
0dc^cd]T
P]ScWTcTP\QaX
112APSX^!
Setting up
Note: If you have a ChargePAK C6L rechargeable battery (sold separately) fit the battery BEFORE
plugging the radio in. Follow the fitting instructions supplied with the ChargePAK C6L.
1
(See page 10)
B
C

3
Getting started
EN
Controls at a glance
Rear connectors Connecting an auxiliary device
USB connector for
software upgrades
(mini-B type).
3.5mm headphone
socket.
Analogue stereo input
for iPod, CD player, etc.
AUX
!!(
(AUX cable not supplied)
Tune
Volume
Menu
Bass/Treble
12345+
DAB/FM/AUX
ReVu
Alarm/Timer
Standby
ReVu
Press to pause and play live DAB
radio. Rotate Tune dial to fast-
forward/rewind. Press and hold to
return to live radio
Presets 1-5+
Store up to 50 DAB or FM
preset stations
Standby
Switch on and into standby
(off if ChargePAK fitted)
Tune
Rotate to tune and
navigate menus, push
to confirm selections
Alarm/Timer
Set the alarm, kitchen timer
or sleep timer
Menu
Access radio setup options
DAB/FM/AUX
Switch between DAB/FM/AUX
source
Bass/Treble
Adjust audio settings
Volume
Rotate dial to
adjust volume.
Press to mute.

4Listening to radio
Listening to radio
Tune
DAB/FM/AUX
0Qb^[dcTAPSX^
112APSX^!
'&%<7i5<
BTPaRWX]V-
P]ScWTcTP\QaX
112APSX^! '&$<7i
FM
Tune
When listening to FM
Seek Tuning
Rotate the Tune dial right or left to seek to the next or previous FM station.
Manual Tuning
1. Change the FM tuning mode to ‘Manual’ (see page 9).
2. Rotate the Tune dial right or left to step up or down 0.05 MHz.
Changing stations
When listening to DAB
1. Rotate the Tune dial right or left to scroll through the list of available DAB stations. The name
of the current station remains at the top of the screen.
2. Push the Tune dial to change the station.
0dgX[XPahX]_dc
(!(
AUX
Switching between DAB,FM and AUX
Press the DAB/FM/AUX/ button.
Tune

5
Listening to radio
EN
1
?aTbTc bPeTS
0Qb^[dcTAPSX^
4\_ch_aTbTc
?aTbTc
2^]cPRcdbfaX
0Qb^[dcTAPSX^
Tune
Tune
WTQTbcX]_^_
112APSX^!
]ScWTcTP\Qa
112APSX^!
P]ScWTcTP\QaX
112APSX^!
(Exit)
Using Presets
You can store up to 25 DAB and 25 FM presets.
Storing a Preset
1. Tune to the DAB or FM station you want to store as a preset.
2. Press and hold the Preset button (1-5) you wish to use until the ‘Preset saved’ message
appears on screen.
3. Alternatively, press 5+ and rotate the Tune dial to scroll to a preset slot between 1 and 25.
Push the Tune dial to confirm the preset.
Selecting a Preset
To select a preset, press the Preset button (1-5) your station is saved to. For presets above 5,
press the 5+ button then rotate the Tune dial and push to select the preset you wish to listen to.
Using textSCAN™to pause and control scrolling text
1. When scrolling text information is displayed in either DAB or FM (RDS), push the Tune dial to
pause the scrolling text.
2. Turn the dial left or right to scroll through the current scrolling text message. To exit textSCAN
push the Tune dial again.
Scrolling text Information broadcast by most DAB stations and some FM (RDS) stations.
Date Today’s date automatically updated by the DAB signal.
Signal strength A bar showing the signal strength.
Signal quality Displays DAB signal quality: 85 to 100 good; 70 to 84 OK; 0 to 69 poor.
2
1
Changing the information displayed on screen
To change the information displayed on screen, press the Menu button, then rotate the Tune dial
to select ‘info display’. Push to select, then rotate to scroll through the following options:
Tune

6Listening to radio
Intellitext®
Intellitext provides on-demand text information such as sports headlines, weather forecasts
and news from DAB stations that support the service. The text is updated by the broadcasters
and stored in your radio while you listen to stations. Intellitext is listed by station and split into
categories, e.g., Football, Cricket, Headlines, etc.
To view Intellitext messages
1. Press Menu to enter the menu and use the Tune dial to select ‘Intellitext’. Push the Tune dial
to select ‘View’ and access a list of stations for which you have Intellitext information (if you
see ‘No data’ you need to tune to a station broadcasting Intellitext for a few minutes before
information is received).
2 Push the Tune dial to select a station, then rotate and push to browse Intellitext categories
for that station, e.g., Radio 5 > SPORT > FOOTBALL. The selected information will scroll
across the screen. Press Menu to go back to the previous category.
Note: You can use textSCAN (page 5) to pause and control Intellitext messages.
ReVu™− pause and rewind live radio
ReVu enables you to pause and rewind radio by saving an audio ‘buffer’ of the current station. You
can rewind for approximately 10-15 minutes depending on the broadcast quality of the current
station and/or how long you’ve been tuned to the current station.
To pause and rewind live radio
1. Press ReVu to pause the current station and enter ReVu mode.
2. When the audio is paused you can do the following:
Tune
5>>C10;;
B?>AC
<P]2XchR^\_[Tc
5>>C10;;
P]ScWTcTP\QaX
112APSX^!
ReVu
P]ScWTcTP\QaX
112A!J)!L
Tune T
u
n
e
Rewind up to the
start of the audio
buffer.
Press ReVu to stop
rewinding or rotate
the Tune dial one
click in the opposite
direction. Press to Play and
pause.
Press and hold to
Return to live radio.
Fast-forward through
the audio buffer.
Press ReVu to stop
fast-forwarding or
rotate the Tune dial
one click in the
opposite direction.
Time from live
P]ScWTcTP\QaX
112A!J)!L
ReVu
2
ReVu

7
Setting the alarm & timers
EN
Setting the alarm & timers
Setting the alarm
1. Press the Alarm/Timer button and select ‘Alarm’ with the Tune dial to display the alarm
status screen.
2. Push the Tune dial to enter the alarm menu. You can scroll through six alarm options on the
bottom line of the display, while the top line displays their current setting. To change a setting,
push the dial, rotate it to make your selection and then push again to confirm the change.
Set alarm
Push the Tune dial to choose between ‘Alarm on’ (alarm
sounds) or ‘Alarm off’ (alarm does not sound). The
symbol on the screen indicates that the alarm is on.
Set time
Push the Tune dial to set the alarm time. Rotate to set the
hour then push to confirm. Repeat to set the minutes.
Set days
Push the Tune dial to set the days that the alarm sounds.
Choose between: Once only (alarm does not repeat),
Daily (every day), Weekday (Monday to Friday), Weekend,
Saturday or Sunday.
Set alarm mode
Push the Tune dial to choose between: DAB, FM or Tone.
Select station
If you’ve set alarm mode as DAB or FM you can choose
‘Select station’ and choose a DAB station or an FM preset
and push the Tune dial to confirm. Last tuned tunes to
the most recent FM station.
Alarm volume
If the alarm mode is set to DAB or FM, push the Tune dial
to change the alarm volume. Rotate the Tune dial left to
decrease the alarm volume and right to increase it then push
to confirm.
Cancelling a sounding alarm
To cancel a tone alarm push the Tune dial or Standby button.
To cancel a radio alarm press any button.
Note: A sounding alarm will switch off after one hour unless you cancel it.
BTcP[Pa\
0[Pa\^UU
BTcSPhb
3PX[h
BTc\^ST
301
BTccX\T
&)
0[Pa\e^[d\T
BT[TRcbcPcX^]
112APSX^!

8Setting the alarm & timers
Setting the kitchen timer
Élan II has a countdown timer which will sound a beeping tone after a set time period – handy for
use in the kitchen.
To set a kitchen timer
1. Press Alarm/Timer, then rotate the Tune dial to display ‘Kitchen timer’ and push to select.
2. Rotate the Tune dial to change the hours and push to confirm. Rotate again to change the
minutes then push to confirm and start the countdown timer. is displayed on screen.
To cancel a kitchen timer
To stop and reset the kitchen timer before it sounds a beeping tone, press and hold down the
Alarm/Timer button for two seconds until you see the message ‘Timer cleared’.
Setting the sleep timer
Élan II has a sleep timer that switches your radio into standby (or off if powered by a ChargePAK or
batteries) after a number of minutes has elapsed. Use this if you want to fall asleep to the radio.
To set a sleep timer
1. Press the Alarm/Timer button, rotate the Tune dial to display Sleep timer then push the Tune
dial to select.
2. Rotate the Tune dial to increase the duration of the sleep from 15 to 90 minutes in fifteen
minute intervals. Push to start the sleep timer.
To cancel a sleep timer
Select the Sleep timer screen (see above) and set the duration of the Sleep timer to Sleep Off.
Alternatively, press and hold the Alarm/Timer button for three seconds until you see the message
‘Timer cleared’.
W^dab\X]b
Tune Tune
W^dab $\X]b
Tune Tune
Alarm/Timer
P]ScWTcTP\QaX
112APSX^!
CX\TaR[TPaTS
B[TT_>UU
B[TT_>UU
B[TT_"
B[TT_>UU
Tune Tune
2

9
Options and settings
EN
Options and settings
Press the Menu button to access the options menu, rotate the Tune dial to scroll through and
change the options and push to select.
DAB options
Autotune
Scans all DAB Band III frequencies for stations, automatically adds any new stations found to the
station list and removes inactive stations. To stop an Autotune press Menu.
Intellitext options
Select ‘Intellitext’ and use the Tune dial to access the following options for managing Intellitext
messages:
Set timeout Choose to delete old Intellitext messages after 1 week (default) or 1 day.
Clear all Delete all stored Intellitext messages immediately.
FM options
FM tuning mode
Seek When you rotate the Tune dial, the radio tunes to the next station with a good signal.
Manual When you rotate the Tune dial, the radio tunes up or down in steps of 0.05 MHz.
FM stereo mode
Choose from Stereo (default) or Mono. Mono may improve clarity where stereo signals are weak.
General options
Backlight
Timed The backlight turns on for 7 seconds when any button is pressed (default).
Off The backlight does not switch on.
On The backlight is always on when the radio is on.
Audio
Push the Tune dial to select, then rotate to adjust the treble or bass and push to confirm.
Treble Adjust the treble between -5 (minimal treble), and 5 (high treble).
Bass Adjust the bass between -5 (minimal bass),and 5 (maximum bass).
Clock
The clock will automatically set itself and also update for GMT/BST clock changes. However, if you
cannot receive a DAB signal, the time and date can be manually set by selecting Set Clock from
the options menu.

10
Options and settings
Energy saving
Élan II is part of the PURE EcoPlus product family, designed and manufactured to minimize power
consumption when the unit is switched on and to use less than 1 Watt in standby. One way this
low power consumption is enabled is by not collecting and storing Intellitext messages when the
unit is in standby. Two options are available:
On (default) Élan II updates the Intellitext data when you tune to a station that broadcasts
Intellitext. Intellitext data is not collected in standby.
Off Élan II collects Intellitext data in standby from the last station you used to view
Intellitext. This increases standby power consumption.
Note: If you fit the optional ChargePAK C6L or 6 x ‘C’ cell batteries (see below), your radio will
switch off when you press the Standby button and not enter standby, as long as it is not
connected to mains power.
Software upgrade
Software updates for your Élan II may be made available in the future. If you register your product
and include a valid e-mail address you will receive notification of software updates (register at
www.pure.com/register). Available software updates* are also listed at http://support.pure.com
To upgrade your radio
1. Press and hold the Menu button for three seconds to access the maintenance menu.
2. Select ‘Upgrade’ and follow the instructions provided with the upgrade software.
Reset your radio
Resetting your radio removes all presets, clears the station list and resets all options to defaults.
1. Press and hold the Menu button for three seconds to access the software menu.
2. Rotate the Tune dial to choose ‘Factory Reset’ and push the dial to confirm the reset.
Using a ChargePAK™
PURE ChargePAK C6L is a rechargeable battery pack which plugs into the socket in the radio’s
battery compartment. Whenever your radio is connected to a mains supply the ChargePAK will
charge up and the battery icon on screen will animate. When the ChargePAK is fully charged the
battery icon will disappear.
You can also use 6 ‘C’ cell batteries to power Élan II. Fit them according to the diagram inside the
battery compartment.
Note Élan II can only be powered with a ChargePAK C6L. Do not use any other ChargePAK
model. Carefully follow the separate fitting instructions that are supplied with the
ChargePAK C6L.
To purchase a PURE ChargePAK C6L, contact your nearest PURE dealer, visit the shop on our
website at www.pure.com or call the PURE order line on +44 (0)845 148 9001.
*Requires a PC with internet access running Windows XP or Vista and a suitable USB cable (not included).

11
Help and specifications
EN
Help and specifications
Secondary and inactive stations
(<</>>) Secondary DAB services
Secondary services accompany some stations, providing extra information or alternative content
and may only be broadcast at certain times. If a station has secondary services available, the
station shows ‘>>’ next to its name in the station list and the secondary service appears next to
the station in the list. A secondary service has a ‘<<’ before its name in the station list.
(?) Inactive or unavailable DAB stations
Inactive or unavailable stations appear on the station list preceded by ‘?’ and cannot be tuned to.
A station may be inactive or unavailable because the station is not broadcasting at the current
time (check with the station) or has stopped broadcasting altogether. Alternatively, you may not
have a strong enough signal to receive the Multiplex on which the station is broadcast.
Hints and tips
Display says ‘No stations available’
Use Autotune (page 9) to search for stations. Try adjusting your aerial or radio position.
Receiving new DAB stations that have started broadcasting
Use Autotune to scan for new stations, remove unavailable stations and add any new DAB
stations to the station list.
Using the alarm when using ChargePAK C6L or batteries
When a ChargePAK rechargeable battery or ‘C’ cell batteries are fitted and the unit is not
connected to mains power the radio switches off completely when the Standby button is pressed.
In this case, the message ‘Disabling alarm’ will be briefly displayed after the Standby button is
pressed and the alarm will not sound.
Need help?
We want you to get the most out of your Élan II and enjoy all that digital
radio has to offer. If you have any questions about the product after
reading this manual, please visit our support website or contact a
member of our support team by phone or e-mail.
Returns & Repairs
If this product develops a fault within the warranty period we’ll organise
a repair or replace it if necessary. Please read the Warranty information.
suppor[email protected]
support.pure.com
(9am–5:30pm, Mon–Fri)
+44 (0)845 148 9001

12
Help and specifications
Technical Specifications
General: Stereo digital radio with full Band III and FM reception. ETSI EN 300 401
compliant and capable of decoding all DAB transmission modes 1-4 up to
and including 192 kbps. Supports FM RDS and RadioText.
Frequency ranges: DAB Band III 174–240 MHz, FM 87.5–108 MHz.
Speakers: 2 x full-range 3" drive units.
Audio power output: 2.5W RMS per channel; 5W RMS total.
Input connectors: 12V DC power adapter socket (230V adapter supplied), Mini USB connector
for software upgrades, 3.5mm Line in for auxiliary devices.
Output connectors: 3.5mm headphone socket.
Mains power supply: 230V AC to 12V (0.8A) DC external power adapter.
Power consumption: In standby 0.9W; in operation 2.9W on average.
Batteries: ChargePAK C6L (not supplied) or 6 x ‘C’ Cell.
Approvals: CE marked. Compliant with the EMC and Low Voltage Directives
(2004/108/EC and 2006/95/EC).
Dimensions: 280 mm wide x 161 mm high x 88 mm deep.
Aerial: Integral telescopic aerial.
Copyright
Copyright 2009 by Imagination Technologies Limited. All rights reserved. No part of this publication may be copied or distributed, transmitted, transcribed,
stored in a retrieval system, or translated into any human or computer language, in any form or by any means, electronic, mechanical, magnetic, manual or
otherwise, or disclosed to third parties without the express written permission of Imagination Technologies Limited.
Trademarks
Élan II, the Élan II logo, Intellitext, textSCAN, ChargePAK, ReVu, PURE, the PURE logo, EcoPlus, the EcoPlus logo, Imagination Technologies, and the Imagination
Technologies logo are trademarks or registered trademarks of Imagination Technologies Limited. All other product names are trademarks of their respective
companies. Version 1 September 2009.

Erste Schritte....................................................................... 2
Einrichten ...........................................................................................2
Die Bedienelemente auf einen Blick ......................................................3
Anschlüsse auf derRückseite ................................................................3
Externes Gerät anschließen ..................................................................3
Radio hören......................................................................... 4
Zwischen DAB, UKW und AUX-Eingang umschalten ..................................4
Senderwechsel ....................................................................................4
Verwenden von Voreinstellungen............................................................5
Ändern der angezeigten Informationen...................................................5
textSCAN™zum Anhalten und Überprüfen von Lauftext verwenden ............5
Intellitext®..........................................................................................6
ReVu™− Anhalten und Zurückspulen des laufenden Radioprogramms.......6
Einstellen von Wecker und Timer ........................................... 7
Einstellen des Weckers.........................................................................7
Einstellen des Küchen-Timers ...............................................................8
Einstellen des Sleep-Timers..................................................................8
Optionen und Einstellungen .................................................. 9
DAB-Optionen......................................................................................9
Autotune......................................................................................................9
Intellitext-Optionen.......................................................................................9
UKW-Optionen.....................................................................................9
Allgemeine Optionen............................................................................9
Hintergrundbeleuchtung................................................................................9
Audio ..........................................................................................................9
Uhr..............................................................................................................9
Energiesparmodus......................................................................................10
Software-Updates.......................................................................................10
Verwenden von ChargePAK™...............................................................10
Hilfe und Spezifikationen.....................................................11
Sekundärsender/inaktive Sender ........................................................11
Tipps und Tricks.................................................................................11
Technische Daten...............................................................................12
Inhalt

2Erste Schritte
Warten Sie, bis Élan II die automatische Sendersuche für alle verfügbaren DAB-
Sender abgeschlossen hat (dies dauert etwa eine Minute). Wenn die automatische
Sendersuche abgeschlossen ist, wird ein Sender ausgewählt.
Erste Schritte
Lösen Sie die Antenne vom Bügel auf der Oberseite des Radios, und ziehen Sie sie in
voller Länge aus.
Stecken Sie den Stecker des mitgelieferten Netzkabels in den Anschluss auf der
Rückseite des Radios.
Stecken Sie den Netzstecker des Adapters in die Netzsteckdose und warten Sie, bis
sich das Gerät einschaltet.
A
C
B
4]TaVh
bPeX]VT]PQ[TS
0dc^cd]T P]ScWTcTP\QaX
112APSX^!
Einrichten
Anmerkung: Wenn Sie über einen (separat erhältlichen) aufladbaren ChargePAK C6L-Akku
verfügen, setzen Sie diesen ein, BEVOR Sie das Radio mit der Netzsteckdose
verbinden. Befolgen Sie die Anweisungen zum Einsetzen des ChargePAK C6L.
1
(Siehe Seite 10)
B
C
A

3
Erste Schritte
DE
Die Bedienelemente auf einen Blick
Anschlüsse auf der
Rückseite Externes Gerät anschließen
USB-Anschluss (Typ
mini-B) für Software-
Upgrades
3,5-mm-Buchse für
Stereokopfhörer
Analoger Stereoeingang
für iPod, CD-Player usw.
AUX
!!(
(AUX-Kabel nicht in
Lieferumfang enthalten)
Tune
Volume
Menu
Bass/Treble
12345+
DAB/FM/AUX
ReVu
Alarm/Timer
Standby
ReVu
Drücken, um das laufende DAB-
Radioprogramm anzuhalten und
abzuspielen. Das Senderwählrad
drehen, um schnell vor- und
zurückzuspulen. Halten Sie die
Taste gedrückt, um zum laufenden
Radioprogramm zurückzukehren
Speicherplätze 1 − -5+
Sie können bis zu 50 DAB-
oder UKW-Sender als
Voreinstellung speichern
Standby
Einschalten und Standby
(aus bei eingesetztem
ChargePAK)
Tune
Drehen Sie das Rad zur
Navigation durch die
Menüs und drücken Sie
es zur Bestätigung Ihrer
Auswahl
Alarm/Timer
Stellen Sie den Wecker,
den Küchen-Timer oder den
Sleep-Timer ein
Menu
Zugriff auf Einstellungsoptionen
DAB/FM/AUX
Umschalten zwischen
DAB/FM (UKW)/AUX
Bass/Treble
Anpassen der Audioeinstellungen
Volume
Rad zur
Lautstärkeregelung
drehen.
Drücken zum
Stummschalten

4Radio hören
Radio hören
Tune
DAB/FM/AUX
A^RZAPSX^
?>?APSX^!
'&%<7i5<
BTPaRWX]V-
_^_\dbXRP[[SP
?>?APSX^! '&$<7i
FM
Tune
Bei UKW-Empfang (FM)
Automatische Sendersuche
Drehen Sie das Wählrad Tune nach rechts oder links, um nach dem nächsten/vorherigen UKW-
Sender zu suchen.
Manuelle Senderwahl
1. Wechseln Sie den UKW-Frequenzwahlmodus auf manuell (siehe Seite 9).
2. Drehen Sie dann das Wählrad Tune nach links oder rechts, um in Schritten von 0,05 MHz zu
blättern.
Senderwechsel
Bei DAB-Betrieb
1. Drehen Sie den Frequenzsteller Tune nach links oder rechts um durch die Liste der
verfügbaren DAB-Sender zu blättern. Der Name des aktuellen Senders wird oben in der
Anzeige dargestellt.
2. Drücken Sie den Frequenzsteller Tune, um den Sender zu wechseln.
0dgX[XPahX]_dc
(!(
AUX
Zwischen DAB, UKW und AUX-Eingang umschalten
Drücken Sie die Taste DAB/UKW/AUX
Tune

5
Radio hören
DE
1
?aTbTc bPeTS
A^RZAPSX^
4\_ch_aTbTc
?aTbTc
2P[[db]^fP]S
A^RZAPSX^
Tune
Tune
WTQTbcX]_^_
112APSX^!
]ScWTcTP\Qa
112APSX^!
P]ScWTcTP\QaX
112APSX^!
(Beenden)
Verwenden von Voreinstellungen
Sie können bis zu 25 DAB- und 25 UKW-Sender speichern.
Speichern einer Voreinstellung
1. Stellen Sie den zu speichernden DAB- oder UKW-Sender ein.
2. Halten Sie die Taste Speicherplätze gedrückt (1-5), bis die Meldung ‘Einstellung gespeichert’
erscheint.
3. Sie können auch 5+ drücken und den Frequenzsteller Tune drehen, um zu einem
Speicherplatz zwischen 1 und 25 zu blättern. Drücken Sie den Frequenzsteller Tune, um den
Speicherplatz zu bestätigen.
Auswählen einer Voreinstellung
Drücken Sie zum Auswählen eines Speicherplatzes dessen Taste (1-5). Für Speicherplätze über
5 drücken Sie die Taste 5+ und drehen den Frequenzsteller Tune. Drücken Sie diesen, um den
gewünschten Speicherplatz zu wählen.
textSCAN™zum Anhalten und Überprüfen von Lauftext verwenden
1. Wenn im DAB- oder UKW-Modus Lauftextinformationen angezeigt werden, können Sie die
Anzeige durch Drücken des Frequenzstellers Tune anhalten.
2. Drehen Sie das Wählrad nach links oder rechts, um durch den aktuellen Lauftext zu blättern.
Zum Beenden von textSCAN den Frequenzsteller Tune erneut drücken.
Scrolling text Lauftext, der von den meisten DAB-Sendern und einigen UKW-Sendern (RDS)
ausgestrahlt wird.
Date Das aktuelle Datum, wird durch das DAB-Signal automatisch aktualisiert
Signal strength Ein Balken, der die Signalstärke anzeigt
Signal quality Anzeige der Qualität des DAB-Signals: 85 bis 100: gut; 70 bis 84 OK; 0 bis 69:
schwach.
2
1
Ändern der angezeigten Informationen
Zum Ändern der angezeigten Informationen drücken Sie die Taste Menu und drehen den
Frequenzsteller, bis die Anzeige ‘Informationen’ erscheint. Drücken Sie zur Auswahl und drehen
Sie, um durch die folgenden Optionen zu blättern:
Tune

6Radio hören
Intellitext®
Intellitext bietet Ihnen jederzeit abrufbare Informationen wie Sportschlagzeilen, Wetterberichte
und Nachrichten von DAB-Sendern, die diesen Dienst unterstützen. Der Text wird von den DAB-
Sendern aktualisiert und im Radioempfangsbetrieb in Ihrem Radio gespeichert. Intellitext wird
nach Sender aufgeführt und ist in Kategorien gegliedert, z. B. Fußball, Cricket, Schlagzeilen etc.
Anzeige von Intellitext-Meldungen
1. Drücken Sie die Taste Menü, um das Menü aufzurufen. Wählen Sie mit dem Frequenzsteller
Tune ‘Intellitext’. Drücken Sie den Frequenzsteller Tune zur Auswahl von ‘View’ und greifen Sie
auf eine Senderliste vor, für die Intellitext-Informationen vorliegen (wird ‘No data’ angezeigt,
müssen Sie auf einen Sender zugreifen, der einige Minuten lang Intellitext ausstrahlt, um
diese Informationen zu sehen).
2Drücken Sie den Frequenzsteller Tune, um einen Sender auszuwählen. Drehen und drücken
Sie diesen, um durch die Intellitext-Kategorien für diesen Sender zu blättern, z. B. Radio 5>
SPORT > FOOTBALL. Die ausgewählten Informationen laufen dann als Text über das Display.
Drücken Sie Menü, um zur vorherigen Kategorie zurückzukehren.
Tune
5>>C10;;
B?>AC
<P]2XchR^\_[Tc
5>>C10;;
P]ScWTcTP\QaX
112APSX^!
ReVu
P]ScWTcTP\QaX
112A!J)!L
Tune Tune
Zurückspulen bis
zum Anfang des
Audiopuffers
Drücken Sie die
Taste ReVu, um das
Zurückspulen zu
Richtung. Drücken Sie diese
Taste für Wiedergabe
und Pause.
Halten Sie die Taste gedrückt, um zum
laufenden Radioprogramm zurückzukehren.
Schnelles Vorspulen
durch den Audiopuffer
Drücken Sie die
Taste ReVu, um das
Vorspulen zu stoppen.
Zeit bis Live
P]ScWTcTP\QaX
112A!J)!L
ReVu
2
ReVu
2. Bei einer Audio-Pause können Sie wie folgt vorgehen:
So können Sie das aktuelle Radioprogramm anhalten und zurückspulen:
1. Drücken Sie ReVu, um den aktuellen Sender anzuhalten und zum ReVu-Modus zu wechseln.
ReVu™− Anhalten und Zurückspulen des laufenden Radioprogramms
Mit ReVu können Sie das Radioprogramm unterbrechen und zurückspulen, indem ein Audiopuffer
für den aktuellen Sender angelegt wird. Sie können ca. 10-15 Minuten zurückspulen, je nach
Sendequalität und/oder abhängig von der Zeit, die Sie diesen Sender bereits hören.
Anmerkung: Sie können mit textSCAN (Seite 5) Intellitext-Meldungen unterbrechen und lesen.
Table of contents
Languages:
Other PURE Radio manuals

PURE
PURE POCKETDAB 1500 User manual

PURE
PURE One Midi User manual

PURE
PURE Marshall EVOKE-1S User manual

PURE
PURE SENSIA User manual

PURE
PURE One Maxi User manual

PURE
PURE Evoke-2XT User manual

PURE
PURE DRX-601EX User manual

PURE
PURE ONE mini User manual

PURE
PURE Wayne Hemingway Bug TOO User manual

PURE
PURE elan dx20 User manual