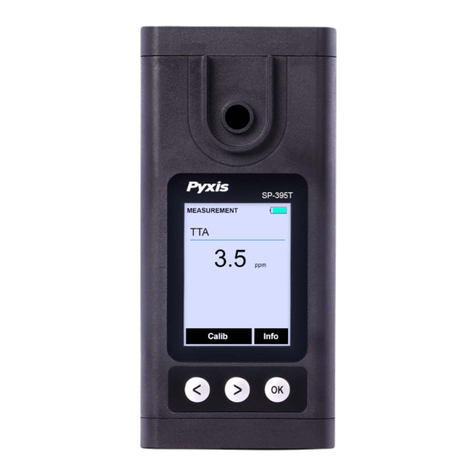
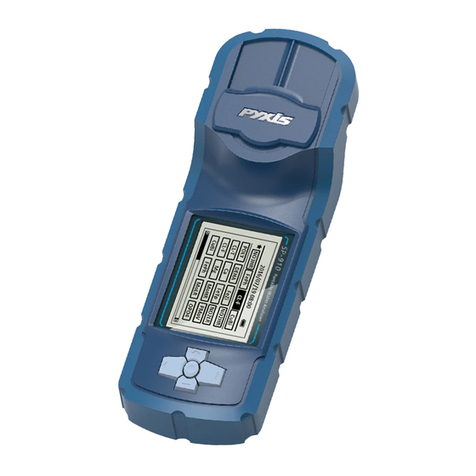
Pyxis SP-200 OXIPOCKET User manual

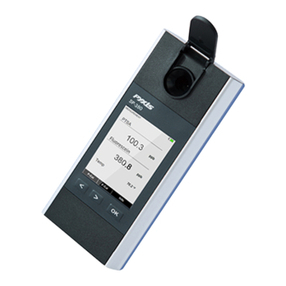
SP-200 Handheld Colorimetric Analyzer
User Manual
February 8, 2021
Rev. 1.02
Pyxis Lab, Inc.
1729 Majesc Dr. Suite 5
Lafayee, CO 80026 USA
www.pyxis-lab.com
© 2017 Pyxis Lab, Inc.
Pyxis Lab Proprietary and Condenal

Table of Contents
1 Introducon 3
1.1 Main Features . . . . . . . . . . . . . . . . . . . . . . . . . . . . . . . . . . . . . . . . . . . . . 3
2 Specicaons 3
3 Unpacking Instrument 3
3.1 Standard Accessories . . . . . . . . . . . . . . . . . . . . . . . . . . . . . . . . . . . . . . . . . 4
3.2 Oponal Accessories . . . . . . . . . . . . . . . . . . . . . . . . . . . . . . . . . . . . . . . . . 4
4 Installaon 5
4.1 Baery Installaon . . . . . . . . . . . . . . . . . . . . . . . . . . . . . . . . . . . . . . . . . . 5
5 Instrument Overview 6
5.1 Control Keys . . . . . . . . . . . . . . . . . . . . . . . . . . . . . . . . . . . . . . . . . . . . . . 6
5.2 Main Module On/O . . . . . . . . . . . . . . . . . . . . . . . . . . . . . . . . . . . . . . . . . 6
6 Measurement 7
6.1 Colorimetric Methods . . . . . . . . . . . . . . . . . . . . . . . . . . . . . . . . . . . . . . . . 7
6.2 Select a Method . . . . . . . . . . . . . . . . . . . . . . . . . . . . . . . . . . . . . . . . . . . . 7
6.3 Single-Vial Measurement . . . . . . . . . . . . . . . . . . . . . . . . . . . . . . . . . . . . . . 8
7 Calibraon 9
7.1 Set Method Parameters . . . . . . . . . . . . . . . . . . . . . . . . . . . . . . . . . . . . . . . 9
7.2 Low Calibraon . . . . . . . . . . . . . . . . . . . . . . . . . . . . . . . . . . . . . . . . . . . . 10
7.3 Slope Calibraon . . . . . . . . . . . . . . . . . . . . . . . . . . . . . . . . . . . . . . . . . . . 11
7.4 Restore Factory Default Values . . . . . . . . . . . . . . . . . . . . . . . . . . . . . . . . . . . 12
8 Device Informaon and Diagnosis 13
8.1 Bluetooth Connecon to Devices . . . . . . . . . . . . . . . . . . . . . . . . . . . . . . . . . . 13
8.2 Factory Reset . . . . . . . . . . . . . . . . . . . . . . . . . . . . . . . . . . . . . . . . . . . . . 14
9 Use with uPyxis® Mobile App 15
9.1 Download uPyxis® Mobile App . . . . . . . . . . . . . . . . . . . . . . . . . . . . . . . . . . . 15
9.2 Connecng to uPyxis® Mobile App . . . . . . . . . . . . . . . . . . . . . . . . . . . . . . . . . 16
9.3 Seng Screen . . . . . . . . . . . . . . . . . . . . . . . . . . . . . . . . . . . . . . . . . . . . . 17
9.4 System Screen . . . . . . . . . . . . . . . . . . . . . . . . . . . . . . . . . . . . . . . . . . . . . 18
9.5 Datalog Screen . . . . . . . . . . . . . . . . . . . . . . . . . . . . . . . . . . . . . . . . . . . . 19
10 Use with uPyxis® Desktop App 19
10.1 Install uPyxis® Desktop App . . . . . . . . . . . . . . . . . . . . . . . . . . . . . . . . . . . . . 19
10.2 Connecng to uPyxis® Desktop App . . . . . . . . . . . . . . . . . . . . . . . . . . . . . . . . 20
10.3 System Screen . . . . . . . . . . . . . . . . . . . . . . . . . . . . . . . . . . . . . . . . . . . . . 21
10.4 Seng Screen . . . . . . . . . . . . . . . . . . . . . . . . . . . . . . . . . . . . . . . . . . . . . 22
10.5 Datalog Screen . . . . . . . . . . . . . . . . . . . . . . . . . . . . . . . . . . . . . . . . . . . . 22

11 Device Maintenance and Precauon 23
11.1 Maintenance Best Pracces and Quick Tips . . . . . . . . . . . . . . . . . . . . . . . . . . . . 23
11.2 Storage . . . . . . . . . . . . . . . . . . . . . . . . . . . . . . . . . . . . . . . . . . . . . . . . . 23
12 Contact Us 23

Warranty Informaon
Condenality
The informaon contained in this manual may be condenal and proprietary and is the property of Pyxis
Lab, Inc. Informaon disclosed herein shall not be used to manufacture, construct, or otherwise reproduce
the goods described. Informaon disclosed herein shall not be disclosed to others or made public in any
manner without the express wrien consent of Pyxis Lab, Inc.
Standard Limited Warranty
Pyxis Lab warrants its products for defects in materials and workmanship. Pyxis Lab will, at its opon, repair
or replace instrument components that prove to be defecve with new or remanufactured components
(i.e., equivalent to new). The warranty set forth is exclusive and no other warranty, whether wrien or oral,
is expressed or implied.
Warranty Term
The Pyxis warranty term is thirteen (13) months ex-works. In no event shall the standard limited warranty
coverage extend beyond thirteen (13) months from original shipment date.
Warranty Service
Damaged or dysfunconal instruments may be returned to Pyxis for repair or replacement. In some in-
stances, replacement instruments may be available for short duraon loan or lease.
Pyxis warrants that any labor services provided shall conform to the reasonable standards of technical com-
petency and performance eecve at the me of delivery. All service intervenons are to be reviewed and
authorized as correct and complete at the compleon of the service by a customer representave, or des-
ignate. Pyxis warrants these services for 30 days aer the authorizaon and will correct any qualifying
deciency in labor provided that the labor service deciency is exactly related to the originang event. No
other remedy, other than the provision of labor services, may be applicable.
Repair components (parts and materials), but not consumables, provided during a repair, or purchased
individually, are warranted for 90 days ex-works for materials and workmanship. In no event will the in-
corporaon of a warranted repair component into an instrument extend the whole instrument’s warranty
beyond its original term.
Warranty Shipping
A Repair Authorizaon (RA) Number must be obtained from Pyxis Technical Support before any product can
be returned to the factory. Pyxis will pay freight charges to ship replacement or repaired products to the
customer. The customer shall pay freight charges for returning products to Pyxis. Any product returned to
the factory without an RA number will be returned to the customer. To receive an RMA you can generate a
request on our website at hps://pyxis-lab.com/request-tech-support/.
Pyxis Technical Support
Contact Pyxis Technical Support at +1 (866) 203-8397, [email protected], or by lling out a request for
support at hps://pyxis-lab.com/request-tech-support/.
1 Introducon
The Pyxis SP-200 Handheld Colorimetric Analyzer is a single- and mul-parameter colorimetric tesng plat-
form. With the use of auxiliary colorimetric reagent kits, the SP-200 can quickly test a variety of water
quality parameters on the spot with high sensivity.
1.1 Main Features
The SP-200 includes the following features:
• Innovave technology plaorm with colorimetric measurement of 6 LED wavelengths
• Use of matching reagent kits and prefabricated reagent tubes
• Long standby mainframe 10,000+ measurements
• Can store up to 8 GB of test data (including test me)
• Create user-dened standard curves, view historical data, or analyze data via the uPyxis® App.
2 Specicaons
Table 1. SP-200 Specicaons
Item Specicaon*
Part Number (P/N) 50802
Absorbance Linearity Range 0–2.0 Abs
Absorbance Reproducibility ±0.005 Abs (0–1.0 Abs)
Colorimeter Wavelength 365/420/470/525/568/624 nm
Wavelength Accuracy ±1 nm
Temperature Range 40–106 °F (4–41 °C)
Humidity 85% at 106 °F (41 °C)
Data Storage 30,000 group data storage, Bluetooth transmission
Display 320x240 TFT-LCD, visible under direct sunlight
Power Supply 4 AA alkaline baeries
Typical Baery Life 10,000 readings
Cuvee 24mm diameter cuvee
Dimension (L ×W×H) 6.69 ×3.15 ×1.77 inch (170 ×80 ×45 mm)
Weight †0.88 lbs (400 g)
Enclosure Rang IP67
Regulaon CE/RoHS
*With Pyxis’s connuous improvement policy, these specicaons are subject to change with-
out noce.
†Baeries excluded
3 Unpacking Instrument
Remove the instrument and accessories from the shipping container and inspect each item for any damage
that may have occurred during shipment. Verify that all items listed on the packing slip are included. If any

3.1 Standard Accessories
• Quick-Start Guide
• Four (4) AA alkaline baeries
• Two (2) 10 mL Sample Vials, 24 mm diameter P/N: MA-24
• Bluetooth/USB Adapter for Desktop P/N: MA-NEB
• User Manual available online at hps://pyxis-lab.com/support/
3.2 Oponal Accessories
The following oponal accessories can be ordered from Pyxis Customer Service ([email protected]om) or
Pyxis E-Store at hps://pyxis-lab.com/shop/.
Table 2. Oponal Accessories
Accessory Name Part Number (P/N)
Pyxis Carrying Case for Handheld Devices 50725
10 mL Sample Vial MA-24
25 mL Sample Vial MA-25

4 Installaon
4.1 Baery Installaon
The SP-200 is powered by four alkaline baeries. Typical baery life lasts for 10,000 measurements or 10
months. When the baery capacity is crically low, the SP-200 will display a ”LOW BATTERY” warning for 5
seconds and then automacally turn o.
*NOTE*Do not use rechargeable nickel cadmium (NiCad) or lithium baeries.
Replace the baeries to resume operaon of the SP-200 aer the baery warning. The SP-200 will auto-
macally turn on in the measurement mode aer new baeries are installaon.
The SP-200 baery compartment, shown in Figure ??, is on the back side of the instrument. Baeries are
held in place by a cover secured with two Phillips-head screws.
Figure 1. The SP-200 baery compartment
Install baeries using the following steps:
1. Remove the baery compartment cover by loosening the two screws.
2. Remove old baeries and dispose of them properly.
3. Following the posive and negave terminal signs in the compartment boom, snap four new AA
alkaline baeries rmly into the baery holder.
4. Replace the baery compartment cover and ensure that the sealing O-ring is lying at on the baery
holder.
5. Fasten the two screws.
*NOTE*Failure to properly seat the O-ring may result in water damage to the SP-200.

5 Instrument Overview
Figure 2.
5.1 Control Keys
The SP-200 has three control keys, as shown in Figure 2. The le ( ), right ( ), and ok ( ) keys
are used to launch acons indicated on the LCD display directly above the keys. The labels above the keys
indicate the funcon associated with each key and funcons can be changed in dierent operaon modes.
5.2 Main Module On/O
To turn on the SP-200: Press momentarily and release.
To turn o the SP-200: Press and hold for about three seconds. Release when the LCD display
turns o. The SP-200 turns itself o aer 60 seconds without user interacon detected. This is done to
conserve baery life.
*NOTE*This auto-me o seng may be customized by the user as desired through the
uPyxis® Mobile or Desktop App.

6 Measurement
6.1 Colorimetric Methods
A wide range of colorimetric methods is supported by the SP-200 analyzer and the number of them keeps
increasing with connuous development of Pyxis. The following table is list of Supported Colorimetric Meth-
ods:
Table 3. Supported Colorimetric Methods
Abbreviaon Chemical Measured Method Type Range
CL-F Free Chlorine DPD 2.2 ppm
CL-T Total Chlorine DPD 2.2 ppm
Br-T Total Bromine DPD 4.5 ppm
CLO2 Chlorine Dioxide DPD 5.0 ppm
PAA Peroxyacec Iodometry 500 ppm
H2O2 Hydrogen Peroxide Iodometry 500 ppm
Bleach-L Bleach — Low Range Direct Read 1.0%
Bleach-H Bleach — High Range Direct Read 16.0%
O3 Ozone DPD 1.0 ppm
NH2C Chloramine, Mono — Low Range Indophenol 3.0 ppm
CLO2D Chlorine Dioxide — Mid Range Direct Read 50 ppm
CLO2H Chlorine Dioxide — High Range Direct Read 1500 ppm
CL2H Free/Total Chlorine — High Range DPD 10 ppm
CL2UH Free/Total Chlorine — Ultra High Range Iodometry 400 ppm
6.2 Select a Method
When powered on, the SP-200 is in the screen of the last selected measurement method, as shown in the
Figure 3. Use the following steps to select a dierent method:
1. Press Color ( ) to launch the Method screen (Figure 4).
*NOTE*The top line of the page shows the most frequently selected method, marked
by the ☆.
2. Press Up () and Down ( ) to navigate to the desired method.
*NOTE*Long press to exit without changing the method.
3. Press to select and start the highlighted method.

Figure 3. Figure 4.
6.3 Single-Vial Measurement
1. Make the Blank sample by lling a sample vial with the water sample and place it in the sample vial
compartment of the SP-200.
2. Press Zero (). Zero will then appear on the top-le corner of the display (Figure 5).
3. Add the appropriate reagent to the Blank sample.
4. Make the Developed sample by capping the sample vial and inverng several mes to fully mix the
reagent and sample.
5. Place the Developed sample in the sample vial compartment SP-200.
6. Press TMR1 ( ) to start the method mer (Figure 6).
7. The SP-200 will connuously display the concentraon as the mer counts down. Record the nal
value aer mer stops (Figure 7).
*NOTE*The rate of the reacon is oen faster than the standard preset me. If
the concentraon remains stable on the concentraon-me plot, press Stop (
) to terminate the ming step early. The last concentraon measurement will be
displayed.
Figure 5. Figure 6. Figure 7.

7 Calibraon
7.1 Set Method Parameters
Each method has two parameters that can be changed by the user; the units and the chemical formula
form. To change these parameters for a given method, use the following steps:
1. Complete a measurement with the desired method.
2. Press Cal/Sys ( ) as needed to highlight either Unit or Form.
3. Press OK () to launch the Choose Unit screen (Figure 8) or the Choose Form screen (Figure 9).
4. Press »() to navigate to the desired parameter opon.
5. Press OK () to select the desired parameter opon.
Figure 8. Figure 9.

7.2 Low Calibraon
Some methods have a non-zero intercept value in the calibraon equaon. For these methods, the appro-
priate non-zero intercept value is shipped pre-loaded in the SP-200. The following steps are used to carry
out a low calibraon which changes this non-zero intercept value:
1. Complete a measurement with the desired method.
2. Press Cal/Sys () as needed to highlight Low-C.
3. Press OK () to launch the calibraon screen (Figure 10).
4. Fill a sample vial with deionized (DI) water or with soluon with a known concentraon and place it
in the sample vial compartment of the SP-200.
*NOTE*For best results, the know concentraon should be less than half of the max-
imum concentraon of the method. See the Supported Colorimetric Methods table
for concentraon ranges for each method.
5. Use «() and -( ) to adjust the concentraon value to match the known concentraon of the
soluon or to zero if using deionized (DI) water.
6. Press Calib () to connue with the entered concentraon value. The display updates as shown
in Figure 11.
7. Press OK () to start the low calibraon.
8. The message “Low point calibraon succeeded” will appear on the display (Figure 12).
9. Press to exit.
Figure 10. Figure 11. Figure 12.

7.3 Slope Calibraon
Each method has been calibrated prior to shipping, there is no need to calibrate unless a calibraon check
indicates that the method needs a calibraon. The following steps are used to carry out a slope calibraon:
1. Complete a measurement with the desired method.
2. Press Cal/Sys () as needed to highlight Slope-C.
3. Press OK () to launch the calibraon screen (Figure 13).
4. Fill a sample vial with a soluon with known concentraon and place it in the sample vial compart-
ment of the SP-200.
*NOTE*For best results, the know concentraon should be less maximum concentra-
on of the method. See the Supported Colorimetric Methods table for concentraon
ranges for each method.
5. Use «() and -( ) to adjust the concentraon value to match the known concentraon of the
soluon.
6. Press Calib () to connue with the entered concentraon value. The display updates as shown
in Figure 14.
7. Press OK () to start the slope calibraon.
8. The message “High point calibraon succeeded” will appear on the display (Figure 15).
9. Press to exit.
Figure 13. Figure 14. Figure 15.

7.4 Restore Factory Default Values
Each method can be restored to the factory default intercept and slope values, individually. The following
steps are used to carry out a factory default of the desired method’s intercept and slope values:
1. Complete a measurement with the desired method.
2. Press Cal/Sys () as needed to highlight Default.
3. Press OK (). The display updates as shown in Figure 16.
4. Press OK () to start the factory default of the desired method.
5. The message “Restore data succeeded” will appear on the display (Figure 17).
Figure 16. Figure 17.

8 Device Informaon and Diagnosis
The Informaon screen is launched when Cal/Sys ( ) is pressed while not in an ongoing measurement
procedure. This screen contains the device serial number, soware version, and hardware version (Figure
18). The baery life as a percentage and the MAC addresses for main module also shown.
Press Diag () to launch the Diagnosis screen where raw measurement data are displayed (Figure 19).
The informaon has no use for normal operaon, but instead is used for device troubleshoong. Provide
an image of both the Informaon screen and the Diagnosis screen when you contact Pyxis (service@pyxis-
lab.com) for troubleshoong your device or call +1 (866) 203-8397.
Figure 18. Figure 19.
8.1 Bluetooth Connecon to Devices
The SP-200 uses a built-in Bluetooth Low Energy Connecon (BTLE) to connect wirelessly to a smart phone
via the uPyxis® Mobile App or to a computer via the included Bluetooth Adapter (P/N: MA-NEB) and the
uPyxis® Desktop App. To allow the SP-200 to connect via Bluetooth with other devices follow the steps
below:
1. Power on the SP-200 by pressing .
2. Press Cal/Sys () to launch the Informaon screen.
3. Press Diag () to launch the Diagnosis screen.
4. Allow 5–10 seconds for the message in the top-right corner of the display change from Starng BTLE...
to BTLE Started (Figure 19).
5. Choose to connect via one of two opons:
(a) The uPyxis® Mobile App (see the Use with uPyxis® Mobile App secon), or
(b) The uPyxis® Desktop App (see the Use with uPyxis® Desktop App secon).

8.2 Factory Reset
Use the following steps to restore all device parameters to factory default:
1. Power on the SP-200 by pressing .
2. Press Cal/Sys () to launch the Informaon screen.
3. Press Diag () to launch the Diagnosis screen.
4. Allow 5–10 seconds for the message in the top-right corner of the display change from Starng BTLE...
to BTLE Started .
5. Press Factory (). The display updates as shown in Figure 20.
6. Press OK () to start the factory reset.
7. The message “Data recovery is successful!” will appear on the display (Figure 21).
Figure 20. Figure 21.

9 Use with uPyxis® Mobile App
9.1 Download uPyxis® Mobile App
Download uPyxis® Mobile App from Apple App Store or Google Play.
Figure 22. uPyxis® Mobile App installaon

9.2 Connecng to uPyxis® Mobile App
Connect the SP-200 sensor to a mobile smart phone according to the following steps:
1. Follow the steps in the Bluetooth Connecon to Devices secon to make the SP-200 discoverable.
2. Open uPyxis® Mobile App.
3. On uPyxis® Mobile App, pull down to refresh the list of available Pyxis devices.
4. If the connecon is successful, the SP-200 and its Serial Number (SN) will be displayed (Figure 26).
5. Press on the SP-200 image.
Figure 23.

9.3 Seng Screen
From the Seng screen, the user can set the Power o me and Screen o me in seconds.
Figure 24.
This manual suits for next models
1
Table of contents
Other Pyxis Measuring Instrument manuals

Pyxis
Pyxis SP-350P User manual

Pyxis
Pyxis ST-774 User manual

Pyxis
Pyxis SP-710 User manual

Pyxis
Pyxis SP-395 User manual

Pyxis
Pyxis SP-380P User manual

Pyxis
Pyxis IK-765SS-O3 User manual

Pyxis
Pyxis CR-301 User manual

Pyxis
Pyxis SP-210 User manual

Pyxis
Pyxis SP-350 User manual

Pyxis
Pyxis Porta-Check EZ-100 User manual
Popular Measuring Instrument manuals by other brands

Schaller
Schaller humimeter GF2 operating manual

NDC
NDC BenchMike Pro 2025 Instruction handbook

Elcometer
Elcometer 121/2 operating instructions

Prexiso
Prexiso PR500HV Safety instructions and the User Manual

Panasonic
Panasonic LC2H preset Specifications

SATO KEIRYOKI
SATO KEIRYOKI SK-93F-II instruction manual