4. Mounting instruction :
The fixture may be mounted in any position provided there is adequate room
for ventilation. It is important never to obstruct the fan or vent pathway.
Mount the fixture using a clamp. Unscrew the safety screws underneath the
device and fix a G-Clamp to the fixture. After finding desired position tighten
the G-Clamp. When selecting installation location, take into consideration
routine maintenance. Safety cables must always be used. Never mount in
places where the fixture will be exposed to rain, high humidity, extreme
temperatures changes or restricted ventilation. The product should be
securely mounted so that its output emission is always directed away from
people and at objects that are able to reflect emission in a hazardous direction.
In this regard, the separation distances cited in HS(G)9 should be observed.
5. Caution :
For your safety, please kindly pay attention to all of the warnings below:
Always plug in the power plug last and disconnect from the mains, when
the device is not in use or before cleaning.
Do not install and operate the device in rain or extreme heat, moisture
or dusty environments.
This device is for indoor use only and in a dry environment.
Do not switch on immediately but wait until it reaches room
temperature, if the device has been exposed to drastic temperature
fluctuations.
Do not shake the device and avoid brute force when installing or
operating
User Manual – LED Derby’s 151.576UK & 151.575UK
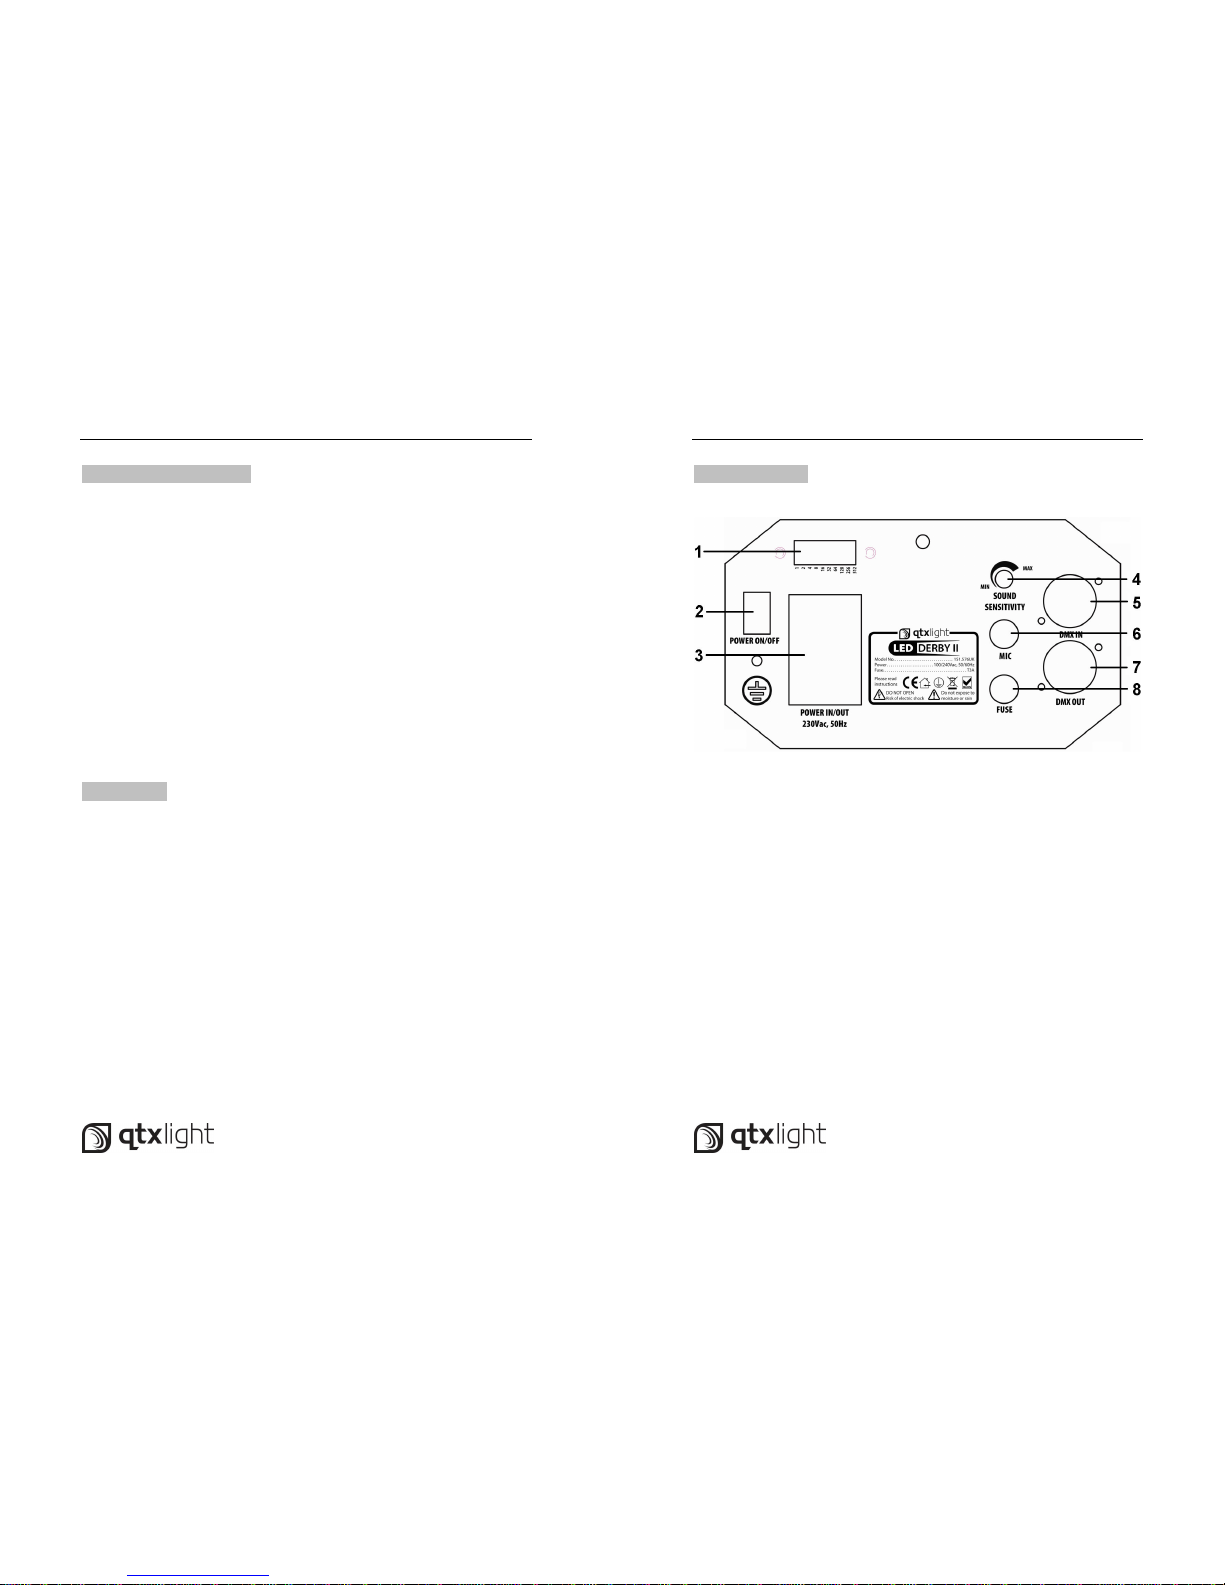
11. Rear display :
1. DMX Dip switch control
2. Power ON/OFF Switch
3. IEC Power in and Power loop out
4. Sound sensitivity control
. DMX IN
6. Microphone
7. DMX OUT
8. Fuse
* NOTE: Rear display is the same for the Double Derby II version