manuals.online logo
Brands
  1. Home
  2. •
  3. Brands
  4. •
  5. Quadratec
  6. •
  7. Automobile Accessories
  8. •
  9. Quadratec QuadraTop 11113.0435 User manual

Quadratec QuadraTop 11113.0435 User manual

QuadraTop®Fabric
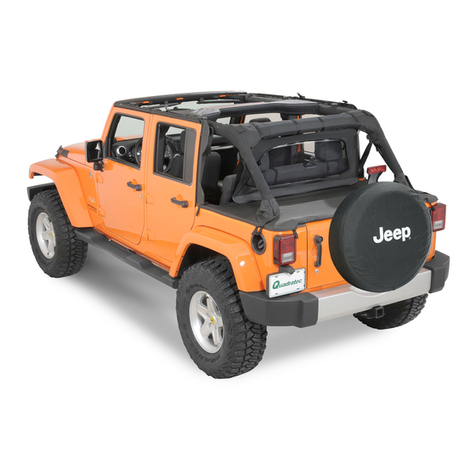
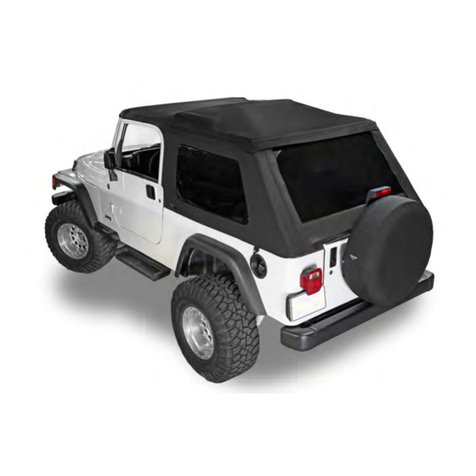
Replacement Soft Top
Adventure Top Fabric Only
Replacement Soft Top for 2007-2018
2 Door Jeep®Wrangler JK Item #11113.0435
Loss of vehicle control involves risk of death or serious injury, particularly to
parts of your body not restrained within vehicle. This product is intended for
weather protection only and should not be relied upon to contain occupants
in the event of an accident or to protect from either ground contact or falling
objects. To reduce risk of accident or injury:
•ALWAYS WEAR SEATBELTS
• Always keep head, arms & body parts within vehicle.
• Fully secure or stow the soft top before driving according to instructions.
Never try to latch or fold soft top while driving. Do not use if damaged or
worn.
• Read and follow all instructions & warnings accompanying this product, in
your vehicle owner’s manual and Off Road Driving Supplement.
RISK OF EYE INJURY. Safety glasses should be worn at all times while insta-
lling or maintaining this product.
PART LIST:
FABRIC TOP - QTY 1
QUARTER WINDOW, RIGHT - QTY 1
QUARTER WINDOW, LEFT - QTY 1
REAR WINDOW - QTY 1
Driver Side Over Door Bow - Qty 1
Passenger Side Over Door Bow - Qty 1
Center Bow Assembly - Qty 1
REQUIRED TOOLS:
SAFETY GLASSES
MASKING TAPE
PHILLIPS SCREW DRIVER
PLIERS
LARGE TOWEL
This Replacement Fabric kit is designed to fit on your Factory soft top installed
2 Dr Jeep® Wrangler when portions of your original soft top rear bow assembly
has been completely removed. Before beginning your installation of this
product, you will need to remove your existing soft top fabric and factory rear
bow.
WARNING
CAUTION
NOTICE
The Trusted Source
Important Safety information
Your QuadraTop® Fabric Replacement Top
is intended to be used with other QuadraTop
Products to increase the fair weather enjoy-
ment of your off-road capable vehicle. Before
installation, please take a moment to review
the following safety information
and installation instructions. Important safety
information is generally preceded by one of
three signal words indicating the relative risk
of injury.
The signal words mean.
a hazardous situation which, if not avoided, could result in death or serious in-
jury. You CAN be KILLED or SERIOUSLY HURT if you don’t follow instructions.
WARNING
CAUTION
NOTICE
a hazardous situation which, if not avoided, could result in minor or moderate
injury. You CAN be moderately HURT and also may suffer property damage if
you don’t follow instructions.
Careful attention is required to this instruction or operation but does genera-
lly not relate to personal injury. Damage to your Quadratec® product or other
property may result if you don’t follow instructions.
Before you begin Installation:
We are excited that you have chosen the
Adventure Top Fabric Replacement Top Kit.
This high-quality soft top is designed to
provide protection from the elements and a
stylish look on your Jeep®. Please note that it
is important that you become familiar with the
installation process of this top by reading the
following instruction sheet and warnings
thoroughly.
When unpacking, carefully check to make sure
all parts are included. If any part is missing
or broken, please call Quadratec customer ser-
vice at 800-745-6037. When unpacking, check
to make sure all parts are included.
For a smooth t and ease of installation, this top should be installed at tempe-
ratures above 72 degrees. Below this temperature, the fabric may contract an
inch or more making it difcult to install. We highly recommend taking the top
out of the package and letting it sit inside a warm place or direct sunlight for
1-2 hours before you install the top. When warm, this top will install quickly.
Preparation for Installation of the Adventure Top Fabric Only Replacement Top:
Factory Hardware Requirement:
This product is designed to t over your original
factory soft top hardware with the rear bow
assembly removed. Please see HARDWARE A
to make sure you have the correct hardware for
this top and iden-tify which components will be
removed.
Please note that the bow mount brackets insta-
lled on the roll bar and factory door surrounds
will REMAIN on the vehicle and will be used to
install the Adventure Top hardware. You will
also be re-using your Factory Windshield
Header for this install.
NOTICE
The Trusted Source
2
Step 1: Remove Existing Soft Top Fabric
Put on safety glasses. After verifying that you
have the correct factory original bow system and
hardware, remove the existing soft top from the
vehicle.
This process will entail removing all Quarter win-
dows, unscrewing the top from the rear bows and
removing the fabric from the windshield header by
unscrewing or loosening 19 or 27 header
screws (Depending on model year). See below for
Header fabric removal options (Step 1B).
Make sure you keep all screws and fasteners in a
safe place after removal. You will be using them
again later in the installation. See FIGs 1, 2, 3
& 4. Once the soft top is removed, inspect all of
your hardware to make sure no parts are bent or
missing.
Step 1A: Detach Old Top Fabric from Header
For Model Years 2010-2018 Only:
You will need to peel back the corner foam and
un- screw the cable attachment on both ends of
the header using a Phillips Head Screw driver.
For Model Years 2007-2009 Only:
You will need to peel back the foam and remove
the two corner screws that hold a plastic mounting
ange located in the same vicinity.
See FIGs 5, 6, 7 & 8.
The following header installation will be easier to accomplish with the help of
another person. This step will most likely be the most difcult step in the install
and you should take your time. The easiest way to install this header is stan-
ding on the front seats facing forward.
We suggest placing a towel or cover on the seats to protect them from dirt &
debris from your shoes. Once the soft top header fabric is installed in the fac-
tory header, the remaining installation is very straight forward.
NOTICE
The Trusted Source
3
Step 1B: Remove Fabric From The Header
After you have removed the corner screws called
out in step 1A, there are two ways to remove and
replace the fabric on your vehicle’s soft top hea-
der. Both ways will work but we have found that
the quickest way is to just loosen (not remove) the
19 or 27 screws on the header and simply “peel”
the old fabric from the header (Fig 9).
Then when you install the new fabric to the hea-
der, you push the round front attachment on the
fabric back into the header and tighten the screws
(see installing the front header later, in step 3).
The second method takes more time as it entails
removing all 19 or 27 screws from the header and
removing the fabric after the top plate is removed
(Fig 10).
Then to install the fabric to the header you place
the front round attachment into the header and re-
place the top plate with the screws (see installing
the front header later, in step 3).
Preparation for Installation of Fabric Only Replacement Top:
Step 2: Remove the side Over Door Bows from
the Front Header Assembly
After removing the soft top fabric from your
existing hardware, locate the front over door bows
and remove the rear portion of the bows from the
front header portion using a at head screw driver
(Fig 11 & 12).
Un-latch the over door bow from the roll bar
mount bracket and the rear bow from the Bow
mount bracket (Figs 13 & 14).
Repeat on the other side of the vehicle. With
the help of a friend, completely remove this bow
assembly from the vehicle (Fig 15).
Installation of Fabric Only Replacement Top:
Step 3: Installation of the Fabric to the Front
Header Assembly
With the original bow assembly removed from the
vehicle you now have the front header sitting on
top of the wind- shield. Take the front header off
the windshield and place on a table or soft towel.
As mentioned in Step 1B, you have two ways
to install the front fabric onto the front header. If
you just loosened the header top plate screws
and “peeled” the soft top fabric from the header
channel, proceed to step 3A.
If you removed the 19-27 screws from the top
plate, proceed to step 3B.
The Trusted Source
4
Installation of Fabric Only Replacement Top:
Step 3A: “Quick” Attach the Deck Fabric to the
Windshield Header
With the soft top underside (substrate) facing up
and top of the Windshield header also facing up,
center the front tube sewn onto the deck onto the
header and push the front tube into the space
created when you loosened the top plate screws.
Working from the center out to each side, push
the tube into the slot securing it into the header.
Note: if necessary, to help you insert this tube you
may want to use an ice scraper or plastic putty
knife to push the tube into the slot (Figs 16, 17 &
18).
When the fabric is in the header and you know it is
centered (Fig 19), tighten the screws on the
header securing the fabric to the header (Fig 20)
including the four corner screws (Fig 21).
Flip the Header over so the underside is facing
up (Fig 22). Slip the corner pocket sewn into the
top be- tween the header and position the cable
anchors over the two holes with the cable facing
the outside of the header (FIG 22). Wrap the
plastic tab over the cable anchors and reinstall
the screws securing the fabric/cable anchors to
the header (Fig 23)
Note: On 07-09 models the screw holes may not
line up exactly and some hole relocation may be
required using a drill.
Step 3B: Standard Attach-
ment of Deck Fabric to the
Windshield Header
With the metal header top
plate removed, slide the
sewn in extrusion along the
front edge of the top into
the channel of the lower header that is secured to
the windshield in step one. See FIG 24.
Locate and line up the center notch in the middle
of the fabric to the center of the channel centering
the fabric on the lower header. Secure the fabric
around the center notch with masking tape. See
FIG 25.
Step 4: Securing the Top in Lower Header
Working from the center out, secure the top in the
lower header channel with masking tape holding
it in place for installing the top plate to the lower
header.
Use 5-6 pieces of tape to hold the top in place.
Note: The tape pieces will be completely covered
when the top plate is put back on the lower
header.
See FIGs 26, 27 & 28.
Once centered, use a heavy masking tape on
each side of the notch to hold in place.
The Trusted Source
5
Step 5: Complete Header Re-Assembly
Close the upper header over the taped down fabric
sandwiching the fabric but leaving the underside
faced up on the hood (See FIG 29).
Using the screws you removed in step one, reinstall
the four corner screws and then the 19 or 27 (de-
pending on model year) screws along the top of the
header. See FIG 30 & 31.
Un-latch the bow assembly from the windshield
(inside vehicle) and lower the bow assembly to the
rear of the vehicle folding the top back over with the
underside of the fabric facing down (see FIG 32).
Step 6:
Install Over Door Bows to Front Header
Take the Fabric/Header assembly from step ve
and place the assembly on a table top or on a soft
towel with the underside facing up and the two
“header legs” facing away from the header (Fig 33).
Locate the over door bow assembly (Fig 34) and
round header sleeve (round tube). Slip the round
door “sleeve” over the header leg and insert the
“knuckle” installed on the over door bow into the
Header leg (Fig 35).
Making sure the quick release knuckle is facing
outward (Fig 36).
Note that the over door bow assembly are sided-left
and right.
Secure the over door bow to the Header leg with
the attached set screw (Fig 37). Slide the bow
sleeve over the knuckles as shown in Fig 38. Re-
peat this procedure on the opposite side.
The Trusted Source
6
Step 7: Install Center Bow to the Vehicle
Locate the center bow assembly. With a friend,
place the bow assembly over the roll bar and line
up the assembly to the original upper bow mount
bracket (Fig 40) that were left on the vehicle. The
center bow should be towards the rear of the vehi-
cle as shown in Fig 39.
Line up the Quick release knuckle with the upper
bow mount bracket attachment and attach each
side of the center bow assembly to the bracket
(Figs 41, 42, 43 & 44).
Repeat on other side of vehicle.
Step 8: Installing the Header/Deck Fabric Fa-
bric to the Center Bow
With the help of a friend, locate the completed
header assembly created in Step 4 and place this
assembly over the windshield with the two “header
legs” towards the rear of the vehicle. Line the
quick release knuckles to the center bow (Fig 46).
Repeat on other side of vehicle.
With the over door bows mounted to the center
bow, drape the fabric attached to the front header
back towards the rear of the vehicle as shown in
Fig 47.
The Trusted Source
7
Locate the center bow webbing and the spring
assembly that is attached to the top deck. Figs 48
& 49.
Attach the
spring end to the webbing as shown in gs 50 and
51.
Using pliers, crimp the spring end so it does not
come loose.
Step 9: Installing the Top Deck to the Jeep®
With the header resting on the windshield, close
the front header latches to secure the front of the
top to the wind- shield. See FIGs 52, 53 & 54.
With the fabric installed on the header and draped
over the back of the vehicle, go to the rear corner
of the Top deck and locate the rear corner straps.
Thread the straps down and under the seat belt
mount as shown in FIGs 55 & 56 and thread the
strap through the buckle (Figs 57 & 58). Repeat
this on the other side of the vehicle and while
pulling towards the rear of the vehicle, slightly
tighten one strap and then the other side strap
tightening up the top deck. When rst tightening
the rear straps notice the location of the rear bar
sewn into the pocket on the top deck. It needs to
be centered on the rear roll bar legs.
NOTE: Do not completely tighten these straps yet.
They should be holding the top but not pulled as
tight as possible. You will do nal “tightening” after
you install the windows.
The Trusted Source
8
IMPORTANT: The top deck MUST be centered on the rear of the vehicle for the
windows to t properly.
NOTICE
Step 10: Installing the Quarter and rear Windows to the top Deck
To ensure the top is centered on the vehicle you
will be installing the two quarter windows and the
rear window to the top deck and to each other
before securing it to the vehicle body.
Pro-Install TIP: To make this as easy as possible,
you may have to release the front windshield hea-
der (release but not un-hook) and loosen the rear
corner straps installed in step 4. This will allow
you to line up all window zippers and attachments.
The rear corner straps and header will need to be
re-tightened/clamped before using the top.
Locate the drivers rear quarter window.
Line up and slide the rear quarter window into the “C” Channel as shown in FIGs 59, 60 & 61. Repeat
this on the passenger side of the vehicle.
Locate the rear window and line up and slide the
rear window into the “C” Channel located at the
top of the rear portion of the top deck (FIGs 62, 63
& 64).
Once both quarter windows are secured to the top
deck, line up the driver’s side rear zipper on the
Quarter window to the zipper on the rear window
and zip it down a few inches (FIG 65).
Repeat this on the passenger side of the rear
window. You may have to lift the quarter window
up to secure this second zipper. Once both side
zippers are secure, zip the rear window zippers
down about half way (Fig 66). You will close these
zippers completely at the end of the install.
When removing the quarter and rear windows from the Top deck be sure to sli-
de them out completely before pulling down. Disengage the side hook and loop
before sliding the windows out. DO NOT “Peel” the windows out!
Failure to completely disengage the windows from the “C” Channel will damage
the Top and quarter window!
NOTICE
The Trusted Source
9
Each Time you remove the windows:
Completely pull the windows out of the “C” Chan-
nel before pulling the windows down!
Do not “Peel” the windows out.
There may be times when the “P” extrusion may come out of the “C” Channel
ends due to extreme downward pressure. This is normal. If this occurs, slide
the “P” extrusion out of the C channel and re install securing the window back
into the “C” Channel.
NOTICE
Step 10: Installing the Top to the Jeep Body
Starting at the driver’s side front, attach the side
belt rail into the vehicle body by “rolling” the plastic
into the slot (FIG 67).
Once secure move to the rear driver’s side corner
and “roll” the plastic into the Jeep body corner belt
rail as shown in FIG 68. Repeat this procedure on
the pas- senger side.
NOTE: as shown in FIG 69 there is a web loop
installed on the side of the quarter window.
This is to be used for unhooking the quarter win-
dow only and is not designed to be pulled down on
for installation!
Repeat the quarter window install on the passen-
ger side of the vehicle. You may have to pull the
corners around towards the front or back of the
vehicle to cen- ter the top on the vehicle.
Go inside the Jeep and locate the long center bow
ap. Wrap this bow ap tightly around the center
bow and secure it with the hook and loop fastener
(FIGs 70 & 71). you can now reach through the
rear zipper on each side and tighten the corner
straps. Alternate tightening to keep the top cente-
red. Seal hook and loop around windows (Figs 72
& 73).
Step 11A: Installing the Tailgate Bar and Rear
Window to the body of the Jeep®
Take the factory bar and orient the “C“-Channel
with the round seal facing down and slide the “C”
Channel onto the rear window retainer as shown in
FIGs 74 & 75.
The Trusted Source
10
After sliding the retainer all the way through the
“C” Channel, roll the tailgate bar into the mounts
with the outside of the fabric facing towards the
rear of the Vehi- cle (Figs 76 & 77).
Once the Tailgate bar in secure, lower zippers on
both sides of the rear curtain (FIG 78) and then
secure the rear zipper cover ap as shown in Figs
79 & 80.
Step 11B: Installing the Tailgate Bar and Rear
Window to the body of the Jeep®
Once the Tailgate bar in secure, lower zippers on
both sides of the rear curtain (FIG 78) and then
secure the rear zipper cover ap as shown in Figs
79 & 80.
Using your SkyMaster Fastback Soft Top
Folding Back the Front Section of your Top:
To fold back your SkyMaster Soft Top: If driving,
stop the vehicle and put in park. Unlatch the front
header from the windshield (FIG46, on page 6)
Pushing up from the middle, fold back the top.
Make sure the hook and loop fastener are tightly secured to the center bow
after the front sun roof is folded back. Both rear corner straps must also be se-
cure when the top is folded back These safety measures are designed to secure
the top deck to the vehicle and if not adhered to can cause injury, death and a
serious accident. Always wear your seat belts when using this product!
WARNING
Top Installation is now complete!
Before Rolling up the rear window, make sure the glass is clean. Dirt and Debris
can cause window scratches when rolled up.
NOTICE
The Trusted Source
11
Care and Maintenance:
Your QuadraTop is made of the nest ma-
terials available but to keep it look- ing new
and for the maximum possible wear, it will
need periodic cleaning and basic mainte-
nance. The main threats to your soft top are
pollutants, dirt and grime. By keeping your
soft top clean you will prolong the life of your
top.
We recommend the following to keep your
top like new:
Washing: The soft top fabric should be was-
hed often using a mild soap, warm water and
a soft bristle brush (do not use the brush on
the window glass!). You can also use special
soft top clean- ers available on our website
and shown on page 15. Make sure that after
clean- ing you rinse with clear water to remo-
ve all traces of soap.
Zippers: Keeping the zipper cleaned and
lubricated with a silicone lubricant (see Page
15) will help prevent damage and keep the
zippers in a smooth working condition. If zi-
pper opens behind the slider, the slider may
have been spread apart. This problem can
usually be xed
by using an ordinary pair of pliers to bring
the sides back into parallel. Return slider to
the end of the zipper in the nor- mal Open
position. Squeeze lightly at
First and test zipper. If the zipper contin- ues
to remain open squeeze more rmly with
pliers and try the zipper again. Repeat proce-
dure until your zipper operates correctly.
Windows: It is very important that you keep
your QuadraTop windows clean! Use a mild
soap and water solution to gently clean your
windows. NEVER wipe your windows clean
with a dry cloth! Dust and dirt on a dry cloth
can scratch your windows causing “fog- ging”
and permanent damage. When re- moving
your windows, store them with a towel be-
tween the panels/rear win- dows to protect
them from damage. If frost or ice forms on
the outside of your windows during the win-
ter, DO NOT use an ice scraper to remove
this frost. Over time you will see small micro
scratches in your windows which are natural
wear and tear. These Micro scratches can be
“polished” out using the window polish listed
on page 15 (Available at Quadratec.com).
Water/Fabric: In the event of seeping
through the seams, 3M Scotchgard® may
be applied on the inside of the seams to stop
the see. Rips in the fabric may be repaired
with Bondex® iron on patches. Iron the
patches to the Inside of the top, carefully
following the Bondex® instructions.
Snaps: Keep snaps cleaned and lubricated
with silicone to help prevent snaps from
sticking to the studs. If a snap does beco-
me stuck to a stud, use a screwdriver and
GENTLY pry apart to prevent permanent
damage to the snap or the top fabric.
The Trusted Source
12
Please review this set of instructions, and
examine your original equipment hardware.
Is any hardware is missing or damaged?
Quadratec offers a full assortment of original
equipment hard- ware and accessories to
keep your top looking new and performing
at its peak. The following parts and current
pricing are available at Quadratec.com
Don’t see what you need on the list? Call for
Expert Advice at 800-745-5337
> Complete Bow Assemblies: #11132.95XX
>Soft Top Emergency Repair Kit: #91083.4201
>Zipper Slick Zipper Lubricant: #91083.4200
>Soft Top Cleaner & Protectant: #91083.110X
>Soft Glass Window Polishes: #91083.11XX
Replacement Hardware & Soft Top Accessories available at Quadratec.com
The Trusted Source
13
Quadratec Limited Warranty
for QuadraTop® Replacement Soft Tops
Your QuadraTop® replacement soft top is
covered by the following Limited Warranty
provided exclusively by Quadratec, Inc. 1028
Saunders Lane, West Chester, PA 19380.
This Limited Warranty is the only warranty
made in connection with purchase. Qua-
dratec neither assumes nor authorizes any
vendor, retailer or other person or entity to
assume for it any other obligation or liability
in connection with this product or Limited
Warranty.
What is Covered:
Subject to the terms, exclusions and limita-
tions herein and with respect only to soft tops
rst sold in the United States, Quadratec
warrants to the initial retail purchaser only
that your QuadraTop soft top shall be free of
defects in material and workmanship for a
period of 3 years from date of initial retail
sale.
All other warranties are hereby disclaimed,
except to the extent prohibited by applicable
law in which case any implied warranty of
merchantabil- ity or tness for a particular
purpose on this prod- uct is limited to 3 years
from date of initial retail sale. Quadratec
reserves the rights to: (a.) require invoice or
other proof your soft top is within the terms
of this Limited Warranty as a condition of
warranty service and, (b.) make future revi-
sions to this product and Limited Warranty
without prior notice or obligation to upgrade
your soft top.
What is Not Covered:
Your Quadratec Limited Warranty does not
cover products or parts Quadratec determi-
nes to have been damaged by or subjec-
ted to: (a.) installation damage, alteration,
modication, failure to maintain or attempted
repair or service by anyone not authorized
by Quadratec, (b.) normal wear and tear,
cosmetic damage or damage from
water immersion, (c.) Acts of God, accidents,
misuse, negligence, inadequate mounting
or impact with vehicle(s), obstacles or other
aspects of the environment, (d.) theft, vanda-
lism or other intentional damage.
Remedy Limited to Repair/Replacement:
The exclusive remedy provided hereun-
der shall, upon Quadratec inspection and
at Quadratec’s option, be either repair or
replacement of product or parts (new or
refurbished) covered under this Limited
Warranty. Customers requesting warranty
consideration on QuadraTop soft top should
rst contact Quadratec to obtain a RGA
number (610-701-3336). All labor, removal,
shipping and installation costs are custo-
mer’s responsibility.
Other Limitations - Exclusion of Damages
- Your Rights Under State Law:
In consideration of the purchase price paid,
neither Quadratec nor any independent
Quadratec distributor/licensee are responsi-
ble for any time loss, rental costs, or for any
incidental, consequen- tial, punitive or other
damages you may have or incur in connec-
tion with any part or product purchased. Your
exclusive remedy hereunder
for covered parts is repair/replacement as
described above.
This Limited Warranty gives you specic
rights. You may also have other rights that
vary from state to state. For example, some
states do not allow limitations of how long an
implied warranty lasts and/or do not allow the
exclusion or limitation of incidental or con-
sequential damages, so the limitations and
exclusions herein may not apply to you.
The terms Quadratec®, QuadraTop®
Essentials® and Essential® are Registered
Trademarks of Quadratec Inc. Registered in
U.S. Patent and Trademark Office.
©Quadratec, Inc. 2020. All Rights Reserved.
Version 11.7.20
Part #12999.1000
14
The Trusted Source

Other Quadratec Automobile Accessories manuals

Quadratec 07-Current Wrangler User manual

Quadratec

Quadratec 07-Current Wrangler User manual

Quadratec 92034.1090 User manual

Quadratec

Quadratec 92034.1090 User manual

Quadratec 11081.02 Series User manual

Quadratec

Quadratec 11081.02 Series User manual

Quadratec Brute Strength 12057.0271 User manual

Quadratec

Quadratec Brute Strength 12057.0271 User manual

Quadratec QuadraTop Adventure Top S User manual

Quadratec

Quadratec QuadraTop Adventure Top S User manual

Quadratec QuadraTop User manual

Quadratec

Quadratec QuadraTop User manual

Quadratec 12057.0102 User manual

Quadratec

Quadratec 12057.0102 User manual

Quadratec QuadraTop 11113.2335 User manual

Quadratec

Quadratec QuadraTop 11113.2335 User manual

Quadratec QuadraTop 11113.2435 User manual

Quadratec

Quadratec QuadraTop 11113.2435 User manual

Quadratec 92034.1007 User manual

Quadratec

Quadratec 92034.1007 User manual

Quadratec QuadraTop Adventure Top 1113.00 Series User manual

Quadratec

Quadratec QuadraTop Adventure Top 1113.00 Series User manual

Quadratec Lost Canyon ROVE-SEC-1 User manual

Quadratec

Quadratec Lost Canyon ROVE-SEC-1 User manual

Quadratec JL User manual

Quadratec

Quadratec JL User manual

Quadratec 92034.1091 User manual

Quadratec

Quadratec 92034.1091 User manual

Quadratec 12061.010 Series User manual

Quadratec

Quadratec 12061.010 Series User manual

Quadratec iVault User manual

Quadratec

Quadratec iVault User manual

Quadratec 16400.0010 User manual

Quadratec

Quadratec 16400.0010 User manual

Quadratec 12033.1001 User manual

Quadratec

Quadratec 12033.1001 User manual

Quadratec QuadraTop 11113.1135 User manual

Quadratec

Quadratec QuadraTop 11113.1135 User manual

Quadratec 13111.0411 Quick guide

Quadratec

Quadratec 13111.0411 Quick guide

Quadratec QuadraTop Premium 11000.2335 User manual

Quadratec

Quadratec QuadraTop Premium 11000.2335 User manual

Quadratec J5 97109.1023 User manual

Quadratec

Quadratec J5 97109.1023 User manual

Quadratec 12057.014 Series User manual

Quadratec

Quadratec 12057.014 Series User manual

Quadratec Rock Sliders User manual

Quadratec

Quadratec Rock Sliders User manual

Popular Automobile Accessories manuals by other brands

Navistar NavKal user guide

Navistar

Navistar NavKal user guide

STO N SHO SNS 158 Installation procedures

STO N SHO

STO N SHO SNS 158 Installation procedures

Gentex STDHL3 manual

Gentex

Gentex STDHL3 manual

Active Controls ActiveStart ACS30P Installation, operation & application guide

Active Controls

Active Controls ActiveStart ACS30P Installation, operation & application guide

RBP RBP-1306B-RX3 instructions

RBP

RBP RBP-1306B-RX3 instructions

Dakota Digital BIM-01-2 quick start guide

Dakota Digital

Dakota Digital BIM-01-2 quick start guide

Grid PORSCHE 911 GT3 CUP instruction manual

Grid

Grid PORSCHE 911 GT3 CUP instruction manual

Jarv JRV-CC2000-BLK user guide

Jarv

Jarv JRV-CC2000-BLK user guide

Subaru H501SAJ000 installation instructions

Subaru

Subaru H501SAJ000 installation instructions

Kuda-Phonebase 093480 Installation instruction

Kuda-Phonebase

Kuda-Phonebase 093480 Installation instruction

MBRP Off Camber Fabrications 130716 manual

MBRP

MBRP Off Camber Fabrications 130716 manual

Response AR-3129 user manual

Response

Response AR-3129 user manual

HAUL MASTER 58114 Owner's manual & safety instructions

HAUL MASTER

HAUL MASTER 58114 Owner's manual & safety instructions

Metra Electronics JP-RGBKT-1 manual

Metra Electronics

Metra Electronics JP-RGBKT-1 manual

Whispbar K469W Fitting instructions

Whispbar

Whispbar K469W Fitting instructions

Directed DS3+ installation guide

Directed

Directed DS3+ installation guide

NORAUTO 2611977-NO3198 manual

NORAUTO

NORAUTO 2611977-NO3198 manual

Aries S224045 installation manual

Aries

Aries S224045 installation manual

manuals.online logo
manuals.online logoBrands
  • About & Mission
  • Contact us
  • Privacy Policy
  • Terms and Conditions

Copyright 2025 Manuals.Online. All Rights Reserved.