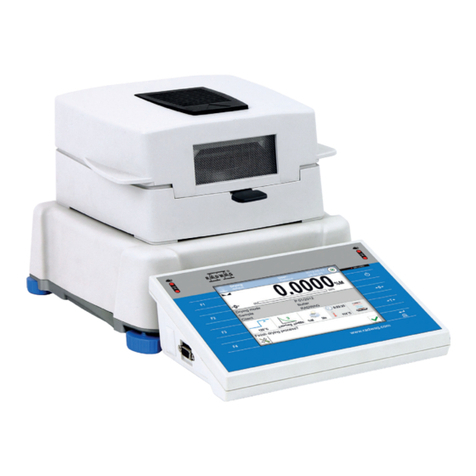
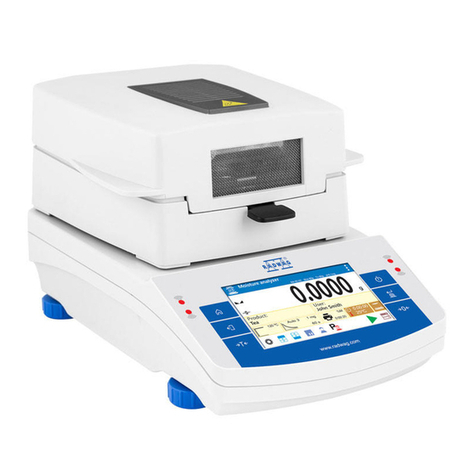
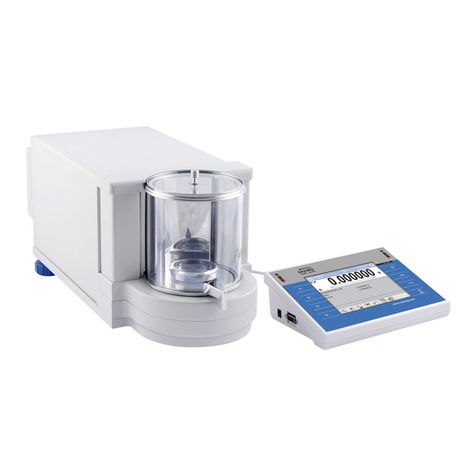
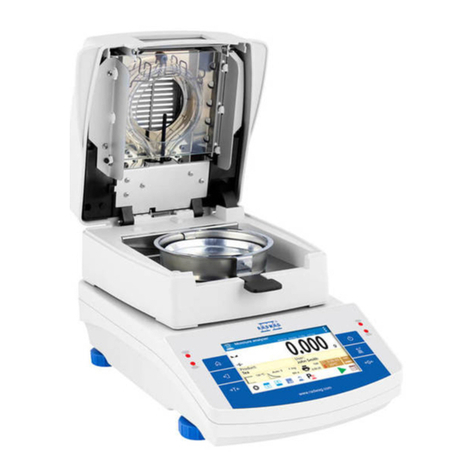
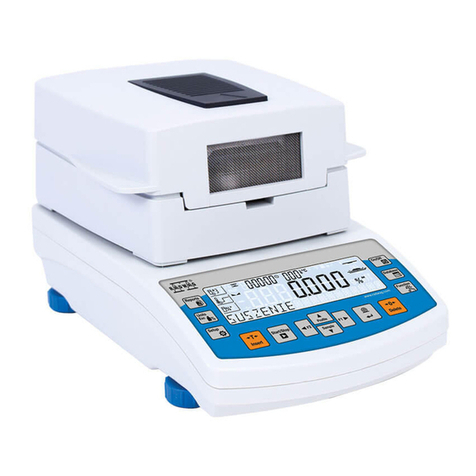
RADWAG MA 5Y User guide

Szybki start
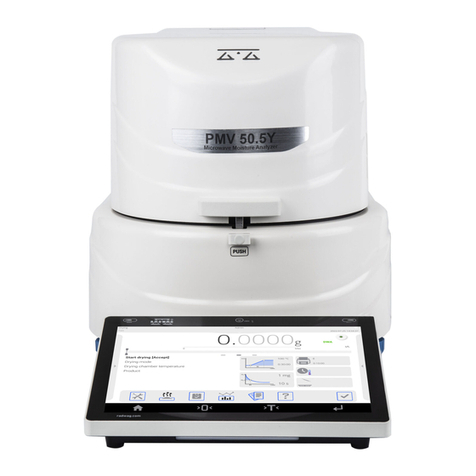
Wagosuszarka
Start up Guide
• MA 5Y
Moisture Analyzer
IMMB-20-01-01-24-EN-PL


1
2
3
5
*Rodzaj wtyczki może się różnić w zależności od kraju.
*The plug type may vary by country.
4
Zachowaj opakowanie do celów
gwarancyjnych i serwisowych.
Keep the packaging should a warranty
claim or service be required.
2. UNPACKING
ROZPAKOWANIE
1. CONTENT
ZAWARTOŚĆ
Moisture
analyzer Disposable pan Cross-shaped
holder
Drying
pan handle Drying pan shield Power cord*
Wagosuszarka Szalka
jednorazowa Krzyżak szalki Uchwyt szalki Osłona szalki Kabel zasilający*
x1 x10 x1 x1 x1 x1

+40 °C
+104°F
+10 °C
+50 °F
h
h ≥ 100 cm (39”)
w ≥ 20 cm (8”)
ww
Urządzenie należy użytkować w pomieszczeniach niezapylonych o temperaturze
powietrza: 10–40 °C (50–104 °F) i optymalnej wilgotności względnej poniżej 80 %.
Ewentualne zmiany temperatury powinny następować stopniowo i bardzo powoli.
Waga powinna być ustawiona na stabilnym stole lub konsoli ściennej. Dla
osiągnięcia najbardziej stabilnych i powtarzalnych wyników zaleca się użycie
stołu antywibracyjnego.
Zachowaj wolną przestrzeń wokół
urządzenia: h = minimum 100 cm
(39 cali), w = minimum 20 cm (8 cali).
Używaj wagi z dala od źródeł ciepła.
Nie wystawiaj jej na działanie promieni
słonecznych.
Nie wystawiaj urządzenia na działanie
pola magnetycznego. Nie odważaj
substancji magnetycznych.
Unikaj podmuchów i ruchu powietrza
w miejscu eksploatacji wagi.
Nie używaj wagi na nierównym lub
niewypoziomowanym podłożu.
Nie używaj w miejscach niestabilnych,
narażonych na wstrząsy i wibracje.
Operate the device in a room where the temperature ranges between 10–40 °C
(50–104 °F) and where the relative humidity is below 80%.
Place the moisture analyzer on a solid surface to ensure stability. To obtain sta-
ble and repeatable weighing results, an anti-vibration table is recommended.
Keep free space around the device:
h = min. 100 cm (39 in.),
w = min. 20 cm (8 in.).
Place the device away from heat
sources. Avoid exposing the device
to the sunlight.
Avoid exposing the device to
a magnetic field. Do not weigh
magnetic substances.
Avoid air drafts and air movements
at the workstation.
Make sure that the device is placed
on an even surface.
Do not place the device on an
unstable surface exposed to shocks
and vibrations.
3. RECOMMENDATIONS AND WARNINGS
ZALECENIA I OSTRZEŻENIA
Nie używaj w miejscu zagrożonym
wybuchem. Nie odważaj materiałów
wybuchowych i łatwopalnych.
Nie otwieraj komory podczas
pracy, ze względu na bardzo wysoką
temperaturę elementów grzewczych.
Zachowaj szczególną ostrożność przy
wyjmowaniu próbki. Próbka i elementy
urządzenia mogą być gorące.
Do not place the device in a hazard-
ous area. Do not weigh explosive or
flammable materials.
Do not open in the course of opera-
tion since the heating components
reach very high temperature.
Be extremely careful while taking the
sample out. The sample and the mois-
ture analyzer elements may be hot.
1 2 3
4. COMPONENTS ASSEMBLY
MONTAŻ ELEMENTÓW WAGI
4 5

up to 8 h
1 2 3
Podłącz przewód zasilacza do gniazda AC z tyłu
wagi.
Podłącz zasilacz do
gniazda elektrycznego.
Ustaw urządzenie w miejscu jego użytkowania i pozostaw je do osiągnięcia temperatury pokojowej.
Nie podłączaj wagi aż do osiągnięcia
temperatury pokojowej (orientacyjny
czas stabilizacji: do 8 godzin).
Place the device at the workstation, wait until it reaches room temperature.
Connect the power cord to the AC socket located
at the back of the device.
Connect the device to
the mains.
Prior to switching the device on let it
reach room temperature (estimated
stabilisation time: up to 8 hours).
5. PREPARING FOR WORK
PRZYGOTOWANIE DO PRACY
5.1. Temperature stabilization
Stabilizacja temperatury wagi
1
W celu włączenia zasilania wagosuszarki należy nacisnąć
włącznik znajdujący się obok gniazda zasilania z tyłu obudowy.
Press the switch located next to the power supply socket
at the back of the housing to switch on the device.
5.2. Switching the device on
Włączenie wagi

2The balance switches on automatically when connected to the mains. If the
balance is manually switched off using the top menu, it must be switched on
using the button underneath the display housing on the left.
Waga włącza się automatycznie po podłączeniu jej do prądu. Jeśli waga
zostanie wyłączona ręcznie z górnego menu, należy ją włączyć przyciskiem
znajdującym się pod spodem obudowy wyświetlacza z lewej strony.
0.0000
Start drying [Accept]
Drying mode
%M
0:00:30
Drying chamber temp...
Product
09:30:00Wed 14.07.2021
ast Dosing
Weighing
g
0 Max
FJohn Smith
DWA
m
1
m
2
0.0000
Start drying [Accept]
Drying mode
%M
0:00:30
Drying chamber temp...
Product
09:30:00Wed 14.07.2021
ast Dosing
Weighing
g
0 Max
FJohn Smith
DWA
m
1
m
2
Leveling - Auto leveling
3 4
The balance with automatic levelling starts the pro-
gram and the levelling process runs automatically.
When autolevelling is complete, the home screen is
displayed.
Po zakończeniu autopoziomowania pokaże się ekran
główny.
Waga z automatycznym poziomowaniem uruchomi program
i waga automatycznie rozpocznie proces poziomowania.

Ultra-microbalances and microbalances are equipped with the Reflex Level System, which monitors and automati-
cally corrects the balance level.
Ultramikrowagi i mikrowagi zostały wyposażone w Reflex Level System, który zapewnia monitorowanie poziomu wagi
i automatycznego jej poziomowania.
0.0000
Start drying [Accept]
Drying mode
%M
0:00:30
Drying chamber temp...
Product
09:30:00Wed 14.07.2021
ast Dosing
Weighing
g
0 Max
FJohn Smith
DWA
m
1
m
2
Leveling
0.0000
Start drying [Accept]
Drying mode
%M
0:00:30
Drying chamber temp...
Product
09:30:00Wed 14.07.2021
ast Dosing
Weighing
g
0 Max
FJohn Smith
DWA
m
1
m
2
1 2
Press the level status pictogram. The control panel of the levelling function is displayed.
Nacisnąć ikonę stanu poziomowania.
Twoja wagosuszarka jest gotowa do użycia!
Przed korzystaniem z trybu WAŻENIA, wskazane jest wykonanie adiustacji urządzenia: patrz punkt 7.1.
(dla procesu SUSZENIA adiustacja nie jest wymagana).
Wyświetlacz wagi pokaże panel kontrolny funkcji pozio-
mowania.
0.0000
Start drying [Accept]
Drying mode
%M
0:00:30
Drying chamber temp...
Product
09:30:00Wed 14.07.2021
ast Dosing
Weighing
g
0 Max
FJohn Smith
DWA
m
1
m
2
Leveling - Auto leveling
0.0000
Start drying [Accept]
Drying mode
%M
0:00:30
Drying chamber temp...
Product
09:30:00Wed 14.07.2021
ast Dosing
Weighing
g
0 Max
FJohn Smith
DWA
m
1
m
2
Leveling
3 4
Press to confirm the automatic levelling start.
Press to abort the process.
The balance is levelled correctly.
Press to return to the home screen.
Nacisnąć przycisk , aby potwierdzić rozpoczęcie
procesu automatycznego poziomowania. Proces pozio-
mowania można przerwać po naciskając przycisk .
Waga jest prawidłowo wypoziomowana. Nacisnąć przy-
cisk , aby wrócić do wyświetlania okna głównego.
5.3 Manual Levelling
Ręczne Poziomowanie wagi
The moisture analyzer is ready to use!
Before using WEIGHING mode, carry out instrument adjustment: refer to section 7.1.
(adjustment is not required for DRYING mode).

Przed korzystaniem z trybu WAŻENIA, wskazane jest wykonanie adiustacji urządzenia (dla procesu SUSZENIA adiusta-
cja nie jest wymagana). Adiustacja zewnętrzna wykonywana jest za pomocą wzorca o odpowiedniej dokładności i masie
zależnej od typu i udźwigu wagi.
It is recommended to carry out adjustment operation prior to running the WEIGHING mode (adjustment is not
required for DRYING). External adjustment is carried out using an external mass standard of the right accuracy and
weight value, which value depends on device type and capacity.
0.000000
Start drying [Accept]
Drying mode
%M
0:00:30
Drying chamber temp...
Product
09:30:00Wed 14.07.2021
ast Dosing
Weighing
g
0 Max
FJohn Smith
DWA
m
1
m
2
information about the currently used working mode, logged-in
operator, date, time, active connection with a computer.
weighing result win-
dow and level status
freely programmable
additional information
on-screen function
buttons
fixed function buttons
informacja o aktualnie używanym modzie pracy, zalogowanym
użytkowniku, dacie, czasie, aktywnym połączeniu z komputerem.
okno wyniku ważenia
i stan wypoziomowania
wagi
dowolnie programo-
walne dodatkowe
informacje
ekranowe przyciski
funkcyjne
stałe przyciski funkcyjne
0.0000
Start drying [Accept]
Drying mode
%M
0:00:30
Drying chamber temp...
Product
09:30:00Wed 14.07.2021
ast Dosing
Weighing
g
0 Max
FJohn Smith
DWA
m
1
m
2
Adjustment Operators Profiles Database Communication
Scheduled tasksAmbient
conditions
MiscellaneousAdministrator
panel
Peripherals
Update About
09:30:00Wed 14.07.2021
ast Dosing
Weighing
FJohn Smith
21
Press „external adjustment” function button or .Press „Adjustment”.
Naciśnij przycisk funkcyjny „Adiustacja zewnętrzna” lub
naciśnij .
Naciśnij przycisk „Adiustacja”.
6. HOME SCREEN
EKRAN GŁÓWNY
7. BASIC OPERATIONS
OPERACJE PODSTAWOWE
7.1. External Adjustment
Adiustacja zewnętrzna

External adjustment Adjustment test
Adjustment weights Report printout
Adjustment historyGLP projekt
Adjustment
09:30:00Wed 14.07.2021
ast Dosing
Weighing John Smith
F
External adjustment Adjustment test
Adjustment weights Report printout
Adjustment historyGLP projekt
Adjustment
09:30:00Wed 14.07.2021
ast Dosing
Weighing John Smith
F
Adjustment
Mass determination
3 4
Press „External adjustment” and follow the instruc-
tions on display.
Wait for the process to be completed.
Start drying [Accept]
Drying mode
%M
0:00:30
Drying chamber temp...
Product
09:30:00Wed 14.07.2021
ast Dosing
Weighing
g
0 Max
FJohn Smith
DWA
m
1
m
2
-0.0048
Start drying [Accept]
Drying mode
%M
0:00:30
Drying chamber temp...
Product
09:30:00Wed 14.07.2021
ast Dosing
Weighing
g
0 Max
FJohn Smith
DWA
m
1
m
2
0.0000
21
Make sure that the weighing pan is empty and press
“Zeroing” button.
The balance has been zeroed.
Upewnij się, że szalka jest pusta i naciśnij przycisk „Zerowanie”.
Waga została wyzerowana.
Naciśnij przycisk „Adiustacja zewnętrzna” i i postępuj
zgodnie z instrukcjami wyświetlonymi na wyświetlaczu.
Poczekaj na zakończenie procesu.
7.2. Zeroing
Zerowanie
Przed rozpoczęciem procesu adiustacji musisz zaopatrzyć się w odpowiedni wzorzec masy. Zaleca się użycie
wzorca klasy F1 lub F2. Z tabeli obok wybierz wzorzec odpowiedni dla Twojej wagi. Uwaga! Upewnij się, że
szalka jednorazowa została zamontowana (patrz punkt 4.). Podczas adiustacji nie zamykaj komory suszenia.
The adjustment mass standard does not come with the
moisture analyzer. Prior to adjustment prepare the right
mass standard. You are recommended to use mass
standard of class F1 or F2. View the table and select the
mass standard you need. Caution! Make sure that the disposable weighing pan has been installed
(read point 4.). Do not close the drying chamber in the course of adjustment.
Balance model
Model wagi
Mass standard [g]
Wzorzec masy [g]
PMV 50 50

Przed wybraniem profilu suszenia/trybu zakończenia zaloguj się jako Administrator (patrz punkt 8.1.).
Prior to drying profiles / drying process finish modes setup, log in as Administrator (point 8.1.).
Start drying [Accept]
Drying mode
%M
0:00:30
Drying chamber temp...
Product
09:30:00Wed 14.07.2021
ast Dosing
Weighing
g
0 Max
FJohn Smith
DWA
m
1
m
2
0.1547
Start drying [Accept]
Drying mode
%M
0:00:30
Drying chamber temp...
Product
09:30:00Wed 14.07.2021
ast Dosing
Weighing
g
0 Max
FJohn Smith
DWA
m
1
m
2
0.0000
21
With loaded weighing pan: upon stabilization
of the weighing result, press “Tare” button.
The balance has been tared.
Przy obciążonej szalce: po uzyskaniu stabilnego
wyniku kliknij przycisk „Tarowanie”.
Waga została wytarowana.
7.3. Taring
Tarowanie
7.4. Drying profiles / drying process finish modes
Profile suszenia / tryby zakończenia procesu suszenia
Start drying [Accept]
Drying mode
%M
0:00:30
Drying chamber temp...
Product
09:30:00Wed 14.07.2021
ast Dosing
Weighing
g
0 Max
FJohn Smith
DWA
m
1
m
2
0.0000
m
1
m
2
Naciśnij, aby wyświetlić
listę profili suszenia. Naciśnij, aby wyświetlić listę opcji
zakończenia suszenia.
Press to view list of drying profiles. Press to view list of drying
processfinish modes.
Profile suszenia: Opcje zakończenia suszenia:
Drying profiles: Drying process finish modes:
Standard: / Standardowy:
the most precise moisture content measurement
najdokładniejszy pomiar wilgotności
Mild: / Lekki:
the most precise moisture
najbardziej precyzyjne nawilżanie
Fast: / Szybki:
for samples with moisture content 5% - 15%
dla próbek o wilgotności 5% - 15%
Step: / Schodkowy:
for substances with moisture content higher than 15%
dla substancji o wyższej zawartości wilgoci niż 15%
Automatic: / Automatyczne:
triggered in accordance with automatic settings
uruchamiane zgodnie z ustawieniami automatycznymi
Time-defined: / Czasowe:
triggered manually by the user
uruchamiane po upływie zadeklarowanego czasu
Manual: Time-defined: / Ręczne:
triggered after passage of declared time
uruchamiane ręcznie przez użytkownika
User-defined: / Definiowane:
triggered in accordance with user settings
uruchamiane zgodnie z ustawieniami użytkownika
Test: / Test:
Enables adjusting finish mode parameters to a tested sample
Umożliwia dostosowanie parametrów trybu wykończenia do
badanej próbki

0.0000
Start drying [Accept]
Drying mode
%M
0:00:30
Drying chamber temp...
Product
09:30:00Wed 14.07.2021
ast Dosing
Weighing
g
0 Max
F
DWA
m
1
m
2
Not login
Shut down Profile Settings Manual Log in
Working
mode
Last adjustment: 21/01/2022 14:46:22
Software version: LL2.0 S qt14
Weighing firmware version: 1.0.0
Light Dark
Admin
Operators
09:30:00Wed 14.07.2021
ast Dosing
Weighing
FNot login
21
Slide down the top menu and press „Log in”. Select „Admin” from the menu.
Rozwiń menu w górnej części wyświetlacza i naciśnij pole
„Zaloguj”.
Z menu wybierz pozycję „Admin”.
Some balance settings are available only for the Administrator.
Prior to the balance parameters setup, log in as the Administrator.
Niektóre ustawienia wagi są dostępne wyłącznie dla Administratora.
Przed ustawieniem parametrów wagi zaloguj się jako Administrator.
Enter password
09:30:00Wed 14.07.2021
ast Dosing
Weighing Not login
F
****
q w e r t y u i o p
lkjhgfdsa
z
&123*/a
x
English
c v b n m , .
0.0000
Start drying [Accept]
Drying mode
%M
0:00:30
Drying chamber temp...
Product
09:30:00Wed 14.07.2021
ast Dosing
Weighing
g
0 Max
FJohn Smith
DWA
m
1
m
2
3 4
Enter password „1111” and press . You have logged as the Administrator.
Wprowadź hasło „1111” i zatwierdź przyciskiem . Zostałeś zalogowany jako Administrator.
8. SETTINGS
USTAWIENIA
8.1. Administrator Login
Logowanie administratora

Adjustment Operators Profiles Database Communication
Scheduled tasksAmbient
conditions
MiscellaneousAdministrator
panel
Peripherals
Update About
09:30:00Wed 14.07.2021
ast Dosing
Weighing
FAdmin
Admin
Operators
09:30:00Wed 14.07.2021
ast Dosing
Weighing
FAdmin
21
Name and Surname
Code
Default profile None
Fingerprint
Face profile
Name
Password ********
Permissions Operator
Card no.
Language English
Theme Dark
Account active
3
Prior to operators configuration, log in as the Administrator (see section 9.1).
Press to enter Menu and select „Operators”. Press add button and fill in the necessary fields for
a new operator.
Wejdź do Menu za pomocą przycisku i wybierz
„Użytkownicy”. Naciśnij przycisk dodaj i wypełnij potrzebne pola dla
nowego użytkownika.
Przed konfiguracją użytkowników zaloguj się jako Administrator (patrz punkt 9.1).
8.2.Operator Settings
Konfiguracja użytkowników
Name:
Set an operator name
Nazwa:
Nadaj nazwę użytkownikowi
Language
Select a language
Język
Nadaj język wyświetlania
Card number
Add an operator
proximity card
Numer karty
Dodaj kartę zbliżeniową
użytkownika
Code
Assign an operator code
Kod
Nadaj kod użytkownikowi
Account active
Active or inactive operator
Konto aktywne
Użytkownik aktywny lub
nieaktywny
Fingerprint
Assign a fingerprint
Odcisk palca
Nadaj odcisk palca
Password:
Assign an operator password
Hasło:
Nadaj hasło użytkownikowi
Permissions
Assign permissions (guest,
operator, advanced opera-
tor, administrator)
Uprawnienia
nadaj uprawnienia (gość,
użytkownik, użytkownik
zaawansowany, Administrator)
Theme
Select theme (dark, light)
Motyw
nadaj motyw (ciemny, jasny)
Name and surname
Enter an operator’s first and
last name
Imię i nazwisko
Wpisz imię i nazwisko
użytkownika
Default profile
Set a default profile
Profil domyślny
Nadaj profil domyślny
Face profile
Add an operator’s face
Profil twarzy
Dodaj twarz użytkownika

0.0000
Start drying [Accept]
Drying mode
%M
0:00:30
Drying chamber temp...
Product
09:30:00Wed 14.07.2021
ast Dosing
Weighing
g
0 Max
FJohn Smith
DWA
m
1
m
2
Settings
Weighing
Buttons
Information
Printouts
Soft key 1 Soft key 2
Soft key 3 Soft key 4
Soft key 6Soft key 5
Soft key 7 Left proximity sensor
Right proximity sensor
Header printout Footer printout
Product Set tare
AdjustmentProfile
None Close door
Open door
Buttons
09:30:00Wed 14.07.2021
ast Dosing
Weighing John Smith
F
21
Soft key 1 Soft key 2
Soft key 3 Soft key 4
Soft key 6Soft key 5
Soft key 7 Left proximity sensor
Right proximity sensor
Header printout Footer printout
Product Set tare
AdjustmentProfile
None Close door
Open door
Buttons
09:30:00Wed 14.07.2021
ast Dosing
Weighing John Smith
F
Right proximity
Sensor
None
Profile
Adjustment
Zero
Tare
Set tare
Disable tare
3
You can assign a function of your choice to each proximity sensor. In addition, you can assign various func-
tions to the same sensor in different working modes. See the exemplary procedure for sensors configuration
for the “Weighing” mode.
Slide out the menu. Select „Buttons”.
Select a respective sensor (right or left) from the list.
Select a function to be assigned to the sensor.
Do każdego czujnika zbliżeniowego możesz przyporządkować wybraną funkcję. Ponadto w różnych trybach pracy
możesz przypisać do tego samego czujnika inną funkcję. Zobacz przykładową procedurę konfiguracji czujników dla
trybu pracy “Ważenie”.
Rozwiń boczne menu. Wybierz z menu „Przyciski”.
Wybierz konkretny czujnik (prawy lub lewy) z listy i wy-
bierz funkcję, którą chcesz przypisać do danego czujnika.
8.3. Proximity Sensors Setup
Konfiguracja czujników zbliżeniowych

Ciała stałe:
- konieczne rozdrobnienie,
- niewielka masa próbki,
- duża powierzchnia próbki.
Próbki o niskiej wilgotności:
- konieczna duża masa próbki
(10 - 15 g).
Ciecze:
- duża powierzchnia próbki.
Solids:
- sample crushing necessary,
- sample of low weight required,
- large sample surface.
Samples with low moisture
content:
- sample of heavy weight required
(10 - 15 g).
Liquids:
- large sample surface.
Optymalna struktura i wielkość próbki są ważnymi czynnikami
wpływającymi na szybkość, dokładność i powtarzalność pomiarów.
Optimal sample structure and size are crucial features
influencing measurements speed, accuracy and repeatability.
9. SAMPLES AND DRYING METHODS
PRÓBKI I METODY SUSZENIA
9.1. Preparing samples
Przygotowanie próbek do suszenia

Substancje, które w wyniku ogrzania
wydzielają opary powodujące koro-
zję (np. kwasy).
Używaj niewielkich próbek, aby
zminimalizować ryzyko osadzania
się pary na chłodniejszych częściach
obudowy.
Substancje łatwopalne i wybuchowe
oraz takie, które w wyniku ogrzania
wydzielają łatwopalne opary.
Używaj niewielkich próbek i niższej
temperatury suszenia, aby zapobiec
powstawaniu płomieni lub eksplozji.
Użyj okularów i rękawic ochronnych.
Substancje żrące i toksyczne oraz
takie, które w wyniku ogrzania
wydzielają toksyczne opary.
Ze względu na ryzyko podrażnienia
oczu, skóry, układu oddechowego
lub nawet śmierci próbki takie można
suszyć wyłącznie w dygestorium.
Substances that in the course of
heating may emit vapours causing
corrosion (e.g. acids).
Apply small amount of samples, this
helps to prevent risk of settling
of vapour over cool housing com-
ponents.
Explosive and flammable and ma-
terials that in the course of heating
emit flammable vapours.
Apply small amount of samples and
lower drying temperature, this helps
to prevent flames from rising and
explosion. Use glasses and protec-
tive gloves.
Toxic and corrosive substances
and substances that in the course
of heating emit toxic vapours.
Due to risk of eyes, skin and lungs
irritation, and due to risk of death,
such samples must be dried in fume
cupboard.
Niektóre rodzaje próbek wymagają zachowania szczególnej ostrożności!
Mogą one stanowić zagrożenie dla osób i rzeczy, a odpowiedzialność za ewentualne
szkody wynikające z ich użycia ponosi użytkownik wagosuszarki.
Some sample types require particular caution!
They may pose risk for people and objects. It is the moisture analyzer operator who is
responsible for potential loss being a result of such samples use.
9.2.Handling hazardous samples
Postępowanie z próbkami niebezpiecznymi

hotspot
HDMI USB
(Free Link)
USB-C
RJ45
HDMI
Display Arkusz
kalkulacyjny
Computer* Printer Barcode
scanner
Ekran Arkusz
kalkulacyjny
Komputer* Drukarka Skaner kodów
kreskowych
Computer Printer Computer Printer
Smartfon
Tablet
Komputer Drukarka Komputer Drukarka
Smartphone
Tablet
Wi-Fi ® is a registered trademark of Wi-Fi Alliance.
*A USB to RS232 converter must be used for proper connection.
Wi-Fi ® jest zarejestrowanym znakiem towarowym będącym własnością organizacji Wi-Fi Alliance.
*Do poprawnego podłączenia należy użyć konwertera USB na RS232.
10. CONNECTING PERIPHERALS
PODŁĄCZENIE URZĄDZEŃ PERYFERYJNYCH
Free link - entering data
from a balance into
computer programs.
Free link - wprowadzanie
danych z wagi do programów
komputerowych.

Przed rozpoczęciem czyszczenia
koniecznie odłącz wagę od źródła
zasilania! Wyjmij wtyczkę z gniazda
elektrycznego i odłącz wszystkie inne
przewody podłączone do wagi.
Do czyszczenia stosuj wyłącznie
miękkie ściereczki z mikrowłókien,
włókien naturalnych lub sztucznych.
Nie używaj ściereczek o ostrej struktu-
rze ani żadnych materiałów mogących
zarysować powierzchnię!
Środek czyszczący nanoś najpierw na
ściereczkę. Nigdy nie aplikuj środka
czyszczącego bezpośrednio na
urządzenie!
Prior to cleaning it is necessary
to disconnect the device from the
mains! Remove the plug from the
outlet, disconnect all cables.
Use soft cloths made of microfiber,
natural fiber or man-made fiber.
Avoid using abrasive cloths or cloths
that might scratch the surface.
Apply the cleanser onto the cloth
first. Avoid applying the cleanser
directly onto the device.
• GLASS PANES AND COMPONENTS can be cleaned using window cleaner.
• WEIGHING PANS AND STAINLESS STEEL OR ALUMINIUM COMPONENTS can be cleaned using a cloth
slightly soaked in a solution of water and gentle cleanser (e.g. soap or dishwashing liquid).
• OPERATION PANEL AND HOUSING can be cleaned using a cloth slightly soaked in a solution of water and
gentle cleanser (e.g. soap or dishwashing liquid).
Nie używaj agresywnych środków
czyszczących (np. rozpuszczalników,
preparatów zawierających chlor,
substancje żrące i wybielacze).
Nie używaj środków czyszczących
zawierających substancje o ostrej
strukturze oraz preparatów przezna-
czonych do szorowania.
Uważaj, żeby do układu wagowego
(do wnętrza urządzenia) nie dostał
się żaden pył ani ciecz.
Do not use aggressive cleaning
agents (e.g. solvents, chlorine
preparations, corrosive chemicals,
bleach).
Neither use substances of sharp
structure nor intended for scrub-
bing.
Make sure that neither dust nor
liquid gets inside the weighing
system (device inside).
11. DEVICE CLEANING
CZYSZCZENIE I KONSERWACJA
11.1. General recommendations
Zalecenia i ostrzeżenia
11.2. Cleaning instructions
Wskazówki dotyczące czyszczenia urządzenia

• SZYBY I ELEMENTY SZKLANE możesz wyczyścić, używając płynu do mycia szyb.
•SZALKĘ ORAZ ELEMENTY ZE STALI NIERDZEWNEJ I ALUMINIUM możesz wyczyścić ściereczką lekko zwilżoną
łagodnym roztworem wody i delikatnego środka czyszczącego (np. mydła lub płynu do mycia naczyń).
• GŁOWICĘ ODCZYTOWĄ ORAZ OBUDOWĘ WAGI możesz wyczyścić ściereczką lekko zwilżoną łagodnym roztwo-
rem wody i delikatnego środka czyszczącego (np. mydła lub płynu do mycia naczyń).
• Suche resztki próbek możesz usunąć za pomocą pędzla lub małego ręcznego odkurzacza.
•Wyczyszczone elementy możesz osuszyć miękką, suchą ściereczką lub użyć bezpyłowego papierowego ręcznika, aby
wchłonął pozostałą wilgoć.
• Zamontuj wszystkie elementy urządzenia dopiero po ich całkowitym wysuszeniu.
• Dry sample leftovers can be removed using either brush or handheld vacuum cleaner.
•Clean components can be dried using soft cloth or dust-free paper towel, with this the remaining moist will be
absorbed.
• Install all the components providing they are completely dry.

www.radwag.com
Table of contents
Other RADWAG Measuring Instrument manuals

RADWAG
RADWAG MA 50/1.R User guide

RADWAG
RADWAG PUE HY10 User manual

RADWAG
RADWAG PUE HX7 User manual

RADWAG
RADWAG PMV User guide

RADWAG
RADWAG MA X2 Synergy User manual

RADWAG
RADWAG MA 3Y User manual

RADWAG
RADWAG MA X2.A Series User guide

RADWAG
RADWAG PUE HX5.EX User manual

RADWAG
RADWAG PUE H315 User manual

RADWAG
RADWAG SM-UYA 4Y User manual

RADWAG
RADWAG PMR SERIES User manual

RADWAG
RADWAG PUE C315 User guide

RADWAG
RADWAG WPT EX Series User manual

RADWAG
RADWAG MA X7.A User guide

RADWAG
RADWAG MAX 60 User manual

RADWAG
RADWAG PUE 5 User manual

RADWAG
RADWAG PUE C32 User manual

RADWAG
RADWAG MA X2.IC.A Series User manual

RADWAG
RADWAG PUE CY10 User manual

RADWAG
RADWAG PMV Series User guide