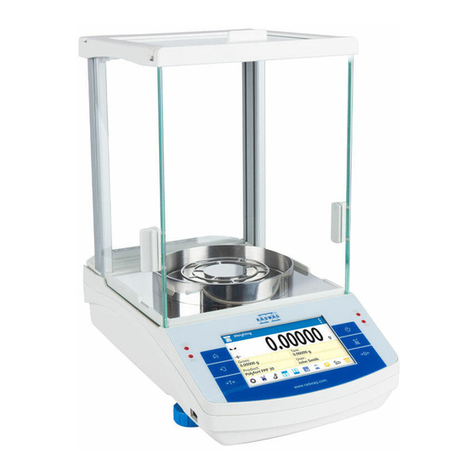
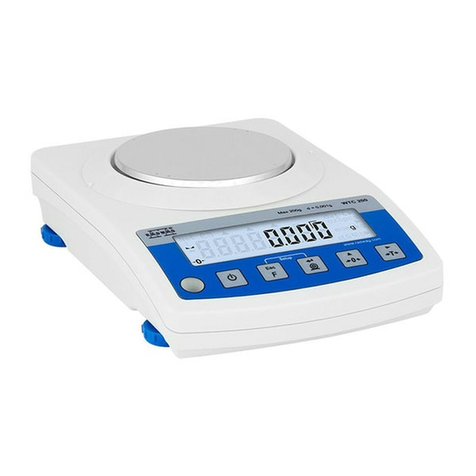
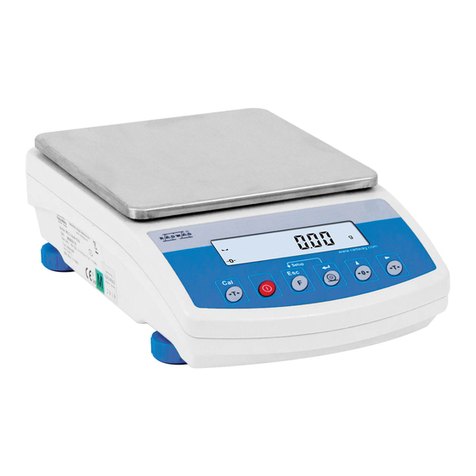
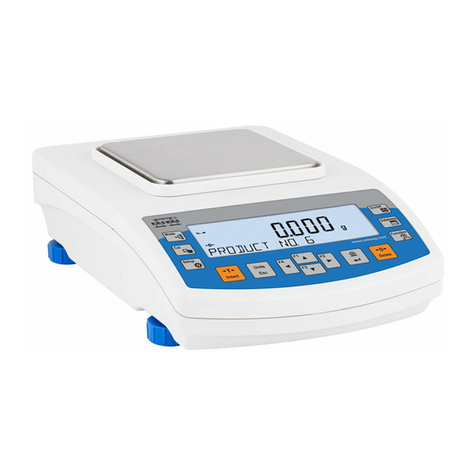
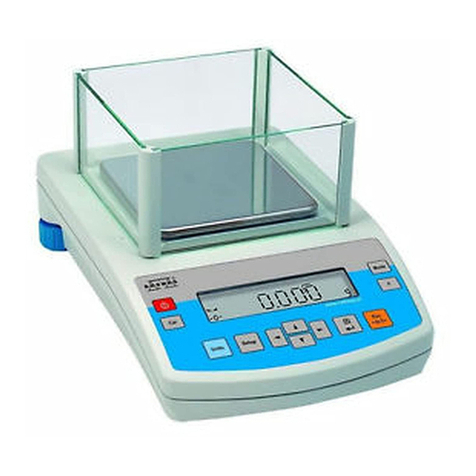
RADWAG APP series User manual

Number of instruction:
LMI-26-02/06/08/ENG
Precision balances
APP/C series
MANUFACTURER
OF ELECTRONIC WEIGHING INSTRUMENTS
RADWAG 26 – 600 Radom, Bracka 28 Street, POLAND
phone +48 48 38 48 800, phone/fax. +48 48 385 00 10
Sales Department +48 48 366 80 06
www.radwag.com

- 2 -
JUNE 2008

- 3 -
Contents
1.TECHNICAL DATA..................................................................................6
2.BASIC INFORMATION............................................................................7
2.1.Intended use...............................................................................................7
2.2.Inappropriate use........................................................................................7
2.3.Warranty.....................................................................................................7
2.4.Monitoring the metrological parameters of the instrument..........................8
2.5.Data included in this user manual...............................................................8
2.6.Staff training................................................................................................8
3.TRANSPORT AND STORAGE...............................................................8
3.1.Acceptance check.......................................................................................8
3.2.Packaging...................................................................................................8
4.UNPACKING, INSTALLATION AND COMMISSONING.........................8
4.1.Installation and operation place..................................................................8
4.2.Unpacking...................................................................................................9
4.3.Positioning..................................................................................................9
4.4.Standard accessories...............................................................................10
4.5.Cleaning ...................................................................................................10
4.6.Connection to mains.................................................................................10
4.7.Connection of additional equipment..........................................................10
5.BASIC FUNCTIONS OF THE INSTRUMENT.......................................11
6.KEYBOARD...........................................................................................12
7.USER MENU.........................................................................................13
7.1.Moving in user menu ................................................................................15
7.1.1.Return to weighing function..............................................................15
8.WEIGHING............................................................................................15
8.1.Choice of basic weighing unit ...................................................................16
8.2.Choice of weighing unit (temporary).........................................................17
8.3.Setting accessibility of balance operating modes .....................................18
8.3.1.Choice of modes quantity accessible for user..................................18
8.3.2.Setting contents of P6.1 FFun – ALL parameters ............................20
9.MAIN SETTING PARAMETERS...........................................................21
9.1.Setting level of filtering..............................................................................22
9.2.Result confirmation...................................................................................23
9.3.Autozero function......................................................................................24
9.4.Light off the last display digit.....................................................................25
10.ANOTHER PARAMETERS...................................................................26
10.1.Backlight of weighing result ......................................................................26
10.2.“Beep” signal – reaction on pressing key..................................................27

- 4 -
10.3.Printout of all balance parameters through RS 232 port...........................27
11.BALANCE CALIBRATION.....................................................................28
11.1.Balance with internal calibration ...............................................................28
11.2.Entering calibration menu.........................................................................30
11.3.Calibration test..........................................................................................33
11.3.1.Balances with internal calibration.....................................................33
11.3.2.Balances with external calibration....................................................34
11.4.Manual calibration.....................................................................................35
11.4.1.Internal calibration............................................................................35
11.4.2.External calibration...........................................................................36
11.5.Calibration report printout .........................................................................36
12.SETTING PRINTOUTS FOR GLP PROCEDURES..............................37
12.1.Setting the contents of printouts for GLP procedures...............................38
13.BALANCE OPERATING MODES .........................................................42
13.1.Counting details of the same mass...........................................................43
13.2.+/- control referring mass of set standard.................................................47
13.3.Control of % deviation referring mass of standard....................................49
13.3.1.Mass of standard determined by its weighing ..................................50
13.3.2.Mass of standard entered to balance memory by user.....................51
13.4.Defining thickness of solids and liquids ....................................................52
13.4.1.Testing thickness solids ...................................................................52
13.4.2.Testing thickness of liquid................................................................53
13.5.Summing function.....................................................................................53
14.FUNCTIONS FOR USING RS 232........................................................55
14.1.Speed of transmission..............................................................................56
14.2.Continuous transmission ..........................................................................57
14.2.1.Continuous transmission off in actual interval ..................................57
14.2.2.Continuous transmission of in basic units ........................................58
14.3.Setting type of operating for RS 232 joint .................................................59
14.4.Designation of data type sent through RS 232 joint..................................60
14.5.Designation of minimum mass for operating of some functions................61
15.COOPERATION WITH PRINTER OR COMPUTER.............................62
15.1.Schedules of connecting conductors........................................................63
15.2.Printing data with date and time................................................................64
15.3.Cooperation with statistic printout Kafka SQS ..........................................64
15.4.Format of sending data.............................................................................64
15.4.1.Format of sent data after pressing the PRINT button.......................65
15.4.2.Format of sent data for orders generated from the computer...........65
16.WEIGHING LOADS UNDER BALANCE...............................................66
17.LIST OF ORDERS IN RADWAG BALANCES ......................................67
18.ERROR MESSAGES.............................................................................68
- 5 -
19.ADDITIONAL EQUIPMENT...................................................................68
19.1.Vibration damping table............................................................................68
19.2.Additional display......................................................................................68
19.3.Computer software ...................................................................................68
- 6 -
1. TECHNICAL DATA
External
calibration APP
8/C APP
10/C APP
25/C APP
30/C
Internal calibration APP
8/C/2 APP
10/C/2 APP
25/C/2 APP
30/C/2
Max capacity 8 kg 10 kg 25 kg 30 kg
Tare range -8 kg -10 kg -25 kg -30 kg
Min capacity 0,2 g 2 g
Readability 0,01 g 0,1 g
Repeatability 0,01 g 0,1 g
Linearity ±0,02 g ± 0,2 g
Working
temperature +15 °C - +30 °C
Power Zasilacz 230V 50Hz AC /11 V AC
Drift sensitivity 2 ppm/°C w temp. +18°C - +30°C
Pan size 300 x 250 mm 365 x 285 mm

- 7 -
2. BASIC INFORMATION
2.1. Intended use
Balance you have acquired serves to determine the weighing value of a load in
laboratory environment. It is intended for application as a non-automatic weighing
instrument only, i.e. the material to be weighed is manually and carefully placed in
the center of the weighing pan. Weighing result should be read only after stable
reading has been obtained.
2.2. Inappropriate use
Do not use the balance as a dynamic weighing instrument. Even if small quantities
of weighed material are added or removed from the weighing pan of the instrument,
the reading should be taken only after stabilization of the result. Do not place any
magnetic materials on the weighing pan, as this can cause damage of the
measuring system of the instrument. Be sure to avoid impact shock and overloading
the balance in excess of the prescribed maximum load rating, minus any possible
tare weight that has been applied. Never use the balance in an environment
endangered by an explosion. This balance has not been adjusted for operation in
explosive areas. There must not be any modification made to the balance.
2.3. Warranty
Warranty is not valid at the following:
•Non-observation of the guidelines in the user manual,
•Use of balance other than specified in this manual,
•Alternation to or opening of the device,
•Mechanical damage and damage caused by media, natural water,
and tear,
•Inappropriate erection or electric installation,
•Overloading of the measuring instrument.

- 8 -
2.4. Monitoring the metrological parameters of the instrument
Metrological features of the balance should be tested by the user within regular
intervals of time, within scope of quality assurance.
2.5. Data included in this user manual
Please read the user manual carefully before erecting and commissioning, even if
the user has is experienced with this kind of weighing instruments.
2.6. Staff training
This balance may only be operated and looked after by trained member of staff.
3. TRANSPORT AND STORAGE
3.1. Acceptance check
Please check the packaging immediately upon delivery and the device during
unpacking for any visible signs of external damage.
3.2. Packaging
Please retain all parts of the original packaging in case it should be necessary to
transport or return items at any time. Only the original packaging should be used for
return consignments. Before dispatch, disconnect all attached cables and
loose/movable parts (weighing pan, etc). Please place any elements of the balance
in its original packing. Please protect the balance and its parts against any damage
while in transport.
4. UNPACKING, INSTALLATION AND COMMISSONING
4.1. Installation and operation place
* Balance should be stored and used in locations free of vibrations and
shakes, free of wind and dust.
* Air temperature should not exceed range between:
+15oC ÷+30oC
* Humidity of air should not exceed 80% (not condensing).
* When operating the balance, room temperature should not change more
than 0,5°C within one hour,
* The balance should be placed on a stable surface not affected by vibrations
and distant from heat sources.

- 9 -
* Please take special safety measures when weighing magnetic loads, as part
of this balance is a strong magnet. If there is a necessity to perform
measurement of such load, please use option of under hook weighing, which
removes the load from area influenced by the magnet. For installation place
of under hook device, please look at the bottom casing of the balance,.
* Avoid static charging of items to be weighed, or weighing container. In case
of static discharges may occur, please ground the device. Grounding bolt is
placed at the back side of the balance’s casing.
4.2. Unpacking
Cut safety tape off. Take balance off the box. Take out balance from
package. Take all necessary to correct performance of balance elements
off the box.
Take off the pan and remove carrying protection, look at drawing below.
Placing balance in place of using.
4.3. Positioning
Before switching on the balance, please level the device with
two adjusting feet situated at the back of the casing. Please
level the balance so that the air bubble of the level is placed
centrally.

- 10 -
4.4. Standard accessories
•Balance.
•Weighing pan.
•Power adapter.
•User manual.
4.5. Cleaning
Balance should be cleaned with damp cloth. In order to clean the weighing pan of
the balance, please remove it from the weighing chamber. Cleaning of the pan
when installed may cause damage of the measuring system of the balance.
4.6. Connection to mains
Balance can be connected to mains only with a power adapter offered as standard
accessory to the balance. Nominal power supply of the power adapter (specified on
the data plate of the power adapter) should be compatible to the power from mains.
Please plug the adapter the socket at the back of the balance, the display with light
on and show sequence of digits – display test), after which balance will display
0.00g. if indication is different from zero, please press ESC/TARA button.
4.7. Connection of additional equipment
The balance must be disconnected from the mains before connecting or
disconnecting additional equipment (printer, PC) to or from the data interface. Use
only accessories and peripheral equipment recommended by the manufacturer with
your balance. These have been ideally coordinated to your balance.

- 11 -
5. BASIC FUNCTIONS OF THE INSTRUMENT
Electronic balance is appropriate for precise measurements mass in laboratory
conditions with possibility of setting to zero in all measure range. Balance
calibration is done by CAL on balance keyboard.
9Functions for weighing units (press Units key)
-select default units of weighing <StUn>,
-Weighing in grams,
-Weighing in [kg],
-Weighing in [ct],
-Weighing in units from beyond SI (only: [oz], [ozt], [dwt], [t], [mom], [gn],
Access to these units is blocked from factory menu level,
9Functions for calibration and weighing modes
-Counting pieces < PIECES>,
-Control +/- <HiLo>,
-Control of deviations % according to standard mass <Perc A>,
<Perc B>,
-Thickness of liquids <d_Li> or solids <d_Co>,
-Summing <Add>
9Choice of criteria of stable result depending on usage conditions
-Turn off/on system of autozero <AUTO>,
-Average result of weighing <AvE>,
-Back light function<bl>,
-Beep signal <bEEP>,
9Function for using RS 232
-Choose speed of transmission,
-Define sent data as: stable / not stable,
-Continuous work,
-automatic work for RS 232.
Moreover balance can be used to weigh hang loads, print report of calibration,
check deviation of calibration and print reports of testing thickness of liquids and
solids.

- 12 -
6. KEYBOARD
Switches the display off. ON/OFF key.
Function key. F key.
Selects the work mode. MODE key.
Changes measure units. UNITS key.
Sends information to external instrument (PRINT) or confirms
parameter value or function (ENTER). PRINT/ENTER Key.
Sets indication to zero. Esc/TARA Key.
Calibration (internal or external)
Menu of balances
Navigation bar

- 13 -
7. USER MENU
Menu is divided into 7 basic groups. Each group has individual name starting with
capital letter P. Names of groups and their contents is shown below.
P1 CAL [Calibration]
P1.1 iCAL | [internal calibration]
P1.2 ECAL | [external calibration]
P1.3 tCAL | [temperature calibration]
P1.4 ACAL | both/nonE/tenno/tinnE [automatic calibration]
P1.5 CALt | 1 h ÷ 12h [time of automatic calibration]
P1.6 CALr | YES/no [report from calibration]
P2 GLP [Good Laboratory Practice ]
P2.1 USr | _ [name of user]
P2.2 PrJ | _ [name of project]
P2.3 Ptin | YES/no [printout of measurement time]
P2.4 PdAt | YES/no [printout of measurement date]
P2.5 PUSr | YES/no [printout of user name]
P2.6 PPrJ | YES/no [printout of project name]
P2.7 PId | YES/no [printout of factory number of balance]
P2.8 PFr | YES/no [printout of frames]
P3 rEAd [Main user parameters]
P3.1 AuE | Stand/Slouu/FASt [filtering level]
P3.2 ConF | FASt_rEL/Fast/rEL [confirmation of result]
P3.3 Auto | On/OFF [autozero]
P3.4 Ldi9 | ALuuAYS/never/uu_StAb[light off the last digit]
P4 Print [Data transmission – RS 232]
P4.1 bAud | 2400/4800/9600/19200 [speed of transmission]
P4.2 CntA | YES/no [continuous printout in currently
used unit]
P4.3 Cntb | YES/no [continuous printout in basic unit]
P4.4 rEPL | YES/no [manual or automatic operating]
P4.5 PStb | YES/no [result printout: stable or unstable]
P4.6 Lo | 00000.00 [min mass for automatic operating]

- 14 -
P5 Unit [Mass units]
P5.1 StUn | g/kg/ct/oz/ozt/dwt/t/mom/G [basic mass unit – e.g. gram]
P5.2 mg | YES/no [kg - milligram]
P5.3 Ct | YES/no [ct – carat]
P5.4 oZ | YES/no [oz – ounce]
P5.5 oZt | YES/no [ozt – troy ounce]
P5.6 dwt | YES/no [dwt – pennyweight]
P5.7 t | YES/no [t – tael]
P5.8 nno | YES/no [mom - momme]
P5.9 Gr | YES/no [gr – grain]
P6 Func [Functions]
P6.1 FFun | [choice of balance function]
P6.2 PcS | YES/no [counting pieces]
P6.3 HiLo | YES/no [check weighing]
P6.4 PrcA | YES/no [% deviation with reference to
weighed standard mass]
P6.5 Prcb | YES/no [% deviation with reference to declared
standard mass]
P6.6 d_Co | YES/no [density determination of solids]
P6.7 d_Li | YES/no [density determination of liquids]
P6.8 Add | YES/no [summing]
P7 othEr [Other functions]
P7.1 bL | On/Aut/OFF [display backlight]
P7.2 bEEP | On/OFF [keys sound]
P7.3 PrnS | [printout of balance parameters]

- 15 -
7.1. Moving in user menu
User moves in menu using balance keyboard (see point no 6)
7.1.1.Return to weighing function
Introduced changes in balance memory will be saved for good after
return to weighing with procedure of saving changes. Press several
times Esc key until display indicates message SAvE?.
When display indicates question press if necessary: PRINT/ENTER – confirmation
of changes or ESC – resignation from introduced changes. After pressing
appropriate key, balance will go back to weighing.
8. WEIGHING
Before weighing or if the conditions of work changes (e.g. if temperature of
surrounding is higher then 3
o
C) balance should be calibrated.
•Balance should be loaded few times by mass close to max capacity before
taking measurements,
•Check if not load balance shows „precise zero” - if measurement is
stable - order , if not press key →0/T←,
•by means of Units key set measure unit : [g], [kg], [ct], and if they are
accessible in factory menu [oz], [ozt], [dwt], [t], [mom], [gn],
•put load on balance and read result on display ,
•indication can be setting to zero many times by pressing key Esc/TARE
(summary of mass loads record to balance memory cannot be bigger then its
max capacity).

- 16 -
Don’t unplug the balance from power supply between following measurements.
Switch the balance off by pressing ON/OFF key. If user presses key ON/OFF once
again balance is ready to following measurements
8.1. Choice of basic weighing unit
Function is used to setting the initial unit with which the balance will start after
switching on. Enter to submenu P5 Unit,
press several times UNITS key. Display will indicate by turns available units.

- 17 -
After choosing basic unit press ENTER/PRINT key. Chosen unit will stop pulsing.
Possibilities of choice:
•For EC verified balances, user can choose following units: [g], [kg], [ct]
•For non-verified balances, user can choose following units: [g], [ct], [kg],
[oz], [ozt], [dwt], [t], [mom], [gn].
Go back to weighing mode with procedure of saving changes
(see point - 7.1.2. – return to weighing).
ATTENTION:
Balance after switching on will start with set basic unit.
8.2. Choice of weighing unit (temporary)
Function enables choice of unit with which mass on the pan will be indicated. Unit
will be valid until change of unit or switching on and off the balance. Each pressing
the Units key, causes change of measuring unit.
Possibilities of choice:
•For EC verified balances, user can choose following units: [g], [kg], [ct]
•For non-verified balances, user can choose following units: [g], [ct], [kg],
[oz], [ozt], [dwt], [t], [mom], [gn].

- 18 -
8.3. Setting accessibility of balance operating modes
In this group of parameters user declares functions which are to be accessible for
user after pressing SETUP key.
Enter group P6 Func.
8.3.1.Choice of modes quantity accessible for user
Function enables user to set if after pressing RIGHT ARROW key all operating
modes will be accessible (ALL) or only one from the list chosen and used by
operator, or all functions unavailable (OFF).

- 19 -
After choosing setting press ENTER/PRINT key. Balance will go back to displaying
name ofsubmenu.P6.1 FFun. If function other than ALL is chosen, procedure of
returning to weighing differs from remaining ones. If e.g. function PcS is chosen
(procedure according to 13.1 point), to return to weighing:

- 20 -
Press key Esc/TARA, balance will return to weighing.
8.3.2.Setting contents of P6.1 FFun – ALL parameters
Function enables switching off modes not used by operator. This causes faster
access to used modes.
This manual suits for next models
10
Table of contents
Other RADWAG Scale manuals

RADWAG
RADWAG WPT User manual

RADWAG
RADWAG PS 3000.R2 User manual

RADWAG
RADWAG XA 4Y.A PLUS User guide

RADWAG
RADWAG PS 200/2000 R2 User manual

RADWAG
RADWAG AS R2.PLUS User manual

RADWAG
RADWAG MYA.3Y User manual

RADWAG
RADWAG HRP User manual

RADWAG
RADWAG PS/X series User manual

RADWAG
RADWAG C32 User manual

RADWAG
RADWAG PM C32 User guide

RADWAG
RADWAG UYA 5Y User guide

RADWAG
RADWAG AS X2 PLUS User guide

RADWAG
RADWAG HX5.EX User manual

RADWAG
RADWAG THB.Y User manual

RADWAG
RADWAG TWM4 User manual

RADWAG
RADWAG WPY/KB series User manual

RADWAG
RADWAG PS Series User manual

RADWAG
RADWAG WPW/E User manual

RADWAG
RADWAG AS X2 PLUS User guide

RADWAG
RADWAG PS X7.M User guide