Scheduled Watering
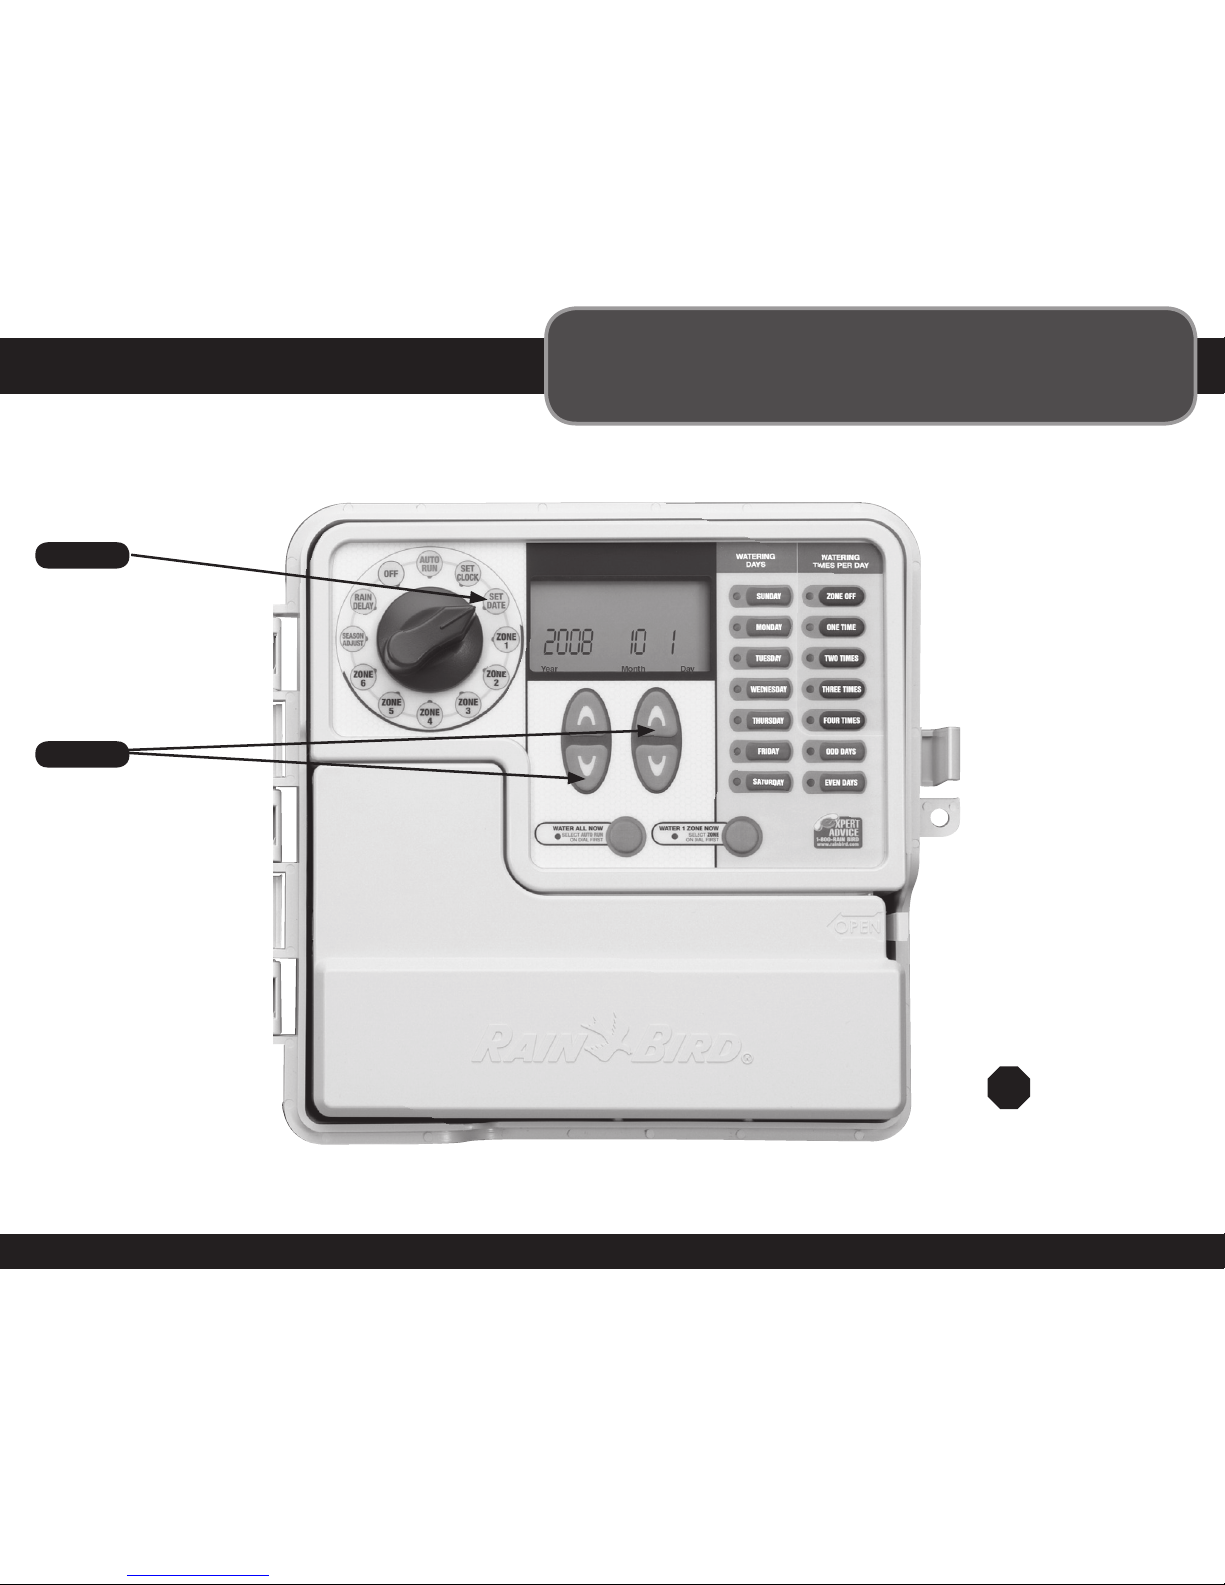
Step 1
Turn dial to
the Zone
you wish to
schedule
Step 3
Select number of times
per day to water**;
default is once per day
**If you have trouble with
water puddling or running off,
you might consider watering
more than once per day—but
for less time each time you
water. This will give the water
a better chance of soaking
into the soil and not running
off into the street.
Step 4
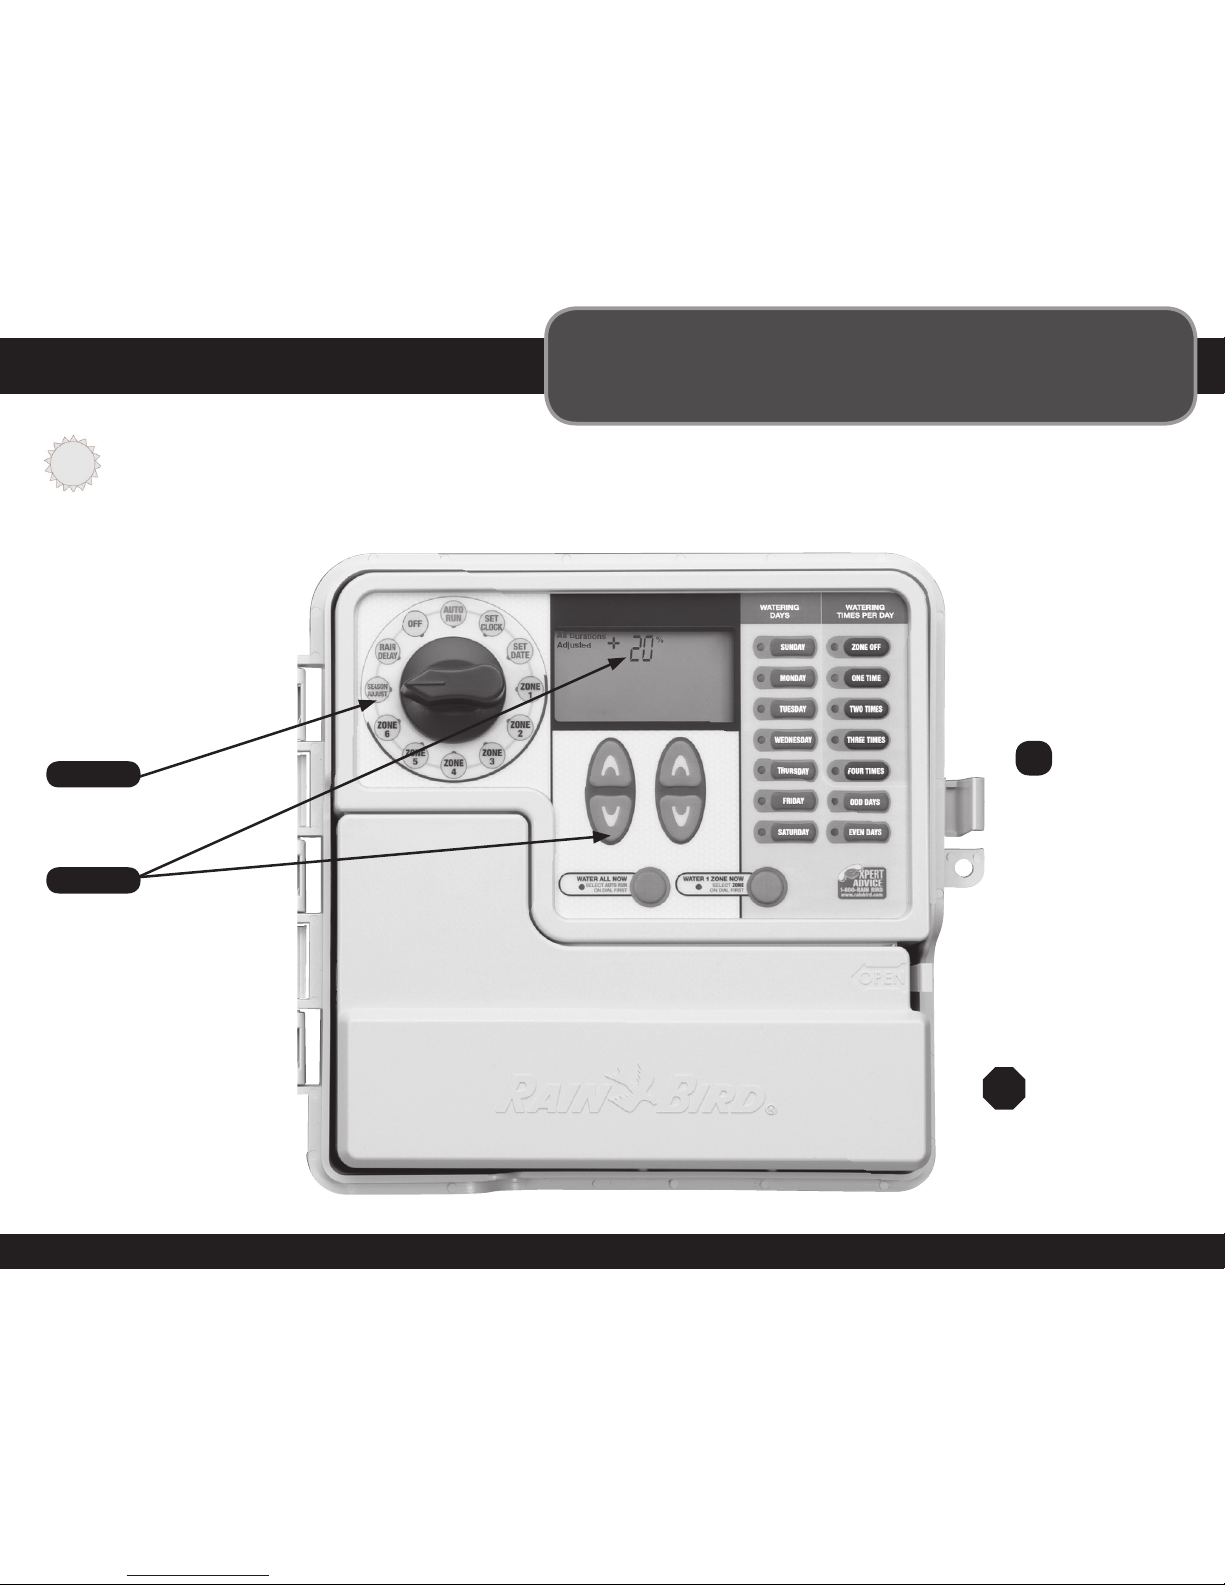
Use Up/Down
arrow keys to select
how many minutes
to water
Step 5
Use Up/Down arrow
keys to select start time
to water*
*If you selected more than
one watering time per day
in Step 3, then you will be
asked to input the FIRST
watering start time. All
subsequent start times are at
fixed intervals that cannot be
changed and are noted in text
above the Start Time. The
fixed intervals are:
Step 2
Select the day(s) of the week or
odd/even days you wish to water
Step 6
Turn dial to
next Zone
and repeat
Steps 2–5
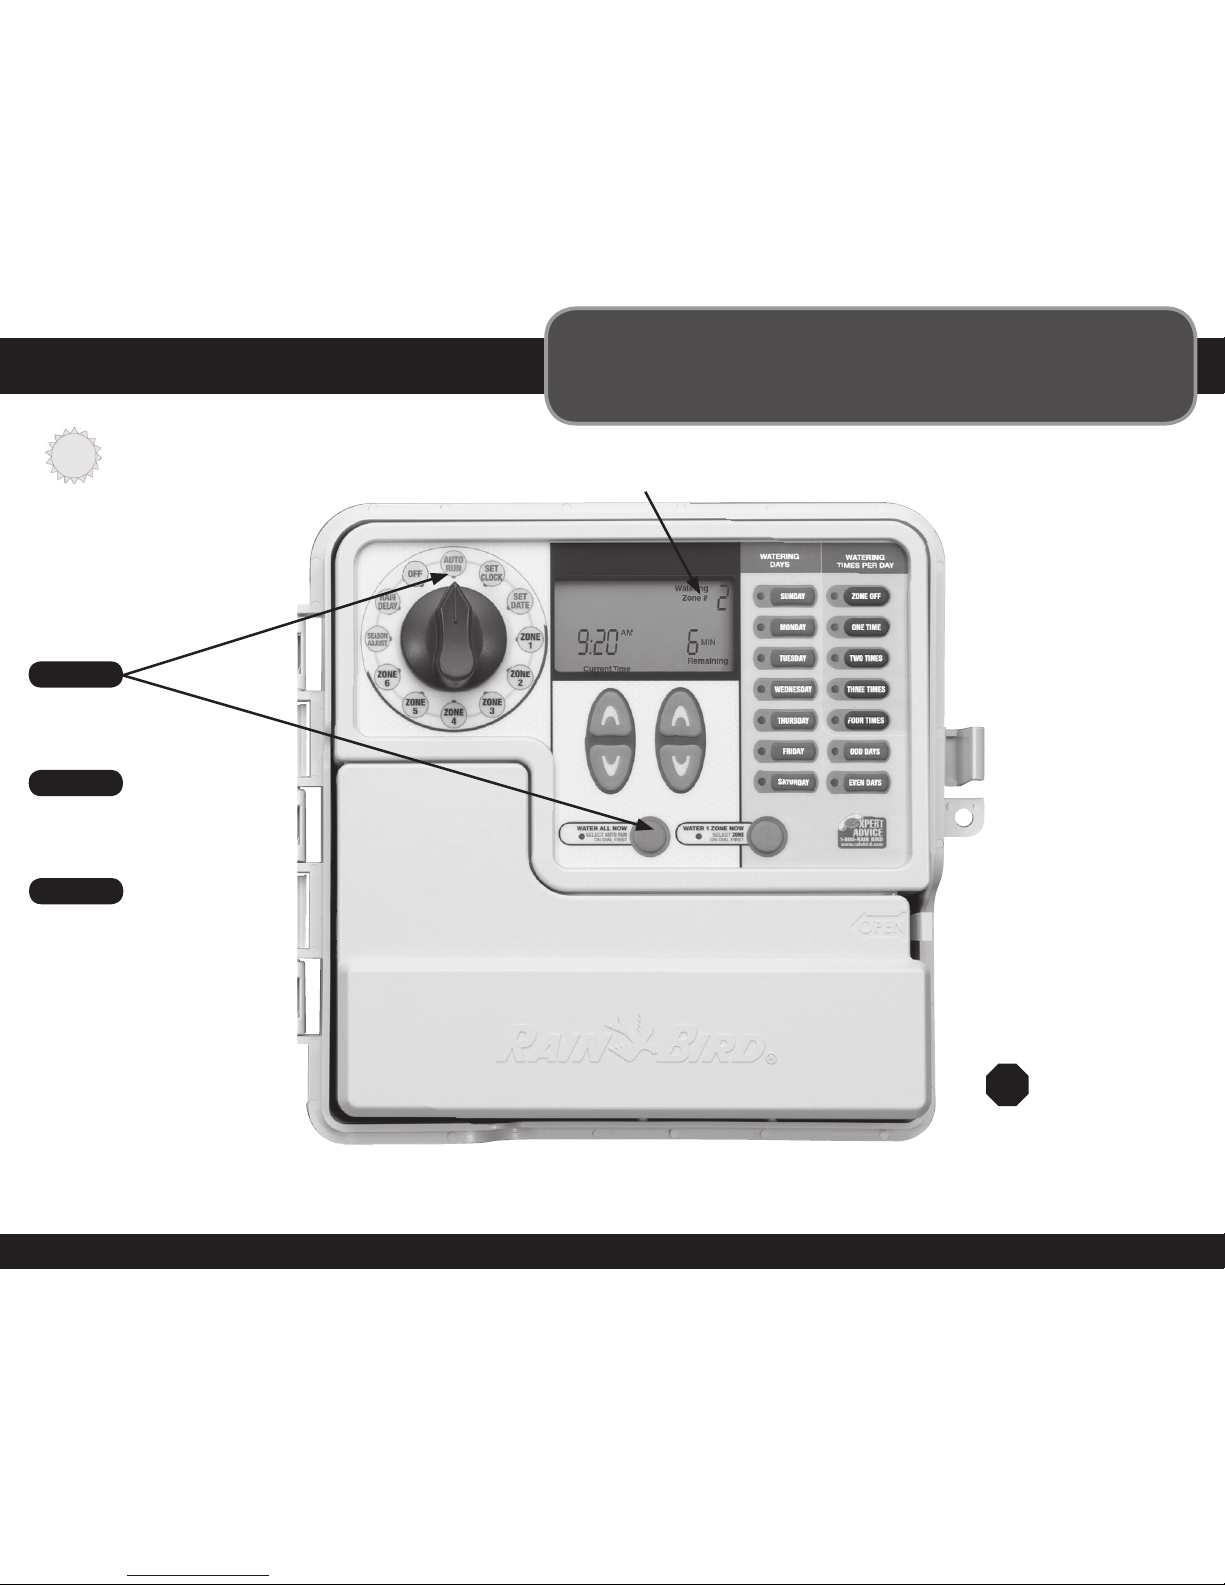
IMPORTANT:
Reset dial to
Auto Run after
making any
adjustments to
the programming
STOP
Watering Times per Day Options Hours from First Start Time For Additional Watering Times
2 times per day 6 hours
3 times per day 4 and 8 hours
4 times per day 3, 6, and 9 hours
USER TIP:
You will set up each Zone on its
own schedule simply by repeating the steps
below for each Zone you want to schedule.
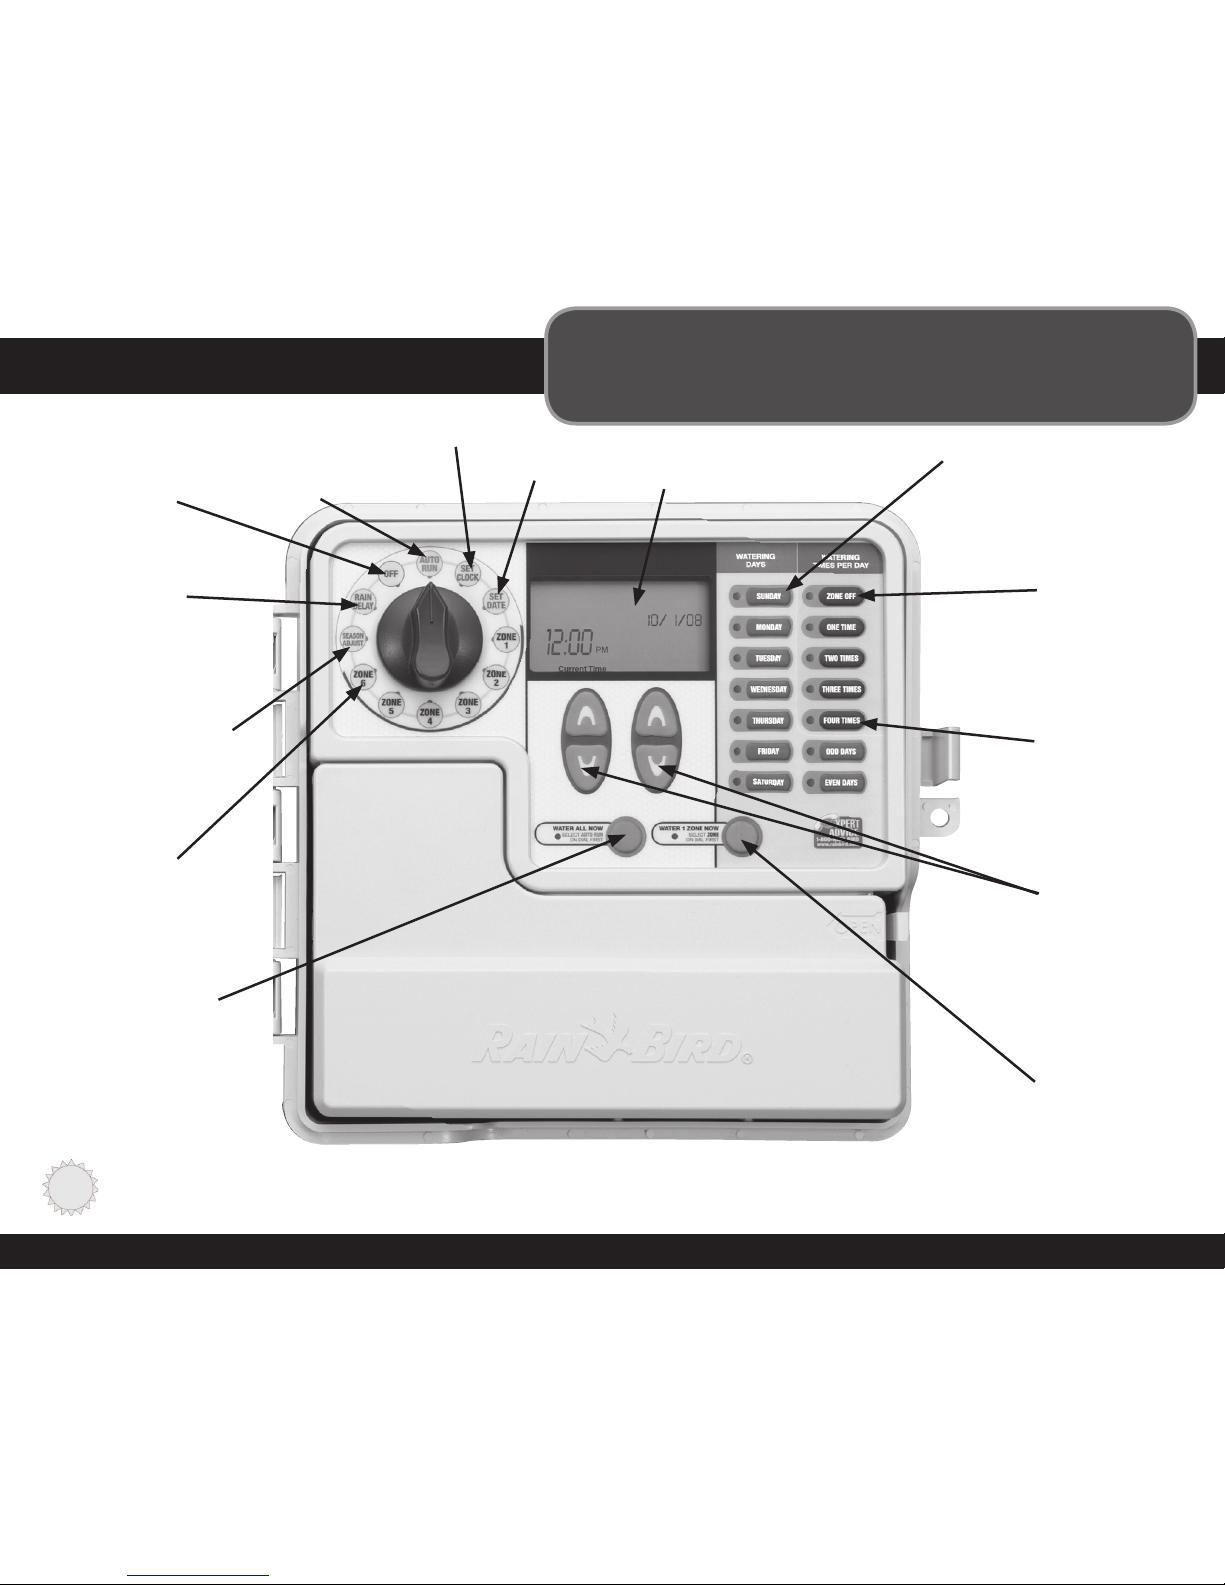
Zone to water
Rain Bird Timer
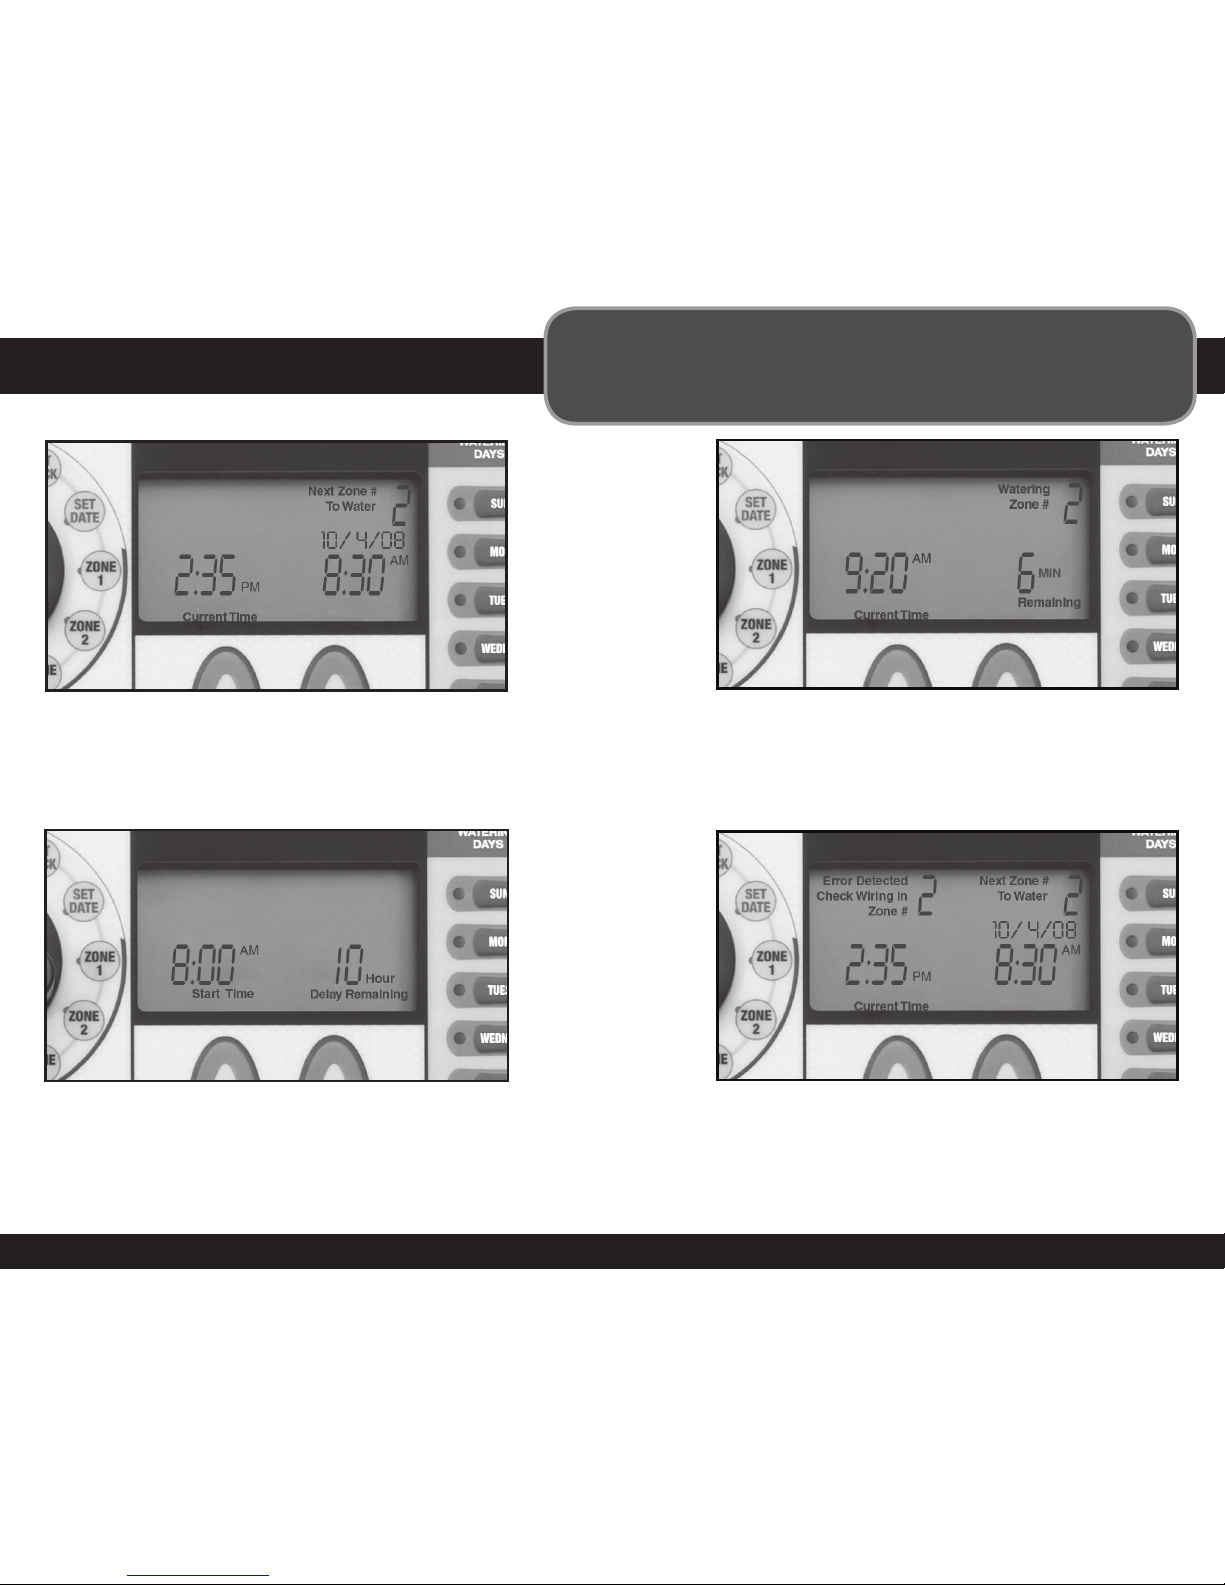
This section shows you how to set up a
watering schedule for each Zone in your yard.