manuals.online logo
Brands
  1. Home
  2. •
  3. Brands
  4. •
  5. RCA
  6. •
  7. Portable DVD Player
  8. •
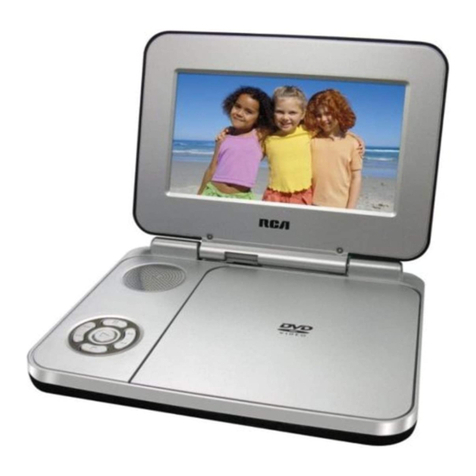
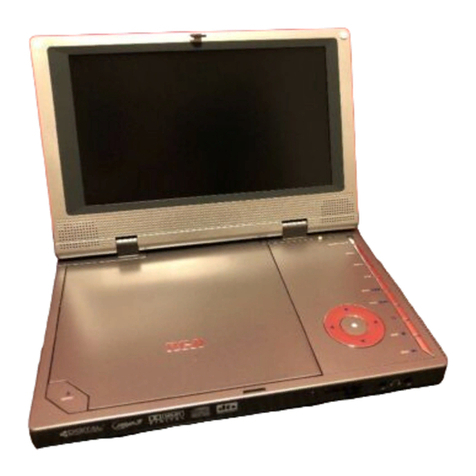
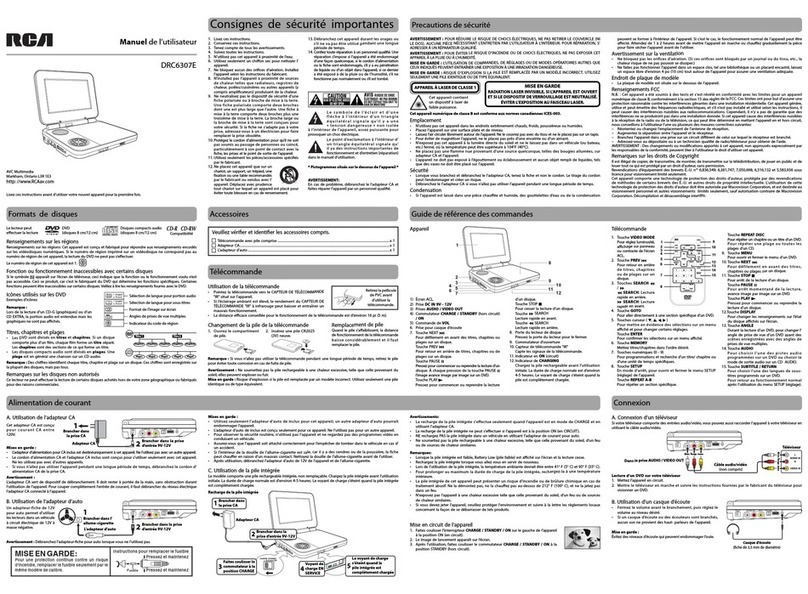
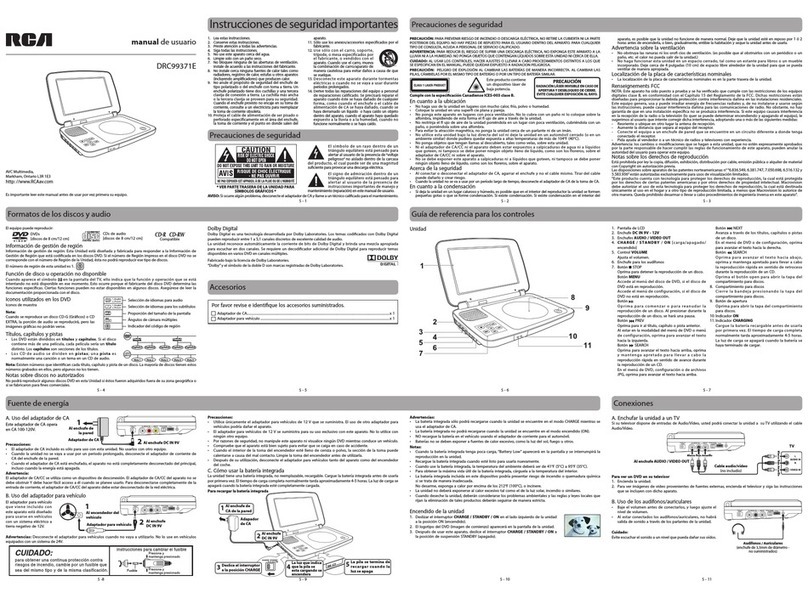
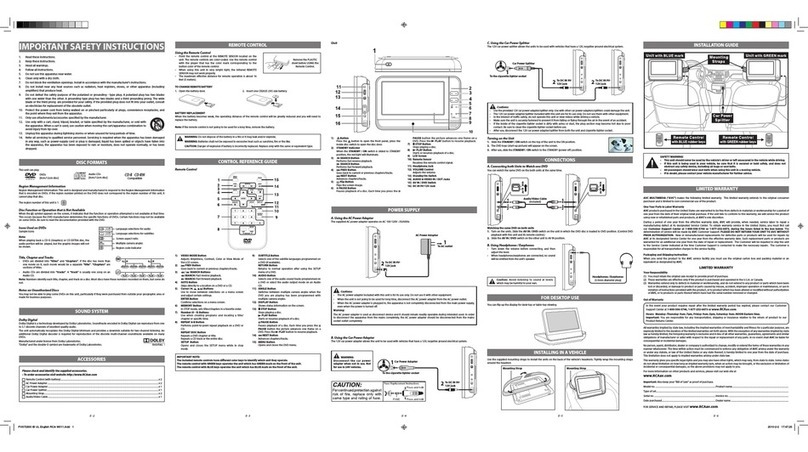
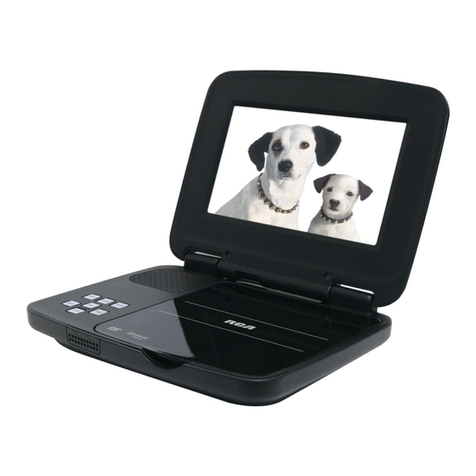
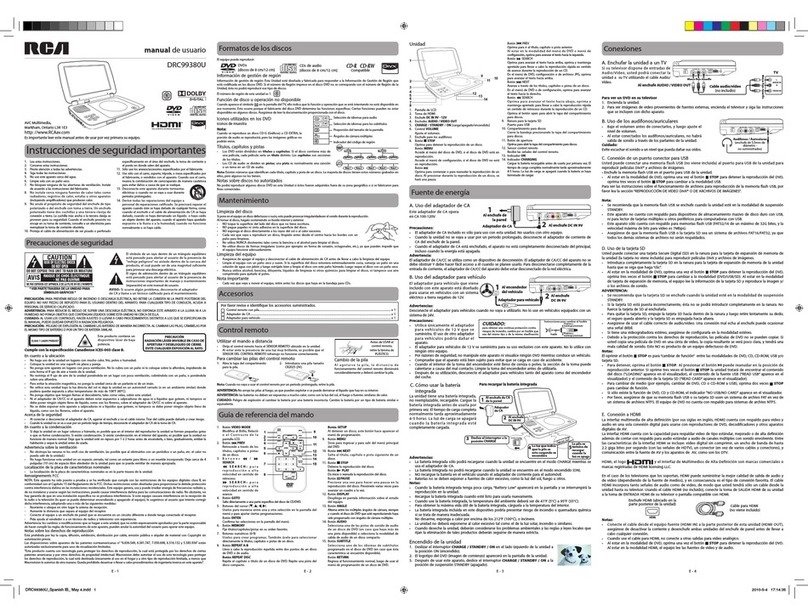
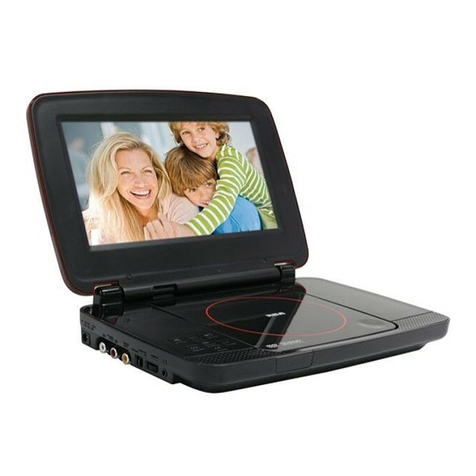
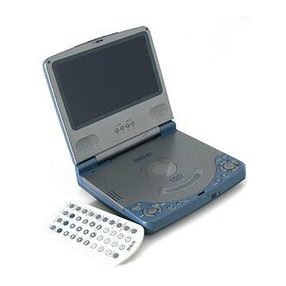
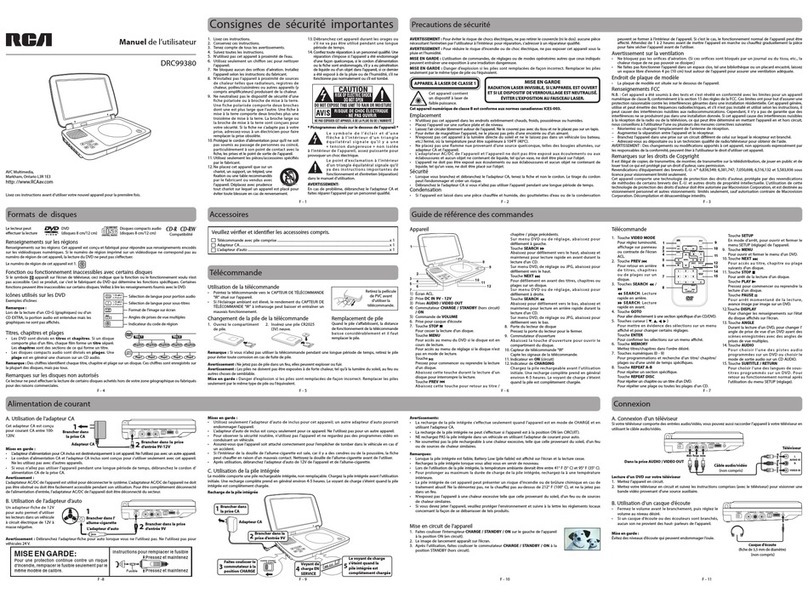
  9. RCA DRC99310U User manual

RCA DRC99310U User manual

WARNING: Should any trouble occur, disconnect the AC power adapter and refer servicing to a qualied
technician.
WARNING: TO PREVENT FIRE OR SHOCK HAZARD, DO NOT REMOVE COVER (OR BACK). NO USER-
SERVICEABLE PARTS INSIDE. REFER SERVICING TO QUALIFIED SERVICE PERSONNEL.
WARNING: TO REDUCE THE RISK OF ELECTRIC SHOCK, DO NOT EXPOSE THIS APPLIANCE TO RAIN OR
MOISTURE. DO NOT PLACE OBJECTS FILLED WITH LIQUIDS ON OR NEARTHIS UNIT.
CAUTION: USE OF CONTROLS OR ADJUSTMENTS OR P ERFORMANCE OF PROCEDURES OTHER THAN
THOSE SPECIFIED MAY RESULT IN HAZARDOUS RADIATION EXPOSURE.
CAUTION: DANGER OF EXPLOSION IF BATTERY IS INCORRECTLY REPLACED. REPLACE ONLY WITH THE
SAME OR EQUIVALENTTYPE.
On Placement
• Donot usetheunit inplaces thatareextremely hot,cold,dusty orhumid.
• Placetheunitona atandevensurface.
• Donot restrictthe airowoftheunit byplacing itin aplacewith poorair ow,bycovering itwitha
cloth, or by placing it on carpeting.
• Toavoidmagnetizing,do notplacetheunitnear speakersormagnets.
• Donotusethisunitindirectsunlightorleavetheunitinaclosedautomobile(orsimilar
environments)whereit wouldbeexposedtohigh temperaturesabove104°F(40°C).
• Nonaked amesources suchas lightedcandles shouldbe placedon theAC poweradapterorthe
main unit.
• TheAC/DC adaptorand apparatusshould notbe exposedtosplashingordrippingliquids,andno
objectslled withliquids,such asvases,shouldbeplaced ontheAC/DC adaptorandapparatus.
• Theapparatus shouldnotbeexposedto drippingor splashingandthatnoobjects lledwith liquids,
such as vases, should be placed on apparatus.
On Safety
• When con nectingordisconnectingt heACpoweradapter,gr ipt heplug and not the cord its elf.
Pullingthecordmaydamage itandcreate ahazard.
• When youarenot goingtouse theunit foralong periodoftime,disconnectthe ACpoweradapter.
On Condensation
• When leftina heated room whereitis warm anddamp,water droplets or condensation may form
inside the unit. When there is condensation inside the unit, the unit may not function normally. Let
the unitstandfor1 to2hours before turning the power on,orgraduallyheatthe room and allow
the unit to dry before use.
Ventilation Warning
• Donot block theventilation openingsor holes.Ifthe ventilationopenings orholes areblockedby a
newspaper or cloth, etc., the heat may not be able to get out.
• Do notoperatetheunitin aconfined space, suchasa bookcase or built-in cabinet.Allow about 4
inches(10cm) offreespace allaroundthe unitforadequateventilation.
Rating Plate Location
• Theratingplateislocated onthebottom ofunit.
FCC Statements
NOTE: This equipment has been tested and found to comply with the limits for a Class B digital device,
pursuantto Part15oftheFCC Rules.Theselimits aredesignedto providereasonableprotectionagainst
harmful interference in a residential installation. This equipment generates, uses and can radiate radio
frequency energy and, if not installed and used in accordance with the instructions, may cause harmful
interference to radio communications. However, there is no guarantee that interference will not occur in a
particular installation. If this equipment does cause harmful interference to radio or television reception,
which can be determined by turning the equipment o and on, the user is encouraged to try to correct
the interference by one or more of the following measures:
– Reorient or relocate the receiving antenna.
– Increase the separation between the equipment and receiver.
To DC IN 9V - 12V Jack
2
Car power adapter
To cigarette
lighter socket
1
AC power adapter 2
1
To DC IN 9V - 12V Jack
To wall outlet
B. Using the Car Power Adapter
Th e 1 2V c a r po w er a d ap te r
al low s th e un it to b e us ed
with vehiclesthathave a 12V,
negative ground electrical
system.
A. Using the AC Power Adapter
Caution:
• TheACpoweradapterincludedwiththisunit isforits useonly.Do notuseitwithother equipment.
• Whenthe unitis notgoing tobe usedfor longtime, disconnectthe ACpoweradapter fromthe wall
outlet.
• Whenthe ACpower adapteris pluggedin, theapparatus isnot completelydisconnected fromthe
main power supply, even when the power is turned o.
Warning:
TheAC/DCadaptorisusedasdisconnectdevice.TheAC/DCadaptorofapparatusshouldnotbe
obstructed OR should be easily accessed during intended used. To be completely disconnect the power
input,theAC/DCadaptorofapparatusshallbedisconnectedfromthemains.
Power Supply
The supplied AC power adapter
operatesonAC100-120V.
Caution:
• Usethe provided12V carpower adapteronly.Usewithothercarpoweradapters coulddamage the
unit.
• The 12 Vc ar powera dap ter included wit ht his unitisfor its useonly. Do notus ei tw ith ot her
equipment.
• Inthe interestoftrac safety,donot operatethisunit orviewvideoswhiledriving avehicle.
• Makesure theunitis securelyfastenedto preventitfrom fallingoryingthroughthe airinthe event
of an accident.
• When the inside ofthe cigarette light ers ocket is dir tywith ashesor dus t,t heplug section may
becomehot duetopoor contact.Besuretoclean thecigarettelighter socketbeforeuse.
• Afteruse,disconnectthe12V carpoweradapter fromboththeunitand cigarettelightersocket.
C. Using the Built-in Battery
The unit has a built-in, non-replaceable, rechargeable battery. Charge the built-in battery before using it
forthe rst time.Complete chargingtypically takes approximately4-5 hours.The charging lightwill go
out when the built-in battery becomes fully charged.
Warning:
• Thebuilt-inbatterycanonlyberechargedwhentheunitis inCHARGEmode whileusingtheAC
power adapter.
• Thebuilt-inbatterycannotbe rechargedwhentheunitis inONmode.
• DoNOTrechargethebuilt-inbatteryina vehicleusingthecarpower adapter.
• Batteriesshould notbeexposed toexcessiveheat suchassunshine, reorthelike.
Note:
• Whenthe built-inbatterypower islow,"BatteryLow"will displayonthescreenand theunitwill stop
playing.
• Rechargethe built-inbatterywhen youare readytouse itagain.
• Whileusing thebuilt-inbattery, theenvironmental temperatureshouldbe 41°F(5°C)to95°F(35°C).
• Toget thelongestservice lifeof thebuilt-inbattery, chargeatindoor-temperature.
• Thebuilt-in batteryin thisdevicemaypresenta riskof fireor chemicalburn ifmistreated.Donot
disassemble,heat above212oF(100oC), or incinerate.
• Theunit shouldnotbe exposedto excessiveheatsuch assunshine,reorthe like.
• Whendiscardingtheunit,environmentalproblemsmustbe consideredandlocalrulesorlaws
governing the disposal of such products must be strictly followed.
To recharge the built-in battery
1To AC power
outlet
2To DC IN 9V
- 12V Jack
3Slide the switch
to CHARGE 4Charging
light ON 5
Recharging
is completed
when charging
light goes out
AC power
adapter
B.Using Headphones/Earphones
• Turndown thevolumebefore connecting,andthen adjustthe level.
• When headphones/earphonesareconnected, nosoundwillbeemitted fromtheunit's speaker.
Headphones /Earphones
(3.5mmdiameterplug)(notincluded)
Caution:
Avoid listening to sound at levels which may be harmful to your ears.
C. Connecting a USB Flash Drive
Youcan connectaUSBashdrive (notincluded) tothe USBport onthe unittoplay DivX®movies as
well as music and picture les.
• Plug theUSBash drivetotheUSBport onthe unit.
• Pressing STOP button while player is not playing content will cause the player to switch between
DVD, USB, and SD Card modes. Repeatedly press STOP to select the mode you desire.
Foroperation ofleplayback onthe USBashdrive, pleaserefer tothe section“PLAYINGDivX® VIDEO
OR PICTURE FILES”.
Note:
• It isrecommendedUSB ashdriveispluggedwhen theunitisinSTANDBYmode.
• It doesnot supportUSBharddiskmassstoragedevice,multi-cardreaderandotherUSBcomputer
peripheral.
• It onlysupports USBashdrive(FAT32/16max.capacity32Gbytes max,videobitrate is7Mbps).
• Make sureyour USBash driveor SDcard isFAT16/FAT32le system.All otherle systemwill notbe
supported.
D. Using a SD Card Slot
You can connect a Secure Digital (SD) card (not included) to the SD card slot on the unit to play DivX
movies as well as sound & picture les.
• Plug theSDcard fullyinto thememoryexpansion cardslotontheunit untilitclicks.
• Pressing STOP button while player is not playing content will cause the player to switch between
DVD, USB, and SD Card modes. Repeatedly press STOP to select the mode you desire.
Warning:
• It isrecommendedthe SDcard ispluggedwhen theunitisinSTANDBY mode.
• IftheSDcardisorientedincorrectly,itwillnotgofullyintotheslot.Donotapplyforcewhen
inserting the SD card.
• To removetheSD card,push the SDcard into theslot andthenslowly removeyour nger, thelock
is released and the SD card is pushed out.
• Make suretouse correctAudio/Video cable,wrongplug connectionmaycauseweaksignal.
• If youhavea stereoVCR, makesureyou setitinstereomode.
• Duetocopyrightprotection,DVDmoviescannotbecopied.IfyoucopyaDVDmovieontoa
videotape, the resulting copy will be unclear, with poor sound quality. This is NOT caused by a
defective DVD system.
A.2Connecting aTVusinganalogoutput(goodoption)
IfyourTVhasaudio/videoinputs,youcanconnecttheunittoyourTVusingstandard Audio/Video
cables.
To AUDIO /
VIDEO OUT
jacks
Audio / Video cable
(not included)
White Red Yellow
TV
White RedYellow
Watching a DVD on your TV
1. Turnonthe unit.
2. TurnontheTVandfollowtheinstructions includedwithittowatchvideofromexternal sources.
Connections
A.1Connecting aTVusingHDMIoutput(bestoption)
HDMI (High Definition Multimedia Interface) supports both video and audio on a single digital
connectionfor usewithDVD players,set-top boxesandother digitalAVdevices.
For TVs that support it, HDMI can provide the best quality audio and video output (depending on media
source), and so is the preferred connection type. A HDMI cable (not included) incorporates both audio
and video signals, so you will have just one cable running from the unit to your TV. Using an HDMI
cable(not included),connect theHDMI OUTjack onyour unitto theHDMIINjackonyourTVorHDMI-
compatible display.
HDMI,the HDMIlogo andHigh-Denition MultimediaInterface aretrademarks orregistered trademarks
of HDMI licensing LLC.
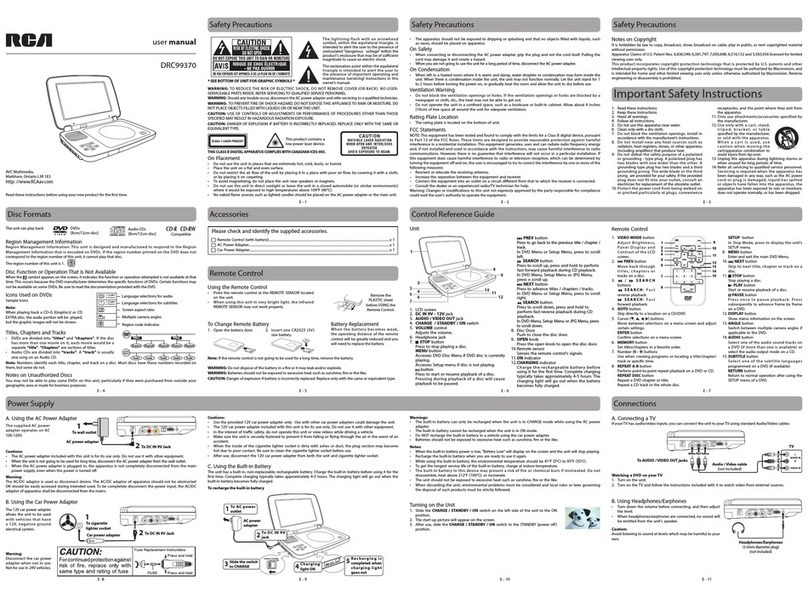
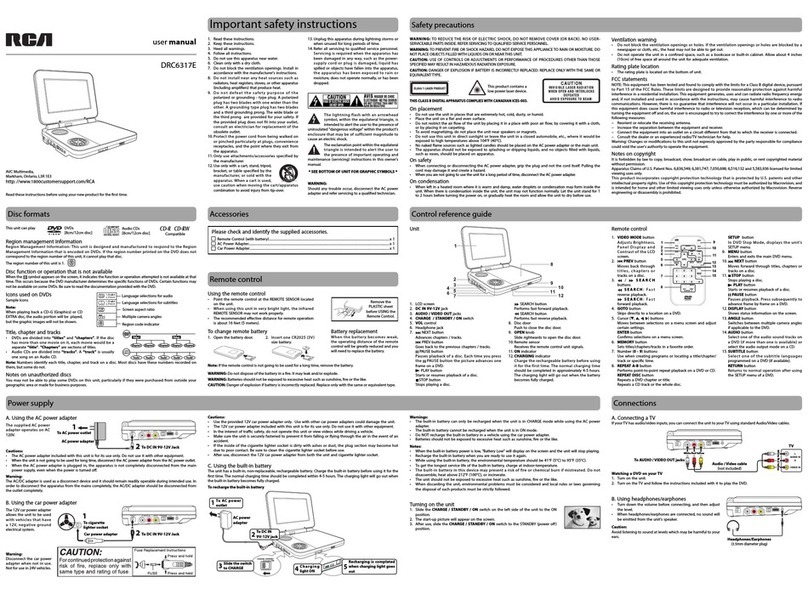
DRC99310U
user manual
Read these instructions before using your new product for the rst time.
AVC Multimedia,
Markham,OntarioL3R1E3
http://www.RCAav.com
Safety Precautions
* SEE BOTTOM OF UNIT FOR
GRAPHIC SYMBOLS *
The lightning flash with an arrowhead symbol,
within the equilateral triangle, is intended to alert
theusertothepresenceofuninsulated"dangerous
voltage"withintheproduct'senclosurethatmaybe
ofsucientmagnitudetocauseanelectricshock.
Theexclamationpointwithintheequilateral
triangle is intended to alert the user to the presence
of important operating and maintenance (servicing)
instructions in this owner’s manual.
THIS CLASS B DIGITAL APPARATUS COMPLIESWITH CANADIAN ICES -003.
This product contains a
low power laser device.
Control Reference Guide
Battery Replacement
Whenthebatterybecomesweak,theoperatingdistanceoftheremotecontrolwillbegreatlyreducedand
you will need to replace the battery.
Note: If the remote control is not going to be used for a long time, remove the battery.
WARNING: Donotdisposeofthebatteryinareoritmayleakand/orexplode.
WARNING: Batteriesshouldnotbeexposedtoexcessiveheatsuchassunshine,reorthelike.
CAUTION:Dangerofexplosionifbatteryisincorrectlyreplaced.Replaceonlywiththesameorequivalent
type.
2. Insertone CR2025(3V )sizebattery.
To Change Remote Battery
1. Openthe batterydoor.
Using the Remote Control
• Pointthe remotecontrolat theREMOTE SENSORlocated
on the unit.
• Whenusingthisunitin verybrightlight,theinfrared
REMOTESENSOR maynotwork properly.
Remote Control
Remote Control
1. VIDEO MODE button
Adjust Brightness, Contrast and
Aspect Ratio of the LCD screen.
2. PREV button
 Movebackthroughtitles,
chaptersor tracksona disc.
3. / SEARCH buttons
SEARCH:
 Fastreverseplayback.
SEARCH:
 Fastforwardplayback.
4. GOTO button
 Skipdirectly toalocationon
 aCD/DVD.
5. Cursor( , , , ) buttons
Move between selections on a menu screen
and adjust certain settings.
ENTER button
Conrm selections on a menu screen.
6. MEMORY button
 Settitles/chapters/tracks inafavorite order.
7. Number(0-9) buttons
Use when cre atin g programs or l ocating a
title/chapter/trackorspecictime.
8. REPEAT A-B button
 Perform point-to-pointrepeatplayback on a
DVD or CD.
REPEAT DISC button
Repeat a DVD chapter or title.
 Repeata CDtrackor thewholedisc.
12.DISPLAY button
Show status information on the screen.
13.ANGLE button
Switch between multiple camera angles if
applicable to the DVD.
14.AUDIO button
 Selectoneoftheaudiosoundtracksona
DVD (if more than one is available) or select
the audio output mode on a CD.
15.SUBTITLE button
Select one of the subtitle languages
programmed on a DVD (if available).
RETURN button
Return to normal operation after using the
SETUP menu of a DVD.
SUBTITLE/
RETURN
M
6
5
4
98 07
3
2
ENTER
MEMORYDISPLAY
AUDIO
MENU
PREV SEARCH
GOTO
VIDEO
MODE
NEXT
STOP PAUSE
PLAY
ANGLE
SETUP
A-B DISC
REPEAT
1
2
3
4
5
6
7
8
9
10
11
12
13
14
15
HDMI Cable
(not included)
– Con nec t the equip ment into an outl et on a c ircu it differ ent fr om that to wh ich the receive r is
connected.
– Consultthedealeroran experiencedradio/TV technicianforhelp.
Warning:Changesor modificationstothis unitnotexpresslyapprovedbytheparty responsiblefor
compliancecouldvoidtheuser'sauthoritytooperatetheequipment.
Notes on Copyright
It is forbidden by law to copy, broadcast, show, broadcast on cable, play in public, or rent copyrighted
material without permission.
ApparatusClaimsofU.S.PatentNos.6,836,549;6,381,747;7,050,698;6,516,132and5,583,936licensedfor
limited viewing uses only.
This product incorporates copyright protection technology that is protected by U.S. patents and
otherintellectual propertyrights. Useof thiscopyright protectiontechnology mustbe authorizedby
Macrovision,and isintended forhome andother limitedviewing usesonly unlessotherwise authorized
by Macrovision. Reverse engineering or disassembly is prohibited.
1. Readthese instructions.
2. Keep theseinstructions.
3. Heed allwarnings.
4. Follow allinstructions.
5. Do notusethis apparatusnear water.
6. Clean onlywitha drycloth.
7. Do notblockthe ventilationopenings. Installinaccordance withthemanufacturer'sinstructions.
8. Do not install near any heat sources such as radiators, heat registers, stoves, or other apparatus
(including ampliers) that produce heat.
9. Donot defeatthe safetypurpose ofa polarizedor grounding- typeplug. Apolarized plughas two
blades with one wider than the other. A grounding type plug has two blades and a third grounding
prong. The wide blade or the third prong are provided for your safety. If the provided plug does
not t into your outlet, consult an electrician for replacement of the obsolete outlet.
10. Protectthepowercordfrombeingwalkedonorpinchedparticularlyatplugs,convenience
receptacles,and thepointwhere theyexit fromtheapparatus.
11. Onlyuse attachments/accessoriesspeciedby themanufacturer.
12. Useonlywithacart,stand,tripod,bracket,ortablespecifiedbythe
manufacturer, or sold with the apparatus. When a cart is used, use
cautionwhenmoving thecart/apparatuscombinationto avoidinjury
from tip-over.
13. Unplugthis apparatusduringlightning stormsor whenunusedfor longperiodsoftime.
14. Referall servicingto qualiedservice personnel.Servicingisrequiredwhentheapparatus hasbeen
damaged in any way, such as the AC power cord or plug is damaged, liquid has spilled or objects
havefallenintothe apparatus,theapparatushasbeen exposedtorainormoisture, doesnot
operate normally, or has been dropped.
Important Safety Instructions
Theunitcanplayback
Region Management Information
Region Management Information: This unit is designed and manufactured to respond to the Region
Management Information that is encoded on DVDs. If the region number printed on the DVD does not
correspond to the region number of this unit, it cannot play that disc.
Theregionnumberofthisunitis1.
Noteon UnauthorizedDiscs
You may not be able to play some DVDs on this unit, particularly if they were purchased from outside your
geographic area or made for business purposes.
DVDs
[8cm/12cmdisc] Compatible
Audio CDs
[8cm/12cmdisc]
Disc Function or Operation That is Not Available
When the symbol appears on the screen, it indicates the function or operation attempted is not
available at that time. This occurs because the DVD manufacturer determines the specic functions of
DVDs. Certain functions may not be available on some DVDs. Be sure to read the documentation provided
with the DVD.
Icons Used on DVDs
Sample lcons
Note:
Whenplayingback aCD-G(Graphics)orCDEXTRAdisc,
the audio portion will be played, but the graphic images
will not be shown.
Language selections for audio
Language selections for subtitles
Screen aspect ratio
Multiple camera angles
Region code indicator
1
Titles,ChaptersandTracks
• DVDsaredivided into “titles” and “chapters”. If the disc
has more than one movie on it, each movie wou ld be a
separate “title”. “Chapters” are sections of titles.
• Audio CDsaredivided into “tracks”. A “track” is usually
one song on an Audio CD.
Note: Numbersidentify eachtitle,chapter,andtrackon adisc. Mostdiscshavethesenumbers recorded
on them, but some do not.
Disc Formats
Chapter1
Title1 Title2
Chapter2 Chapter3 Chapter1 Chapter2
Track1 Track2 Track3 Track4 Track5
Accessories
Pleasecheck andidentifythe suppliedaccessories.
 RemoteControl(withbattery)..................................................................................................................................x1
AC Power Adapter.........................................................................................................................................................x 1
Car Power Adapter........................................................................................................................................................x 1
Headphone Splitter...................................................................................................................................................... x 1
E- 1 E-2 E -3 E- 4 E-5
1. LCDscreen
2. HDMIjack
3. DC IN 9V - 12Vjack
4. AUDIO / VIDEO OUTjack
5. CHARGE / STANDBY / ON switch
6. VOLUME control
Adjusts the volume.
7. Headphonejack
8. STOP button
Press to stop playing a disc.
MENU button
Accesses DVD Disc Menu if DVD disc is
currently playing.
Accesses Setup menu if disc is not playing.
button
 Pressto startorresume playbackof adisc.
 Pressingduringplayback ofadisc willcause
playbackto bepaused.
PREV button
 Pressto goback tothe previoustitle/ chapter
/track.
Unit
In DVD Menu or Setup Menu, press to scroll
left.
SEARCH button
Press to scroll up, press to perform fast
forwardplayback duringCDplayback.
In DVD Menu, Setup Menu or JPG Menu,
press to scroll up.
NEXT button
 Pressto advancetitles/ chapters/ tracks.
In DVD Menu or Setup Menu, press to scroll
right.
SEARCH button
Press to scroll down, press to perform fast
reverseplayback duringCDplayback.
In DVD Menu, Setup Menu or JPG Menu, press
to scroll down.
9. DiscDoor
Push to close the disc door.
10.OPENknob
 Pressthe openknobto openthe discdoor.
11.USBConnector port
12.SDCard Slot
13.Remotesensor
 Sensesthe remotecontrol'ssignals.
14.ON indicator
15.CHARGING indicator
Charge the rechargeable battery before
using it for the rst time. Complete charging
typicallytakes approximately4-5hours. The
charging light will go out when the battery
becomes fully charged.
Warning:
Disconnect the car power
adapter when not in use. Not
forusein24Vvehicles.
Turning on the Unit
1. Slidethe CHARGE / STANDBY / ON switch on the left side of the unit to the
ON position.
2. Thestart-up picturewillappearonthe screen.
3. Afteruse, slidethe CHARGE / STANDBY / ON switch to the STANDBY (power
o) position.
Remove the
PLASTIC sheet
before USING the
Remote Control.
SETUP button
In Stop Mode, press to display
the unit’s SETUP menu.
9. MENU button
 EnterandexitthemainDVD
Menu.
10. NEXT button
 Skiptonexttitle,chapteror
trackon adisc.
11. STOP button
Stop playing a disc.
PLAY button
 Startorresumeplaybackofa
disc.
PAUSE button
 Pressoncetopauseplayback.
Press subsequently to advance
frame by frame on a DVD.
TV
Headphone Splitter(included)
Portable Cart Warning
Adjust the LCD Screen
You can adjust Brightness, Contrast and Aspect Ratio of the LCD screen.
1. PresstheVIDEO MODE button.
2. Press the  / button to select Brightness, Contrast or Aspect Ratio. Select Default to set the LCD
screen to factory default setting.
3. Pressthe / button to change the setting.
4. PresstheVIDEO MODEbuttonto exitthemenu.
This owner’s manual explains the basic instructions for operating this unit. Some DVDs are produced in
a manner that allows specic or limited operation during playback.Therefore, this unit may not respond
to all operating commands. THIS IS NOT A DEFECT. Please refer to the instructions accompanying the
specic DVD in question for more information about the options available on that DVD.
“ ” may appear on the screen during operation. A “ ” means the desired operation is not
permitted by the unit or disc.
Playing a Disc
1. Slidethe CHARGE /STANDBY /ON switch on the left side of the unit to the ON position.
 SeeCustomizingthefunctionsettings beforeproceedingto step2.
2. PresstheOPENknobto openthediscdoor.
3. Holdthe discbyits sidesandcarefully placeitonto thespindlewith thelabelside facingup,pushing
gentlyuntil youheara“click”.
4.Closethe disc door.Ittakesa short while for your unittoload the disc. After loading, theunitwill
automatically bring you to the main menu of the DVD or start playing the DVD.
5. Iftheunitdoesnot automaticallystart playingtheDVD, pressthe P LAY button on the remote
control or button on the unit.
PausingPlayback (StillMode)
Press the PAUSEbutton.Toresumenormalplayback,pressthe PLAY button on the remote control or
button on the unit.
For a DVD, each time you press the PAUSE button on the remote control, the picture advances one
frame.
StoppingPlayback
Press the STOPbuttonatthelocationwhereyouwanttointerruptplayback.Toresumeplaybackatthe
position where the disc was stopped, press the PLAY button on the remote control or button on the
unit.
If you press the STOP button twice, the unit’s memory will be cleared and pressing the PLAY button
on the remote control or button on the unit will reset the DVD to the beginning.
StoppingPlayback inDVD/CD/DIVX
• Duringplayback,pressthe STOPbutton attheloactionwhereyouwanttointerruptplayback.Press
the PLAYbuttontoresumeplaybackatthepositionwherethediscwasstopped.
• Pressthe STOPbutton twicetoclear theunit's memory.Pressing the PLAY button will play the
disc from the beginning.
• Pressingthe STOPbuttonthreetimeswillchangetonextmode.
StoppingPlayback inPictureFiles
• Duringplayback,pressthe STOPbuttonwillchangebacktoFilelist.
• Duringplayback,pressthe STOPbuttontwicewillchangetonextmode.
FastForward /FastReverse
1. Pre ssthe SEARCH or SEARCH button when a disc is playing. Each time you press the
SEARCH or SEARCHbutton,theplaybackspeed changesinthefollowingsequence:
x2 x4 x8 x20 x2 x4 x8 x20
2. Pressthe P LAY button on the remote control or press the button on the unit when you reach
thedesired pointtoresume normalplayback.
Note:
• TheDVD playermutessound andsubtitlesduring reverseandforwardscanof DVDs.
• Thefast playbackspeedmay dierdependingon thedisc.
Skip Forward/Reverse
• Pressthe NEXT button toadvancetitles, chapters/tracks.
• Pressthe PREV buttontogo backtocurrentorprevioustitles,chapters/tracks.
• Foran Audio CD,use the number buttonsonthe remote controltogo directly tothedesired track
number.
Audio Selection
On some DVDs, the sound is recorded in two or more formats. Follow the directions below to select the
preferred language and sound system.
1. Whilea discisplaying, presstheAUDIO button to show the current
audio format number.
2. PresstheAUDIO button repeatedly to select the desired audio format.
Note:
• Ifonly oneaudioformatisrecordedon theDVD,the numberdoesnotchange.
• SomeDVDsallow youto changeaudioselections usingthe disc menuonly. Ifthis is thecase, press
the MENU button and choose the appropriate language on the disc menu.
• Youcanselectdierentaudio channels(Left, Right,MonoorStereo)onan AudioCD bypressing the
AUDIO button repeatedly.
Subtitle Selection
1. Whilea DVDisplaying, pressthe SUBTITLE button to display the
 currentlanguage setting,asshown inthe example.
2. Pressthe SUBTITLE button repeatedly to select the desired subtitle language. You can turn subtitles
o by pressing the SUBTITLEbuttonrepeatedly untilthe“O ” is displayed.
Note:
• SomeDVDs areset todisplaysubtitles automatically, andyou cannotturn themo evenifyouset
the subtitle function to o.
• Duringsome scenes,thesubtitles maynotappearimmediatelyafter youselectyour desiredscene.
• Thenumber ofsubtitlelanguages recordeddiffersdependingonthe disc.If onlyonelanguageis
recorded, the language does not change.
• Thisfunctioncanonlybeusedfordiscson whichsubtitleshave beenrecordedinmultiple languages.
• SomeDVDsallow youtochangesubtitles usingthedisc menuonly.Ifthis isthecase,press the
MENU button and choose the appropriate subtitle on the disc menu.
PlayingaDisc(BasicPlayback)
[ 1 ENGLISH ]
[ 1 ENGLISH D5.1CH ]
E- 6
You can play a specic DVD title or chapter repeatedly (title repeat, chapter repeat, A-B repeat).
Repeating a Chapter
1. WhiletheDVDis playing,presstheREPEAT DISCbuttonuntilthe“ Repeat Chapter ” indicator
displays on the screen. The current chapter is played repeatedly.
Repeating a Title
2. Whilethe DVDis playing,presstheREPEAT DISCbuttonuntilthe “Repeat Title ” indicator displays
on the screen. The current title is played repeatedly.
ToResume NormalPlayback
3. Whilethe DVDisplaying,press theREPEAT DISC buttonuntilthe “Repeat O ” indicator displays
on the screen.
YoucanplayasingleCDtrackorthewholediscrepeatedly.
Repeatinga SingleTrack
1. Whilethe CDis playing,press theREPEAT DISC buttonuntil the“ Repeat single ” indicator displays
onthe screen.Thecurrent trackis playedrepeatedly.
Repeating the Whole Disc
2. Whilethe CDisplaying, presstheREPEAT DISC buttonuntilthe “Repeat all ” indicator displays on
the screen. The whole disc is played repeatedly.
ToResume NormalPlayback
3. WhiletheCD isplaying, presstheREPEAT DISC buttonuntilthe “Off ” indicator displays on the
screen.
Repeating a Specic Section
You can play a specic section repeatedly.
1. Whilethe discisplaying, presstheREPEAT A-Bbutton atthe beginningof thesection(“ Repeat A-
” is displayed) you want to play repeatedly.
2. Pressthe REPEAT A-Bbuttonagain atthe endofthe section(“Repeat A-B ” is displayed).
3. Theunit willimmediatelybegin replayingyour selection.
ToResume NormalPlayback
4. Whilethe discisplaying, presstheREPEAT A-B button untilthe“ Repeat A-B O ” indicator displays
on the screen (the repeat indicator disappears from the screen for a CD). The system will return to
normalplayback.
Note:
• Somediscs maynotpermit A-Brepeat operation.
• Youcannot settheA-B repeatfunction forasegment thatincludesmultiplecameraangles.
• Youcanspecifyasegmentonly withinthecurrenttitleor track.
• Theremay beaslight dierencebetween pointA and thelocation whereplayback actually resumes
depending on the disc.
RepeatPlayback
PlayingDivX®VideoorPictureles
Thisunit canplayDivX® andpicturelesrecordedonCD-R/CD-RWdiscs,USBashdrive andSDcard.
To play video les on this product you must rst convert them to DivX format using the DivX Plus
Player on your PC or MAC. This application can be downloaded at www.divx.com. Please do so,
and then install on your PC or MAC.
PlayingDivX® VideoorPictureFiles
If playing DivX video or picture les, see note below.
1.PresstheOPENknobto openthediscdoor.
2.Placea DivX®/pictureledisc ontothetray withlabelside up.
3.Closethe discdoor.
4.Aselection menuwillappearonthe screen.
5.Press or button to select the picture or video icon, and then
press ENTER.
If picture mode is selected, use below to nevigate the menu:
/ : selects a le
/ : page up or down
RETURN : returns to previous menu
ENTER : plays your selected le
Note:
•ForplayinglesonUSBash driveor SDcard, youshouldpluginthe USBash driveorSDcardwhen
theunit isinSTANDBY mode.then followstep5.
•Youcanpress the buttontointerruptplayback, andpressthe PLAY buttontoresume playback.
•Youalsocanuse theGOTO buttonoruse thenumbered buttonstoenter aphoto numberandquickly
select any image.
•During pictureplayback,press ANGLEbutton repeatedlytorotate thepicture.
ABOUTDIVX VIDEO:DivX®is adigital videoformat createdbyDivX, Inc.This isan ocialDivXCertied
devicethat playsDivX video.Visit www.divx.comfor moreinformation andsoftware toolsto convert
your les into DivX video.
ABOUTDIVX VIDEO-ON-DEMAND:ThisDivX Certied®device mustbe registeredinorder toplay DivX
Video-on-Demand (VOD) content. To generate the registration code, locate the DivX VOD section in the
devicesetup menu.Goto vod.divx.comwith thiscode tocomplete theregistration processandlearn
more about DivX VOD.
DivXCertifed® toplayDivX® video,including premiumcontent.
ENTER
Language Setup
1. Pressthe SETUP button on the remote control or MENU button on the
unit in stop mode (when disc is not playing).
2. Pressthe button to select Language Menu.
3. Pressthe  / button to select the option, then press the button.
4. Press the / button to select your preferred language, then press
the ENTER button to conrm.
5. Repeatsteps 3and4 toadjust otheroptions.
6. Pressthe SETUP or RETURNbuttonto exitthe menu.
CustomizingtheFunctionSettings
E- 7
Sound System
Dolby Digital
DolbyDigitalisatechnologydevelopedbyDolbyLaboratories.SoundtracksencodedinDolbyDigitalcan
reproducefromoneto5.1discretechannelsofexcellentqualityaudio.
Theunit automaticallyrecognizestheDolbyDigitalbitstreamand providesa downmixsuitable fortwo-
channel listening. An additional Dolby Digital decoder is required for reproduction of the discrete multi-
channelsoundtracksavailableonmanyDVDs.
Manufactured under license from Dolby Laboratories.
Dolbyandthedouble-DsymbolaretrademarksofDolbyLaboratories.
E- 9E - 8
Troubleshooting Guide
Printed in China 811-931091W042
Symptom Cause (and remedy)
No power.
Will not play a
video le.
The remote
control does
not function.
No sound or
only a very
low-level
sound is heard.
No picture.
The picture is
not clear.
Severe hum or
noise is heard.
The disc does
not play.
No sound is
input from the
HDMI IN.
•EnsuretheAC poweradapteris connected.
• Theunit isnotturned on.
•Thele maynot beDivX format-please ensureyou've usedtheDivX PlusPlayer on
your PC or Mac to successfully convert the le to DivX format.
•Makesurethe infraredremotesensor isnot blocked.
• Makesure theplasticsheet hasbeen removedfromthe remotecontrol.
• Pointthe remotedirectlyat theinfrared remotesensoron theunit.
• Replacethe batteryinthe remotecontrol withanew one.
•Thevolumecontrol islocatedon theside oftheunit –please tryadjustingthis.
• Thesystem is inpause mode.Press the PLAY button on the remote control or
button on the unit to return to normal play mode.
• Theunitisinfast-forwardorfast-reversemode.Pressthe PL AY button on the
remote control or button on the unit to return to normal play mode.
• Makesure theAUDIO/VIDEOoutput connectionsare correct.
• TheDTS DVDcannotbe decodedto havespeakeroutput.
• Theunit istoohot; shuto theunitfor 30minutestocoolit down.
• Theregionnumberofthe discdoesn't matchtheregion
number of this unit.
• Cleanthe disc.
• Thedisc isscratched.
• AdjusttheLCD'sbrightnessandcontrastusingthe VIDEO MODE button on the
remote control.
• Theplugsandjacksaredirty.Wipethemwithaclothslightlymoistenedwith
alcohol.
• Cleanthe disc.
• Thereis nodiscinside (“NoDisc” appearsonthe screen).
• Insertthe disccorrectlywith theplayback sidefacingdown.
• Cleanthe disc.
• Anon-NTSCdischasbeeninserted.Theunitanddiscregionnumberare
incompatible.
• Condensationmayhaveformedinsidetheunitduetoasuddenchangein
temperature. Wait about an hour for it to clear and try again.
• ChecktheconnectionbetweenthisunitandtheHDMIINjackofotherequipment.
• SeeifyourTVsupportsthis480p/720p/1080i/1080pDVDsystem.
• MakesureyourTVsupportsHDCP(HighBandwidthDigitalContentProtection).
Need More Help?
Please visit online help at http://www.RCAav.com
Specicationsandexternalappearancearesubjecttochangewithoutnotice.
System Setup
1. Pressthe SETUP button on the remote control or MENU button on the
unit in stop mode (when disc is not playing).
2. Pressthe / button to select TV System Menu.
3. Pressthe / button to select the option, then press the button.
4. Pressthe / button to adjust the settings, then press the ENTER
button to conrm.
5. Repeatsteps 3and4 toadjustotheroptions.
6. PresstheSETUP or RETURNbuttonto exitthemenu.
Default
Ittakes3-5secondstoresettheDVDsettingstothefactorydefault.
View DivX(R) VOD
DivX® Registration
DivX®registrationcode allowsyou torentand purchasemovies overtheinternet usingtheDivX®VOD
service. This menu setting will display the registration code of your unit as follows:
YOU MUST REGISTERYO UR DEVICE TO PLAY
DIVX PROTECTED VIDEOS.
REGISTRATION CODE:
REGISTER AT HTTP://VOD.DIVX.COM
Registrationserviceathttp://vod.divx.com
Followthe instructionsanddownload themovie fromyour computerontoa CD-R/RWor DVD+R/-R or
DVD+RW/-RWforplaybackontheunit.
Note:
• ThisregistrationcodeisforDivX®Video-On-Demandonly.Donotapplythiscodeforotherapplications
or websites.
• If youhave alreadyregisteredthis product, selecting theView DivX(R)VOD setting willallowyou to
deregister (deactivate)theproduc tfor DivX playback -werecommendyou DO NOTderegisterthe
product.
Screen Saver
To turn on or o the screen saver (screen protection to prevent image burn).
Note:
WhenyouleavetheunitinDVDstopmodeforapproxiamtely5minutes,thescreensaveroftheunit
automatically appears if you set the Screen Saver to On mode. To turn off the screen saver, press the
P LAY button.
TV Display
Depending on the format of the DVD disc, you can choose the picture format (aspect ratio) best suited
the format of your TV screen.
4: 3PS
• Whenwide-screenvideo isplayed, thismodeclips theright andleftsides ofthe
image so that it can be viewed on a conventional screen.
• Somewide-screenDVDsthatdonotpermitPanScanmodeplaybackare
automaticallyplayedin letterboxmode (blackbandsthat appearat the topand
bottom of the screen).
4: 3LB
• Whenwide-screen videoisplayed inthis modeon aconventionalscreen, black
bands appear at the top and bottom of the screen.
16: 9
• Thisisthe correctmodeforplayingwide-screenvideosontheunitscreen or
otherexternal wide-screens.
Note:
• Thedisplayable picture sizeis preseton the DVD.Thereforethe playbackpicture
ofsome DVDsmaynot conformtothe picturesize selected.
• When youplayDVDsrecordedin the 4:3 aspect ratio, theplayback picture will
alwaysappearinthe4:3 aspectratioregardlessoftheTVdisplaysetting.
• Select 16:9 toconformthe LCDscreenon the unit. Alwaysbe sure that yourTV
display conforms to the actual TV in use if you connect the unit to a TV.
HDMI Res. (Resolution)
YoucansettheHDMIRes.(Resolution)tobeAuto,480p,720p,1080ior1080p,accordingtotheconnected
TV.
Note:
• SelecttheHDMIresolutionaccordingtotheperformanceoftheconnectedTV.
• IftheVideooutisnotsettoHDMI,youcannotselecttheHDMIRes.
JPEG Interval
TosettheJPEGIntervalforslideshowplayback.SelectOtodisabletheslideshowfeature.
O:Playsbackoneleatatime.
5secondsPlaysbackimagesintheformofaslideshowat5secondsinterval.
10secondsPlaysbackimagesintheformofaslideshowat10secondsinterval.
15secondsPlaysbackimagesintheformofaslideshowat15secondsinterval.
Locating a Desired Section
Locatinga SpecicChapter/Title
Ifyou knowthe chapter/titlenumber forthe chapter/titlethat youwant toplay, youcan locateit by
directly selecting that number.
1. Pressthe GOTO button.
2. Pressthe / buttontohighlightchapter/title number,then pressthecorrespondingnumberbuttons
forthe chapter/titleyouwant (forexample: 02,08,10 or15).PresstheENTER button to conrm.
3. Playbackstarts fromtheselected chapter/title.
Note:
• Ifthechapter/titlenumberentered isnotpermitted.Repeatsteps 1and2tore-enter thecorrect
number.
• Somediscs maynotrespond tothis process.
• Thismethodoflocatingachapter/titleisavailableonlyonaDVDthatcontainschapter/title
numbers.
Youcancombine yourfavoritetitles/chapters/tracksand play
them in the order you determine.
1. PresstheMEMORY button and a program screen appears.
2. Selecttheitemsintheorder youwantbypressingthe
number buttons. Each time you press the Cursor buttons
( , , , ), the space is highlighted. Highlight where you
want to enter, then press the corresponding number
buttons.
3.PresstheCursorbuttons( , , , ) t o mov e th e
highlighted bar to , then press the PLAY or ENTER
button.TheDVDplayerstartsmemoryplayback.
4.Toresumenormalplaybackfrommemoryplayback
a) Press the MEMORY button.
b) Press the Cursor buttons ( , , , ) to m ove the
highlightedbarto“Clear”,thenpresstheENTER button.
All the input programs will be cleared.
c) Press the PLAYbuttontoresumenormalplayback.
Note:
• Ifthetitleorchapternumbersyouenteredisnot
permitted by the DVD, after you press the ENTER button,
itwill restoreto[- -].You shouldre-entercorrect numbers.
• Some discsmaynot permitmemory playbackoperation.
• Ifyouselectrepeatduringmemoryplayback,theDVD
playerrepeats thecurrentmemory playback.
• If youpressthe MEMORY button while the display appears on the TV screen, the display disappears.
• The programmedselectionswill becleared whenyouopen thedisctrayorturn otheDVDplayer.
e.g. DVD
e.g. CD
Default
View DivX(R) VOD
Screen Saver
TV System
Language
Player Menu
Subtitle
Audio
Disc Menu
Maintenance
Cleaning the Disc
Adefective orsoileddisc insertedinto theunitcan causesoundtodropout duringplayback.
Handle the disc by holding its inner and outer edges.
• DoNOTtouchthesurface ofthe unlabeledsideof thedisc.
• DoNOTstickpaperor tapeonthesurface.
• DoNOTexposethedisc todirectsunlight orexcessiveheat.
• Cleanthe disc before playback.Wipe the discfromthecenter outwardwith a
cleaning cloth.
• NEVERuse solventssuchas benzineoralcoholtoclean thedisc.
• DoNOTuseirregularshapeddiscs(example:heartshaped,octagonal,etc.).Theymaycause
malfunctions.
Cleaning the Unit
• Besure toturnthe unito anddisconnectthe ACpoweradapterbeforecleaning theunit.
• Wipe theunitwitha dry softcloth.Ifthe surfaces are extremely dirty, wipe clean withacloth that
hasbeen dippedinaweaksoap-and-water solutionand wrungoutthoroughly,thenwipe witha dry
cloth.
• Neveruse alcohol,benzine, thinner,cleaning uidor otherchemicals. DoNOT usecompressed airto
remove dust.
Important Note
• Beforetransporting theunit,remove thediscfrom thedisccompartment.
Note:
Pressing STOPbuttonis for"function change"betweenDVD/CD/CD-ROM,USBand/or SDCardmode.
• Tostop,press STOP button. Pressing button canresumeinpreviousplayback position.If STOP
buttonis pressedthree times,the unittrys tond thecontent ofdisc ("LOADING..."is shown),to nd
thecontentofUSB("READ USB"isshown)andto ndthecontent ofSD("READ CARD"is shown).
• Tochangemedia(e.g.changeDVD/CD/CD-ROMtoUSB),press STOP three times for function
change.
• If onlyDVD/CD/CD-ROM exists,"NOUSB/NO CARD"isshownasindication.
• Pleasemake sure yourUSBash drive orSDcard isFATle system instead ofNTFSle system.The
DVD unit does not support NTFS le system.
Angle Selection
Some DVDs contain scenes that have been shot from a number of
dierent angles. For these discs, the same scene can be viewed from
each of these dierent angles.
1. Whileyou areplayinga DVDwith dierentangles recorded,press
the ANGLE button to view the number of current angles available.
2. Press the ANGLE button repeate dly to change the scene to the
nextrecordedangle.
• Afterapprox.twoseconds,playbackwillcontinuefromthenewangleselected.
• Ifnobuttonispressedwithin10seconds,playbackcontinueswithoutchangingthecurrentangle.
Note:
This function can only be used for discs on which scenes shot from multiple angles have been recorded.
Display Function
While the disc is playing, press the DISPLAY button
repeatedly to display information on operation status.
Elapsed Time:
Elapsedtime from thebeginning ofthe chapter/title
which is currently playing.
Remaining Time:
Remainingtime ofthechapter/title whichiscurrently
playing.
Programmable Memory
16:9
4:3PS
Cut o ff wh e n a
wide-screen video
image is played.
4:3LB
Note:
• SomeDVDs maynot playinthe audiolanguage youselected. Apriorlanguage maybe programmed
on the disc.
• SomeDVDs maybe setto displaysubtitles ina languageother thantheoneyouselected.Aprior
subtitle language may be programmed on the disc.
• SomeDVDsallowyoutochangesubtitle selectionsusingthedisc menuonly.Ifthisisthecase,
press the MENU button and choose the appropriate subtitle language from the selection on the disc
menu.
• SomeDVDs may notinclude yourpre-selected language.Inthis case,the DVDplayerautomatically
displaysdisc menusconsistentwith thedisc's initiallanguagesetting.
Video Setup
1. Pressthe SETUP button on the remote control or MENU button on the
unit in stop mode (when disc is not playing).
2. Pressthe / button to select Video Menu.
3. Pressthe / button to select the option, then press the button.
4. Presst he  / button to adjust the setting, then press the ENTER
button to conrm.
5. Repeatsteps 3and4 toadjustotheroptions.
6. PresstheSETUP or RETURNbuttonto exitthemenu.
Video
TV Display
HDMI Res.
JPEG Interval
Locating a Specic Time
You can move to a specic location by entering its corresponding time (hours, minutes, seconds).
1. Pressthe GOTO button.
2. Pressthe correspondingnumberbuttons (5digits:X:XX:XX,forexample: 03005,108 23,122 56)for
the setting point you want.
3. Playbackstarts fromtheselected section.
Note:
• Ifthe timeentered isnotpermitted bythe DVD,"  "will display.Youshould re-enterthe correct
time.
• Somediscs maynotrespond tothis process.
• Somescenes maynotbe locatedas preciselyasyou specied.
• Thismethod foraccessingspecic locationsis availableonlywithin thecurrenttitleofthe DVD.
Other RCA Portable DVD Player manuals

RCA DRC97383 User manual

RCA

RCA DRC97383 User manual

RCA DRC62705E24G User manual

RCA

RCA DRC62705E24G User manual

RCA DRC99380 User manual

RCA

RCA DRC99380 User manual

RCA DRC99381E User manual

RCA

RCA DRC99381E User manual

RCA DRC6309 Instruction Manual

RCA

RCA DRC6309 Instruction Manual

RCA DRC6389T User manual

RCA

RCA DRC6389T User manual

RCA DRC616N User manual

RCA

RCA DRC616N User manual

RCA DRC6331 - Portable DVD Player User manual

RCA

RCA DRC6331 - Portable DVD Player User manual

RCA DRC99310KB User manual

RCA

RCA DRC99310KB User manual

RCA DRC99380U User manual

RCA

RCA DRC99380U User manual

RCA DRC99371E User manual

RCA

RCA DRC99371E User manual

RCA DRC99380U User manual

RCA

RCA DRC99380U User manual

RCA DRC6272E22 User manual

RCA

RCA DRC6272E22 User manual

RCA DRC6331 - Portable DVD Player Instruction Manual

RCA

RCA DRC6331 - Portable DVD Player Instruction Manual

RCA DRC627N User manual

RCA

RCA DRC627N User manual

RCA DRC99380U User manual

RCA

RCA DRC99380U User manual

RCA DRC6317E - Portable DVD Player Instruction Manual

RCA

RCA DRC6317E - Portable DVD Player Instruction Manual

RCA DRC6327E - 7" Portable DVD Player User manual

RCA

RCA DRC6327E - 7" Portable DVD Player User manual

RCA DRC6327E - 7" Portable DVD Player User manual

RCA

RCA DRC6327E - 7" Portable DVD Player User manual

RCA DRC99310 User manual

RCA

RCA DRC99310 User manual

RCA DRC6318E - Portable DVD Player Instruction Manual

RCA

RCA DRC6318E - Portable DVD Player Instruction Manual

RCA DRC99390 User manual

RCA

RCA DRC99390 User manual

RCA DRC97283 User manual

RCA

RCA DRC97283 User manual

RCA DRC99373E User manual

RCA

RCA DRC99373E User manual

Popular Portable DVD Player manuals by other brands

Philips PET744 user manual

Philips

Philips PET744 user manual

Coby DBTF-DVD7107 Specifications

Coby

Coby DBTF-DVD7107 Specifications

Audiovox D705PK Operation manual

Audiovox

Audiovox D705PK Operation manual

Panasonic PalmTheater DVD-LA95 operating instructions

Panasonic

Panasonic PalmTheater DVD-LA95 operating instructions

Audiovox DS9106 instruction manual

Audiovox

Audiovox DS9106 instruction manual

Curtis DVD 7014 user manual

Curtis

Curtis DVD 7014 user manual

Philips PET704 user manual

Philips

Philips PET704 user manual

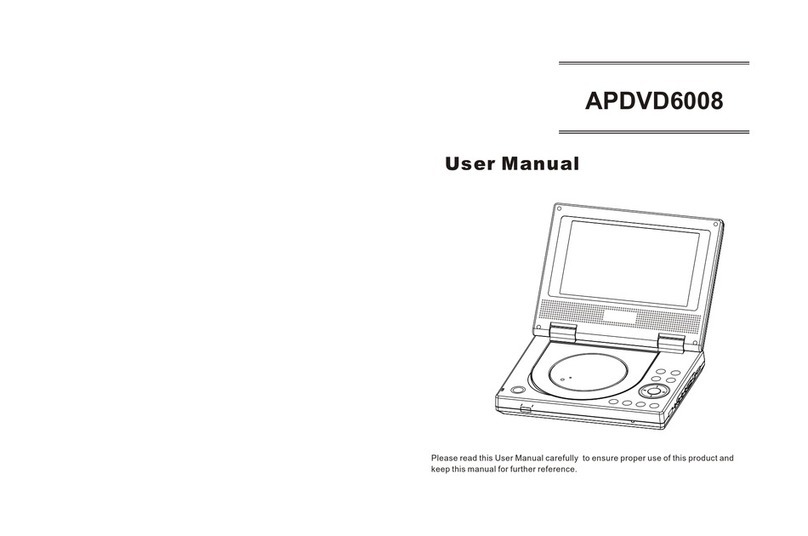
Akura APDVD6008 user manual

Akura

Akura APDVD6008 user manual

Philips PET702P Specifications

Philips

Philips PET702P Specifications

LENCO DVP-736 user manual

LENCO

LENCO DVP-736 user manual

Polaroid PDU-2729 user manual

Polaroid

Polaroid PDU-2729 user manual

Fluid 9" Dual Screen Portable DVD Player user manual

Fluid

Fluid 9" Dual Screen Portable DVD Player user manual

Polaroid PDV-088PT Operation manual

Polaroid

Polaroid PDV-088PT Operation manual

Bush T-1001B instruction manual

Bush

Bush T-1001B instruction manual

Logik L7DUALM11 instruction manual

Logik

Logik L7DUALM11 instruction manual

Philips PET742/12 quick start guide

Philips

Philips PET742/12 quick start guide

Samsung DVD-L200W manual

Samsung

Samsung DVD-L200W manual

Panasonic PalmTheater DVD-LS50 operating instructions

Panasonic

Panasonic PalmTheater DVD-LS50 operating instructions

manuals.online logo
manuals.online logoBrands
  • About & Mission
  • Contact us
  • Privacy Policy
  • Terms and Conditions

Copyright 2025 Manuals.Online. All Rights Reserved.