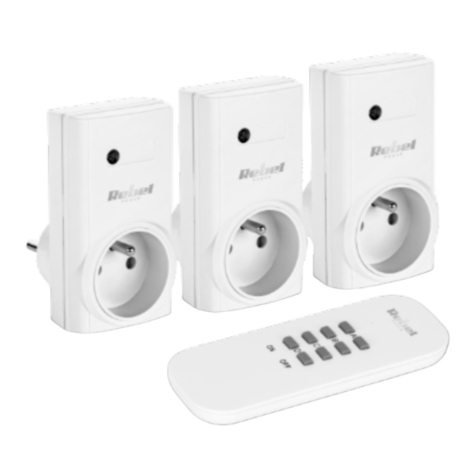
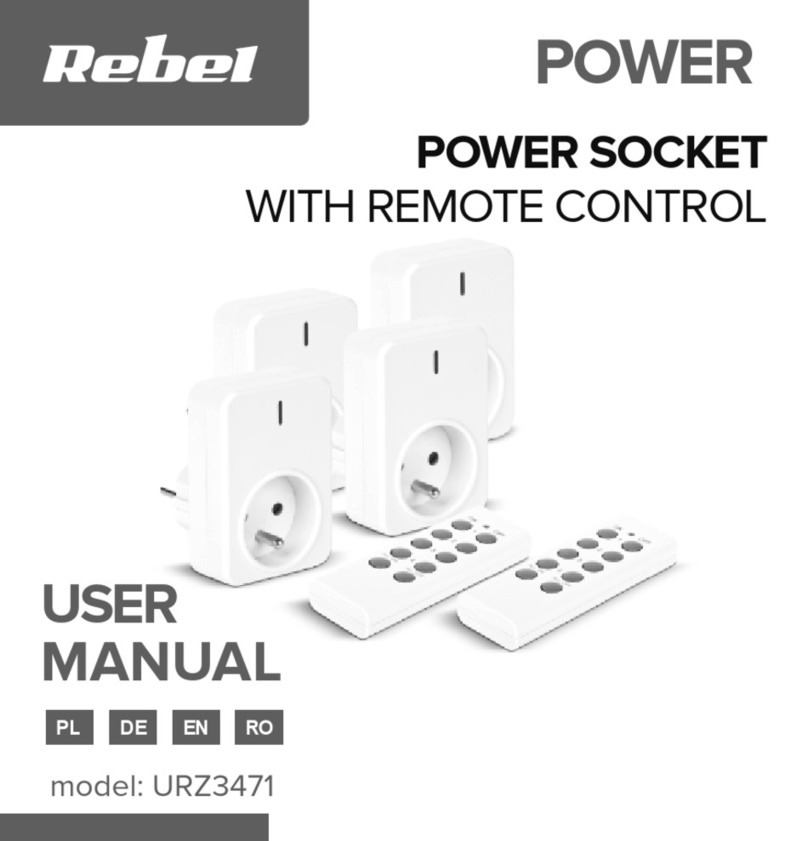
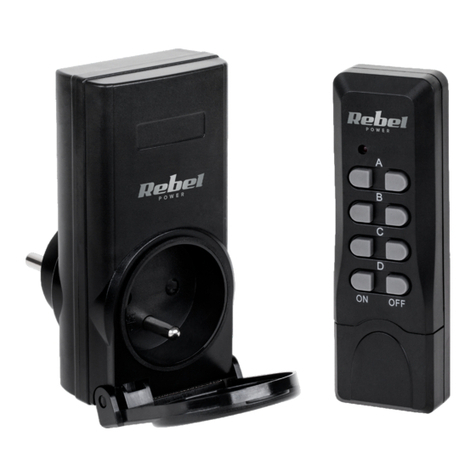
Rebel URZ3469 User manual

POWER
POWER SOCKET
WITH REMOTE CONTROL
USER
MANUALPL
ENDEPL RO
model: URZ3469

2
PL

3PL
KWESTIE BEZPIECZEŃSTWA
Przed użyc em należy dokładn e zapoznać s ę z treśc ą nstrukcj obsług
oraz zachować ją w celu późn ejszego wykorzystan a.
• Produkt należy chron ć przed w lgoc ą. N e należy używać an
przechowywać urządzen a w zbyt wysok ch temperaturach
wysok ej w lgotnośc . Produkt należy chron ć przed bezpośredn m
nasłoneczn en em oraz źródłam c epła.
• Urządzen e jest przeznaczone tylko do użytku wewnętrznego.
• Urządzen e należy przechowywać w m ejscu n edostępnym dla dz ec .
• Jeśl urządzen e n e jest używane przez dłuższy czas, należy
odłączyć je od źródła zas lan a.
• N e należy używać n eoryg nalnych akcesor ów.
• Zabran a s ę własnoręcznej naprawy sprzętu. W wypadku
uszkodzen a, należy skontaktować s ę z autoryzowanym punktem
serw sowym w celu sprawdzen a/naprawy.
• Należy ZAWSZE odłączyć urządzen e od źródła zas lan a przed
czyszczen em.
• Obudowę urządzen a należy czyśc ć za pomocą m ękk ej, suchej
śc ereczk . N e należy używać środków chem cznych lub
detergentów do czyszczen a tego urządzen a.
• Zakres dz ałan a urządzen a może ulec zmn ejszen u, jeśl w pobl żu
znajdują s ę nne urządzen a elektron czne.
• Do gn azdka n e należy podłączać urządzeń o prądz e wyższym n ż
10 A (około 2300 W).
• Do poprawnego dz ałan a należy zapewn ć odpow edn przepływ
pow etrza.
• Przed użyc em należy sprawdz ć poprawność nstalacj bater w p loc e.
• Jeżel bater a została rozładowana, należy wym en ć ją na nową.
4
PL
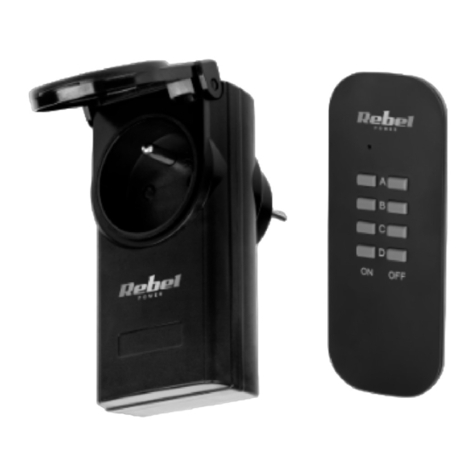
OPIS PRODUKTU
1. Gn azdko
2. Przyc sk programowan a/włączan a/wyłączan a.
3. Wskaźn k zas lan a
4. Wskaźn k aktywnośc
5. Przyc sk włączan a wyłączan a zas lan a
OBSŁUGA
1. Po podłączen u do zas lan a, gn azdka są sparowane z p lotem.
2. Aby włączyć zas lan e w gn azdku należy nac snąć przyc sk ON przy
numerze odpow adającym gn azdku.
3. Aby wyłączyć zas lan e w gn azdku należy nac snąć przyc sk OFF
przy numerze odpow adającym gn azdku.
4. Jeżel gn azdko n e jest sparowane z p lotem, do włączan a
wyłączan a należy użyć przyc sku na gn azdku.
1
2
3
4
5

5PL
USUWANIE PAROWANIA GNIAZDKA
1. Jeżel do gn azdka jest podłączone urządzen e, należy je odłączyć.
2. Odłączyć gn azdko od zas lan a.
3. Trzymając nac śn ęty przyc sk programowan a, podłączyć gn azdko
do zas lan a.
4. Po około 5 sekundach wskaźn k zas lan a zaczn e m gać, sygnal zując
pomyślne usun ęc e parowan a (przyc sk parowan a można zwoln ć).
PAROWANIE GNIAZDKA Z PILOTEM
1. Aby sparować gn azdko z p lotem należy najp erw usunąć
dotychczasowe sparowan e (jak w punkc e powyżej).
2. Należy nac snąć przytrzymać przyc sk na gn azdku, aż wskaźn k
zas lan a zaczn e m gać. Zwoln ć przyc sk parowan a.
3. Podczas m gan a wskaźn ka zas lan a, na p loc e należy nac snąć
przyc sk ON lub OFF, przy wybranym numerze.
4. Wskaźn k zas lan a przestan e m gać, po udanym parowan u.
Uwaga: do jednego numeru na p loc e można przyp sać maksymaln e trzy
gn azdka.
ROZWIĄZYWANIE PROBLEMÓW
Jeżel gn azdko n e reaguje na polecen a p lota należy wykonać następujące
czynnośc :
1. Należy wykonać czynnośc op sane w akap tach „Usuwan e parowan a
gn azdka” „ Parowan e gn azdka z p lotem”.
2. Wym en ć bater e w p loc e.
3. Upewn ć s ę, że gn azdka są podłączone praw dłowo do zas lan a.

6
PL
4. Upewn ć s ę, że gn azdka znajdują s ę w m ejscu o praw dłowej
cyrkulacj pow etrza, tak aby n e doszło do przegrzan a.
SPECYFIKACJA
• Możl wość podłączen a trzech gn azdek do jednego kanału
• Gn azdka z uz em en em
• 3 kanały kontrol gn azdek
• Wskaźn k zas lan a gn azdka
• Wskaźn k aktywnośc p lota
• Zas lan e: 230 V; 50 Hz
• Maksymalne obc ążen e prądu: 10 A
• Moc maksymalna: 2300 W
• Częstotl wość p lota: 433,92 MHz
• Zas ęg p lota: do 30 metrów
• Bater a p lota: 23A, 12 V
• Wym ary gn azdka: 56 x 82 x 70 mm
• Wym ary p lota: 38 x 82 x 16 mm
• Waga gn azdka: 103,2 g
• Waga p lota (z bater ą): 35,1 g
WIĘCEJ
W ęcej nformacj na temat tego urządzen a dostępne są na stron e:
www.rebelelectro.com.
Przed użyc em należy dokładn e zapoznać s ę z treśc ą nstrukcj obsług .
Odw edź stronę www.rebelelectro.com, aby poznać w ęcej produktów
akcesor ów.

7PL
Polan
Prawi łowe usuwanie pro uktu
(zużyty sprzęt elektryczny i elektroniczny)
Oznaczen e um eszczone na produkc e lub w odnoszących s ę do n ego
tekstach wskazuje, że po upływ e okresu użytkowan a n e należy usuwać
z nnym odpadam pochodzącym z gospodarstw domowych. Aby
un knąć szkodl wego wpływu na środow sko naturalne zdrow e ludz
wskutek n ekontrolowanego usuwan a odpadów, pros my o oddz elen e
produktu od nnego typu odpadów oraz odpow edz alny recykl ng w celu
promowan a ponownego użyc a zasobów mater alnych jako stałej
praktyk .Wcelu uzyskan a nformacj na temat m ejsca sposobu
bezp ecznego dla środow ska recykl ngu tego produktu użytkown cy w
gospodarstwach domowych pow nn skontaktować s ę z punktem
sprzedaży detal cznej,w którym dokonal zakupu produktu, lub z organem
władz lokalnych. Użytkown cy w firmach pow nn skontaktować s ę ze
swo m dostawcą sprawdz ć warunk umowy zakupu. Produktu n e należy
usuwać razem z nnym odpadam komercyjnym .
Wyprodukowano w CHRL dla LECHPOL ELECTRONICS Sp. z o.o. Sp.k.,
ul. Garwol ńska 1, 08-400 M ętne.
Lechpol Electron cs Sp. z o.o. Sp.k. n n ejszym ośw adcza, że Gn azdo
s ec owe sterowane p lotem URZ3469 jest zgodne z dyrektywą
2014/53/UE. Pełny tekst deklaracj zgodnośc UE jest dostępny pod
następującym adresem nternetowym: www.lechpol.eu.

8
DE
SICHERHEITSANLEITUNGEN
Vor dem ersten Gebrauch des Produktes lesen S e b tte d ese
Bed enungsanle tung sorgfält g und bewahren d ese auf für späteres
Nachschlagen.
1. Schützen S e d eses Produkt vor Feucht gke t. Verme den S e d e
Verwendung / Auewahrung n extremen Temperaturen und hoher
Feucht gke t. Setzen S e es n cht d rektem Sonnenl cht und
Wärmequellen aus.
2. Das Gerät st nur zur Benutzung m Innenbere ch gee gnet
3. Halten S e das Gerät außerhalb der Re chwe te von K ndern.
4. Be längerer N chtbenutzung, trennen S e das Gerät vom Stromnetz.
5. Benutzen S e nur autor s ertes Zubehör.
6. Versuchen S e n cht, das Gerät selbst zu repar eren. Im Schadensfall,
wenden S e s ch an e nen autor s erten Kundend enst für
Überprüfung / Reparatur.
7. Immer vor der Re n gung Gerät ausschalten und vom Stromnetz trennen.
8. Re n gen S e das Gerät m t e nem we chen le cht befeuchteten Tuch.
Benutzen S e ke ne Scheuerm ttel oder andere Chem kal en um das
Gerät zu re n gen.
9. D e Re chwe te des Gerätes kann verr ngert werden, wenn es n der
Nähe anderer elektron scher Geräte aufgestellt w rd.
10.Schl eßen S e n cht an d e Steckdose Geräte m t e ner Stromstärke
höher als 10 A (etwa 2300 W) an.
11. Dam t das Gerät r cht g funkt on ert, muss es ausre chend belüftet
werden.

9DE
PRODUKTBESCHREIBUNG
1. Steckdose
2. Taste Programm eren/EIN [ON]/AUS [OFF]
3. Betr ebsanze ge
4. Akt v tätsanze ge
5. EIN/AUS Tasten
BETRIEB
1. Nachdem S e d e Steckdosen n d e Netzsteckdose gesteckt haben,
s nd d e Steckdosen bere ts m t der Fernbed enung gekoppelt.
2. Um d e Steckdose e nzuschalten, drücken S e d e Taste EIN neben
der entsprechenden Nummer auf der Fernbed enung.
3. Um d e Steckdose auszuschalten, drücken S e d e Taste AUS neben
der entsprechenden Nummer auf der Fernbed enung.
4. Wenn d e Steckdose n cht m t der Fernbed enung gekoppelt st, drücken
S e d e Taste EIN/AUS an der Steckdose, um d e Stromversorgung e n-
und auszuschalten.
1
2
3
4
5

10
DE
LÖSCHEN DER STECKDOSENKOPPLUNG
1. Wenn e n anderes Gerät an d e Steckdose angeschlossen st, trennen
S e d eses.
2. Trennen S e d e Steckdose vom Stromnetz.
3. Während S e d e Taste Programm eren gedrückt halten, verb nden
S e d e Steckdose m t dem Stromnetz.
4. Nach etwa 5 Sekunden beg nnt d e Betr ebsanze ge zu bl nken.
Kopplung wurde erfolgre ch gelöscht (Taste Programm eren kann
losgelassen werden).
KOPPELN DER STECKDOSE MIT DER
FERNBEDIENUNG
1. Um d e Steckdose m t der Fernbed enung zu koppeln, muss d e
vorhandene Kopplung gelöscht werden. Um d eses zu tun, befolgen
S e d e Schr tte m oberen Abschn tt.
2. Taste Programm eren auf der Steckdose gedrückt halten b ss d e
Betr ebsanze ge zu bl nken beg nnt. Taste Programm eren loslassen.
3. Während d e Betr ebsanze ge bl nkt, drücken S e d e Taste EIN/AUS
neben der gewünschten Nummer auf der Fernbed enung.
4. Nach erfolgre cher Kopplung, hört d e Betr ebsanze ge zu bl nken auf.
H nwe s: B s zu dre Steckdosen können e ner Nummer auf der Fernbed enung
zugeordnet werden.

11 DE
FEHLERBEHEBUNG
Wenn d e Steckdose n cht auf d e Fernbed enung reag ert, befolgen S e
d e unteren Schr tte:
1. Befolgen S e d e Schr tte n den Abschn tten "Löschen der
Steckdosenkopplung" und "Koppeln der Steckdose m t der
Fernbed enung".
2. Ersetzen S e d e Batter e n der Fernbed enung.
3. Stellen S e d e s cher dass d e Steckdosen ans Stromnetz
angeschlossen s nd.
4. Stellen S e d e s cher dass s ch d e Steckdosen an e nem ausre chend
belüfteten Ort befinden um e ne Überh tzung zu verme den.
TECHNISCHE DATEN
• 3 Kanäle für Steckdosensteuerung
• Geerdete Steckdosen
• Verb ndung m t b s zu dre Steckdosen auf e nem Kanal
• Betr ebsanze ge auf der Steckdose
• Akt v tätsanze ge auf der Fernbed enung
• Spannung: 230 V; 50 Hz
• Max malstrom: 10 A
• Max malle stung: 2300 W
• Frequenz der Fernbed enung: 433,92 MHz
• Re chwe te der Fernbed enung: b s zu 30 Meter
• Batter e der Fernbed enung: 23A; 12 V
• Abmessungen der Steckdose: 56 x 82 x 70 mm
• Abmessungen der Fernbed enung: 38 x 82 x 16 mm
• Gew cht der Steckdose: 103,2 g
• Gew cht der Fernbed enung (m t Batter e): 35,1 g

12
DE
ERFAHREN SIE MEHR
Für we tere nformat onen zu d esem gerät finden s e unter:
www.rebelelectro.com.
Lesen s e d e bed enungsanle tung sorgfält g durch, bevor s e das gerät
verwenden.
Besuchen s e www.rebelelectro.com webs te für we tere produkte und
zubehör.
H erm t erklär d e F rma LECHPOL ELECTRONICS Sp. z o.o. Sp.k. dass s ch
das Gerät Steckdose m t Fernbed enung URZ3469 m E nklang m t den
Best mmungen der R chtl n e 2014/53/UE befindet.
Komplette Konform tätserklärung zum herunterladen auf www.lechpol.eu.

13 DE
Deutsch
Korrekte Entsorgung ieses Pro ukts (Elektromüll)
(Anzuwenden n den Ländern der Europä schen Un on und anderen
europä schen Ländern m t e nem separaten Sammelsystem) D e
Kennze chnung auf dem Produkt bzw. auf der dazugehör gen L teratur
g bt an, dass es nach se ner Lebensdauer n cht zusammen m t dam
normalen Haushaltsmüll entsorgt werden darf. Entsorgen S e d eses Gerät
b tte getrennt von anderen Abfällen, um der Umwelt bzw. dermensch lchen
Gesundhe t n cht durch unkontroll erte Müllbese t gung zu schaden.
Recyceln S e das Gerät, um d e nachhalt ge W ederverwertung von
sto chen Ressourcen zu fördern. Pr vate Nutzer sollten den Händler,
be dem das Produkt gekauft wurde, oder d e zuständ gen Behörden
kontakt eren, um n Erfahrung zu br ngen, w e s e das Gerät auf
umweltfreundl che We se recyceln können. Gewerbl che Nutzer sollten
s ch an Ihren L eferanten wenden und d e Bed ngungen des
Verkaufsvertrags konsult eren. D eses Produkt darf n cht zusammen m t
anderem Gewerbemüll entsorgt werden.
Hergestellt n Ch na für LECHPOL ELECTRONICS Sp. z o.o. Sp.k.,
ul. Garwolńska 1, 08-400 Mętne.

14
EN
SAFETY INSTRUCTIONS
Please read th s operat on nstruct on carefully before use, and keep t for
future reference.
1. Protect th s product from mo sture. Avo d us ng/stor ng t n extreme
temperatures and h gh hum d ty. Do not expose t to d rect sunl ght
and other sources of heat.
2. The dev ce s ntended for ndoor use only.
3. Keep the dev ce out of the reach of ch ldren.
4. D sconnect from power outlet f the dev ce s not go ng to be used
for a long t me.
5. Use only author zed accessor es.
6. Do not attempt to repa r th s dev ce yourself. In case of damage,
contact author zed serv ce po nt for check-up or repa r.
7. Always d sconnect the product from the power outlet before clean ng.
8. Clean the dev ce w th a soft, dry cloth. Do not use any chem cal
agents to clean th s dev ce.
9. Dev ces range may be decreased, f placed near other electron c dev ces.
10.Do not plug to the socket appl ances w th current h gher than 10 A
(about 2300 W).
11. To work correctly, the dev ce needs proper vent lat on.

PRODUCT DESCRIPTION
1. Socket
2. Programm ng/ON/OFF button
3. Power nd cator
4. Act v ty nd cator
5. ON/OFF buttons
OPERATION
1. After plug ng the sockets to power outlet, the sockets are already
pa red w th the remote.
2. To turn on power n the socket, press the ON button next to the
correspond ng number on the remote.
3. To turn o power n the socket, press the OFF button next to the
correspond ng number on the remote.
4. If the socket s not pa red w th the remote, press ON/OFF button on
the socket, to turn power on and o.
1
2
3
4
5
15 EN

16
EN
DELETING SOCKET PAIRING
1. If another dev ce s connected to the socket, d sconnect t.
2. D sconnect the socket from power outlet.
3. Wh le hold ng programm ng button, plug the socket to the power outlet.
4. After about 5 seconds power nd cator w ll start flash ng. Pa r ng has
been successfully deleted (programm ng button can be released).
PAIRING THE SOCKET WITH THE REMOTE
1. To pa r the socket w th the remote, exs st ng pa r ng must be deleted.
To do t, follow steps n paragraph above.
2. Press and hold programm ng button on the socket unt l power
nd cator starts flash ng. Release the pa r ng button.
3. Wh le power nd cator s flash ng, press the ON or OFF button next
to the chosen number on the remote.
4. After successful pa r ng, the power nd cator w ll stop flash ng.
Note: up to three sockets can be ass gned to one number on the remote.
TROUBLESHOOTING
If the socket s not respond ng to the remote, follow steps below:
1. Follow steps n paragraphs "Delet ng socket pa r ng" and "Pa r ng the
socket w th the remote".
2. Replace the battery n the remote.
3. Make sure that the sockets are plugged properly to the power outlet.
4. Make sure that the sockets are placed n a well-vent lated pos t on to
prevent overheat ng.

SPECIFICATION
• 3 channels for socket control
• Grounded sockets
• Connect on w th up to three sockets on one channel
• Power nd cator on the socket
• Act v ty nd cator on the remote
• Voltage: 230 V; 50 Hz
• Max mum current: 10 A
• Max mum power: 2300 W
• Remote frequency: 433,92 MHz
• Remote range: up to 30 meters
• Remote control battery: 23A, 12 V
• Socket’s d mens ons: 56 x 82 x 70 mm
• Remote’s d mens ons: 38 x 82 x 16 mm
• Socket’s we ght: 103,2 g
• Remote’s we ght (w th battery): 35,1 g
LEARN MORE
For more nformat on on th s dev ce v s t: www.rebelelectro.com.
Read owner’s manual carefully before us ng your dev ce.
V s t www.rebelelectro.com webs te for more products and accessor es.
17 EN

18
EN
18
RO
English
Correct Disposal of This Pro uct
(Waste Electrical & Electronic Equipment)
(Appl cable n the European Un on and other European countr es w th
separate collect on systems) Th s mark ng shown on the product or
ts l terature, nd cates that t should not be d sposed w th other household
wastes at the end of ts work ng l fe. To prevent poss ble harm to the
env ronment or human health from uncontrolled waste d sposal, please
separate th s from other types of wastes and recycle t respons bly
to promote the susta nable reuse of mater al resources. Household users
should contact e ther the reta ler where they purchased th s product,
or the r local government oce, for deta ls of where and how they
can take th s tem for env ronmentally safe recycl ng. Bus ness users
should contact the r suppl er and check the terms and cond t ons of
the purchase contract. Th s product should not be m xed w th other
commerc al wastes for d sposal.
Made n Chna for LECHPOL ELECTRONICS Sp. z o.o. Sp.k., ul. Garwolńska 1,
08-400 M ętne.
Lechpol Electron cs Sp. z o.o. Sp.k. hereby declares that Power socket
w th remote control URZ3469 s cons stent w th d rect ve 2014/53/UE.
Full text of the EU Declarat on of Conform ty s ava lable at follow ng
Internet address: www.lechpol.eu.

INSTRUCȚIUNI PRIVIND SIGURANȚA
Vă rugăm c t ț cu atenț e aceste nstrucț un îna nte de ut l zare ș păstraț -
le pentru consultăr ulter oare.
1. Protejaț acest produs de umezeală. Ev taț ut l zarea/depoz tarea
acestu a la temperatur extreme ș um d tate mare. Nu expuneț
produsul la lum na d rectă a soarelu ș la alte surse de căldură.
2. D spoz t vul este dest nat doar ut l zăr în nter or.
3. Ț neț d spoz t vul departe de cop .
4. Deconectaț de la sursa de al mentare dacă d spoz t vul nu va fi
ut l zat o per oadă ma lungă de t mp.
5. Ut l zaț doar accesor autor zate.
6. Nu încercaț să reparaț produsul s ngur. În caz de deter orare,
contactaț un serv ce autor zat pentru ver ficare ș reparaț e.
7. Deconectaț întotdeauna produsul de la sursa de al mentare îna nte
de curățare.
8. Curățaț d spoz t vul cu un mater al text l moale ș uscat. Nu folos ț
agenț ch m c pentru a curăța acest d spoz t v.
9. D stanța d spoz t velor poate fi redusă dacă se află în aprop ere
d spoz t ve electron ce.
10.Nu conectaț la pr ză aparate cu curent ma mare de 10 A (aprox mat v
2300 W).
11. Pentru a funcț ona corect, d spoz t vul are nevo e de o vent laț e
adecvată.
19 EN
19 RO

20
RO
DESCRIEREA PRODUSULUI
1. Pr ză
2. Programare/porn re/opr re
3. Ind cator al mentare
4. Ind cator act v tate
5. Butoane porn re/opr re
FUNCȚIONARE
1. După conectarea pr zelor la sursa de al mentare, pr zele sunt deja
asoc ate cu telecomanda.
2. Pentru a al menta pr za, apăsaț butonul ON de lângă numărul
corespunzător de pe telecomandă.
3. Pentru a opr al mentarea în pr ză, apăsaț butonul OFF de lângă
numărul corespunzător de pe telecomandă.
4. Dacă pr za nu este asoc ată cu telecomanda, apăsaț butonul
Porn re/Opr re de pe pr ză pentru a porn ș opr .
1
2
3
4
5
Table of contents
Languages:
Other Rebel Accessories manuals

Rebel
Rebel Power URZ1227-3 User manual

Rebel
Rebel URZ2007-2 User manual

Rebel
Rebel URZ3264 User manual

Rebel
Rebel POWER URZ1226-2 User manual

Rebel
Rebel URZ3149-1 User manual

Rebel
Rebel POWER URZ1227-2 User manual

Rebel
Rebel Power URZ1226-3 User manual

Rebel
Rebel URZ3471 User manual

Rebel
Rebel URZ3454 User manual
Popular Accessories manuals by other brands

AVS Electronics
AVS Electronics TS85 V LED HP GENERAL MANUAL FOR INSTALLATION

Joolz
Joolz Geo raincover instruction manual

PCB Piezotronics
PCB Piezotronics 351B03 Installation and operating manual

Siemens
Siemens 3VT9200-4PA30 operating instructions

APG
APG LPU-2127 user manual

Phoenix
Phoenix 10 Installation and operation guide