reedinstruments
www com
10
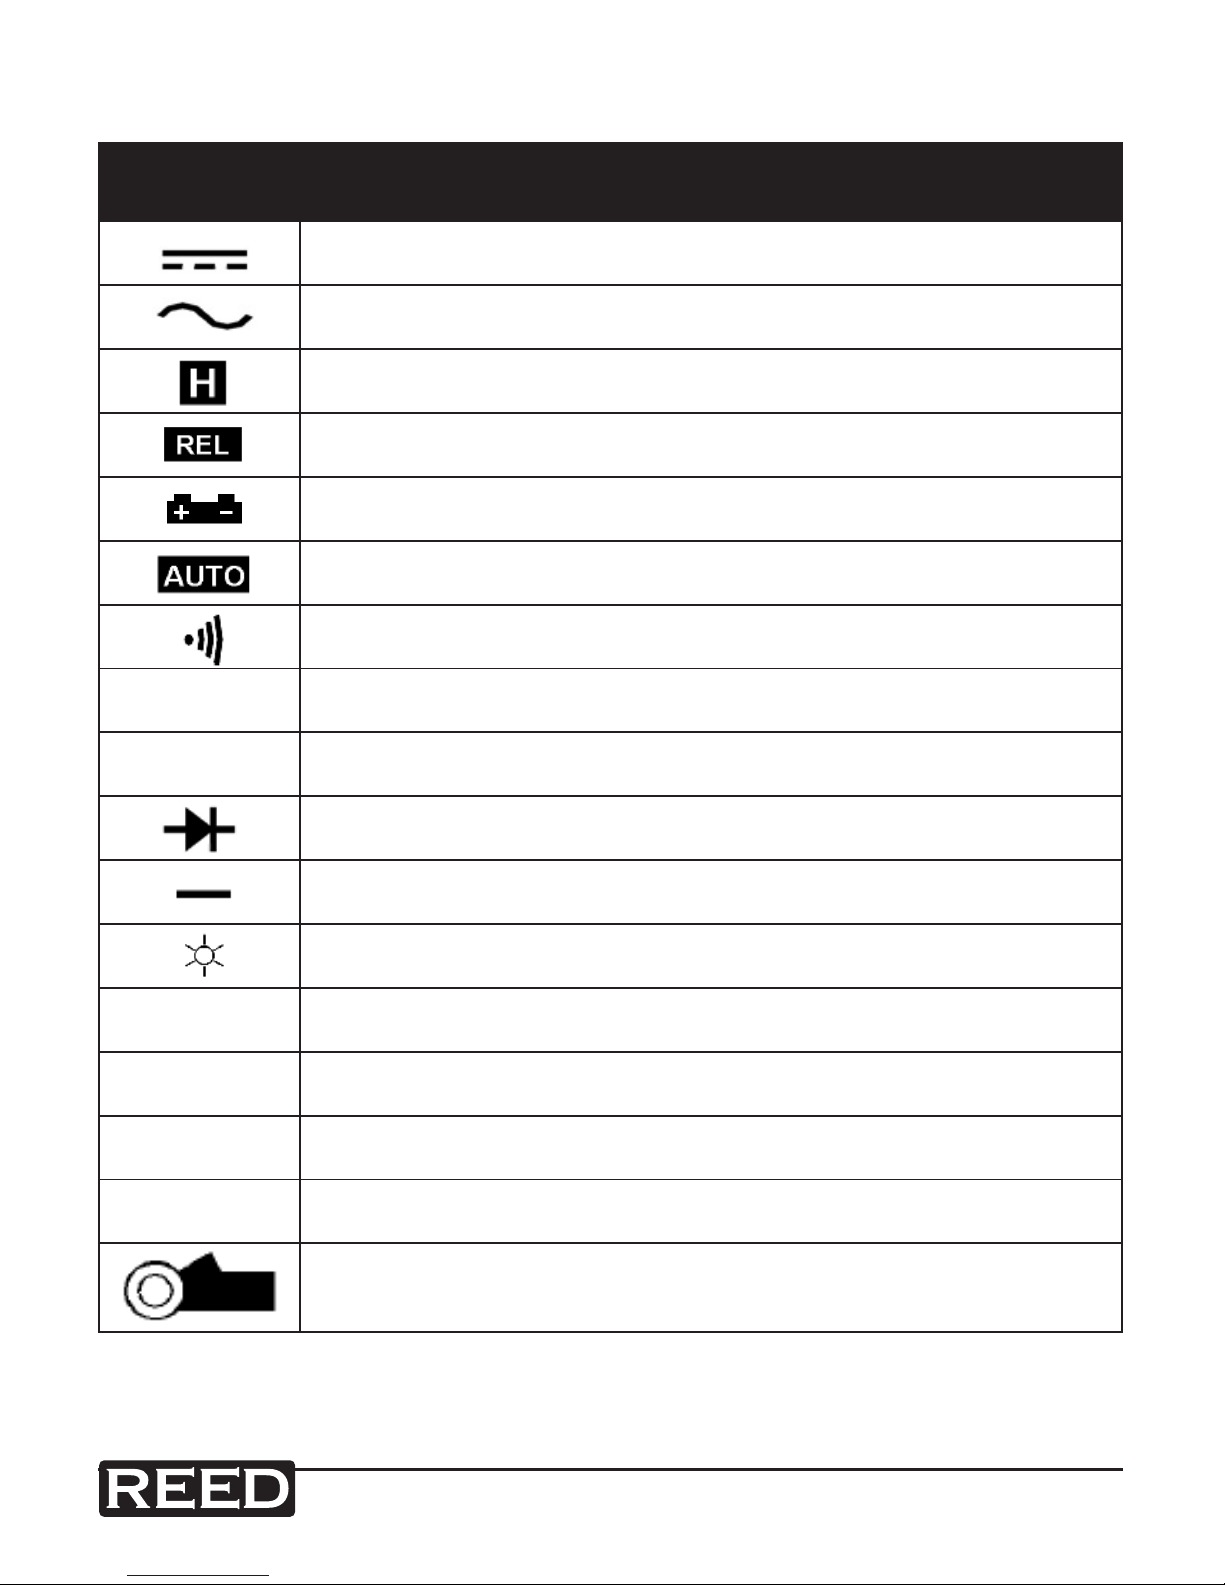
AC Current Measurement (Direct input)
Connect the Black test lead into the COM terminal. Connect the Red test
lead into the uA, mA terminal. If measuring uA (400uA, 4000uA), move the
function rotary switch to the uA position and press the function button
until the display shows .
If measuring mA (40mA, 400mA), move the function rotary switch to the
mA position and press the function button until the display shows .
Open the circuit where the current to be measured is located and
securely connect the test lead in series with the circuit
DC Current Measurement (Direct input)
All the measuring procedures are same as AC current measurement,
except press the function button until the display shows .
Note: The maximum value that can be measured for direct input current
value is AC/DC 400mA. Do not exceed the input current value more than
400mA otherwise the protection fuse will break. When taking a direct input
measurement and the meter shows a value of 0, check if the protection
fuse is broken.
Capacitance Measurement
Note: Due to the possibility of any existing stray capacitance on the
internal circuit board or in the test alligator (for the 50nF and 500nF range)
you should always do the zero adjustment procedure before making any
measurements.
Connect the Black test lead into the COM terminal. Connect the Red test
lead into the terminal. Move the function rotary switch to the
position and press the function button until the display shows nF. During
a capacitance measurement the meter will always perform under the auto
range mode.
Frequency Measurement
Connect the Black test lead into the COM terminal. Connect the Red test
lead into the Hz terminal. Move the function rotary switch to the Hz
position and press the Hz/% button until Hz is displayed on the screen.
During a frequency measurement the meter will always perform under the
auto range mode.