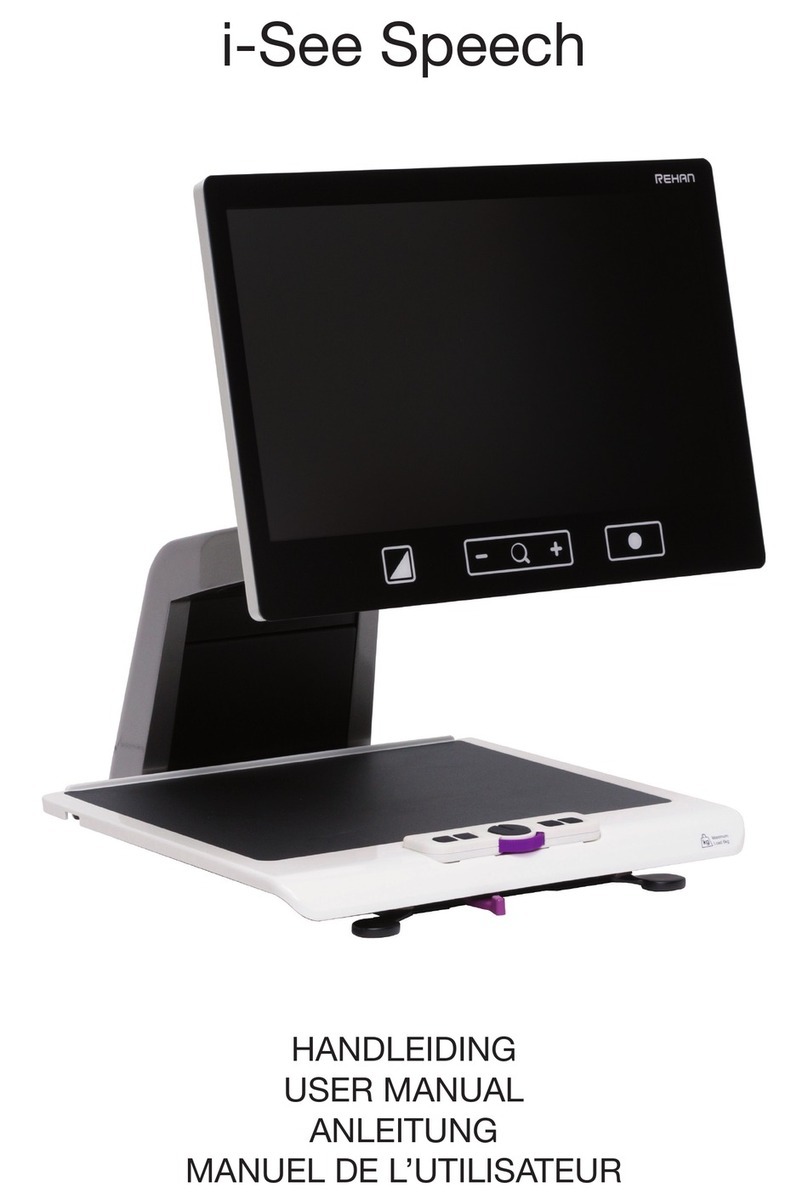
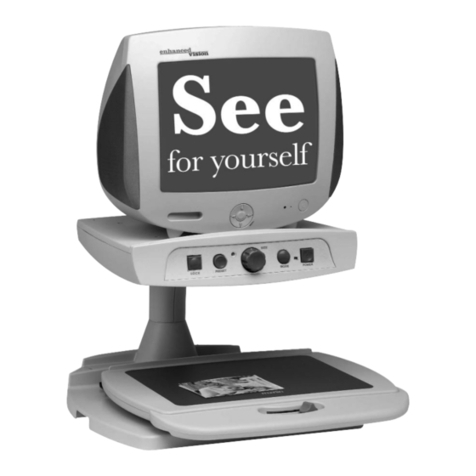
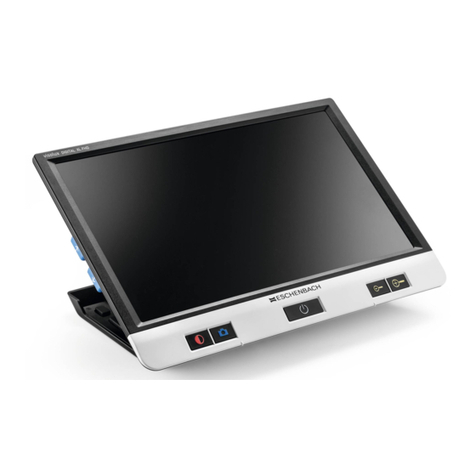
Rehan i-See HD User manual

GEBRUIKSAANWIJZING
USER MANUAL
GEBRAUCHSANLEITUNG
ISTRUZIONI D’USO
MANUAL DE INTRUCCIONES
MANUEL DE L’UTILISATEUR
i-See HD


EN
DE
IT
FR
NL
ES
Nederlands ............................... 5
English..................................... 13
Deutsch ................................... 21
Italiano .................................... 29
Français ................................... 45
Español.................................... 37
i-See HD_Manual_INT_V2.2


5
NL
Inhoudsopgave
1 Introductie ............................................................. 6
2 Inhoud verpakking .................................................... 6
3 Installatie .............................................................. 6
3.1 TFT scherm bevestigen ............................................. 6
3.2 Scherm kantelen..................................................... 7
3.3 Scherm in hoogte verstelbaar ..................................... 7
3.4 Kabels bevestigen ................................................... 8
4 Gebruik ................................................................. 8
5 Bediening............................................................... 9
5.1 Aan-/uitschakelaar .................................................. 9
5.2 Beeldweergave......................................................10
5.3 Vergroten - verkleinen.............................................10
5.4 Voorkeursvergroting................................................10
5.5 Autofocusblokkering................................................10
5.6 Helderheid...........................................................10
5.7 Leeshulp .............................................................10
5.8 Tableau...............................................................11
5.9 Remhendel...........................................................11
6 Richtlijnen ............................................................11
7 De i-See HD recyclen ................................................11
8 Technische specicaties ..............................................12

i-See HD
6
NL
1 Introductie
Gefeliciteerd met uw i-See HD; een beeldschermloep van
hoogwaardige kwaliteit die ook bijzonder gebruiksvriendelijk is.
Voordat u de i-See HD in gebruik neemt, lees deze handleiding
aandachtig door. Deze handleiding bevat namelijk instructies over
hoe het apparaat geïnstalleerd moet worden en beschrijft alle
functies waarover de i-See HD beschikt.
2 Inhoud verpakking
In de verpakking van de i-See HD treft u het volgende aan:
• i-See HD onderstel
• Monitor met bedieningspaneel
• Stroomkabel
• Handleiding
3 Installatie
Maak het apparaat nooit zelf open; hiermee vervalt de
garantie. Vermoedt u dat onderhoud of reparatie nood-
zakelijk is, neem meteen contact op met de leverancier.
De i-See HD wordt voorgemonteerd vanuit de fabriek geleverd. U
hoeft alleen het beeldscherm op het onderstel te bevestigen, de
kabels aan het beeldscherm aan te sluiten en de stroomkabel aan
te sluiten aan het onderstel.
3.1 TFT-scherm bevestigen
Bevestig het TFT-scherm door het scherm in het onderstel te hangen
en de draaiknoppen aan beide achterzijden van het scherm vast te
draaien.

7
NL
3.2 Scherm kantelen
Draai de knoppen aan beide achterzijden van het scherm los zodat
het scherm te bewegen is. Kantel het scherm in de gewenste positie
en draai de schroeven vast.
3.3 Scherm in hoogte verstelbaar
Bij de i-See HD is het mogelijk om het scherm in hoogte te verstellen.
U kunt dit doen door de hendel aan de rechter zijkant van het beeld-
scherm naar u toe te trekken en het scherm vervolgens, met uw
linkerhand onder de linker benedenhoek van het scherm geplaatst,
omhoog of omlaag te schuiven. Laat de hendel los om het scherm in
die positie te vergrendelen.

i-See HD
8
NL
3.4 Kabels bevestigen
4 Gebruik
• Vermijd direct zonlicht op het scherm en het leestableau.
• Wees voorzichtig met de bewegende onderdelen van het tableau.
• De i-See HD vraagt weinig tot geen onderhoud. Als u het ap-
paraat aan de buitenzijde wilt schoonmaken, gebruik dan al-
leen een zachte droge doek. Gebruik in geen geval agressieve
schoonmaakproducten zoals alcohol, aceton en andere chemi-
sche middelen.
• Gebruik de i-See HD niet als hulpmiddel om te lopen, zitten of op te
staan.
• Schakel het apparaat altijd uit als u er geen gebruik van maakt.
• Sluit het netsnoer aan op een geaarde wandcontactdoos.
• Zorg ervoor dat de i-See HD in een goed geventileerde ruimte staat.
• Gebruik uw beeldschermloep alleen binnen. Stel het apparaat niet
bloot aan extreme of snel veranderende temperaturen of vochtig-
heid. Plaats uw i-See HD niet naast een warmtebron of in direct
zonlicht.
• Plaats het apparaat op een stabiele ondergrond zodat het apparaat
niet kan vallen. Zorg ervoor dat de i-See HD minimaal 10 cm van
de tafelrand is geplaatst.
Monitor
Bedieningspaneel

9
NL
5 Bediening
5.1 Aan-/uitschakelaar
De aan/uit schakelaar van de i-See HD bevindt zich aan de rechter
zijkant van het apparaat.
U kunt de bedieningsknoppen van de i-See HD vinden op het witte
bedieningspaneel.
5.2 Beeldweergave
Druk op de knop om te kiezen tussen het gebruik van
de laatst gebruikte foto- of hoogcontraststanden.
Draai vervolgens aan de knop om de individuele
standen te selecteren.
U kunt een gedetailleerd overzicht van de beschik-
bare standen vinden in de technische speci caties
in deze handleiding.

i-See HD
10
NL
5.3 Vergroten / verkleinen
Draai de knop naar rechts om de weergave op het
beeld te vergroten. Draai de knop naar links om
de weergave op het beeld te verkleinen.
5.4 Voorkeursvergroting
Tijdens het lezen van teksten en het bekijken van afbeeldingen
gebruikt u een vergrotingsinstelling die voor u het prettigst werkt.
De i-See HD onthoudt automatisch deze gebruikte instelling als u
tussen foto- of hoogcontraststanden wisselt. Dit houdt in dat als u
overschakelt van een fotostand naar een hoogcontraststand en visa
versa, het apparaat automatisch de laatst gebruikte vergroting van
deze stand zal gebruiken.
5.5 Autofocusblokkering
De i-See HD zal altijd het beeld automatisch scherpstellen. In som-
mige situaties (zoals tijdens het schrijven) kan het handig zijn om
deze automatische focussering te blokkeren. Druk de vergrotings-
knop in om de autofocus te blokkeren. Draai aan de knop om de
blokkering op te he en.
5.6 Helderheid
Draai deze knop linksom of rechtsom om de hel-
derheid te verhogen of te verlagen.
5.7 Leeshulp
Door op de leeshulpknop te drukken kunt u 4 ver-
schillende leeshulpen selecteren: een horizontale
en een verticale leeslijn en een horizontaal en een
verticaal afdekkader. Door vervolgens aan de knop
te draaien stelt u uw gekozen leeshulp in.
Door de leeshulpknop 2 seconden ingedrukt te
houden zet u de laatst gekozen leeshulp direct aan of uit.

11
NL
5.8 Tableau
De i-See HD is voorzien van een soepel bewegend X Y tableau. Hier-
op legt u uw lees- of beeldmateriaal dat u op het scherm wilt ver-
groten. Het tableau kan van links naar rechts (X-richting) en van
voor naar achter (Y-richting) bewogen worden.
5.9 Remhendel
Onder het tableau van de i-See HD bevindt zich een remhendel
waarmee u de beweging van het tableau kunt beperken. De hendel
heeft 3 posities:
links = alle beweging van het tableau is geblokkeerd
midden = de beweging van boven naar beneden is geblokkeerd
rechts = het tableau is vrij beweegbaar
6 Richtlijnen
De i-See HD is getest op veiligheid en elektromagnetische interfe-
rentie en voldoet aan de EMC Directive en de Low Voltage Directive
afgegeven zoals deze is afgegeven door het Europese Parlement en
de Commissie van de Europese Unie.
Dit apparaat voldoet ook aan de eisen die gesteld zijn onder FCC 47
CFR deel 15B klasse B.
7 De i-See HD recyclen
Dit symbool van de gekruiste afvalbak geeft aan dat het
product niet weggegooid mag worden met het huisvuil.
Vraag bij uw gemeente na voor de regels omtrent het
weggooien van elektronische producten.

i-See HD
12
NL
8 Technische specicaties
Algemene Specicaties (voor 22”)
Vergroting 3× –75×
Resolutie 720p
Afmetingen 51 × 48 × 64 cm (scherm in hoogste stand)
Gewicht 15,8kg/34,8lb
Stroomtoevoer 110 – 240V @ 50/60Hz
Gebruiksomstandigheden Temperatuur +5oC –+35oC
+41oF – +95oF
Luchtvochtigheid <70% (geen condensatie)
Opslag- en transportomstandigheden Temperatuur +0oC –+50oC
+32oF –+122oF
Luchtvochtigheid <90% (geen condensatie)
Heeft u nog vragen na het lezen van deze handleiding, neem
dan contact op met uw leverancier.

13
EN
Table of contents
1 Introduction....................................................... 14
2 Package contents ................................................ 14
3 Installation ........................................................ 14
3.1 Attach the TFT screen ......................................... 14
3.2 Tilt the screen .................................................. 15
3.3 Adjust the height of the screen .............................. 15
3.4 Connecting the cables ......................................... 16
4 Use ................................................................. 16
5 Controls............................................................ 17
5.1 On/o switch.................................................... 17
5.2 Display modes ................................................... 17
5.3 Zooming in and out............................................. 18
5.4 Zoom presets.................................................... 18
5.5 Blocking the autofocus ........................................ 18
5.6 Brightness........................................................ 18
5.7 Reading aid ...................................................... 18
5.8 Tableau........................................................... 19
5.9 Brake handle .................................................... 19
6 Regulations........................................................ 20
7 Discarding the i-See HD ......................................... 20
8 Technical specications ......................................... 21

i-See HD
14
EN
1 Introduction
Congratulations with your i-See HD; a desktop video magni er of
high quality that is especially user friendly.
Read this manual thoroughly before you start to use your i-See HD.
This manual contains instructions on how the device needs to be
installed, and describes all of the functions of the i-See HD.
2 Package contents
The package of the i-See HD contains the following:
• i-See HD base
• TFT screen for with control interface
• Powercable
• Manual
3 Installation
Never open up the device yourself; this will void your
warranty. If you suspect the device is in need of service
or repairs, please contact your supplier.
The i-See HD will be delivered to you in a pre-assembled state. All
you have to do is connect the TFT monitor to the base, attach the
cables to the control interface and TFT monitor and connect the
power cable to the base.
3.1 Attach TFT screen
You can attach the TFT monitor by hanging it on the base and
tightening the bolts on both rear sides of the screen.

15
EN
3.2 Tilt the screen
Loosen the bolts at both rear sides of the screen; this loosens up the
screen so you can move it in your preferred position. Tighten the
bolts to secure the screen at that position.
3.3 Adjust the height of the screen
With the i-See HD it is possible to adjust the height of the screen.
Simply grab the lever at the right side of the TFT screen, pull it
towards you and, while holding your left hand at the lower left cor-
ner of the screen, slide the screen up or down. Release the lever to
secure the screen at that position.

i-See HD
16
EN
3.4 Connecting the cables
4 Use
• Avoid direct sunlight on the screen and tableau.
• Be careful when handling the moving parts of the reading table.
• The i-See HD requires little or no maintenance. If you want to
clean the exterior of the device, only use a dry cloth. The use
of aggressive cleaning products like alcohol, acetone or other
chemical substances is prohibited.
• Do not use the i-See HD as a support for walking, sitting down or
getting up.
• Switch o the device if you do not intend to use it.
• Ensure that the i-See HD is placed in a well ventilated room.
• Place the i-See HD on a stable surface to prevent it from falling.
• Only use your i-See HD indoors. Do not expose the i-See HD to
extreme temperature uctuations or humidity. Do not place your
i-See HD next to a heat source or in direct sunlight.
• Only use the supplied cables and connect the power cable to an
earthed socket.
• Ensure that the i-See HD is placed at a minimal distance of
10 cm / 4 inches from the edge of the table.
Monitor
Control interface

17
EN
5 Controls
5.1 On/off switch
The on/o switch of the i-See HD is located on the right hand side
of the pillar.
The control interface contains all the controls of the i-See HD.
5.2 Display modes
Push the knob to switch between
photograph modes or high contrast modes. The
last used mode will automatically be selected.
Turn the knob to select di erent display modes.
You can nd a detailed overview of the available display modes in
the technical speci cations section of this manual.

i-See HD
18
EN
5.3 Zooming in and out
Turn the knob to the right to zoom in. Turn the
knob to the left to zoom out.
5.4 Zoom presets
While reading texts and looking at images, you
require a zoom setting that suits your needs. The i-See HD contains
a function that memorizes these preferred zoom settings for you.
This means that when you switch from the photograph mode to a
text mode, the i-See HD will automatically switch to the last zoom
setting you used in the text mode. The same goes when you switch
from a text mode to the photograph mode – the device will auto-
matically switch to the last zoom setting you used while viewing
photos.
5.5 Blocking the autofocus
The i-See HD will always automatically focus on the object on the
tableau. However, in certain situations (like during writing), it can
be useful to block the autofocus.
Push the zoom knob to block the autofocus. Turn the knob in either
direction to unblock the autofocus.
5.6 Brightness
Turn the knob to the left to decrease or or to the
right to increase the brightness of the image on
your screen.
5.7 Readings aid
By pushing the knob the user can choose between
4 di erent reading aids: a horizontal and verti-
cal reading line, a horizontal and a vertical block
blank. By subsequently turning the knob you can
ne tune your chosen reading aid.
By keeping the knob pressed for 2 seconds, you can immediately
switch your chosen reading aid on or o .

19
EN
5.8 Tableau
The i-See HD contains a tableau on which you can place your read-
ing material. The tableau can move from left to right (X-direction)
and from front to back (Y-direction).
5.9 Brake handle
Underneath the tableau of the i-See HD you will nd a single brake
handle with which you can control the movability of the tableau.
The handle has 3 positions:
Left = all movement of the tableau is blocked
Middle = the movement from front to back (Y-direction) is blocked
Right = the tableau can be moved freely
6 Regulations
The i-See HD is tested for safety and electromagnetic interference
and meets the requirements of both the Low Voltage Directive and
the EMC Directive as laid out by the European Parliament and the
Council of the European Union.
The device also meets the requirements of FCC 47 CFR Part15B
Class B.
7 Discarding the i-See HD
This symbol of the crossed out wheelie bin indicates
that the product must not be disposed of with your oth-
er household waste. Check local regulations for proper
disposal of electronic products.

i-See HD
20
EN
8 Technical specications
General specications (for 22”)
Magnication 3× –75×
Resolution 720p
Dimensions 51 × 48 × 64 cm (screen in highest position)
20 × 19 × 25.2 inch
Weight 15.8kg / 34.8lb
Power supply 110 – 240V @ 50/60Hz
Conditions of use Temperature +5oC –+35oC
+41oF – +95oF
humidity <70% (no condensation)
Conditions of storage and transport Temperature +0oC –+50oC
+32oF –+122oF
Humidity <90% (no condensation)
If you have any questions of queries after reading this manual,
please contact your supplier.
Other manuals for i-See HD
1
Table of contents
Languages:
Other Rehan Magnifier manuals

Rehan
Rehan i-See HD User manual

Rehan
Rehan ACUITY BASIC User manual

Rehan
Rehan i-See User manual

Rehan
Rehan Looky 4+ HD User manual

Rehan
Rehan i-See Speech User manual

Rehan
Rehan LOOKY User manual

Rehan
Rehan Looky 6 HD User manual

Rehan
Rehan Looky + User manual

Rehan
Rehan Looky 10 User manual

Rehan
Rehan i-See Touch User manual