Rehan Looky 10 User manual

USER MANUAL
Looky 10


3
User Manual Rev. F
Table of contents
1 Precaution ..................................................................................................................... 4
2 Quick Start..................................................................................................................... 4
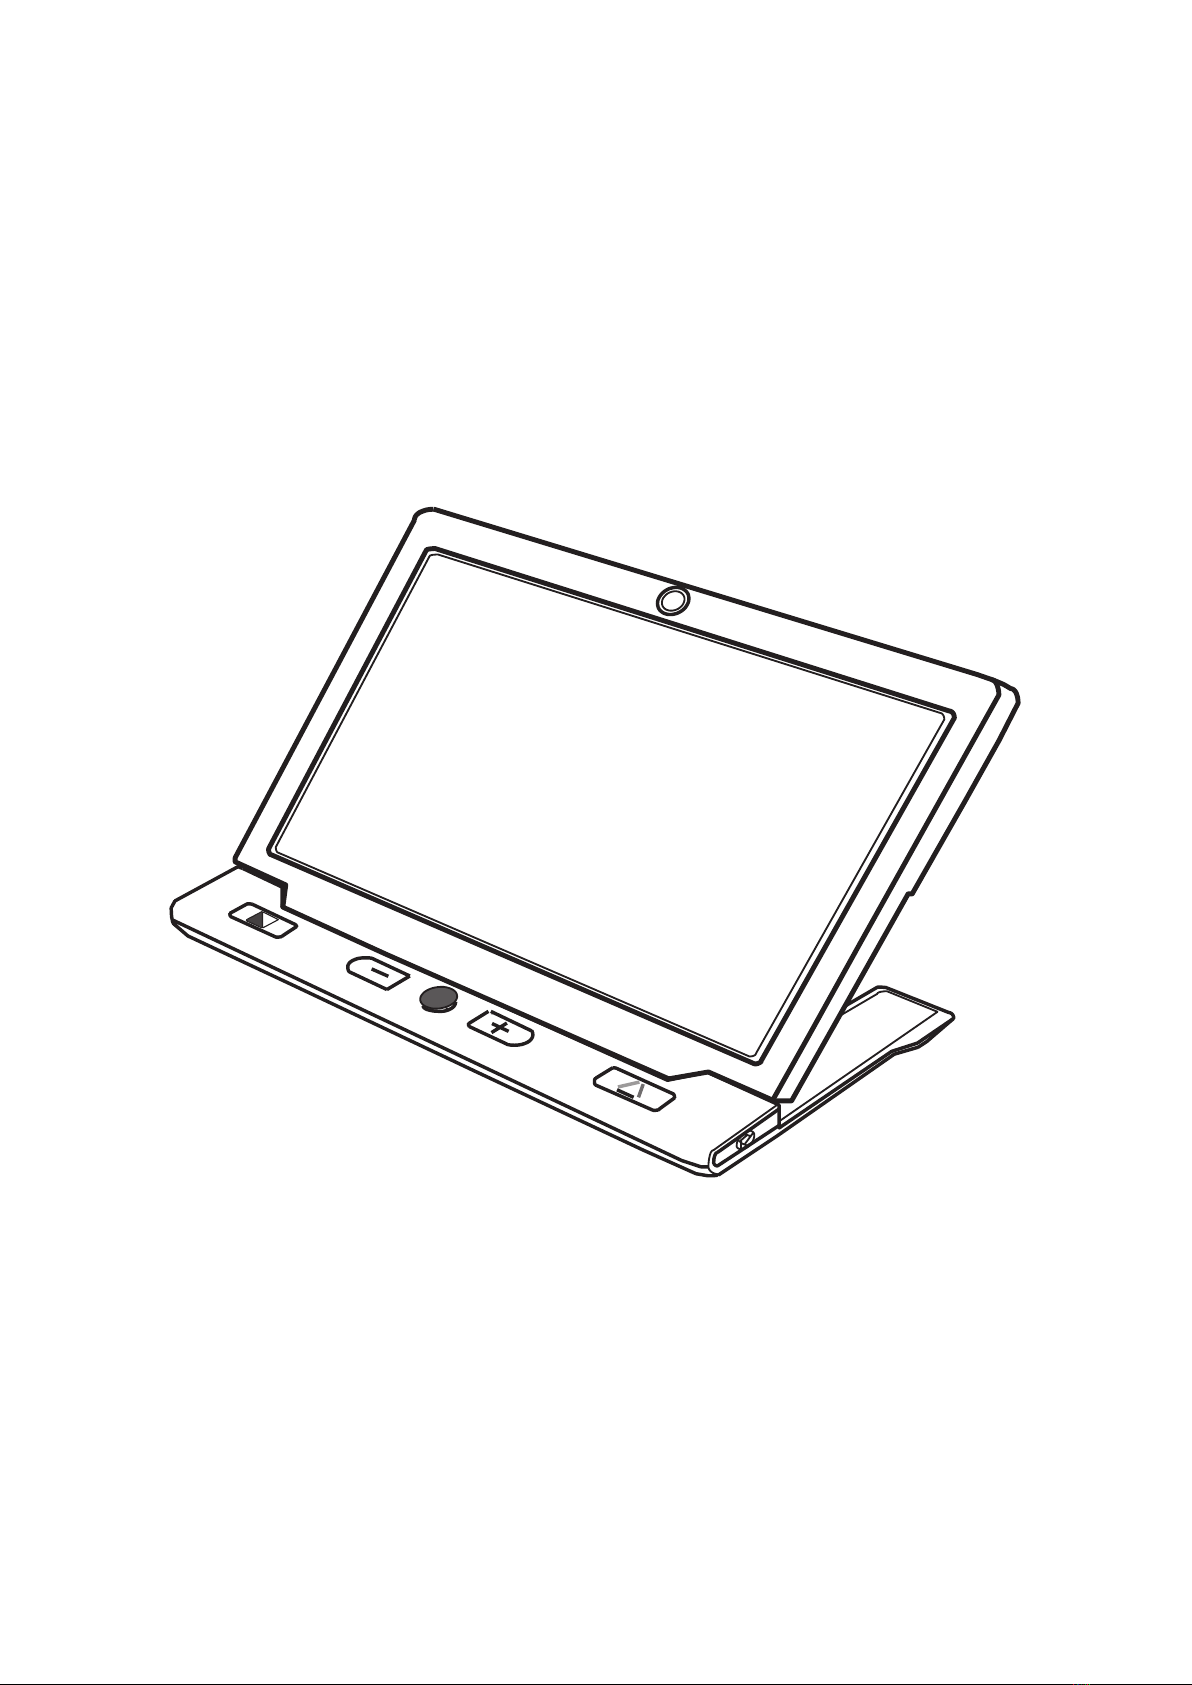
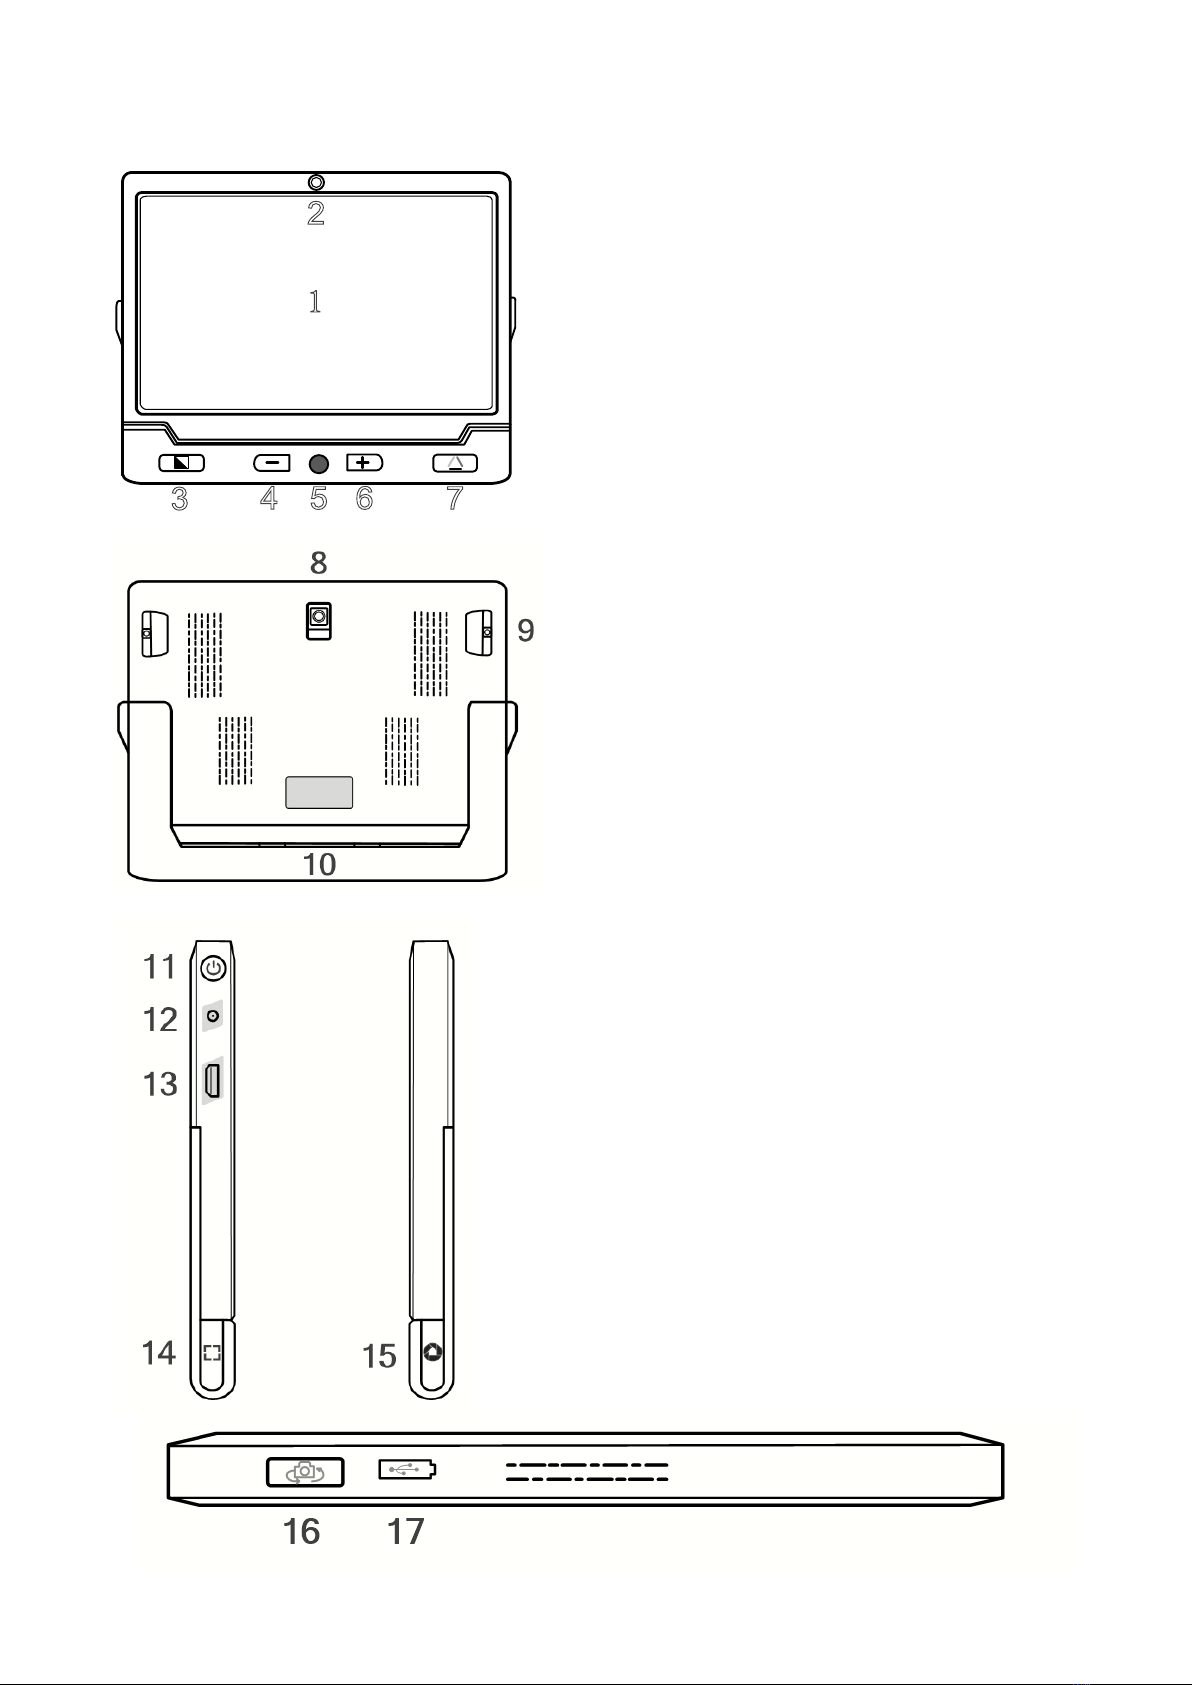
Overview ......................................................................................................................... 4
Compositions.................................................................................................................. 5
Accessories .................................................................................................................... 6
Battery Charging............................................................................................................. 6
Power LED...................................................................................................................... 6
Stand .............................................................................................................................. 7
3 Operation....................................................................................................................... 7
Power Button.................................................................................................................. 7
Beep Type....................................................................................................................... 7
Beep Control................................................................................................................... 7
Camera Switch ............................................................................................................... 8
Magnication .................................................................................................................. 8
Color Mode..................................................................................................................... 8
Brightness....................................................................................................................... 9
Lighting ........................................................................................................................... 9
Image Freeze .................................................................................................................. 9
Image Storage ................................................................................................................ 9
Image Playback .............................................................................................................. 9
Line & Mask .................................................................................................................. 10
Find............................................................................................................................... 10
Real-time Navigation .................................................................................................... 10
Memory......................................................................................................................... 10
HDMI Output................................................................................................................. 11
Auto Power Saving ....................................................................................................... 11
Restore ......................................................................................................................... 11
Hardware Reset ............................................................................................................ 11
4 Troubleshooting .......................................................................................................... 12
The unit does not turn on ............................................................................................. 12
Black screen or White screen....................................................................................... 12
The image does not change .........................................................................................12
Smudges or blemishes on the screen ..........................................................................12
5 Specifications ............................................................................................................. 13

4Looky 10
1 Precaution
Before using Looky 10 for the rst time, you must charge its battery. Refer to
Battery Charging section for more details.
Always operate the unit in a place where the temperature is between 10°and
35°C (50°and 95°F).
Keep the unit away from wet areas, rain, and other sources of liquids. Do not
submerge the unit.
Do not attempt to repair the unit. Any unauthorized attempt will void the product
warranty. Please contact your distributor.
Use the supplied power adapter and battery.
2 Quick Start
Overview
Thank you for purchasing Looky 10.
Looky 10 is a portable 10 inch video magnier with excellent Full HD image quality,
and it assures the real-time crisp image while moving or changing magnication
continuously from 2.5X to 18X. The integrated dual camera system provides three
viewing ways to fulll the daily use: Near View to read books or newspapers; Far
View to see posters or blackboards; Mirror View to dress up.
Besides the common zooming and color mode function, there are also various prac-
tical functions such as Reading Line & Mask, Image Freeze and Storage, Find and
Navigation.

5
User Manual Rev. F
Compositions
1. LCD-screen
2. Front camera
3. Enhanced Color
4. Zoom out
5. Joystick
6. Zoom in
7. True Color
8. Rear camera
9. LED lights
10. Stand
11. Power button
12. Power port
13. HDMI port
14. Locate button
15. Freeze button
16. Camera switch
17. USB port
1
34 5 6 7
2

6Looky 10
Accessories
Battery Charging
1. Connect the supplied power cable to the power adapter.
2. Connect the supplied power cable to the unit’s power port.
3. Plug the power adapter into an AC outlet and start charging.
Power LED
• Charging when the unit is off, the power LED will be green, and then auto turn off when
fully charged. A full Charge will take about 5 hours, and will support the unit working for
about 3 hours.
• Charging when the unit is on, the power LED will be green.
• When the unit is on without charging, the power LED will be green when the battery level
is high and will be red when the battery is dying. As long as the red light starts to ash,
it is a signal to charge the battery.
• You can also check the battery status by pressing the power button. Refer to the follo-
wing instructions for more details.
User manual Power adapter HDMI cable
Cleaning cloth Carrying case

7
User Manual Rev. F
Stand
With integrated fold-away writing stand at an ergonomic viewing angle, Looky 10 can satisfy
users’ desire to read more and long time in a comfortable position. Also there’s enough
space under the camera to work the pen. Unfold the stand as the following gure shows.
The rear camera is designed to auto rotate according to the status of the stand, so that
both the Near View and Far View are supported on this unit.
3 Operation
Power Button
• Press and hold the power button ( ) for 5 seconds to turn on/off the unit.
• When the unit is on, press the power button to check the current status of battery capa-
city, freeze mode, focus status, and beep.
• Press other buttons when holding the power button will make combo functions. Refer
to the following instructions for more details.
Beep Type
• Unit on/off beep
• Button beep
• Threshold beep
• Low battery beep
Beep Control
Press and hold the Power button and press the True Color button ( ) to turn on/off the
beep.

8Looky 10
Camera Switch
• Switch the Camera Switch ( ) left to open the rear camera for Near View and Far
View.
• Switch the Camera Switch right to open the front camera for Mirror View.
Magnification
• Press the Zoom In button ( ) to increase magnication.
• Hold the Zoom In button for continuous increase.
• Press the Zoom Out button ( ) decrease magnication.
• Hold the Zoom Out button for continuous decrease.
Back/Front Camera magnication range when standing on table is 2.5x – 18x.
Color Mode
A color mode is a predened color combination. Full-color mode is suitable for viewing
pictures or maps.
Enhanced-contrast mode is combined with different foreground and background colors
which can help to read more clearly.
• Press the Enhanced Color button ( ) to go through the Enhanced-color combination
list.
• Press the True Color button ( ) to return to the Full-color mode.
• Holding the Enhanced Color button for 5 seconds to switch between the Simplied
Enhanced Color Combination List and the Integrated Enhanced Color Combination List
(factory default).
The Simplified Enhanced Color Combination List
1. White on black
2. Black on white
3. Yellow on black
4. White on blue
5. Yellow on blue
The Integrated Enhanced Color Combination List
1. White on black
2. Black on white
3. Yellow on black
4. Black on yellow
5. White on blue
6. Blue on white
7. Yellow on blue
8. Blue on yellow
9. Green on black
10.Black on green
11.Violet on black
12.Black on violet
13.Blue on black
14.Black on blue
15.White on green
16.Green on white
17.White on red
18.Red on black

9
User Manual Rev. F
Brightness
Brightness of the screen can be adjusted in both Full-color mode and Enhanced-contrast
mode.
• Press and hold the Power button and press the Zoom In button to increase the bright-
ness. Factory default value will be highlighted green.
• Press and hold the Power button and press the and Zoom Out button to decrease the
brightness.
Lighting
Press and hold the Power button and press the Freeze button ( ) to turn on/off the LED
Lighting manually.
Image Freeze
Freezing an image on the LCD screen can be useful for further reading. At this status, mag-
nication as well as color change are still allowed for a better experience.
• Press Freeze button to lock the active image.
• Press Freeze button again to unlock.
For the locked image with increased magnication, you can use the Joystick to navigate
around freely.
Image Storage
Long press the Freeze button for 3 seconds to store the current image. You can save up to
18 images.
Note: When the saved images reach to the maximum value (18 images, Memory Full ICON
appears), you will need to delete some pictures first in Playback mode before the next suc-
cessful saving.
Image Playback
To enter the Playback mode, long press the True Color button for 3 seconds.
Slide the Joystick ( ) to select the target image from the Nine Grids Thumbnail Image
Gallery. Press the True Color button to view the target image. You can view and navigate the
image with the same operations described in the Image Freeze section. Press the Freeze
button to return to the Nine Grids Thumbnail.
When in Nine Grids Thumbnail, press the Locate button ( ) to select the target Image
which needs to be deleted. Press the Locate button again to conrm, or any other buttons
to cancel.
When in Nine Grids Thumbnail, hold the Locate button for 5 seconds to delete all the ima-
ges. Press the Locate button again to conrm, or any other buttons to cancel.
Long press the True Color button for 3 seconds to exit the Playback mode.

10 Looky 10
Line & Mask
Press the Locate button to switch among different Reading Line & Mask modes:
• One horizontal line
• One vertical line
• Horizontal mask
• Normal, no line & mask
Slide the Joystick to change the position of reading line or the distance between the masks.
The Real-time Navigation is unusable in Line & Mask mode.
Press the Power button will quickly exit the Line&Mask modes.
Find
Long press the Locate button for 2 seconds and hold not to release it, a location box would
appear.
Move and change the content in the location box, aiming it at the part you want to view, and
then release the Locate button , the image will return back to the previous magnication
with the refreshed content.
For example, you are viewing one part of a map with a certain magnication. Then you want
to see another part without changing your favorable magnication. Then the function would
be convenient and useful for you.
Real-time Navigation
In the state of amplication, users can slide the Joystick when in the real-time video mode
to navigate the image for seeing more without moving the unit.
Press the Zoom In and Zoom Out buttons at the same time to help you re-center the image
(Red Dot appears).
Press and hold the Power button , and slide the Joystick to quick jump to the start point
or end point for better reading experience. For example, if you have nished reading a
horizontal line and want to read from the beginning of the next line, just press and hold the
Power button and slide the Joystick left. The start point or end point will be auto recorded
and refreshed according to the maximum navigation range when reading.
Memory
The unit will memorize automatically the most recent settings such as color mode,
magnication, beep when power is off normally and apply them when the unit is on next
time.

11
User Manual Rev. F
HDMI Output
Connect the unit to your external display device with HDMI cable for a better and larger
viewing.
Auto Power Saving
If no operation and no move for over 3 minutes, the unit will turn off automatically.
Press and hold the Power button and click the Enhanced Color button to turn on/off the
Auto Power Saving function manually (factory default is on).
Restore
Long press the Freeze button and the Locate button at the same time for 5 seconds to reset
to the default factory settings. Auto power off when reset is done.
Hardware Reset
When the unit is hung or can’t be turned off normally, press the Power + Freeze button +
True Color button at the same time to trigger the hardware reset.

12 Looky 10
4 Troubleshooting
The unit does not turn on
• Connect to the power adapter
• Charge the battery
• Hardware Reset
Black screen or White screen
• If the unit is sitting on a at pure surface, the screen may be black or white. Lift the unit
off to ensure change happens.
• Adjust the magnication.
• Adjust the color mode.
• Restart the unit.
• Hardware Reset.
The image does not change
• If the unit enter the freeze mode or playback mode, the image will not change.
• Press power button to check the current status.
• Restart the unit.
• Hardware Reset.
Smudges or blemishes on the screen
• Adjust brightness.
• Clean the LCD screen and camera.
Please contact your local distributor if your problem is not solved.

13
User Manual Rev. F
5 Specifications
Display 10 inch wide LCD, HD screen
Camera Auto Focus, HD
Color modes
Photograph Full colour (or high saturation)
Simplified
“Enhanced Color
Combination List”
White on black White on blue
Black on white Yellow on blue
Yellow on black
Integrated
“Enhanced Color
Combination List”
White on black Black on green
Black on white Violet on black
Yellow on black Black on violet
Black on yellow Blue on black
White on blue Black on blue
Blue on white White on green
Yellow on blue Green on white
Blue on yellow White on red
Geen on black Red on black
Size <= 245 × 200 × 22 mm
Weight <=680 grams
Battery Integrated rechargeable Li battery
Usage time 3 hours
Charge time 5 hours
Power Adapter Input: 110-240V; Output: 5V/3A
If you have any questions after reading this manual, please contact your supplier.

REHAN ELECTRONICS
Aughrim Road
Carnew
County Wicklow
Ireland
www.rehanelectronics.ie
Table of contents
Other Rehan Magnifier manuals

Rehan
Rehan Looky4 User manual

Rehan
Rehan i-See User manual

Rehan
Rehan LOOKY User manual

Rehan
Rehan i-See HD User manual

Rehan
Rehan i-See Speech User manual

Rehan
Rehan Looky 6 HD User manual

Rehan
Rehan ACUITY BASIC User manual

Rehan
Rehan LOOKY User manual

Rehan
Rehan ACUITY BASIC User manual

Rehan
Rehan i-See Touch User manual
Popular Magnifier manuals by other brands

Federal Manufacturing & Engineering Corp.
Federal Manufacturing & Engineering Corp. 250 instructions

Humanware
Humanware Explore 3 user guide

SightCare
SightCare CLOVER 10 user guide

ENHANCED VISION
ENHANCED VISION Flipper Series manual

VisionAid
VisionAid Eye-D Quick reference guide

ENHANCED VISION
ENHANCED VISION DaVinci Pro quick start