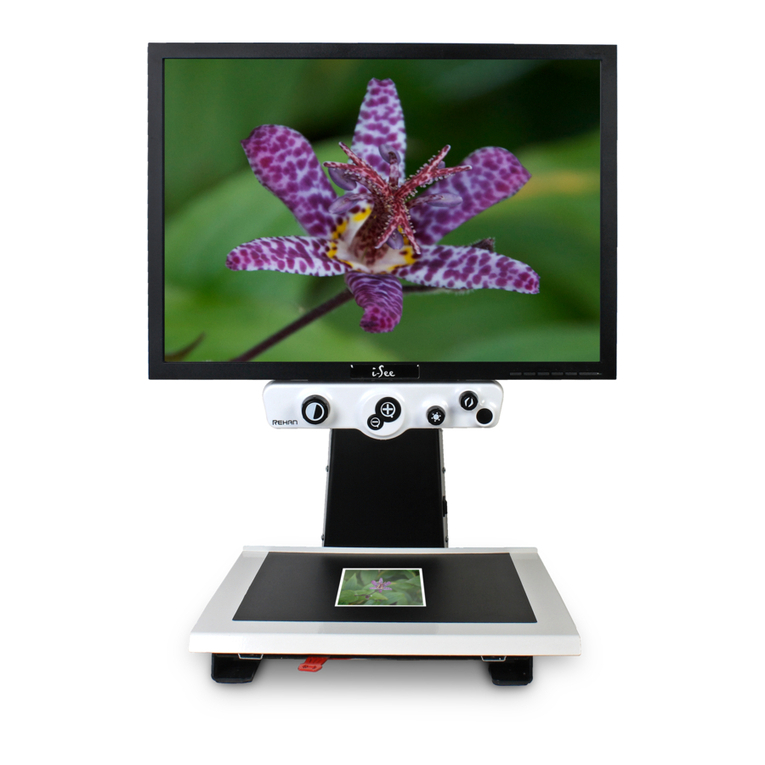
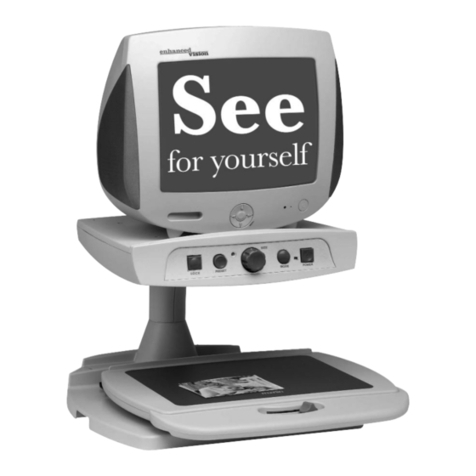
Rehan i-See HD User manual

GEBRUIKSINSTRUCTIES
INSTRUCTIONS FOR USE
GEBRAUCHSANLEITUNG
ISTRUZIONI D’USO
MANUAL DE INTRUCCIONES
MANUEL DE L’UTILISATEUR
i-See HD


NL
DE
FR
IT
EN
ES
i-SeeHD_IFU_INT_V2.4 11-2022
Nederlands ...................................................................................4
English ........................................................................................13
Français ......................................................................................31
Italiano ........................................................................................49
Español .......................................................................................40
Deutsch.......................................................................................22

4 i-See HD
NL
Inhoudsopgave
Voorwoord...................................................................................................................5
1 Inleiding.......................................................................................................................5
2 Inhoud verpakking ......................................................................................................5
3 Veiligheid .....................................................................................................................6
3.1 De i-See HD vervoeren ................................................................................................6
4 Installatie .....................................................................................................................6
4.1 TFT scherm bevestigen ...............................................................................................6
4.2 De kabels aansluiten.................................................................................................... 7
4.3 Scherm kantelen..........................................................................................................7
4.4 Scherm in hoogte verstelbaar......................................................................................7
5 Bediening ....................................................................................................................8
5.1 Aan-/uitschakelaar.......................................................................................................8
5.2 Beeldweergave ............................................................................................................8
5.3 Vergroten - verkleinen..................................................................................................8
5.4 Voorkeursvergroting.....................................................................................................8
5.5 Autofocusblokkering....................................................................................................8
5.6 Helderheid....................................................................................................................8
5.7 Contrast .......................................................................................................................8
5.8 Leeshulpen...................................................................................................................9
5.9 Tableau.........................................................................................................................9
5.10 Remhendel...................................................................................................................9
6 Storingen.....................................................................................................................9
6.1 Reiniging ....................................................................................................................10
7 Recyclen....................................................................................................................10
8 Garantiebepalingen...................................................................................................10
9 Technische specificaties...........................................................................................11
10 Informatie van uw leverancier ..................................................................................58
11 Informatie van de fabrikant ......................................................................................58
Dit document betreft de oorspronkelijke algemene gebruiksaanwijzing en
is opgesteld door en wordt uitgegeven in opdracht van Rehan Electronics Ltd.
De i-See- en i-See HD-productnamen zijn handelsmerken van Rehan Electronics Ltd.
Lees deze gebruikershandleiding aandachtig door alvorens de
i-See HD te gebruiken. Bewaar deze gebruiksaanwijzing voor
toekomstig gebruik.

5i-See HD
NL
Voorwoord
Deze gebruikershandleiding is bedoeld voor eindgebruikers ter ondersteuning van
het gebruik, installatie en onderhoud van de i-See HD. Lees voor gebruik deze
gebruikershandleiding zorgvuldig door en neem alle veiligheidsvoorschriften in acht om te
voorkomen dat er schade wordt veroorzaakt aan uw gezondheid, apparaat of milieu.
De i-See HD is ontwikkeld als ondersteunend hulpmiddel bij leesproblemen door
slechtziendheid door aandoeningen zoals Maculadegeneratie, Glaucoom, etc.
Neem gerust contact op met uw leverancier indien u nog vragen heeft na het lezen van
deze gebruikershandleiding. U vindt deze informatie op de achterzijde van dit document.
Belangrijke aanwijzingen en waarschuwingen worden aangegeven in kaders
zoals deze.
1 Inleiding
De i-See HD is een beeldschermloep met voorleesfunctie van hoge kwaliteit, met
gebruiksvriendelijke bediening die bestaat uit druk- en draaiknoppen. De i-See HD is een
tafelmodel beeldschermloep welke zowel thuis als op kantoor te gebruiken is.
Een uitgebreid overzicht van mogelijkheden en technische specicaties vindt u in
hoofdstuk 9 Technische Specificaties.
Wijzigingen mogen alleen worden uitgevoerd door de fabrikant of een door de
fabrikant goedgekeurde reparateur. Bij ongeoorloofde reparatie of aanpassing
bestaat kans op letsel en vervalt alle garantie.
2 Package contents
In de verpakking van de i-See HD treft u het volgende aan:
• i-See HD-basis
• Monitor met bedieningspaneel
• Stroomkabel
• Gebruiksinstructies

6 i-See HD
NL
3 Veiligheid
• Vermijd direct zonlicht op het scherm en het leestableau.
• Wees voorzichtig met de bewegende onderdelen van het tableau.
• De i-See HD vraagt weinig tot geen onderhoud. Als u het apparaat aan de buitenzijde
wilt schoonmaken, gebruik dan alleen een zachte droge doek. Gebruik in geen
geval agressieve schoonmaakproducten zoals alcohol, aceton en andere chemische
middelen.
• Gebruik de i-See HD niet als hulpmiddel om te lopen, zitten of op te staan.
• Schakel het apparaat altijd uit als u er geen gebruik van maakt.
• Zorg ervoor dat de i-See HD in een voldoende geventileerde ruimte staat.
• Plaats het apparaat op een stabiele, vlakke ondergrond zodat het apparaat niet kan vallen.
• Zorgervoor dat de i-See HD minimaal 10 cm van de tafelrand is geplaatst.
• Gebruik uw beeldschermloep alleen binnen. Stel het apparaat niet bloot aan extreme
of snel veranderende temperaturen of vochtigheid. Plaats uw i-See HD niet naast een
warmtebron of in direct zonlicht.
• Gebruik alleen de bijgeleverde kabels en een geaard stopcontact .
• Gebruik van dit apparaat naast of gestapeld op andere apparatuur moet worden
vermeden, omdat dit kan leiden tot onjuiste werking.
• Het gebruik van andere accessoires, transducers en kabels dan gespeciceerd
of geleverd door de fabrikant van deze apparatuur kan resulteren in verhoogde
elektromagnetische emissies of verminderde elektromagnetische immuniteit van deze
apparatuur en incorrecte werking tot gevolg hebben.
• Draagbare RF-communicatieapparatuur (met inbegrip van randapparatuur zoals
antennekabels en externe antennes) mag niet dichter dan 30 cm (12 inch) bij enig deel
van de i-See worden gebruikt, met inbegrip van de door de fabrikant gespeciceerde
kabels. Anders kunnen de prestaties van deze apparatuur worden aangetast.
3.1 De i-See HD vervoeren
Bij het vervoeren van de i-See HD wordt aangeraden om het apparaat in de originele
verpakking te vervoeren om zo de kans op beschadigingen als gevolg van transport te
minimaliseren. Houd hierbij de transport- en opslagtemperaturen in acht.
4 Installation
De i-See HD wordt voorgemonteerd vanuit de fabriek geleverd. U hoeft enkel de stekker
achter in het apparaat te steken, de andere zijde in het stopcontact te steken en het
scherm op de gewenste hoogte te schuiven.
4.1 TFT-scherm bevestigen
Bevestig het TFT-scherm door het scherm in het onderstel te hangen en de draaiknoppen
aan beide achterzijden van het scherm vast te draaien.

7i-See HD
NL
4.2 De kabels aansluiten
Sluit de stroom- en videokabel van de basis aan op de monitor. Sluit de datakabel aan op
het bedieningspaneel tot deze klikt.
Monitor
Control interface
4.3 Scherm kantelen
Draai de knoppen aan beide achterzijden van het scherm los zodat het scherm te
bewegen is. Kantel het scherm in de gewenste positie en draai de schroeven vast.
4.4 Scherm in hoogte verstelbaar
Bij de i-See HD is het mogelijk om het scherm in hoogte te verstellen. U kunt dit doen
door de hendel aan de rechter zijkant van het beeldscherm naar u toe te trekken en het
scherm vervolgens, met uw linkerhand onder de linker benedenhoek van het scherm
geplaatst, omhoog of omlaag te schuiven. Laat de hendel los om het scherm in die positie
te vergrendelen.

8 i-See HD
NL
5 Controls
5.1 Aan-/uitschakelaar
De aan/uit schakelaar van de i-See HD bevindt
zich aan de rechter zijkant van het apparaat.
U kunt de bedieningsknoppen van de i-See HD
vinden op het witte bedieningspaneel.
5.2 Beeldweergave
Druk op de knop om te kiezen tussen het gebruik van de laatst
gebruikte foto- of hoogcontraststanden. Draai vervolgens aan de knop
om de individuele standen te selecteren.
U kunt een gedetailleerd overzicht van de beschikbare standen vinden
in de technische specicaties in deze handleiding.
5.3 Vergroten / verkleinen
Draai de knop naar rechts om de weergave op het beeld te vergroten. Draai
de knop naar links om de weergave op het beeld te verkleinen.
5.4 Voorkeursvergroting
Tijdens het lezen van teksten en het bekijken van afbeeldingen gebruikt u
een vergrotingsinstelling die voor u het prettigst werkt.
De i-See HD onthoudt automatisch deze gebruikte instelling als u tussen foto- of
hoogcontraststanden wisselt. Dit houdt in dat als u overschakelt van een fotostand naar
een hoogcontraststand en visa versa, het apparaat automatisch de laatst gebruikte
vergroting van deze stand zal gebruiken.
5.5 Autofocusblokkering
De i-See HD zal altijd het beeld automatisch scherpstellen. In sommige situaties (zoals
tijdens het schrijven) kan het handig zijn om deze automatische focussering te blokkeren.
Druk de vergrotingsknop in om de autofocus te blokkeren. Draai aan de knop om de
blokkering op te heffen.
5.6 Helderheid
Draai deze knop linksom of rechtsom om de helderheid te verhogen of te
verlagen.
5.7 Contrast
In gevallen waar de kwaliteit van het papier of het omgevingslicht wegvallende plekken
veroorzaakt in de hoogcontrastmodus, kan het contrast worden aangepast.

9i-See HD
NL
Om het contrast aan te passen, drukt u 3 keer op de Helderheidsknop om de functie 10
seconden in te schakelen. Gedurende die tijd is het mogelijk om de contrastmodulatie
aan te passen door de helderheidsknop naar links of rechts te draaien om zo de
beeldkwaliteit te verbeteren. Het apparaat laat een pieptoon horen wanneer de functie is
ingeschakeld en wanneer deze automatisch weer uitschakelt.
Wanneer het apparaat uitgeschakeld en weer ingeschakeld wordt, keert het contrast
terug naar de standaardinstelling.
5.8 Leeshulp
Door op de leeshulpknop te drukken kunt u 4 verschillende leeshulpen
selecteren: een horizontale en een verticale leeslijn en een horizontaal en
een verticaal afdekkader. Door vervolgens aan de knop te draaien stelt u
uw gekozen leeshulp in. Door de leeshulpknop 2 seconden ingedrukt te
houden zet u de laatst gekozen leeshulp direct aan of uit.
5.9 Tableau
De i-See HD is voorzien van een soepel bewegend X Y tableau. Hierop legt u uw lees- of
beeldmateriaal dat u op het scherm wilt vergroten. Het tableau kan van links naar rechts
(X-richting) en van voor naar achter (Y-richting) bewogen worden.
5.10 Remhendel
Onder het tableau van de i-See HD bevindt zich een remhendel waarmee u de beweging
van het tableau kunt beperken. De hendel heeft 3 posities:
links = alle beweging van het tableau is geblokkeerd
midden = de beweging van boven naar beneden is geblokkeerd
rechts = het tableau is vrij beweegbaar
6 Storingen
De i-See HD heeft tijdens zijn verwachte levensduur geen niet veel onderhoud nodig.
Gebruik het apparaat altijd binnen de gebruiksomstandigheden zoals beschreven in de
technische informatie.
Probleem Oplossing
Geen beeld Controleer of de stroomkabel aangesloten op een ingeschakeld,
geaard stopcontact en goed in het apparaat zit.
Controleer dat de stroomkabel volledig in het apparaat zit en
goed verbinding maakt.
Controleer of de kabels naar de camera’s en de monitor goed
aangesloten zijn en goed verbinding maken.
Controleer of het apparaat is ingeschakeld.
Controleer of de ledverlichting is ingeschakeld.
Controleer of de monitor is ingeschakeld (de aan-/uitschakelaar
van de monitor zit rechtsonder op de voorkant van de monitor).
Wazig beeld Draai de vergroot-verkleinknop om de autofocus te deblokkeren.
Controleer of de cameralens vies is. Gebruik een droge, zachte
doek voor het schoonmaken van de cameralens.
Bediening werkt niet Controleer of de kabel naar het bedieningspaneel goed is
aangesloten tot deze klikt en goed verbinding maken.
Neem contact op met uw leverancier wanneer er problemen voordoen en aanhouden. U
vindt informatie van uw leverancier en de fabrikant op de achterzijde van dit document.
10 i-See HD
NL
6.1 Reiniging
Koppel om veiligheidsredenen altijd de stroomadapter los van de netvoeding voordat u de
i-See HD reinigt.
Volg de onderstaande instructies om te voorkomen dat de buitenkant van het product
verslechtert of verkleurt:
• Veeg af met een zachte, droge doek.
• Gebruik geen oplosmiddelen of andere chemicaliën. Veeg niet af met een chemisch
behandelde reinigingsdoek.
• Gebruik een zachte, droge doek om alle andere accessoires schoon te maken.
7 Recycling
Dit apparaat mag niet samen met huishoudelijk afval worden weggegooid.
Houd dit apparaat en de verpakking gescheiden van andere soorten afval.
Neem contact op met uw leverancier of lever het in bij een inzamelpunt voor
hergebruik van elektrische en elektronische apparatuur. Hiermee voorkomt u
mogelijke schade aan het milieu en de menselijke gezondheid als gevolg van
het ongecontroleerd afvoeren van afval.
8 Garantiebepalingen
Dit apparaat valt onder de garantievoorwaarden zoals deze zijn opgesteld door uw
leverancier. Voor alle vragen met betrekking tot de garantie van uw apparaat, neem
contact op met uw leverancier.
Meld onverwachte werking en incidenten altijd bij uw leverancier of de fabrikant. Noteer
het serienummer van het apparaat wanneer u contact opneemt met de fabrikant.
Adres fabrikant
productiedatum
Catalogus-
referentienummer
Serienummer
UDI-nummer
In-uitgangswaarden
stroomadapter
Voldoet aan FCC
onderdeel 15 Klasse B
Medisch hulpmiddel
doel en naam
Lees de gebruikers-
handleiding voor
gebruik
Voldoet aan de
CE-normen
IP-waarde
Geaard stopcontact
Gebruikstemperaturen
binnenshuis
WEEE-recycling

11i-See HD
NL
9 Technical specifications
Resolutie 1920 x 1080
Beeldverversing 50 Hz of 60 Hz
Schermgrootte 54,6 cm
22 inch
Beeldweergaven
Deze standen
kunnen worden
uitgeschakeld in het
geavanceerde menu
Foto Volledige kleur (of hoge saturatie)
Grijstinten
Hoogcontrast
Zwart - wit Zwart - geel
Wit - zwart Geel - blauw
Groen - zwart Blauw - geel
Zwart - groen Rood - zwart
Geel - zwart Zwart - rood
Vergroting
(met 22”-scherm)
Minimum ≈ 3×
Maximum ≈ 75×
Leeshulp
Horizontale Leeslijn Beschikbaar in alle modellen
Verticale Leeslijn Beschikbaar in alle modellen
Horizontaal Afdekkader Beschikbaar in alle modellen
Verticaal Afdekkader Beschikbaar in alle modellen
Stroomtoevoer
100-240VAC, 50/60Hz,
Maximaal 1,0A
Geaard stopcontact
Stroomverbruik Max: 25W
Afmetingen 22” (scherm in de
hoogste positie)
51 × 48 × 64 cm
20 × 19 × 25,2 inch
Gewicht 15.8 kg / 34.8lb
IP-classificatie IP20; Vaste vreemde objecten >= 12,5 mm.
Niet beschermd tegen binnendringend water.
Gebruiks-
omstandigheden
Temperatuur 5 tot 35 ˚C
41 tot 95 ˚F
Luchtvochtigheid 10 tot 85%, geen condensatie
Opslag- en
transport-
omstandigheden
Temperatuur -20 tot +60 ˚C
-4 tot +140 ˚F
Luchtvochtigheid 0 tot 90%, geen condensatie
Mocht u nog vragen hebben na het lezen van deze gebruikershandleiding, neem contact
op met uw leverancier.

12 i-See HD
NL
Richtlijnen
Producten met CE-markering voldoen aan het EMC Directive 2014/30/EC
en het Low Voltage Directive 2014/35/EU uitgegeven door de Commissie
van de Europese Gemeenschap.
Nakoming van deze richtlijnen impliceert conformiteit aan de volgende richtlijnen:
• Veiligheid: EN62368-1
• EMC: EN55032; EN55024
• Het apparaat voldoet ook aan FCC onderdeel 15 Class B.
EMI
De i-See HD voldoet aan de geharmoniseerde normen voor medische apparaten om
de basisveiligheid tijdens de verwachte levensduur te handhaven. En biedt redelijke
bescherming tegen schadelijke interferentie in een huishoudelijke installatie.
Er is echter geen garantie dat er geen interferentie kan optreden in een bepaalde
installatie of door ESD, EFT of RF-communicatieapparatuur, waaronder antennes. Als
deze apparatuur schadelijke interferentie veroorzaakt aan radio- of televisieontvangst,
wat kan worden vastgesteld door de apparatuur aan en uit te zetten, kan geprobeerd
worden de interferentie te corrigeren door een of meer van de volgende maatregelen:
• Heroriënteer of verplaats de ontvangstantenne.
• Vergroot de afstand tussen de apparatuur en de ontvanger. (Plaats ze niet dichterbij
elkaar dan 30cm / 12inch, kabels inbegrepen).
• Stapel het apparaat niet op andere apparatuur.
• Sluit de apparatuur aan op een stopcontact van een ander circuit dan dat waarop de
ontvanger is aangesloten.
• Raadpleeg hoofdstuk 11 Problemen oplossen en repareren.
• Raadpleeg de dealer of een ervaren radio-/televisietechnicus voor hulp.
De vloeren moeten gemaakt zijn van hout, beton of keramische tegels. Als de vloeren
bedekt zijn met synthetisch materiaal, moet de relatieve vochtigheid ten minste 30% zijn
om elektrostatische ontladingen (ESD) te voorkomen.

13i-See HD
EN
Table of contents
Foreword ................................................................................................................... 14
1 Introduction...............................................................................................................14
2 Package contents..................................................................................................... 14
3 Safety.........................................................................................................................15
3.1 Transporting the i-See HD .........................................................................................15
4 Installation.................................................................................................................15
4.1 Attach the TFT screen................................................................................................15
4.2 Connecting the cables...............................................................................................16
4.3 Tilt the screen ............................................................................................................16
4.4 Adjust the height of the screen..................................................................................16
5 Controls.....................................................................................................................17
5.1 On/off switch..............................................................................................................17
5.2 Display modes ...........................................................................................................17
5.3 Zooming in and out.................................................................................................... 17
5.4 Zoom presets............................................................................................................. 17
5.5 Blocking the autofocus..............................................................................................17
5.6 Brightness..................................................................................................................17
5.7 Contrast .....................................................................................................................18
5.8 Reading aid................................................................................................................18
5.9 Tableau.......................................................................................................................18
5.10 Brake handle..............................................................................................................18
6 Troubleshooting ........................................................................................................18
6.1 Cleaning.....................................................................................................................19
7 Recycling...................................................................................................................19
8 Warranty .................................................................................................................... 19
9 Technical specifications ...........................................................................................20
10 Supplier information .................................................................................................58
11 Manufacturer information.........................................................................................58
This document concerns the original general user manual,
has been prepared by and is commissioned by Rehan Electronics Ltd.
The i-See and i-See HD product names are trademarks of Rehan Electronics Ltd.
Read this manual carefully before using the i-See HD.
Keep the user manual for future reference.

14 i-See HD
EN
Foreword
This user manual is intended for end users as support for the use, installation and
maintenance of this device. Read this manual carefully before use and observe all safety
instructions to prevent damage to your health, the device or the environment.
The i-See HD has been developed to support reading problems of individuals who have
low vision conditions such as macular degeneration, glaucoma, etc.
If you have any questions after reading this manual, please contact your supplier. You will
nd this information at the end of this user manual.
Important instructions and warnings are placed in black-outlined areas such
as this one.
1 Introduction
The i-See HD is a desktop video magnier of high quality that is user friendly with its
physical buttons and turn knobs. It is designed as a desktop appliance that can be used
in a home or in an ofce setting.
You will nd a comprehensive overview of options and technical specications in Chapter
9 Technical specifications.
Changes to the device may only be made by the manufacturer or a technician
approved by the manufacturer. Unauthorized repairs or modifications may
result in injury and will void all warranties.
2 Package contents
Contents of the box:
• i-See HD base
• TFT screen, including control interface
• Power cable
• Instructions for use

15i-See HD
EN
3 Safety
• Avoid direct sunlight on the screen and tableau of the i-See HD.
• Be careful when handling the moving parts of the reading table of the i-See HD.
• The i-See HD requires little or no maintenance. If you want to clean the exterior of the
device, only use a dry cloth. The use of aggressive cleaning products like alcohol,
acetone or other chemical substances is prohibited.
• Do not use the i-See HD as a support for walking, sitting down or getting up.
• Switch off the i-See HD if you do not intend to use it.
• Ensure that the i-See HD is placed in a well ventilated room.
• Place the i-See HD on a stable and horizontal surface to prevent it from falling.
• Ensure that the i-See HD is placed at least 10 cm / 4 inches from the edge of the table.
• Only use the i-See HD indoors. Do not expose the i-See HD to extreme temperature
uctuations or humidity. Do not place the i-See HD next to a heat source or in direct
sunlight.
• Only use the supplied cables and connect the power cable to an earthed socket .
• Use of this equipment adjacent to or stacked with other equipment should be avoided
because it could result in improper operation.
• Use of accessories, transducers and cables other than those specied or provided by
the manufacturer of this equipment could result in increased electromagnetic emissions
or decreased electromagnetic immunity and result in improper operation.
• Portable RF communications equipment (including peripherals such as antenna cables
and external antennas) should be used no closer than 30 cm (12 inches) to any part of
the i-See HD, including cables specied by the manufacturer. Otherwise, degradation of
the performance of this equipment could result.
3.1 Transporting the i-See HD
If the device needs to be transported it is advised to transport it in its original packaging
in order to avoid any potential injury or damage to the device. Keep the transport and
storage temperature conditions in mind.
4 Installation
The i-See HD will be delivered to you in a pre-assembled state. All you have to do is
connect the TFT monitor to the base, attach the cables to the control interface and TFT
monitor and connect the power cable to the base.
4.1 Attach TFT screen
You can attach the TFT monitor by hanging it on the base and tightening the bolts on
both rear sides of the screen.

16 i-See HD
EN
4.2 Connecting the cables
Connect the power and video cables from the base to the monitor. Connect the data
cable from the base to the control interface.
Monitor
Control interface
4.3 Tilt the screen
Loosen the bolts at both rear sides of the screen; this loosens up the screen so you can
move it in your preferred position. Tighten the bolts to secure the screen at that position.
4.4 Adjust the height of the screen
With the i-See HD it is possible to adjust the height of the screen. Simply grab the lever
at the right side of the TFT screen, pull it towards you and, while holding your left hand
at the lower left corner of the screen, slide the screen up or down. Release the lever to
secure the screen at that position.

17i-See HD
EN
5 Controls
5.1 On/off switch
The on/off switch of the i-See HD is located on
the right hand side of the pillar.
The control interface contains all the controls of
the i-See HD.
5.2 Display modes
Push the knob to switch between photograph modes or high contrast
modes. The last used mode will automatically be selected. Turn the
knob to select different display modes.
You can nd a detailed overview of the available display modes in the
technical specications section of this manual.
5.3 Zooming in and out
Turn the knob to the right to zoom in and to the left to zoom out.
5.4 Zoom presets
While reading texts and looking at images, you require a zoom setting
that suits your needs. The i-See HD contains a function that memorizes
these preferred zoom settings for you.
This means that when you switch from the photograph mode to a text mode, the i-See
HD will automatically switch to the last zoom setting you used in the text mode. The
same goes when you switch from a text mode to the photograph mode – the device will
automatically switch to the last zoom setting you used while viewing photos.
5.5 Blocking the autofocus
The i-See HD will always automatically focus on the object on the tableau. However, in
certain situations (like during writing), it can be useful to block the autofocus.
Push the zoom knob to block the autofocus. Turn the knob in either direction to unblock
the autofocus.
5.6 Brightness
Turn the knob to the left to decrease or to the right to increase the
brightness of the image on your screen.

18 i-See HD
EN
5.7 Contrast
In cases where the quality of the paper or ambient lighting condition causes blank spots
in high contrast mode, the contrast can be adjusted.
To enable contrast adjustment, press on the Brightness button 3 times to enable the
function for 10 seconds. During that time it is possible to adjust the contrast modulation
by rotating the brightness knob left or right and improve the image quality. The device will
beep once when the function is enabled and when it is automatically disabled.
After powering off the device, the contrast adjustment will revert to its default setting.
5.8 Readings aid
By pushing the knob the user can choose between 4 different reading aids: a
horizontal and vertical reading line, a horizontal and a vertical block blank. By
subsequently turning the knob you can ne tune your chosen reading aid.
By keeping the knob pressed for 2 seconds, you can immediately switch
your chosen reading aid on or off.
5.9 Tableau
The i-See HD contains a tableau on which you can place your reading material. The
tableau can move from left to right (X-direction) and from front to back (Y-direction).
5.10 Brake handle
Underneath the tableau of the i-See HD you will nd a single brake handle with which you
can control the movability of the tableau. The handle has 3 positions:
Left = all movement of the tableau is blocked
Middle = the movement from front to back (Y-direction) is blocked
Right = the tableau can be moved freely
6 Troubleshooting
The i-See HD does not require a high level of maintenance during its expected lifetime.
Use the device always within the operating conditions as specied in the technical
information.
Problem Solutions
No picture on screen Check that the power cable is plugged into mains and that wall
socket is switched on.
Check chat power cable is pushed home and making an good
connection.
Check that cable from camera is pushed home and making a
good connection.
Check that the device’s on/off switch is set to ON.
Check that device LED is lighting.
Check that TFT is powered on (the TFT on/off switch is located
in the bottom right corner of the TFT).
Blurry picture Turn zoom knob in either direction to unblock autofocus.
Check camera lens is clean. Use dry, soft cloth to clean the lens.
Interface controls not
working
Check that cable connecting controller is pushed until it clicks
and making a good connection.
If problems persist, then contact your supplier for assistance.

19i-See HD
EN
6.1 Cleaning
For safety reasons, always disconnect the AC power adapter from the mains supply
before cleaning the i-See HD. Follow the instructions below to help prevent the product
exterior from deteriorating or colouration:
• Wipe with a soft, dry cloth.
• Do not use solvents or other chemicals. Do not wipe with a chemically-treated cleaning
cloth.
• Use a soft dry cloth to clean all other accessories.
7 Recycling
The i-See HD contains electrical and electronic equipment (WEEE) and should
not be mixed with general household waste. For proper treatment, recovery
and recycling, please take this product to designated collection points where
it will usually be accepted free of charge. Alternatively, in some countries, you
may be able to return your products to your local retailer upon purchase of an
equivalent new product. Disposing of this product and the packaging correctly will help
save valuable resources and prevent any potential negative effects on human health and
the environment, which could otherwise arise from inappropriate waste handling. If you
are unsure, contact your local authority for further details of your nearest designated
collection point. Penalties may be applicable for incorrect disposal of this waste, in
accordance with your national legislation.
8 Warranty
This product is covered by the warranty provisions of your supplier. For more information
about these provisions, contact your supplier.
Never hesitate to contact your supplier or the manufacturer to report unexpected
operational incidents. Please note the serial number of the device when contacting the
manufacturer.
Manufacturer address
production date
Catalog reference
number
Serial number
UDI number
Device input and
output power
Complies with Part
15 of the FCC Rules
Medical device
purpose and name
Read the
instructions for use
Product conform
E.U. standards
IP rating
Use earthed socket
Indoor use
temperature
WEEE recycling

20 i-See HD
EN
9 Technical specifications
Resolution 1920 x 1080
Video refresh rate 50 Hz or 60 Hz
Display size 54.6 cm
22 inch
Display modes
These display
modes can be
turned off in the
i-See live mode
advanced menu
Photograph Full colour ( or high saturation)
Greyscale
High contrast
Black - white Black - yellow
White - black Yellow - blue
Green - black Blue - yellow
Black - green Red - black
Yellow - black Black - red
Magnication
(With a 22” screen)
Minimum ≈ 3×
Maximum ≈ 75×
Reading Aid
Horizontal Reading Line Available in all models
Vertical Reading Line Available in all models
Horizontal Block Blank Available in all models
Vertical Block Blank Available in all models
Power Supply
Input: 100-240VAC, 50/60Hz,
1.0A max.
Earth connected
Power rating Max: 25W
Dimensions 22” (screen in
highest position)
51 × 48 × 64 cm
20 × 19 × 25.2 inch
Weight 15.8 kg / 34.8lb
IP rating IP20; solid foreign objects >= 12.5mm
Not protected against ingress of water
Conditions of use Temperature 5 to 35 ˚C
41 to 95 ˚F
Humidity 10 to 85%, no condensation
Conditions of
storage and
transport
Temperature -20 to +60 ˚C
-4 to +140 ˚F
Humidity 0 to 90%, no condensation
If you have any questions after reading this manual, please contact your supplier.
Other manuals for i-See HD
1
Table of contents
Languages:
Other Rehan Magnifier manuals

Rehan
Rehan LOOKY User manual

Rehan
Rehan i-See User manual

Rehan
Rehan Looky 6 HD User manual

Rehan
Rehan ACUITY BASIC User manual

Rehan
Rehan Looky 10 User manual

Rehan
Rehan ACUITY BASIC User manual

Rehan
Rehan Looky Book User manual

Rehan
Rehan Looky + User manual

Rehan
Rehan ACUITY SPEECH User manual

Rehan
Rehan i-See Touch User manual