manuals.online logo
Brands
  1. Home
  2. •
  3. Brands
  4. •
  5. Reimo
  6. •
  7. Tent
  8. •
  9. Reimo Casa Air User manual

Reimo Casa Air User manual

1
Casa Air
900015
Aufbauanleitung
Assembly Instructions
www.reimo.com
2
Vielen Dank, dass Sie sich für das Rimini Air 390 Vorzelt entschieden haben. Bitte lesen Sie sich vor dem Aufbau diese
Anleitung ausführlich durch und bewahren Sie diese für zukünftiges Nachschlagen gut auf.
Bei sachgemäßer Verwendung werden Sie sehr lange Freude an Ihrem neuen Vorzelt haben. Wir empfehlen Ihnen, Ihr
Zelt gegen versehentliche Schäden sowie Sturmschäden zu versichern, da diese nicht durch die Garantie abgedeckt sind.
Thank you for purchasing your Rimini Air 390 awning. Please read these instructions carefully before attempting to set
up your awning and retain them for future reference.
If used correctly, your awning shoud give you years of trouble free use. We recommend that your awning is insured
against accidental and storm damage as this is not covered by the warranty.
INHALT / INDEX
Lieferumfang / Assembly parts list .....................................................................................................3
Empfehlungen / Recommendations....................................................................................................4
Luftkammern / About the inflatable frame.........................................................................................4
Aufpumpen / Pump and inflation........................................................................................................5
Aufbauanleitung / Assembly instructions............................................................................................8
Allgemeine Pflege- und Gebrauchshinweise / General Care and usage instrutions .........................12
Bitte lesen Sie vor dem Aufbau diese Anleitung ausführlich durch und bewahren Sie diese
für zukünfiges Nachschlagen auf
Please read instructions and warnings carefully before attempting to set up! Please keep
it for future reference!
3
LIEFERUMFANG / ASSEMBLY PARTS LIST
Optional / Optional
Packsack / Carry Bag
Abspanngurte / Storm Strap
Abspannleiterchen
Pegging Ladder
Innenzelt / Inner Tent Abschlusspolster mit Andruckstange
Rear Pads & Poles Kit
Außenzelt / Flysheet
Gummiösen / Elastic Ring
Aufstellstange für Tür
Canopy Poles Kit
Windblende und Radabeckung
Draft Skirt & Wheel Cover
Metallheringe / Metal Peg
Sturmstangen
Storm Roof Pole
Luftpumpe mit Überdruckventil
Pump & Safety Pressure Valve
1x
1x
1x 1x
6x 6x
3x
62x
24x
1x 1x 1x
4
EMPFEHLUNGEN
• Bitte legen sie vor dem Auspacken eine Bodenplane aus, um das Material Ihres Vorzeltes vor Nässe, Schmutz und
Schaden zu schützen.
• Bauen Sie das Vorzelt vor Antritt Ihrer Reise schon einmal zuhause auf, um sich mit dem Aufbau vertraut zu ma-
chen und um sicherzustellen, dass Sie vor dem ersten Gebrauch alle benötigten Teile haben.
• Wählen Sie zum Aufbau eine glatte, ebene Fläche und entfernen Sie alle spitzen Gegenstände.
• Vermeiden Sie, den Eingang gegen den Wind aufzustellen.
• Unter Bestimmten Bedingungen kann sich im Inneren des Vorzeltes Kondenswasser bilden. Abhängig von
den gegebenen Bedingungen, dem Wetter sowie der Bodenfeuchtigkeit, kann Kondenswasser schwerwie-
gende Folgen haben und mit Undichtigkeit verwechselt werden, da es entlang der Innenseite des Daches
herablaufen sowie an Einrichtungsgegenständen heruntertropfen kann. Wenn sie vermuten, Ihr Vorzelt sei
undicht, ist dies in den meisten Fällen durch Kondenswasser begründet und kann durch gute Belüftung
verbessert werden.
• Dieses Vorzelt ist als Reisevorzelt entwickelt worden, sowie zur Nutzung bei leichtem bis mäßigem Wetter. Bei
starkem Wind oder Schneefall empfehlen wir Ihnen, das Vorzelt abzubauen. Dieses Zelt ist nicht als Dauerstandzelt
geeignet.
RECOMMENDATIONS
• Please lay down a groundsheet in advance, to prevent your awning fabric becoming wet, dirty and damaged, before
uppacking.
• Assemble the awning at home before setting off on your trip in order to familiarise yourself with its assembly and
ensure you have not forgotten anything, especially the first use.
• Choose preferably a smooth, level site and remove all sharp objects.
• Avoid placing the entrance toward the wind.
•Under certain conditions awnings will suffer from condensation.
Depending upon the conditions, the weather and the amount of moisture in the ground, the condensation
could be quite servere and is commonly mistaken for leaking, it can run down the inside of the roof and
drips off internal fittings. If you suspect your awning is leaking it is almost certainly condensation this
can be improved by ensuring adequate ventilation.
• This awning is designed as a touring awning and for touring use in light to moderate weather. During strong winds
or snowfall we recommend that you take the awning down.
This awning is not designed for static, seasonal, permanent pitching or commercial use.
DER LUFTKAMMER-RAHMEN
• Der Rahmen besteht aus 3-lagigen Luftschläuchen, welche sich in Reißver-
schluss-Schutzhüllen befinden. So sind diese sicher, geschützt und lassen
sich bei Bedarf einfach austauschen.
• Der innere Luftschlauch besteht aus einem extra stabilen TPU-Material,
welches robust und wetterbeständig ist und lange halten wird.
• Die Schutzhüllen bestehen aus einem robusten, stichfesten PE-Material. Die
Schutzhüllen werden an Hülsen an der Innenseite des Zeltes per Reißver-
schluss befestigt.
• Die Reißverschlüsse von Schutzhülle und Hülse müssen mit Verbindern
(z.B. Kabelbindern) aneinander befestigt sein. Diese Verbinder sollten
bei normaler Nutzung niemals entfernt werden. Die Reißverschlüsse
dürfen Sie nicht öffnen. Entfernen Sie diese nur, wenn Sie einen Luft-
schlauch entfernen, ersetzen oder reparieren müssen. Wenn Sie die
Verbinder entfernen, muss dies geschehen bevor Sie das Zelt aufpum-
pen, da Sie sonst die Luftschläuche beschädigen oder auch durchste-
5
chen könnten, was nicht durch die Garantie abgedeckt wird.
• Um sicherzustellen, dass sich das aufblasbare Gestänge in der richtigen Po-
sition befindet, achten Sie bitte darauf, dass der Klettverschluss der Kammer
mit dem Klettverschluss am Zeltboden verbunden ist.
ABOUT THE INFLATABLE FRAME
• The frame is made up of air tubes which are placed inside zipped protective
covers making them secure, protected and easy to replace if required.
• The air tubes themselves are made of very strong TPU material which is
strong, resistant to weather and will last for years.
• The protective covers are made from a strong, puncture resistant PE material. The protective cover is zipped inside
the sleeve on the awning.
• The zips on the sleeve and protective cover are locked together with ties. These ties should never be remo-
ved under normal use. They are only to be removed,if you need to remove, replace or repair your air tube.
If you do remove the ties then you must replace them before inflating your awning otherwise you could
cause damage to the air tube, even puncturing it which is not covered under your warrranty.
• To ensure the air tube frame is in the correct position, please check that the protective cover is located on the
velcro pads at all times.
!!ACHTUNG!!
Die Reißverschlüsse von Schutzhülle und Hülse müssen
mit Verbindern (z.B. Kabelbindern) verriegelt werden.
Diese Verbinder sollten bei normaler Nutzung niemals
entfernt werden. Die Reißverschlüsse dürfen sich nicht
öffnen können. Wenn dieser Verbinder entfernen wurde,
können die Luftschläuche und auch ihr Zelt beschädigt
oder durchstochen werden, was nicht durch die Garantie
abgedeckt wird.
Pumpen Sie die Luftschläuche niemals auf, wenn einer der beiden Reißverschlüsse geöffnet ist.
!!ATTENTION!
The zips on the air tube sleeve and protective cover are locked together by a plastic tie.
Never remove this plastic tie under normal use. If this tie is removed then it could cause damage to your air
tubes or awning and is not covered by the warranty.
Never inflate the air tube if either of the zips are undone.
AUFPUMPEN
LUFTPUMPE
Verbinden Sie das Sicherheitsventil mit der Inflate Seite der Luftpumpe und
befestigen Sie den Schlauch am Sicherheitsventil, wie in der Abbildung links dar-
gestellt. Verwenden Sie die Luftpumpe niemals ohne das Sicherheitsdruckventil
mit Ihrem Vorzelt. Das Sicherheitsdruckventil stellt sicher, dass Sie nicht zu viel
Luft in das Gestänge pumpen können.
Eine Nichtverwendung des Sicherheitsdruckventils beim Aufblasen ihres Zeltes
kann dazu führen, dass Sie die Luftschläuche zu stark aufpumpen, was zu einem
Verlust der Garantie führt.
Wichtig:
Der Ideale Luftdruck für dieses Vorzelt beträgt 0,48 bar ( 7 PSI).
Bitte achten Sie darauf, dass Sie diesen Druck nicht überschreiten. Wenn Sie
ihre eigene Luftpumpe nutzen, stellen Sie sicher, dass diese über ein Sicherheits-
druckventil, welches auf 0,48 bar voreingestellt ist, bzw. über ein Manometer
6
verfügt, so dass Sie jederzeit den Druck kontrollieren können.
Übermäßiges Aufpumpen wird nicht durch die Garantie abgedeckt.
PUMPEN SIE IHR ZELT NICHT ZU STARK AUF. ÜBERMÄßIGES AUFPUMPEN FÄLLT NICHT UNTER DIE GARAN-
TIE UND KANN IHR VORZELT BESCHÄDIGEN!
AUFPUMPEN:
• Um die Luftschläuche aufzupumpen, lösen Sie die Abdeckkappe und verbinden sie das Ventil der Luftpumpe mit
dem Lufteinlass (wie unten abgebildet). Sie können nun die Luftschläuche aufpumpen.
Wenn Ihr Luftschlauch gleich wieder Luft verliert, überprüfen Sie bitte, ob das Ventil richtig befestigt wurde, da fehlerhaf-
tes Anschließen zu ausströmender Luft führen kann.
ENTLEEREN: 1 Luftventil / Deflation plug - 2 Luftadapter / Air inlet - 3 Ventillasche / Cap
• Zum Ablassen der Luft, entfernen Sie einfach das Luftventil vom Schlauch,
indem Sie es abschrauben.
Seien Sie vorsichtig, wenn sie das Ventil abschrauben, da ein unnötiges Verdre-
hen des Ventils und des Schlauchs zu einer unnötigen Belastung des Ventils
führen kann. Beim Abschrauben des Ventils halten sie den Schlauch mit einer
Hand fest und Schrauben das Ventil mit der anderen Hand ab, um sicherzustel-
len, dass sich Ventil und Schlauch nicht verdrehen können.
• Wenn Sie das Ventil wieder aufschrauben, achten Sie darauf, dass der Rand
der Ventillasche nicht unter das Ventil gerät, da dies dazu führen kann, dass
das Ventil nicht mehr vollständig abdichtet und die Schläuche auch ohne
eine Beschädigung Luft verlieren.
Wenn ihre Luftschläuche Luft verlieren, überprüfen Sie immer zuerst den korrekten Sitz des Ventils.
PUMP AND INFLATION
PUMP:
Connect the safety valve to the inflate side of the pump and attach the hose to the safety valve as shown in the diagram
to the left. Never attach the pump to the awning without the included safety pressure valve. The safety pressure valve
ensures that you cannot over inflate the awning.
Failure to use the safety pressure valve when inflating the awning could case you to over inflate the air tube which would
invalidate your warranty.
IMPORTANT:
The ideal inflation pressure for this awning is 7 PSI (0.48 bar).
Do not inflate the awning any more than this. If you use your own pump then ensure it is connected to a safety pressure
valve set to 7PSI or has a pressure gauge on so you can tell what the pressure is at all times.
Over inflation is not covered under your warranty.
7
Note: Do not over inflate, over inflation is not covered under your warranty and could damage your awning!
INFLATION:
• To inflate your air tube, unscrew the top cap and attach the pump nozzle to the air inlet (as shown below). You are
now ready to pump your air tube up.
If your air tube deflates straight away check that the value is correctly fitted as this could lead to air escaping from the
tube.
DEFLATION:
• To deflate your air tube simply remove the air valve by unscrewing it from the tube.
Be careful when unscrewing the valve as twisting the valve and tube unnecessarily could cause unneeded stress on the
valve. When unscrewing the valve hold the tube in place with one hand and unscrew the valve with the other thus ensu-
ring the valve and tube are not twisted.
• When you screw the valve back in place be careful not to get it caught on the rim of the valve pocket as this can
stop you creating a seal with the valve and can lead to air being lost from the tube even though there is no punc-
ture.
If your air tube does deflate always first check that the valve is correctly screwed into place.
8
• Bei Bedarf schieben Sie die Windblende in die dafür vorgesehene Keder-
schiene an der Unterseite ihres Fahrzeugs oder Wohnmobils.
• Befestigen Sie dann die Radabdeckung in der vorgesehenen Halterung
am Radkasten oder verbinden Sie sie mit dem oberen Rand der
Windblende.
• If required fit the draft skirt by sliding it into the lower rail on the bottom
of your caravan, motorhome or vehicle.
• The wheel cover either slides into the rail on the wheel arch or uses the
figure of eight tubing and connects to the top of the draft skirt.
• Stellen Sie sicher, dass alle Türen des Vorzelts geschlossen sind und der
Bodenspanngurt angebracht ist.
• Ziehen Sie das Zelt in den Kederkanal ein und bringen das Vorzelt so in
die gewünschte Position.
Hinweis:
Dieses Vorzelt besitzt einen Doppelkeder in zwei Kedergrößen. 6mm für
Wohnwagen und 4mm für Wohnmobile.
• Ensure all the doors on the awning are zipped shut and the floor strap is
attached.
• Slide the awning beading into the rail on your caravan, motorhome or
vehicle and pull the awning along the rail to the desired poistion.
Note:
There are two sizes of beading on this awning. It has 6mm beading for cara-
vans and 4mm beading for motorhomes.
•Verankern Sie die hinteren Ecken ihres Vorzelts unter ihrem Fahrzeug.
Ziehen Sie das Zelt dabei so nah an Ihr Fahrzeug wie möglich.
• Peg the rear corners of the awning under the caravan, pulling the
awning as close to the caravan as possible.
AUFBAUANLEITUNG / PITCHING INSTRUCTIONS
9
AUFBAUANLEITUNG / PITCHING INSTRUCTIONS
• Sie sind nun bereit, ihr Vorzelt aufzupumpen.
• Bevor Sie mit dem Aufpumpen des Vorzeltes beginnen, stellen Sie sicher, dass
Sie die Hinweise und Anweisungen zur Nutzung der Pumpe sorgfältig gelesen und
verstanden haben. Sie müssen diese Anweisungen befolgen, um Ihr Zelt richtig
aufzupumpen.
• Stellen Sie sicher, dass der Bodengurt vor dem Aufpumpen geschlossen ist.
• Pumpen Sie das Zelt auf, achten Sie dabei darauf, dass das Sicherheitsdruckven-
til immer mit der Pumpe verbunden ist.
• You are ready to inflate your awning.
• Before you inflate your awning make sure you have read and understood
the pump and inflation section of these instructions.
You must follow these instructions to ensure proper inflation of your awning.
• Ensure that the floor strap is locked before inflation.
• Inflate your awning using the pump supplied ensuring the safety pressure
valve is connected to the pump at all times.
• Sobald die erste Luftkammer aufgepumpt ist, befestigen Sie Spannleine
wie in der Abbildung gezeigt.
• Die Spannleine sollte mit einer der enthaltenen Gummiösen am Zelt ange-
bracht werden (siehe Abbildung oben), um das Vorzelt im Wind zu schüt-
zen und zudem die Spannleine vor Stolperschäden zu bewahren.
• Once the first air tube has been inflated peg the storm strap as shown in
the diagram.
• The storm strap should be used with the included elastic ring on top which
helps protect the awning in the wind and the storm straps from trip hazard
damage.
• Pumpen Sie die restlichen Luftkammern nacheinander auf, bis alle voll-
ständig mit Luft gefüllt sind und sich aufgerichtet haben.
• Das Vorzelt sollte automatisch die richtige Form annehmen. Aufgrund der
Bodenverhältnisse kann es jedoch nötig sein, das Vorzelt durch leichte
Bewegungen in die richtige Form zu bringen.
• Nachdem das Zelt vollständig aufgepumpt ist und die richtige Form einge-
nommen hat, befestigen Sie die andere Abspanngurte.
• Ihr Vorzelt sollte nun aussehen wie in der unteren Abbildung. Verankern
Sie nun Ihr Vorzelt.
• Wir empfehlen, zuerst die Ecken zu befestigen und anschließend von der
hinteren Ecke nacheinander die restlichen Befestigungspunkte zu veran-
kern.
• Pump the remaining air tubes in turn, until all have been pumped up and
sprung into place.
• The awning should assume the correct shape, but depending upon ground
conditions you may have to move the awning in or our slightly to get the
correct shape.
• Once the last tube has been pumped and the awning is in the correct
shape peg the other storm strap.
• Your awning should look like the diagram below. You can now peg the
awning.
• We recommend pegging the corners first then working forward from the
rear corner in turn until all pegging points have been pegged.
10
Anbringen der Sturmstangen
• Montieren Sie die 3 Dachstangen wie in den obigen Abbildungen
dargestellt.
• Stecken Sie je ein Ende der Dachstangen in eine der vorgese-
henen Taschen und das andere Ende in die gegenüberliegende
Tasche. Spannen Sie diese nun.
• Überspannen Sie die Stangen nicht.
Storm Roof Poles
• Assemble the 3 storm roof poles as shown in the diagrams
above.
• Insert each pole in turn, into their pocket and extend into the
opposite pocket.
• Do not over tension these poles
Abschlusspolster mit Andruckstange
• Verbinden Sie das Abschlusspolster auf der Rückseite der Seiten-
wand mit den Klettverbindungen.
• Nehmen Sie eine der Andruckstangen, stecken Sie das abge-
flachte Ende in die Tasche am oberen Ende der Seitenwand und
verlängern die Stange, bis sie den Boden berührt.
• Drücken Sie das Polster mit Hilfe der Andruckstangen an die
Wand Ihres Fahrzeugs.
• Die Stange sollte ausreichend gespannt sein, um das Polster in
Position zu halten. Zu starkes Spannen kann jedoch zu Beschädi-
gungen führen.
• Befestigen Sie die Stange mit den Klettstreifen an der Rückwand.
Rear Pad and pole Kit
• Attach the rear pad to the rear of the side panel using the velcro
strips on the pad and side panels.
• Take one of the rear poles and place the flattened end into the
pocket in the top corner of the side panel and extend the leg until
it touches the ground.
• Push the pole against the pad and the pad will be pushed
against your caravan, motorhome or vehicle. This creates the
seal against your vehicle.
• This pole should be tight enough to hold the pole in place, but
must not be over tensioned as it could cause damage if over
tensioned.
• Tie the pole in place using the velcro tie backs along the rear of
the panel.
AUFBAUANLEITUNG / PITCHING INSTRUCTIONS
AUFBAUANLEITUNG / PITCHING INSTRUCTIONS (OPTIONAL)
11
AUFBAUANLEITUNG / PITCHING INSTRUCTIONS (OPTIONAL)
Innenzelt
• Nehmen Sie das Innenzelt aus der Tasche und breiten Sie es auf den Boden im Vorzelt aus. Stellen Sie sicher, dass
die Befestigungsbänder an der Oberseite des Innenzeltes auf die maximale Länge gestellt sind, da dies die Befesti-
gung vereinfacht.
• Befestigen Sie nun die farblich markierten Gurte mit den entsprechenden Gurten im Dach des Vorzelts.
• Nachdem alle Gurte verbunden sind, verankern Sie das Innenzelt im Boden.
• Nun straffen sie die Befestigungsbänder, um das Innenzelt zu spannen.
Inner Tent
• Take the inner tent out of its bag and lay it on the ground inside the awning. Ensure the attachment straps on the top
of the inner tent are at their maximum as this makes it easier to attach the inner tent.
• Attach each of the colour coded buckles and straps to their corresponding straps in the roof of the awning. (for examp-
le connect the buckle on the red strap on the inner tent to the red strap in the roof of the awning)
• Once all four are in place peg the four corners of the inner tent into the ground.
• Once pegged tighten the straps on the top of the inner tent so the inner tent is tensioned all around.
12
ALLGEMEINE PFLEGE- UND GEBRAUCHSHINWEISE
Nähte
Wir verschweißen die wichtigsten Nähten an unseren Vorzelten, um Undichtigkeit zu vermeiden.
Abhängig von Ihren Erwartungen kann es erforderlich sein, die restlichen Nähte mit Dichtmittel zu behandeln. Dichtmittel
sollte ebenso an Stellen aufgetragen werden, an denen die verklebten Nähte beschädigt oder durch Verschleiß abgenutzt
sind. Ebenso kann es auf Stellen angewandt werden, an denen eine undichte Stelle entstanden sein könnte. Sie erhalten
Dichtmittel bei Ihrem Fachhändler. Der Keder ist mit einem wasserdichten Garn am Vorzelt vernäht. Dieses Garn quillt
bei Nässe auf, um die Löcher abzudichten. Es muss jedoch mehrmals gebraucht werden, bis dieser Effekt vollständig
wirksam ist.
UV-Beständigkeit
Jede Zelthaut kann durch längere Sonneneinstrahlung Schäden nehmen. Bei normaler Nutzung wird Ihr Vorzelt lange
erhalten bleiben. Abnutzungen durch UV-Licht können durch den Gebrauch von Schutzmitteln verringert werden. Imprä-
gnieren Sie einmal im Jahr (am besten bevor Sie es einpacken) das Zeltgewebe. Dies hilft zwar nicht gegen UV-Abnut-
zung, verbessert aber die Wasserdichtigkeit und verlängert die Lebensdauer Ihres Vorzelts. UV-Abnutzung ist nicht durch
die Garantie abgedeckt.
Kondenswasser
Unter bestimmten Bedingungen kann sich im Zeltinneren Kondenswasser bilden. Abhängig von den gegebenen Bedin-
gungen, dem Wetter sowie der Bodenfeuchtigkeit, kann Kondenswasser schwerwiegende Folgen haben und mit Undich-
tigkeit verwechselt werden, da es entlang der Innenseite des Daches herablaufen sowie an Einrichtungsgegenständen
heruntertropfen kann. Wenn Sie vermuten, Ihr Vorzelt sei undicht, ist dies in den meisten Fällen durch Kondenswasser
begründet und kann durch angemessene Belüftung verbessert werden.
Benutzung
Dieses Vorzelt ist als Reisevorzelt entwickelt worden, sowie zur Nutzung bei leichtem bis mäßigem Wetter. Bei starkem
Wind oder Schneefall empfehlen wir Ihnen, das Vorzelt abzubauen. Dieses Zelt ist nicht als Dauerstandzelt geeignet.
Nichtbeachtung kann zu Garantieverlust führen.
Aufbewahrung
Bewahren Sie das Vorzelt an einem gut durchlüfteten, trockenen Ort auf. Eine feuchtes Vorzelt kann sehr schnell Schim-
mel entwickeln. Schmutzige Vorzelte können mit klarem Wasser und einer weichen Bürste gereinigt werden. Scheuern
Sie nicht und nutzen Sie niemals aggressive Reinigungsmittel.
Sicherheit
Kochen Sie NIEMALS im Vorzelt oder nutzen eine offene Flamme innerhalb des Vorzelts, da dies eine große Brandge-
fahr bedeutet, die ihr Leben gefährden kann.
Ersetzen oder Reparieren von Luftschläuchen
Entleeren Sie den Luftschlauch vollständig. Ersetzen oder reparieren Sie einen Schlauch NIEMALS, bevor er nicht voll-
ständig entleert ist. Öffnen Sie die Verbindungen an der Hülle des Luftschlauchs und öffnen Sie den Reißverschluss der
Hülle. Entfernen Sie dann die Schutzhülle und den Luftschlauch aus der Hülse.
Wenn Sie ein Loch reparieren möchten, nutzen Sie immer ein professionelles Reparatur-Set, speziell für TPU Material. Es
muss eine flexible Ausbesserung sein, da die Schläuche aufgepumpt werden und sich im Einsatz biegen. Lokalisieren Sie
das Loch und reparieren es gemäß der Anleitung Ihres Reparatur-Sets.
Nachdem das Loch repariert wurde, bzw. wenn Sie einen komplett neuen Luftschlauch einsetzen wollen, achten Sie
darauf, dass Sie den Schlauch beim Platzieren in die Schutzhülle nicht verdrehen, da eine Verdrehung des Schlauchs zu
Beschädigung desselben beim Aufpumpen führen kann.
Nachdem der Schlauch platziert ist, schließen Sie den Reißverschluss der Schutzhülle. SIE MÜSSEN NUN DIE REIß-
VERSCHLÜSSE MIT NEUEN VERBINDERN (Z.B. KABELBINDERN) ODER EINER ÄHNLICHEN LÖSUNG BEFES-
TIGEN. Wenn Sie dies versäumen, können Sie Ihr Zelt beim Aufpumpen beschädigen. Wenn die Reißverschlüsse sich
auch nur ein kleines bisschen bewegen können, kann der Schlauch beim Aufpumpen durch den entstandenen Zwischen-
raum austreten und Schaden anrichten. Jeder Schaden, der durch ein nicht befestigten Reißverschluss entsteht, ist nicht
13
durch die Garantie gedeckt!
Nachdem die Reißverschlüsse geschlossen und gesichert wurden, platzieren Sie die Schutzhüllen wieder in den Hül-
len. Schließen Sie die Reißverschlüsse an den Hüllen und BEFESTIGEN SIE AUCH DIESE REIßVERSCHLÜSSE MIT
EINEM NEUEN VERBINDER ODER ÄHNLICHEM. Nichtbeachtung kann beim Aufpumpen Schäden an Ihrem Vorzelt
verursachen und wird nicht durch die Garantie abgedeckt.
GENERAL CARE AND USAGE INSTRUTIONS
Seams
We tape all the main seams on our awnings to help prevent leakage.
Depending upon your expectations, it may be necessary to treat the remaining seams with a seam sealant. Seam se-
alant should also be applied to areas where the taping is damaged or has peeled away through wear and tear. It can also
be applied to areas where a leak may have developed. Seam sealant is available from your dealer. The awning beading
is sewn to the awning with a special waterproof sewing thread. This thread swells when wet to fill the needle holes but
thread needs to become wet several times before it is totally effective.
This is known as ‘weathering’.
U.V. Degradation
Any awning fabric can be weakened by prolonged exposure to sunlight. Under normal use your awning will give long ser-
vice. This degradation can be lessened by the use of proofing solutions such as fabsil. Once a year (just before you put
the awning away) cover the fabric (not the windows) with your preferred proofing solution. This will not only help against
U.V. degradation, but improves waterproofing and lengthens the life span of your awning.
UV degradation is not covered under the warranty.
Condensation
Under certain conditions awnings will suffer from condensation.
Depending upon the conditions, the weather and the amount of moisture in the ground, the condensation could be quite
severe and is commonly mistaken for leaking, it can run down the inside of the roof and drips off internal fittings. If you
suspect your awning is leaking it is almost certainly condensation this can be improved by ensuring adequate ventilation.
Condensation and its effects are not covered under the warranty.
Usage
This awning is designed as a touring awning and for touring use in light to moderate weather.
During strong winds or snowfall we recommend that you take the awning down. This awning is not designed for static,
seasonal, permanent pitching or commercial use. Disregarding this could lead to invalidation of your warranty.
Storage
Store in a well-ventilated dry place. A wet/damp awning will develop mildew surprisingly quickly. Dirty awnings can be
washed using clean water and a soft brush. Do not scrub and never use detergents.
Safety
NEVER cook in the awning or use any naked flame inside the awning as this could lead to fire, damage to the awning or
even death.
Replacing or Repairing an Air Tube
Deflate the air tube fully. NEVER replace or repair a tube before deflating it fully.
Break the plastic ties on the sleeve of the air tube and unzip the sleeve. Then remove the protective cover and air tube
from inside the sleeve. Break the plastic ties on the protective cover and unzip the protective cover. Remove the PU blad-
der from inside the protective cover.
If your are repairing a puncture always use a professional repair kit that is meant to repair TPU material. It needs to be a
flexible repair as the tube is inflated and thus the tube flexes in use. Locate and repair the puncture following the instruc-
tions in your repair kit.
Once the puncture is repaired or your are simply replacing the tube, place inside the protective cover being careful to
ensure that it is not twisted as a twist in the bladder could cause damage when it is inflated.
14
Once the tube has been fitted zip the protective cover shut.
YOU MUST THEN RELOCK THE ZIPS WITH A NEW PLASTIC TIE OR SIMILAR SOLUTION.
If you do not re-lock the zips then you could well cause damage to your awning when it is inflated. If the zips are allowed to
come apart (even a small amount) then when inflated the bladder will expand out of the gap caused by the zips moving apart and
will cause damage.
Any damage caused by failing to re-lock the zips is not covered by your warranty.
Once the zips are shut and locked on the protective cover place the cover back in the sleeve.
Then zip the sleeve shut and again YOU MUST THEN RELOCK THE ZIPS WITH A NEW PLASTIC TIE OR SIMILAR SOLUTION.
Failure to do so could cause damage to your awning when inflated and is not covered by your warranty.
15
16
www.reimo.com

This manual suits for next models

1

Other Reimo Tent manuals

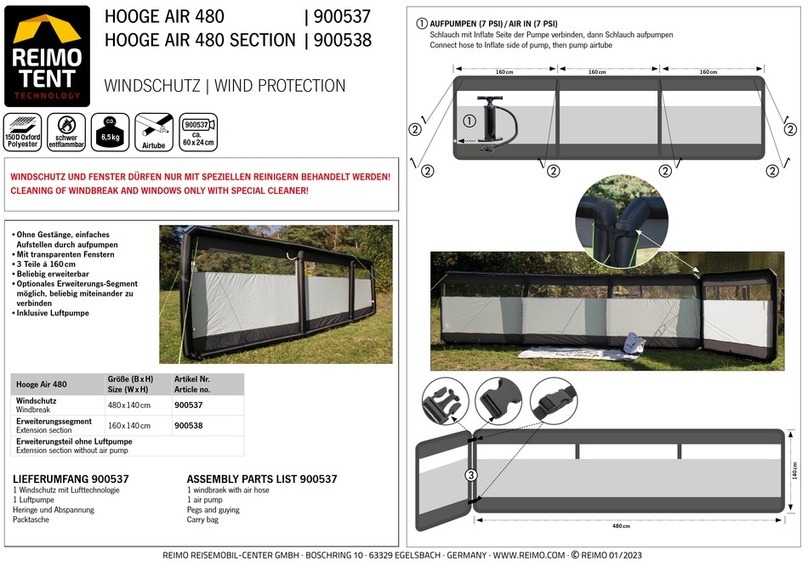
Reimo HOOGE AIR 480 User manual

Reimo

Reimo HOOGE AIR 480 User manual

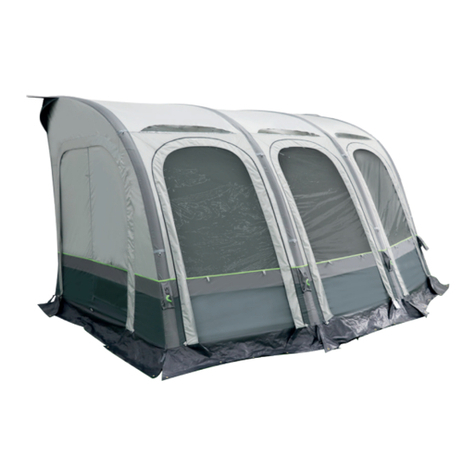
Reimo ADRIA ACTION AIR 391 User manual

Reimo

Reimo ADRIA ACTION AIR 391 User manual

Reimo Yukon User manual

Reimo

Reimo Yukon User manual

Reimo ALICANTE User manual

Reimo

Reimo ALICANTE User manual

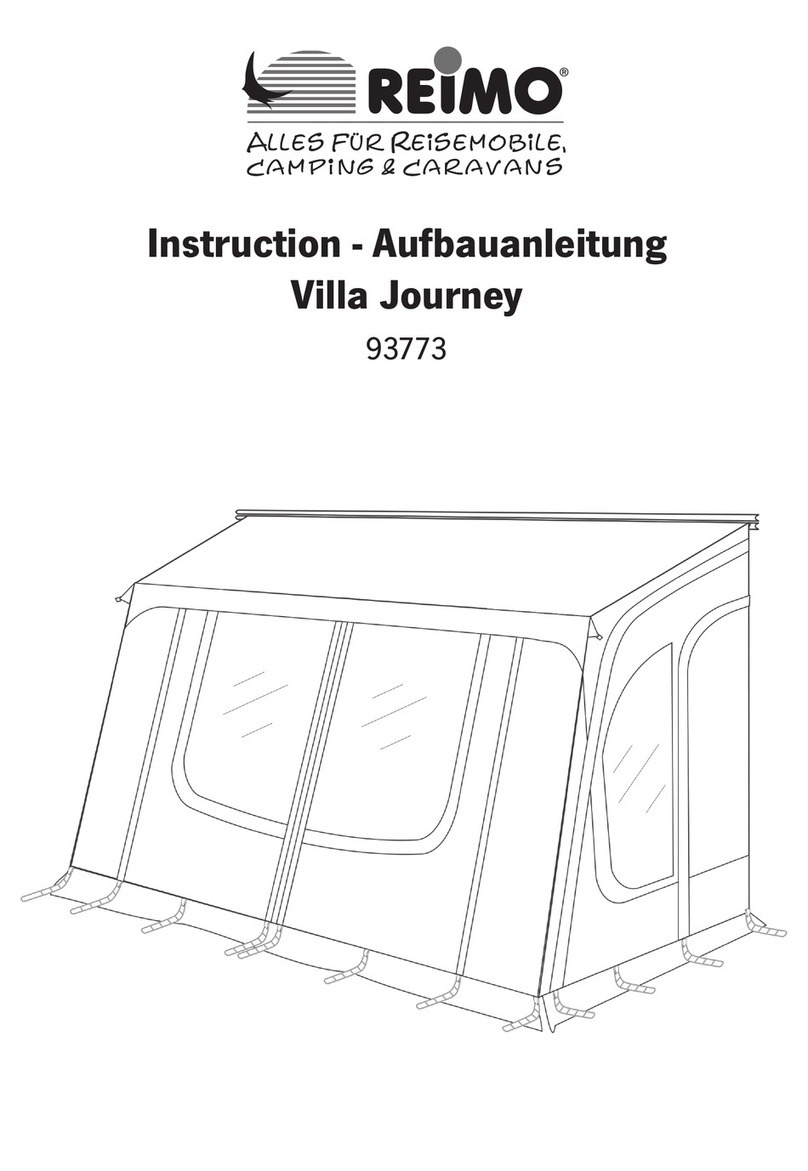
Reimo Villa Journey User manual

Reimo

Reimo Villa Journey User manual

Reimo Victoria Installation instructions

Reimo

Reimo Victoria Installation instructions

Reimo One Beam Air User manual

Reimo

Reimo One Beam Air User manual

Reimo Marina User manual

Reimo

Reimo Marina User manual

Reimo Tour Action Air User manual

Reimo

Reimo Tour Action Air User manual

Reimo TRAPEZ TRAFIC 93796 User manual

Reimo

Reimo TRAPEZ TRAFIC 93796 User manual

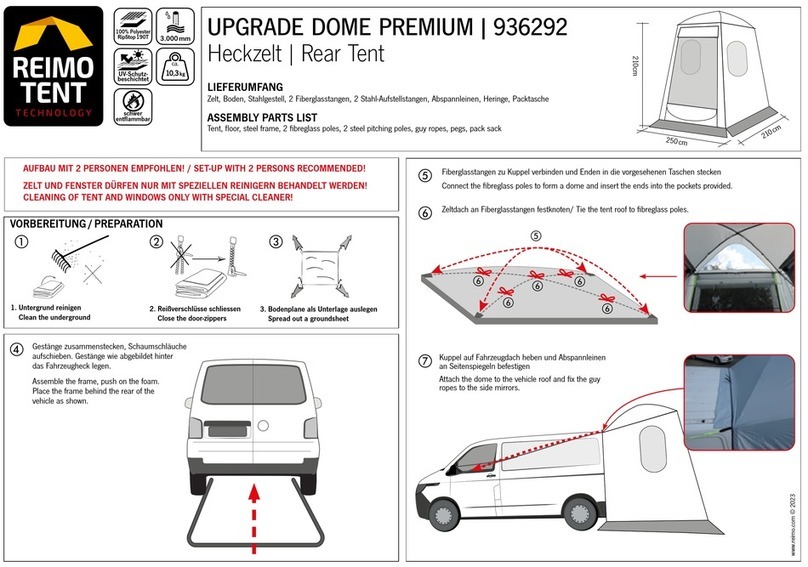
Reimo UPGRADE DOME PREMIUM 936292 User manual

Reimo

Reimo UPGRADE DOME PREMIUM 936292 User manual

Reimo Riva 2 User manual

Reimo

Reimo Riva 2 User manual

Reimo Marina High Air 2.9 User manual

Reimo

Reimo Marina High Air 2.9 User manual

Popular Tent manuals by other brands

Samson Simplicity 6 installation guide

Samson

Samson Simplicity 6 installation guide

ClearSpan 105757 installation instructions

ClearSpan

ClearSpan 105757 installation instructions

Vango ARK 200 Pitching instructions

Vango

Vango ARK 200 Pitching instructions

Costway GT3838 user manual

Costway

Costway GT3838 user manual

Hilleberg TARRA Pitching instructions

Hilleberg

Hilleberg TARRA Pitching instructions

Hartmann ROMA PERGOLA Assembly instructions

Hartmann

Hartmann ROMA PERGOLA Assembly instructions

Everbilt NS HPP100 Use and care guide

Everbilt

Everbilt NS HPP100 Use and care guide

canvascamp Sibley 600 Twin Utimate Setup instructions

canvascamp

canvascamp Sibley 600 Twin Utimate Setup instructions

TentCraft X Series Setup instructions

TentCraft

TentCraft X Series Setup instructions

Bestway Glacier Ridge X2 owner's manual

Bestway

Bestway Glacier Ridge X2 owner's manual

MSR Mutha Hubba NX Assembly instructions

MSR

MSR Mutha Hubba NX Assembly instructions

Khyam Windsor Assembly instructions

Khyam

Khyam Windsor Assembly instructions

Snow Peak Amenity Dome M instruction manual

Snow Peak

Snow Peak Amenity Dome M instruction manual

Celina 30’ x 45’ ETS FRAME TENT Instructions for use

Celina

Celina 30’ x 45’ ETS FRAME TENT Instructions for use

Sierra Designs METEOR 2 Pitching instructions

Sierra Designs

Sierra Designs METEOR 2 Pitching instructions

Vango Mirage 200 instructions

Vango

Vango Mirage 200 instructions

Eureka! Tents 10'x10' Technical instruction manual

Eureka! Tents

Eureka! Tents 10'x10' Technical instruction manual

Mec Frontenac manual

Mec

Mec Frontenac manual

manuals.online logo
manuals.online logoBrands
  • About & Mission
  • Contact us
  • Privacy Policy
  • Terms and Conditions

Copyright 2025 Manuals.Online. All Rights Reserved.