manuals.online logo
Brands
  1. Home
  2. •
  3. Brands
  4. •
  5. Zempire
  6. •
  7. Tent
  8. •
  9. Zempire PRONTO 10V2 User manual

Zempire PRONTO 10V2 User manual

ZEMPIRE.CO.NZ
INSTRUCTION MANUAL
PRONTO 10V2
KEY TIPS
SIDE
FRONT REAR
2 3
PRONTO 10V2
AIR TENT
SLATPAC TABLES
Fantastic for family meals or as a preparation
surface in both large and standard sizes. Aluminium
construction keeps the tables lightweight, durable
and highly corrosion-resistant.
DOME LIGHTS
Our MegadomeV2 & Hangdome camping lanterns
feature a modern dome shape with high output
LED bulbs. Soft to touch with multiple settings,
these can be hung or placed on a surface.
Equipped with a USB rechargeable lithium battery
with up to 45hrs or 80hrs run time.
Internal window panels can be
half opened to control airflow and
privacy. Fold window panels so
they sit between the lower cover
and mesh panel.
When rolling up door panels, fold
the outer corners into the centre
and roll inwards. This prevents the
edges hanging loose and prevents
water from pooling in the roll.
On warm or humid nights, zip
down the top of the 360° door
cover. This provides maximum
ventilation while maintaining your
privacy.
Before inflating your tent, start by
pegging the corners and ensure
the tent is fully pegged with the
floor sitting flat. The floor seam
should have tension between each
peg loop.
PSI
Ensure all doors are zipped closed
before inflating and deflating. This
helps the tent keep its shape and
prevents undue stress on panels
and zips.
Ensure your air tubes are inflated
to the correct pressure by using the
pressure release valve and gauge
on the pump.
Remove the fly sheet for maximum
ventilation during hot summer
days or enjoy views of the stars at
night.
Do not over tension guy ropes as
your tent is designed to be free
standing without the need for
these. The guy ropes should be
taught but shouldn’t pull your tent
out of shape.
PRONTO 10V2 SOLID GROUND SHEET
Fits perfectly under your tent, protecting the floor and
making clean up and pack down easier. Extends out
to the awning area, providing extra weather protection
and floor space.
BOMBER MATS3D
The Twin Bomber3D and Bomberpad3D have a 3D design
& wave contoured surface, offering exceptional warmth
& comfort. Sleeping surfaces are soft to touch and the
open-cell foam allows the mats to self-inflate quickly.
OPTIONAL ADD ONS
AND ACCESSORIES
A VALVE CAP
B BOSTON VALVE
Condensation
It is important that lower vents are opened at all times to reduce the risk of condensation. During humid
or damp conditions, it is recommended that the window covers are opened to expose the mesh layer,
enabling additional airflow throughout your tent.
Do not use foam swabs or non-bonded mats directly on the tent floor. This will cause condensation
between the mat and floor and if not dried out, can lead to mildew forming.
UV Degradation
Tent fabrics can be weakened by prolonged exposure to sunlight. Under normal holiday use, your Zempire®
tent will give you many years of camping enjoyment. However, extended use in strong sunlight will cause
degradation. UV degradation is not covered under warranty. The warranty does not cover permanent sites,
displays or commercial use.
For a detailed description of all the features and specifications please visit our website.
PRESSURE
GAUGE
HOSE
4 5
PITCHING INSTRUCTIONS
1. Test Run
Practice pitching your tent at home to ensure you understand the process.
2. Pick A Site
When picking a site for your tent, try to find an area that is sheltered, flat and free from sharp objects. If
possible, position your tent with the front door facing away from the prevailing wind. Also, try not to pitch
your tent under trees as falling branches and sap can damage the tent.
3. Ground Sheet
To protect your tent from dirt and damage, it is recommended to use a ZEMPIRE®Ground Sheet. Ground
Sheets not only protect your tent floor but also make pack down faster and cleaner. The Ground Sheet
should be pegged down in the correct position first, then the tent placed on top. ZEMPIRE®Ground Sheets
are slightly smaller than the size of the tent floor to ensure water does not collect between the two layers.
4. Unpacking
When you take your tent out for the first time, take a moment to see
how it is packed or take a photo with your phone. This will help you when
it comes to packing your tent away. Separate and identify the different
parts included with your tent. Your tent fly will be pre-attached and does
not require removing when taking the tent down. The package should
include the following:
- Tent fly (pre-attached) - Repair kit
- Tent inner - 25x Dome Pegs 6mm
- 3 x Awning poles (in 10 pieces) - Guy Ropes (pre-attached)
- Pump - Additional Guy Ropes
5. Pump Setup
Your Zempire®High Pressure Pump included with your tent comes with a
pressure gauge to ensure that the air tubes are inflated to the correct level. The
pump accessories should be assembled in the configuration shown.
6. Layout
Unroll the tent with the floor facing down and locate the front entry door. Place
the tent in the correct direction for your selected site. Peg out the 4 corners of
the sewn-in ground sheet ( ), ensuring there is significant tension between each
point and that the floor sits as flat as possible. Ideally the pegs should be angled
away from your tent at 45º.
7. Airflow
Your tent will arrive with the bottom of the front door open to help increase
airflow during the first pitch. It is important however that the door remains
predominantly closed during the pitching process to ensure the tent holds
its correct shape during inflation and is not over tightened, which can cause
damage. To enable air to enter during the pitching process, all window covers
should be opened.
8. Boston Valve Attachment
The external inflation valves (x2) are located on the left side (facing the front)
of the tent, under the rain fly. Before inflating, remove the valve cap (A) and
screw the boston valve (B) into the threaded section attached to the tubes. It is
important that the valve is not cross threaded and is firmly tightened. Make sure
no fabric is stuck in the valve, as this will cause air to leak.
9. Inflation
Inflate the tube to about 4PSI, then go inside the tent and lift the frame until
it stands on its own. Continue to inflate the tube to 7-9PSI. It is important
not to over-inflate the tube. It is recommended that during very hot weather,
7PSI is used to provide room for expansion during the day. In cooler or windier
conditions, 9 PSI is recommended.
10. Setting the Floor
It may be necessary to align the base of each air tube so that the floor sits flat and taught. You may also
need to realign the corner pegging points so the floor sits flat. At this point, it helps if the front door is
completely closed when pegging out the front of the tent.
11. Pegging
Peg the remaining peg loops around the tent. Durable steel pegs are included with your tent which will be
suitable for the majority of conditions. However, when camping at a rocky or sandy location, you may wish
to purchase more specialised pegs. A range of specialised ZEMPIRE® Pegs may be available in your local
region or on our website.
12. Guy Ropes
Guy ropes are pre-attached on all ZEMPIRE®tents. It is recommended that guy ropes are used at all times.
It is important not to over-tighten the guy ropes, they should sit taught but should not distort the shape of
the tent.
13. Awning Poles
Awning poles are included with your tent. These enable the front awning to be poled-out, creating
additional shade and living space. The 10 sections of poles fit together to create 3 poles. The longer
sections create the 2 side poles (3 sections each). The 4 shorter sections create the center pole, which
will be longer than the side poles once complete. Open both doors of the awning fly and insert the poles
through the eyelets on the lower edge. Attach guy ropes and peg out to secure.
14. Deflation and Pack Away
- Close the mesh door, leaving the cover open to allow air to escape from the tent.
- Unpeg all guy ropes and roll up to ensure they do not get tangled during packing.
- Unpeg the peg points, excluding the four corners.
- Clean and dry pegs before storing in the bag.
- Unscrew each of the boston valves on the left side of the tent (this may be quite loud). Wait for all the air
to be expelled.
- Unpeg the four corners of the tent.
- Lay the carry bag at the valve end of the tent.
- Lay out the tent so that you create a clean rectangular shape.
- Fold the tent in half from front to rear and then in half again.
- Place the pump, peg bag and awning poles on top of the folded tent at the opposite side of the valves.
Roll the tent towards the boston valves to help expel any remaining air from the tubes. It may take more
than one roll to expel all the air from the tent.
- Use the webbing compression straps to secure the rolled tent and stand on its end.
- Pull the carry bag over the rolled tent. Flip the tent over, tension the compression straps on the side and
pull the drawstring shut.
FRONT
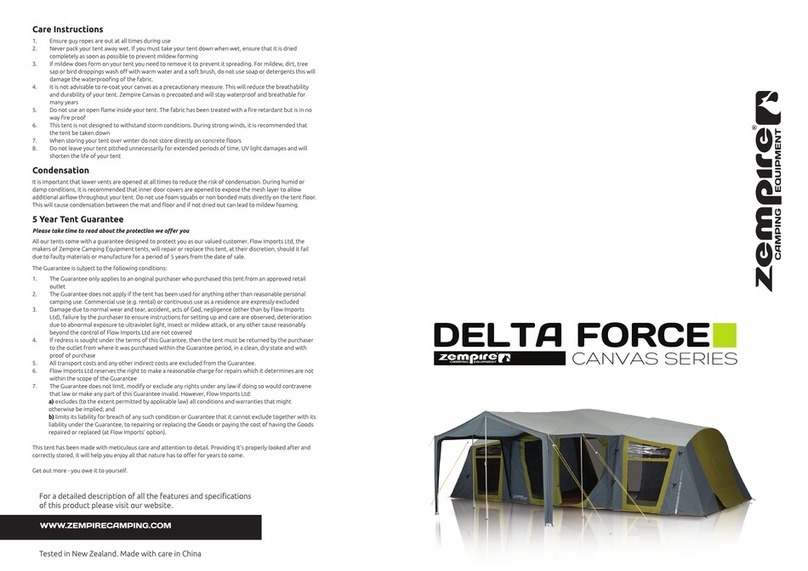
FRONT
CARE INSTRUCTIONS
1. Ensure guy ropes are out at all times during use.
2. Make sure you have all vents open at all times. Constant airflow will drastically reduce condensation
in humid weather conditions. Never cook in your tent as it is unsafe and would also heavily increase
condensation.
3. Ensure all doors are zipped closed before inflating and deflating. This helps keep the tent’s shape and
prevents stress on panels/zips.
4. Never pack your tent away wet. If you must take your tent down when wet, ensure that it is dried
completely as soon as possible to prevent mildew forming.
5. If mildew does form on your tent, wash off with warm water and a soft brush to prevent further growth.
Do not use soap or detergents.
6. Do not use aerosol spray cans or an open flame inside your tent. The fabric has been treated with a fire
retardant but is in no way fire-proof.
7. Always use a peg puller to remove pegs. Never remove pegs by pulling the tent or peg loops; always
clean and dry pegs before storing.
8. This tent is not designed to withstand storm conditions. During a severe storm, it is recommended that
the tent be taken down.
9. Do not leave your tent pitched unnecessarily for extended periods of time. UV light damages the fly
and will shorten the life of your tent.
NEED HELP WITH YOUR TENT?
We have a range of videos on our website which can help you.
Follow the QR code or type the link below in your browser. We suggest to check out our videos beforehand
in case you don't have service at your holiday destination.
2 Year Limited Warranty
Please take time to read about the protection we offer you.
All our products come with a guarantee designed to protect you as our valued customer. Zempire®
Camping Equipment will repair or replace this product, at their discretion, should it fail due to faulty
materials or manufacture for a period of 2 years from the date of purchase.
The Guarantee is subject to the following conditions:
1. The Guarantee only applies to an original purchaser who purchased this product in an unopened
condition from an approved retail outlet.
2. The Guarantee does not apply if the product has been used for anything other than reasonable personal
use. Commercial use (e.g. rental) or continuous use are expressly excluded.
3. Damage due to normal wear and tear, accident, acts of God, negligence (other than by Zempire®
Camping Equipment), failure by the purchaser to ensure instructions for setting up and care are
observed, deterioration due to abnormal exposure to ultraviolet light, damage from wind, insects,
animals or mold/mildew, or any other cause reasonably beyond the control of Zempire®Camping
Equipment are not covered.
4. If redress is sought under the terms of this Guarantee, then the product must be returned by the
purchaser to the outlet from where it was purchased within the Guarantee period, in a clean, dry state
and with proof of purchase.
5. All transport costs and any other indirect costs are excluded from the Guarantee.
6. Zempire®Camping Equipment reserves the right to make a reasonable charge for repairs which it
determines are not within the scope of the Guarantee.
7. The Guarantee does not limit, modify or exclude any rights under any law if doing so would contravene
that law or make any part of this Guarantee invalid. However, Zempire®Camping Equipment:
a) excludes (to the extent permitted by applicable law) all conditions and warranties that might
otherwise be implied; and
b) limits its liability for breach of any such condition or Guarantee that it cannot exclude together
with its liability under the Guarantee, to repairing or replacing the Goods or paying the cost of
having the Goods repaired or replaced (at Zempire®Camping Equipment’s option).
Australia Only
Our goods come with guarantees that cannot be excluded under Australian Consumer Law. You are
entitled to a replacement or refund for a major failure and compensation for any other reasonably
foreseeable loss or damage. You are also entitled to have the goods repaired or replaced if the goods fail to
be of acceptable quality and the failure does not amount to a major failure.
USA Only
Some states do not allow the exclusion or limitation of incidental or consequential damages, so the above
limitation or exclusion may not apply to you. This warranty gives you specific legal rights, and you may also
have other rights which vary from state to state.
Europe Only
The consumer has legal rights under applicable national legislation governing the sale of consumer goods
and those rights are not affected by the guarantee.
All warranty claim processes are explained on our Zempire®website. Please go to www.zempire.co.nz,
select your location and follow the instructions to lodge a warranty claim.
International Distributors:
New Zealand & Australia
Zempire®Camping Equipment
6 Karewa Place, Pukete,
Hamilton, 3200, New Zealand
Ph: +64 7 848 1610
United Kingdom, Belgium,
Netherlands & Luxembourg
Outdoor & Sports Company Ltd.
Redfern House, Dawson Street
Hyde, Cheshire, SK14 1RD, UK
Ph: +44 161 366 5020
North America
Outdoor & Sports Company Inc.
610 Alden Road Unit 101
Markham, ON, L3R 9Z1, Canada
Ph: +1 905 940 9511
Germany, Austria, &
Switzerland
Sport-tech
Goldbeckstrasse 6
69493 Hirschberg, Germany
Ph: +49 6201 8439710
South Korea
Coldspin Corporation
20 Gurodong-ro 15-gil
Guro-gu, Seoul,
South Korea
Ph: +82 2 3397 7711
Designed and tested in New Zealand. Made with care in China.
GALLERY
VIDEO
TO THE
ZEMPIRECAMPING.INFOVIDEOGALLERY
6 7
ZEMPIRE.CO.NZ
AS PART OF OUR ZEMPIRE FAMILY, SHARE
YOUR CAMPING MOMENTS ON SOCIAL
@zempirecamping #zempirefamily
INS0197201004C

Other Zempire Tent manuals

Zempire Shelter Series User manual

Zempire

Zempire Shelter Series User manual

Zempire NEO Series User manual

Zempire

Zempire NEO Series User manual

Zempire Adventure Series User manual

Zempire

Zempire Adventure Series User manual

Zempire NEO Series User manual

Zempire

Zempire NEO Series User manual

Zempire Pro Link Configuration guide

Zempire

Zempire Pro Link Configuration guide

Zempire Neo Series User manual

Zempire

Zempire Neo Series User manual

Zempire Neo Series Configuration guide

Zempire

Zempire Neo Series Configuration guide

Zempire JETSET Series Configuration guide

Zempire

Zempire JETSET Series Configuration guide

Zempire AERO TXL PRO Series User manual

Zempire

Zempire AERO TXL PRO Series User manual

Zempire AERO T SHADE LITE Series User manual

Zempire

Zempire AERO T SHADE LITE Series User manual

Zempire AEROBASE 3 SHELTER Series User manual

Zempire

Zempire AEROBASE 3 SHELTER Series User manual

Zempire Bathroom Series Configuration guide

Zempire

Zempire Bathroom Series Configuration guide

Zempire NEO Series Configuration guide

Zempire

Zempire NEO Series Configuration guide

Zempire NEO Series User manual

Zempire

Zempire NEO Series User manual

Zempire Shelter AeroBase 4 User manual

Zempire

Zempire Shelter AeroBase 4 User manual

Zempire DELTA FORCEV2 User manual

Zempire

Zempire DELTA FORCEV2 User manual

Zempire MONO ADVENTURE Series User manual

Zempire

Zempire MONO ADVENTURE Series User manual

Zempire NEO Series User manual

Zempire

Zempire NEO Series User manual

Zempire Canvaslite Configuration guide

Zempire

Zempire Canvaslite Configuration guide

Zempire TITAN CANVAS Series Configuration guide

Zempire

Zempire TITAN CANVAS Series Configuration guide

Zempire GROUND SHEET User manual

Zempire

Zempire GROUND SHEET User manual

Zempire DELTA FORCE CANVAS Series User manual

Zempire

Zempire DELTA FORCE CANVAS Series User manual

Zempire Zeus Adventure Series User manual

Zempire

Zempire Zeus Adventure Series User manual

Zempire Inflatable Series User manual

Zempire

Zempire Inflatable Series User manual

Popular Tent manuals by other brands

James Baroud Vision 150 user guide

James Baroud

James Baroud Vision 150 user guide

Hilleberg Akto manual

Hilleberg

Hilleberg Akto manual

Tentandtable.com HIGH PEAK FRAME TENT 20 x 20 Assembly instructions

Tentandtable.com

Tentandtable.com HIGH PEAK FRAME TENT 20 x 20 Assembly instructions

Sealey CPS01 instructions

Sealey

Sealey CPS01 instructions

toolport Wikinger Carport Assembly instruction

toolport

toolport Wikinger Carport Assembly instruction

Alice's Garden BURDIGALA PT3X6KDWH manual

Alice's Garden

Alice's Garden BURDIGALA PT3X6KDWH manual

Heimplanet Mavericks manual

Heimplanet

Heimplanet Mavericks manual

Hilleberg ALLAK manual

Hilleberg

Hilleberg ALLAK manual

Coleman 400+ Assembly & instruction manual

Coleman

Coleman 400+ Assembly & instruction manual

Alpkit ORDOS 2 manual

Alpkit

Alpkit ORDOS 2 manual

Big Agnes Big House Series Big House 4 Setup instructions

Big Agnes

Big Agnes Big House Series Big House 4 Setup instructions

Asgard GLADIATOR PLUS 1 Assembly instructions

Asgard

Asgard GLADIATOR PLUS 1 Assembly instructions

Exped LYRA III Quick setup

Exped

Exped LYRA III Quick setup

Kathmandu Bora v2 instruction manual

Kathmandu

Kathmandu Bora v2 instruction manual

ZANE ARTS ZEKU - M INNER TENT manual

ZANE ARTS

ZANE ARTS ZEKU - M INNER TENT manual

Marmot AGATE How to set up

Marmot

Marmot AGATE How to set up

Skandika Kalmar Setup & maintenance

Skandika

Skandika Kalmar Setup & maintenance

Vango NEMESIS Pitching instructions

Vango

Vango NEMESIS Pitching instructions

manuals.online logo
manuals.online logoBrands
  • About & Mission
  • Contact us
  • Privacy Policy
  • Terms and Conditions

Copyright 2025 Manuals.Online. All Rights Reserved.