manuals.online logo
Brands
  1. Home
  2. •
  3. Brands
  4. •
  5. ReSound
  6. •
  7. Hearing Aid
  8. •
  9. ReSound Vea Assembly instructions

ReSound Vea Assembly instructions

ReSound Vea Fitting GuideReSound Vea Fitting Guide
M200701-GB-12.01-Rev.B
New Zealand
Ground Floor, North Entrance
4 Fred Thomas Drive
Takapuna
Auckla nd, 0622
Tel.: (free) 0800 90 0 126
Fax: (fre e) 0800 007 695
www.gnresound.co.nz
United Kingdom
GN ReSound Ltd.
Kirtlington Business Centre
Portway
Kirtlington
Oxon OX5 3JA
Tel.: +44 1869 352 800
Fax: +44 1869 34 3 466
www.gnresound.co.uk
Australia
GN ReSou nd Pty. Ltd.
Unit R1 Rege nts Park Estate
391 Park Road
Regents Park NSW 2143
Tel.: (free) 1800 658 955
Fax: 02 9743 7472
www.gnresound.com.au
Canada
GN ReSound Canada
303 Supe rtest Road
Toronto, Ontario
CANADA M3J 2M4
Tel.: +1 888 737 6863
Fax: +1 800 666 4089
[email protected]
www.gnresound.ca
Worldwide headquarters
ReSound A/S
Lautrupbjerg 7
DK-2750 Ballerup
Denmark
Tel.: +45 45 75 11 11
Fax: +45 45 75 11 19
www.resound.com
ReSound®provides excellent sound by offering innovative
hearing solutions that combine original thinking and design
with solid technology – all based on deep audiological insight
and a profound understanding of the hearing impaired.
Now, ReSound VeaTM raises the bar again. A small, discreet
instrument, delivering strong, invisible connections to the
important things in life. www.resound.com/vea
ReSound a nd rediscover he aring are registe red trademarks o f the GN ReSound Gro up. © 2010th e GN ReSound Grou p,a ll rights reser ved.
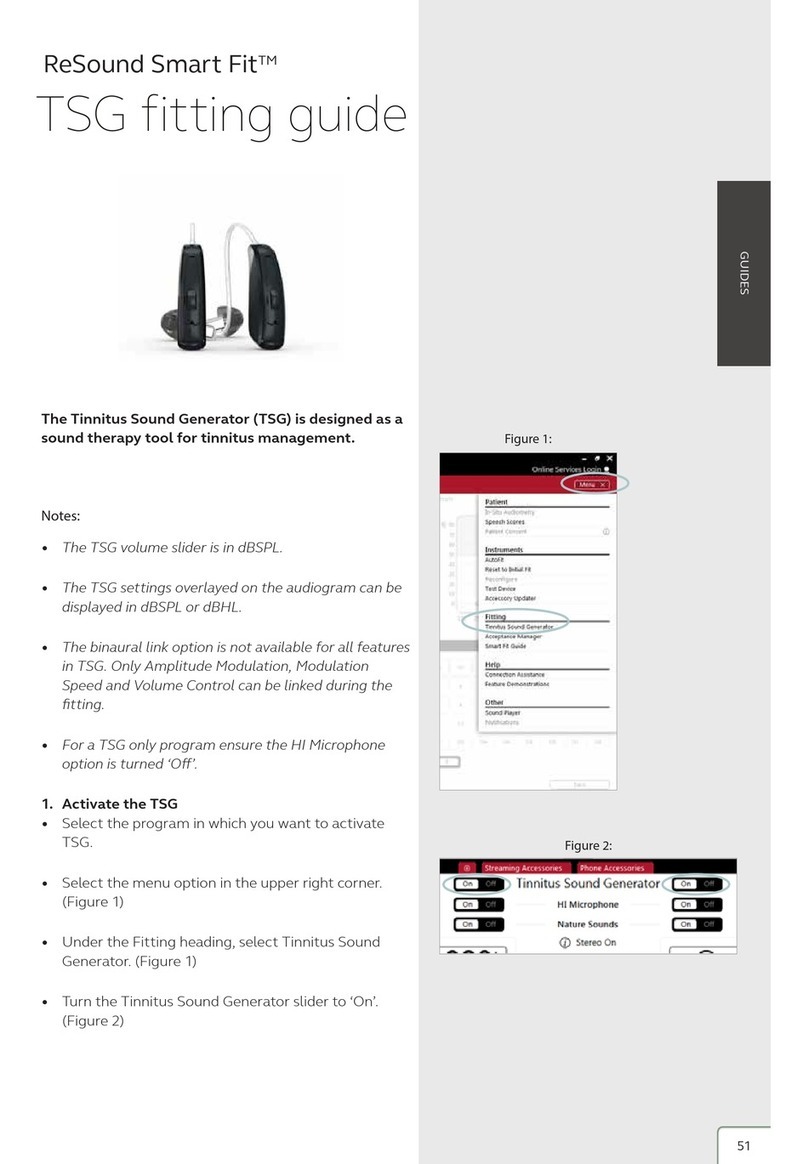
This fitting guide gives an overview of how to fit ReSound Vea hearing instruments
with Aventa 3.3. A ReSound Vea 3 fitting is assumed here. Note that not all features
mentioned here are available in ReSound Vea 2 and ReSound Vea 1. The Aventa 3.3
fitting software supports all ReSound instruments built on the ReSound RangeTM chip.
The ReSound RangeTM chip was introduced with ReSound Alera.
Getting Started
Prior to connecting to Aventa®3.3:
1. Select the appropriate hearing instrument(s) for the
patient’s hearing loss.
2. ReSound Vea requires a battery when fitting. Make sure
the battery is fresh and that it is inserted correctly.
3. ReSound Vea must be fitted with cables, make sure that
the programming interface (Speedlink, Hi-PRO or NOAHlink)
is connected to the PC.
Note that a new programming adaptor is required to fit
ReSound Vea, named Programming Adaptor II.
4. Launch Aventa 3.3. For new fittings, Aventa 3 begins in the
Start screen, where the client’s experience with amplification
can be selected, the programming interface can be chosen,
and connection to hearing instrument(s) can be established.
Choose patient
experience level Click “Connect”
Connecting to the hearing instrument(s)
Select the appropriate patient experience level in the Patient
information box. This will ensure the best starting gain settings
for the patient.
Choose the appropriate programming interface in the “Connect
using” drop-down menu in the Aventa 3.3 Start screen. For
ReSound Vea, this is either Speedlink, Hi-PRO or NOAHlink.
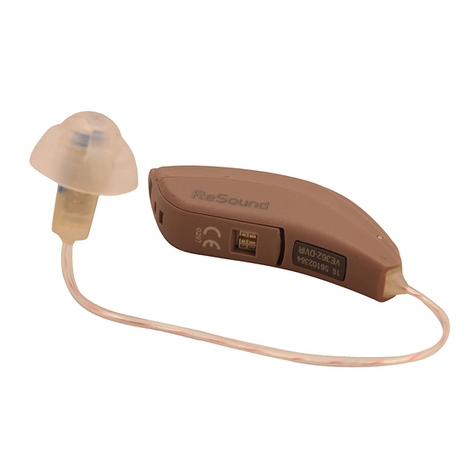
For BTE fittings, slide down the cover on the inside of the
hearing instrument and attach the programming adaptor II.
Connect the hearing instrument(s) to the Speedlink, Hi-PRO or
NOAHlink with the CS44 cable. For custom fitting, use 3-pin
flex strip CS63 and programming cable CS63.
Click “Connect” in the upper
right corner of the Aventa 3
Start screen.
AutoFit
For fast fitting click “AutoFit”
in the Start screen. When
AutoFit has been selected
the instrument(s) will be
connected and go through
4 steps: Fit, Calibrate DFS,
AutoREM and Save. Any step can be cancelled if necessary.
When AutoFit has completed you can choose either to “Go to
Fit Screen” and do fine-tuning or simply “Exit Aventa”.
Click AutoFit
Select programming
interface and click
‘Connect’
Choose ”Go to Fit
Screen” or “Exit
Aventa”
Reconfigure
Vea BTE and mini BTE models can be fit open or closed. To
change from open to closed, or vice versa, the instrument(s)
must be reconfigured. This is done in the Pre-Fit screen. In the
middle of the screen there is a button called “Reconfigure”. Click
this button and follow the instructions to change instruments to
the desired configuration.
If a closed model is being changed to an open model remember
to change the hook to a thin tube adaptor.
Turn the hook 90 degrees and pull. Insert the thin tube adaptor
completely in a 90 degree angle and turn it upright.
Program management
The program tabs are located between the graph and the gain
handles. This is where programs can be changed, added or
removed.
PhoneNow has its own dedicated program tab to the right of
the 3 regular programs. PhoneNow will be activated by use
of the PhoneNow magnet. PhoneNow is turned ‘On’ in the
PhoneNow program.
Tools
Advanced Features
Feature settings including Expansion, Dual Stabilizer II DFSTM
with WhistleControlTM, NoiseTrackerTM II, and directional options
are accessed by clicking “Advanced Features” in the “Tools”
menu. These settings apply to the currently selected program,
and are summarized in the “Features Summary” below the
“Tools” menu.
Physical properties
Physical properties can also be found in “Tools” on the Fit
screen.
Dome and tube selection, and vent configuration can be made
here. Apart from record-keeping for the fitting, selections made
in this screen affect the display in the Fit screen. For example,
when venting is changed, the amount of roll-off in the low
frequencies will be adjusted to show how this physical change
affects the real ear response.
Beeps and volume Control
Once fine-tuning is complete, click on “Beeps and Volume
Control” in the tool set on the Fit screen. A screen will pop
up where all the acoustic indicators can be demonstrated,
changed, added and removed. It is possible to choose a low
frequency beep set or a high frequency beep set.
It is also where volume control changes can be made.
Programming
Once the fitting is complete and all the necessary adjustments
are made, click “Save” at the bottom right of the Fit screen.
Once the data is saved to the instrument(s) and to the database
(Noah) a green confirmation box will display next to the “Save”
button.
At this time it is safe to disconnect the instrument(s). A second
option at this time is to go to the Summary screen. If any
changes are made the confirmation will disappear and it will be
necessary to re-save the data before disconnecting.
Summary
The summary page allows the clinician to print information for
the client, a third party, or clinic notes for a chart. Notes can be
made and saved and then printed as needed.
Fitting
DFS calibration
Once the hearing instrument(s) are connected, an auto-prompt
for DFS calibration will appear. It is strongly recommended to
always run the calibration at the start of a new fitting, or if venting
(including dome changes or earmold changes) are made. This
is because any such changes affect the feedback path and thus
the performance of Dual Stabilizer II DFSTM. Counsel the patient
that a brief buzzing sound will be presented to each ear, and
that they should sit quietly. Click “Yes” to begin the calibration.
Maximum stable gain and Safe Fitting
Once the Dual Stabilizer II DFSTM is calibrated, the Fit screen
automatically opens with two shaded grey areas visible on the
graph (applied to most cases). The darker grey shaded area
indicates unavailable gain while the light grey indicates added
maximum stable gain provided by Dual Stabilizer II DFSTM.
If Safe Fitting is enabled, gain settings will be locked at the dark
grey border. Safe Fitting can be turned off and on in the Fitting
menu or set as a user preference. Note that if you have not
calibrated Dual Stabilizer II DFSTM, there will only be one shaded
area which indicates the full on gain of the particular hearing
instrument(s).
Fine-tuning
By default, Aventa calculates the gain settings for the particular
audiogram using the Audiogram+ fitting rationale. To fine-tune a
program, adjust the gain manually by using the gain matrix or by
using the Aventa Guide where solutions to patient complaints
can be automatically applied.
Once fine-tuning is complete you can copy the relative gain
changes to any other program in your fitting. This can be done
by clicking the “Autorelate” button in the tool bar beneath the
program tabs. Gain adjustments can be autorelated to all or to
selected programs. Select which programs to autorelate to by
checking off the boxes.
New in Aventa 3.3 is the ability to recalculate current program
or all programs.
Click ”Yes” to calibrate
Select dome and tube size
Click ‘Save
Maximum stable gain
Manual gain controls
Tools for fitting are
located here Show program menu
Unavaliable gain
Remove
Attach
Click reconfigure

Other manuals for Vea

2

Other ReSound Hearing Aid manuals

ReSound Nexia 62 User manual

ReSound

ReSound Nexia 62 User manual

ReSound PS60-R User manual

ReSound

ReSound PS60-R User manual

ReSound 10 CIC User manual

ReSound

ReSound 10 CIC User manual

ReSound Enya 67 User manual

ReSound

ReSound Enya 67 User manual

ReSound CP1BW-V User manual

ReSound

ReSound CP1BW-V User manual

ReSound LiNX 3D 88 User manual

ReSound

ReSound LiNX 3D 88 User manual

ReSound IIC User manual

ReSound

ReSound IIC User manual

ReSound Verso Assembly instructions

ReSound

ReSound Verso Assembly instructions

ReSound Magna User manual

ReSound

ReSound Magna User manual

ReSound SY312 User manual

ReSound

ReSound SY312 User manual

ReSound LiNX Quattro MIH User manual

ReSound

ReSound LiNX Quattro MIH User manual

ReSound ENZO 2 Assembly instructions

ReSound

ReSound ENZO 2 Assembly instructions

ReSound ENZO2 88 User manual

ReSound

ReSound ENZO2 88 User manual

ReSound ENYA User manual

ReSound

ReSound ENYA User manual

ReSound Linx Quattro Assembly instructions

ReSound

ReSound Linx Quattro Assembly instructions

ReSound Nexia NX960S-DRWC User manual

ReSound

ReSound Nexia NX960S-DRWC User manual

ReSound AZ30 User manual

ReSound

ReSound AZ30 User manual

ReSound f861-drw User manual

ReSound

ReSound f861-drw User manual

ReSound Phone Clip User manual

ReSound

ReSound Phone Clip User manual

ReSound ONE 9 User manual

ReSound

ReSound ONE 9 User manual

ReSound Ziga Mini BTE ZG60-DI User manual

ReSound

ReSound Ziga Mini BTE ZG60-DI User manual

ReSound LiNX 2 88 User manual

ReSound

ReSound LiNX 2 88 User manual

ReSound LiNX Quattro 61 User manual

ReSound

ReSound LiNX Quattro 61 User manual

ReSound LiNX3D 67 User manual

ReSound

ReSound LiNX3D 67 User manual

Popular Hearing Aid manuals by other brands

oticon Vigo Connect Fittings guide

oticon

oticon Vigo Connect Fittings guide

Phonak Audeo V90-R user guide

Phonak

Phonak Audeo V90-R user guide

Sennheiser RS 180 Instructions for use

Sennheiser

Sennheiser RS 180 Instructions for use

rionet Joyton HI-G6E manual

rionet

rionet Joyton HI-G6E manual

Retone k19 user guide

Retone

Retone k19 user guide

oticon EduMic troubleshooting guide

oticon

oticon EduMic troubleshooting guide

Siemens Octiv SP+ Instructions and guidance

Siemens

Siemens Octiv SP+ Instructions and guidance

Sennheiser Audiology Set 810 S Infra-red Instructions for use

Sennheiser

Sennheiser Audiology Set 810 S Infra-red Instructions for use

Cochlear Nucleus Aqua+ instructions

Cochlear

Cochlear Nucleus Aqua+ instructions

Siemens eCharger user guide

Siemens

Siemens eCharger user guide

Williams Sound FM+ Series user manual

Williams Sound

Williams Sound FM+ Series user manual

Bellman BE2210 manual

Bellman

Bellman BE2210 manual

Starkey Hearing Technologies Remote Quick tips

Starkey Hearing Technologies

Starkey Hearing Technologies Remote Quick tips

Hearing Products International Echo 2.4G user manual

Hearing Products International

Hearing Products International Echo 2.4G user manual

Phonak MLxi Fittings guide

Phonak

Phonak MLxi Fittings guide

Commidt BLUES user manual

Commidt

Commidt BLUES user manual

Miracle-Ear EarENERGY 5 RIC R EV user manual

Miracle-Ear

Miracle-Ear EarENERGY 5 RIC R EV user manual

oticon STREAMER PRO Instructions for use

oticon

oticon STREAMER PRO Instructions for use

manuals.online logo
manuals.online logoBrands
  • About & Mission
  • Contact us
  • Privacy Policy
  • Terms and Conditions

Copyright 2025 Manuals.Online. All Rights Reserved.