manuals.online logo
Brands
  1. Home
  2. •
  3. Brands
  4. •
  5. Resource
  6. •
  7. Indoor Furnishing
  8. •
  9. Resource Circe User manual

Resource Circe User manual

Assembly
Instructions
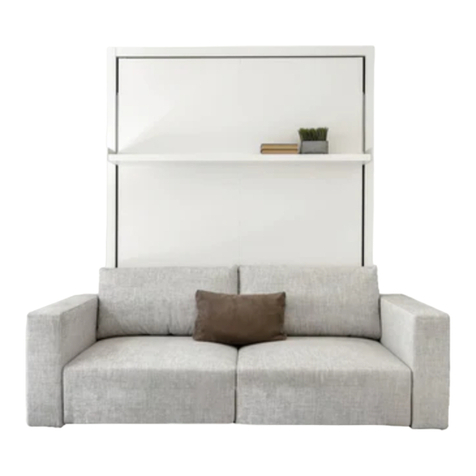
Circe Sofa
WARNING
READ CAREFULLY BEFORE BEGINNING INSTALLATION.
IMPROPER INSTALLATION OF THE PRODUCT MAY CAUSE SERIOUS INJURY
Warranties for all products purchased from Resource Furniture, LLC are
only valid if the product has been properly assembled, Installed by a trained
professional, and operated in accordance with the assembly instructions.
Resource Furniture accepts no responsibility for any damage or injury caused
by Improper Installation.
Installation must be performed by a licensed contractor or a trained
professional, who will ensure proper assembly and installation.
Installation must be performed by at least 2 people.
Improper installation may result in permanent damage to the bed.
Improper installation of this product can cause serious or fatal injury.
No anchor can be used twice. If the product is removed from the wall, new
anchor holes must be drilled and new hardware must be used.
All hardware must be properly tightened. No parts of the model should be
left loose or unstable.
The wall bed must be secured to the wall in four locations using appropriate
hardware. The contractor or installer must select the proper anchoring hardware.
• The wall anchors included are for solid concrete walls only.
• Walls with wooden studs: Wood screws must be screwed into wooden studs in
the wall.
• Any other wall composition: A proper wall anchor suitable for the wall’s
construction must be selected by the contractor or installer.
CIRCE SOFA MATTRESS SPECIFICATIONS
Recommended weight: ~ 66 lbs
Recommended dimensions: 78 3/4 x 59 x 7”
Recommended dimensions with headboard: 75 x 59 x 7” 1
CIRCE SOFA OVERVIEW
48 1/4
63 1/2
86 5/8
85
85
86 5/8
1
1
1
11
2
CIRCE SOFA OVERVIEW
3
CIRCE SOFA OVERVIEW
Note: bed base cannot be disassembled
13
16
CIRCE SOFA COMPONENTS
CODE QT Y. COMPONENTS
1 1 Right side panel
2 1 Left side panel
3 1 Top horizontal panel
4 1 Bottom horizontal panel
5 1 Bed base
6 1 Sofa base
7 1 Lower back panels
8 1 Spline to join lower back panels
9 1 Sofa seat
10 2 Sofa arm
11 2 Triangular sofa base plates
12 2 Angle bracket to attach sofa arm to structure of bed
13 1 Top back panel
14 1 Structural shelf
15 1 Shelf
16 1 Mattress support bar
4
CODE QT Y. COMPONENT DESCRIPTION
A 12 7 x 36 6MA Pins
B 12 D15 L17 Cam Connectors
C44 3.5 x 20 Wood screws for attaching
back panels to structure
D 8 10 x 60 Wooden dowels for attaching
sofa arms to Structure
E 2 14 x 16 x 4 Washer for attaching sofa
arms to structure
F 2 M8 x 180 Threaded rod for attaching
sofa arm to structure
G 6 6MA Nut to attach sofa components
to structure
H 6 M8 x 20mm Machine bolts to secure sofa
components
I 4 Conical washer to secure sofa
components
J 4 M8x30MM Machine bolts for attaching
bed base to structure
K 4 M8 x 45mm Machine bolts for attaching
sofa arms to structure
L 12 M8 Washers for attaching sofa
components
M 1 Shelf support
N 4 M8 x 30mm
Machine bolt for attaching
angle bracket to bottom
horizontal panel
CIRCE SOFA STRUCTURAL HARDWARE
5
6
STRUCTURE ASSEMBLY
1Screw 6 (A) pins into both the (1) right vertical and (2) left vertical panels. Attach the (4)
horizontal bottom panel; (3) horizontal top panel and (14) structural shelf to the vertical
panels by inserting and tightening 12 (B) cams.
7
STRUCTURE ASSEMBLY
2Attach the (7) lower back panels to the structure using (C) wood screws. Insert (8)
back panel spline into lower back panel. Then place the (7) upper back panel on top of
the spline, fastening it to the structure using (C) wood screws. Attach the (13) top back
panel to the structure using (C) wood screws.
8
STRUCTURE ASSEMBLY
3Insert the (15) shelf using the (M) shelf support.
9
Wand Light Exploded Diagram
Cord Length = 118”
Front
Back
4
OPTIONAL WAND LIGHTING
Drill 1/2” hole at 40 1/2” measured from the bottom of the structure (from inside) and 1 1/2” in
from the side. Install mounting Plate with provided wood screws, aligning the 1/2” drill holes.
10
LEVELING THE STRUCTURE
detail 21a
5Ensure that the structure is level and plumb. To compensate for any floor unevenness,
use the adjustable feet on the bottom panel (det. 21a) to level the structure.
11
6
WALL BED ATTACHMENT
1
2
3 4
1 2
3
4
1 2
3
4
1
2
3 4
After the unit is level and plumb it should be securely attached to the wall using the
metal angle mounting brackets as shown in the images below. A proper wall anchor
suitable for the wall’s construction must be selected by the contractor or installer.
MATTRESS BAR INSTALLATION
7Fasten the (16) mattress support bar to the (5) bed frame using the attached bolt to each bar.
Mattress bar must be installed before the bed base is inserted into the structure.
12
13
8
BED BASE INSTALLATION
5
1
5
1
Inserting the bed base into the structure.
14
BED BASE INSTALLATION
9Attach the bed base to the structure using 4 machine bolts (J).
BED BASE INSTALLATION
10
11
Attach the (11) triangular metal sofa plates to the (5) bed base using 3 (H) hex screws on both sides.
Attach the (11) triangular metal sofa plates to the (6) sofa base using 1 (H) machine bolt and 1 (I)
conical washer on each side.
15
16
SOFA ARM INSTALLATION
8
11
detail 11a
IMAGE 8
Insert 8 (D) wooden dowels into the top four holes on both the left and right vertical panels.
Insert and secure the (F) threaded rods into the lowest hole on both the left and right vertical panels.
Position the 2 (10) armrests in front of the left and right panels, lining up the holes on the armrests with the
dowels and threaded rods.
ATTENTION: It is important to securely tighten the hardware connecting the sofa arms to the structure as
well as adjusting the feet under the sofa arms.
CIRCE SOFA
12 Insert 8 (D) wooden dowels into the top four holes on both the left and right vertical
panels. Insert and secure the (F) threaded rods into the lowest hole on both the left and
right vertical panels. Position the 2 (10) armrests in front of the left and right panels,
lining up the holes on the armrests with the dowels and threaded rods.
Attention: It is important to securely tighten the hardware connecting the sofa arms to
the structure as well as adjusting the feet under the sofa arms.
17
SOFA SEAT CUSHION INSTALLATION
detail
12b
detail 12a
N
N
CIRCE SOFA
detail 14a
13 Place the (9) sofa seat cushion on the (6) sofa base, wrapping the excess fabric around
the back of the sofa frame and fastening with velcro ( detail 13a).
18
SOFA FRAME INSTALLATION
14
14 Secure the levers at the front of the sofa base to the armrests using 2 (H) machine bolts and
2 (I) conical washers.

Other Resource Indoor Furnishing manuals

Resource Swing With Chaise User manual

Resource

Resource Swing With Chaise User manual

Resource Oslo Series User manual

Resource

Resource Oslo Series User manual

Resource Kali Board 90 User manual

Resource

Resource Kali Board 90 User manual

Resource Kali 90 User manual

Resource

Resource Kali 90 User manual

Resource Tango 223 User manual

Resource

Resource Tango 223 User manual

Resource Penelope 2 User manual

Resource

Resource Penelope 2 User manual

Resource Swing 0 User manual

Resource

Resource Swing 0 User manual

Resource Kali Duo Sofa User manual

Resource

Resource Kali Duo Sofa User manual
Resource Altea 90 User manual

Resource

Resource Altea 90 User manual

Resource Ulisse Wall Bed User manual

Resource

Resource Ulisse Wall Bed User manual

Resource Kali Duo Board User manual

Resource

Resource Kali Duo Board User manual

Resource Circe Wall Bed User manual

Resource

Resource Circe Wall Bed User manual

Resource Nuovoliola User manual

Resource

Resource Nuovoliola User manual

Resource Ulisse Dining User manual

Resource

Resource Ulisse Dining User manual

Resource LGM User manual

Resource

Resource LGM User manual
Resource ALTEA Work 90 User manual

Resource

Resource ALTEA Work 90 User manual

Popular Indoor Furnishing manuals by other brands

NATHAN JAMES Telos manual

NATHAN JAMES

NATHAN JAMES Telos manual

Twoey inside 3921 Assembly instructions

Twoey inside

Twoey inside 3921 Assembly instructions

Pronto wonen Highboard 06463/301 Assembly instructions

Pronto wonen

Pronto wonen Highboard 06463/301 Assembly instructions

IKEA ANDY DRAWER UNIT W/CASTERS 15X23" instructions

IKEA

IKEA ANDY DRAWER UNIT W/CASTERS 15X23" instructions

Astonica 50105357 instruction manual

Astonica

Astonica 50105357 instruction manual

Meble Furniture PARIS Assembly instructions

Meble Furniture

Meble Furniture PARIS Assembly instructions

hernest H100185 user manual

hernest

hernest H100185 user manual

WIEMANN 991 952 manual

WIEMANN

WIEMANN 991 952 manual

Kidco Premier Gateway Series user guide

Kidco

Kidco Premier Gateway Series user guide

Bartscher 601182 Original instructions for use

Bartscher

Bartscher 601182 Original instructions for use

Argos Home 246/4675 Assembly instructions

Argos Home

Argos Home 246/4675 Assembly instructions

Ethan Home 315B WINGBACK KING Assembly instruction

Ethan Home

Ethan Home 315B WINGBACK KING Assembly instruction

Teknion marketplace Series Installation guides

Teknion

Teknion marketplace Series Installation guides

Bolton Furniture 2 Drawer Bedside Nightstand Assembly instructions

Bolton Furniture

Bolton Furniture 2 Drawer Bedside Nightstand Assembly instructions

GFW TOULOUSE Assembly instructions

GFW

GFW TOULOUSE Assembly instructions

sconto HVKK231 Assembling Instruction

sconto

sconto HVKK231 Assembling Instruction

Luxor PS4000 instruction manual

Luxor

Luxor PS4000 instruction manual

OVE AYSEL 42 installation manual

OVE

OVE AYSEL 42 installation manual

manuals.online logo
manuals.online logoBrands
  • About & Mission
  • Contact us
  • Privacy Policy
  • Terms and Conditions

Copyright 2025 Manuals.Online. All Rights Reserved.