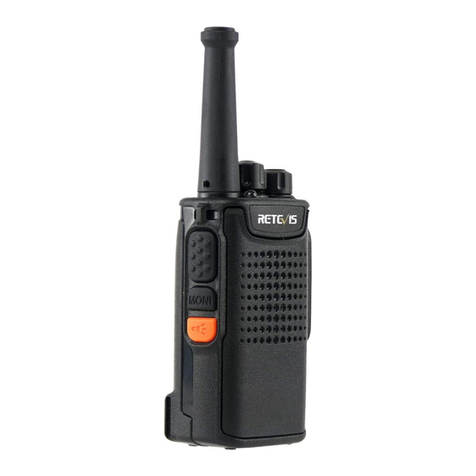
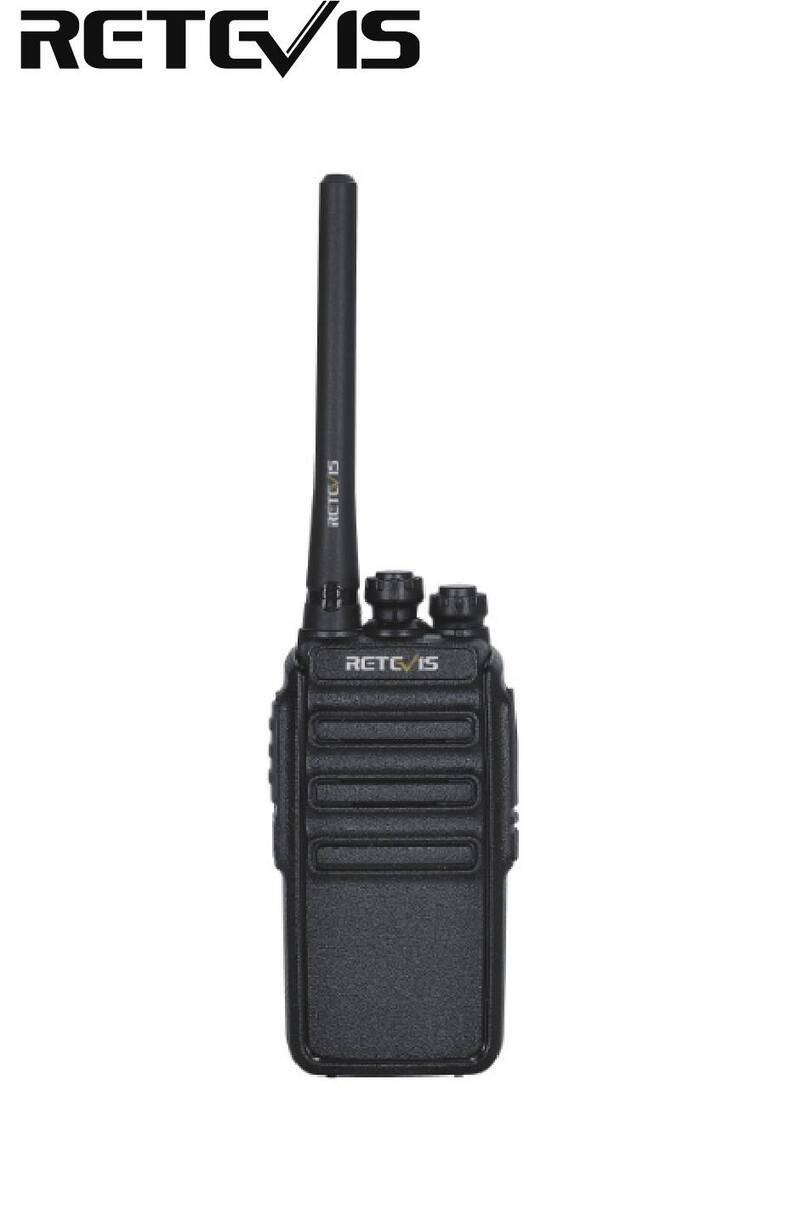
Retevis RT30M User manual

RT30M
Walkie Talkie
EU
DE
FR
IT
ES

Please read this operating instruction
carefully before using your Retevis
RT30M two way radio, including
the part on Product Safety and RF
Energy Exposure Compliance
CAUTION
Before initial use, please check if the product inside
the box is in good condition or not. If there are any
signs of damage or missing parts, please feel free
to contact the carrier or the seller.
Product Inspection
Item Included
Walkie Talkie
Belt Clip
User’s Guide
Quantity(Pcs)
2
2
1
Operating voltage
Operating temperature range
Overall dimensions
Weight
Rf power
3.6~4.5V
-20℃~50℃
119*48*35mm
96g
0.5W
Specification
TECHNICAL PARAMETERS
Europe D503N
DCS
446.09375MHz
Working Frequency
How to assemble and remove the belt clip
Slide the clip into the slot on the back of the radio
until it is snapped into place.
-To remove
Gently pull the lock tab, and then push up the belt
clip to remove it from the radio.
How to install or replace batteries
Make sure the radio is turned off;
Remove the belt clip;
Slide and lift the battery compartment cover;
Insert 3 AAA batteries with correct polarity into per
radio;
Close the battery cover and attach the belt clip.
(Note: Please remove the batteries if the units are
not used for a long time)
Installation
1 2
English
Microphone
LED Indicator
On/Off Power
Button
Call Tone
Speaker
TALK Button
LED Indicator

3 4
How to turn on/off the radio
• Press and hold (On/Off power button) for three
seconds. A short audible beep and a flash of the
LED indicator shows that the radio is on;
• To turn off the radio, you need press and hold until
an audible beep is heard.
Receiving
The radio is ready to receive signals when it is turned
on and no transmitting is made. The LED indicator
glows green when signals are being received.
Transmitting
• To talk to another person, press and hold “TALK”
button. The LED indicator glows red when the radio
is transmitting.
• Please speak directly to the microphone and keep
it 2 inches from your mouth to get maximum clarity.
• Release the button when you finish talking.
Operation
Call Tone
• Allow you to transmit a tone to other radios in your
group to alert them that you want to talk or you’ve
finished talking.
• When the radio is on, press once to send a call
alert. Then all the other radios operating on the
same channel and within the communication range
will receive it. (Note: There is only one call tone
available on this unit)
TOT(Time-out Timer)
The radio will automatically stop transmitting when
the "TALK" button is held for 180 seconds.
Automatic Turn off
The radio will automatically power off after 30 minutes
of inactivity.
Remarks:
1.This guarantee card should be kept by the user,
no replacement if lost.
2.Most new products carry a two-year manufacturer’s
warranty from the date of purchase. Further details,
pls read http://www.retevis.com/after-sale/
3.The user can get warranty and after-sales service
as below:
• Contact the seller where you buy.
• Products Repaired by Our Local Repair Center.
4.For warranty service, you will need to provide a
receipt proof of purchase from the actual seller for
verification.
Guarantee
Pic 1 Pic 2 Pic 3

5 6
Exclusions from Warranty Coverage:
1.To any product damaged by accident.
2.In the event of misuse or abuse of the product or
as a result of unauthorized alterations or repairs.
3.If the serial number has been altered, defaced, or
removed.
Compliance with RF Exposure Standards (If
appropriate, Reference to the actual product’s
Safety Marking)
Your Retevis walkie talkie is designed and tested to
comply with a number of national and International
standards and guidelines (listed below) for human
exposure to radio frequency electro-magnetic energy.
The CE marking means: Hereby, Shenzhen Retevis
Technology Co., Ltd. declares that the radio equipment
type RT30 is in compliance with the RED Directive
2014/53/EU and the ROHS Directive 2011/65/EU
and the WEEE Directive 2012/19/EU. The full text
of the EU declaration of conformity is available at
the following internet address: www.retevis.com
NOTE: The approved batteries, supplied with this
radio, are rated for a 5-5-90 duty factor (5% talk-5%
listen-90% standby) even though this radio complies
with FCC occupational exposure limits and may
operate at duty factors of up to 50% talk.
RF energy exposure standards and guidelines
(if appropriate)
Your Retevis walkie talkie complies with the following
RF energy exposure standards and guidelines:
• American National Standards Institute (ANSI) /
Institute of Electrical & Electronic Engineers (IEEE)
C95. 1-2005
• Institute of Electrical and Electronic Engineers
(IEEE) C95.3-2002
• International Commission on Non-Ionizing Radiation
Protection (ICNIRP)
• International Electrotechnical Com-mission
IEC62209-2:2010]
Model Number:
Serial Number:
Purchasing Date:
Dealer:
Telephone:
User’s Name:
Telephone:
Country:
Address:
Post Code:
Email:
Guarantee

den Gürtelclip zu installieren und demontieren
Führen Sie den Gürtelclip in den Gürtelclipschlitz ein
und drücken Sie ihn nach unten, um die Installation
abzuschließen (Bild 1) Wenn Sie den Gürtelclip
demontieren wollen, drücken Sie zuerst den Karte-
nzapfen und schieben Sie den Gürtelclip nach oben.
den Akku zu installieren
Bitte demontieren Sie zuerst den Gürtelclip, um die
Batterieabdeckung zu öffnen.
Legen Sie die 3 Stk. AAA Akkus rein, bitte beachten
Sie die Richtigkeit der Polarität.
Installieren Sie wieder die Batterieabdeckung und
den Gürtelclip.
Hinweis: Wenn Sie das Funkgerät lange Zeit nicht
benutzen, bitte holen Sie die Akkus aus.(Bild 2)
Technische Daten
Installationsanweisung
Europe D503N
DCS
446.09375MHz
Fréquence de fonctionnement
Betriebsspannung
Betriebstemperaturbereich
Gesamtabmessungen
Gewicht
Rf Leistung
3.6~4.5V
-20℃~50℃
119*48*35mm
96g
0.5W
TECHNISCHE DATEN
Radio Parts and Controls
Bitte überprüfen Sie vor dem ersten Gebrauch, ob
das Produkt im Paket in gutem Zustand ist. Wenn
es irgendwelche Schäden oder fehlende Teile gibt,
zögern Sie sich nicht, den Spediteur oder den
Verkäufer zu kontaktieren.
Packing List
Packing List
Funkgerät
Gürtelclip
Bedienungsanleitung
Menge
2
2
1
Lesen Sie bitte vor der Verwendung
dieses Produkts die mitgelieferte
Bedienungsanleitung für die sichere
Verwendung, die enthält "Produktsic-
herheit und HF-Exposition Broschüre".
CAUTION
1 2
Deutsch
Mikrofon
Kontrolllampe
Sprechen
(PTT) Lautsprecher
An-Ausschalten
/Rufton
Kontrolllampe

3 4
Anschalten / Auschalten
• Bitte halten Sie die Taste gedrückt, bis Sie
eine kurze Piepton hören, die LED-Lampe blinkt
einmal, dann ist das Funkgerät an.
• Bitte halten Sie die Taste ca.3 Sekunden ged-
rückt,bis Sie eine kurze Piepton hören.
Empfangen
Beim Empfangen blinkt die LED Lampe grün.
Senden
Um zu sprechen, sollten Sie die SPRECH-Taste
gedrückt halten, die Taste kann nach Beendigung
der Sprachausgabe losgelassen werden. Beim Se-
nden blinkt die LED Lampe rot. Sprechen Sie vom
dem Mikrofon fern, am besten mit einem Abstand
5cm.
Bedienungsanleitung
Rufton
Diese Funktion wird zum Starten oder Beenden des
Anrufs verwendet.
Der Rufton darf nicht geändert werden.
TOT(Time Out Timer)
Verhindert, dass ein einzelner Funkteilnehmer einen
bestimmten
Kanal lange belegt. Die Übertragungszeit ist 180s.
Automatische Abschaltung
Um den Strom zu sparen, wenn Sie das Funkgerät
über 30 Minuten nicht verwenden, dann werde es
automatisch abgeschaltet. Bitte schalten Sie es ein,
wenn Sie es benutzen.
1. Diese Garantiekarte sollte vom Benutzer aufbew-
ahrt werden, kein Ersatz bei Verloren.
2. Die meisten neuen Produkte gibt es ab dem
Kaufdatum eine zweijährige Herstellergarantie.
Weitere Details, lesen Sie bitte
http://www.retevis.com/after-sale/
3. Der Benutzer kann Garantie und Kundendienst
wie unten erhalten:
• Kontaktieren Sie den Verkäufer, wo Sie kaufen.
• Von unserem lokalen Reparaturzentrum
4. Für den Garantieservice müssen Sie dem Verkä-
ufer eine Kaufbestätigung als Nachweis vorlegen
Exclusions from Warranty Coverage:
1. To any product damaged by accident.
2. In the event of misuse or abuse of the product or
Bemerkungen
Pic 1 Pic 2 Pic 3
【】
【】

5 6
as a result of unauthorized alterations or repairs.
3. If the serial number has been altered, defaced, or
removed.
Einhaltung der RF-Expositionsstandards (ggf.
Verweis auf die Sicherheitskennzeichnung des
Produkts)
Ihr Retevis Walkie Talkie ist so konzipiert und get-
estet, dass es eine Reihe nationaler und internati-
onaler Normen und Richtlinien (siehe unten) für
die Exposition von Menschen mit hochfrequenter
elektromagnetischer Energie erfüllt.
Die CE-Kennzeichnung bedeutet: Hiermit erklärt
Shenzhen Retevis Technology Co., Ltd., dass der
Modell-Nr
Seriennummer
Kaufdatum
Händler
Telefon
Benutzername
Telefon
Land
Adresse
Postleitzahl
Email
Garantiekarte
Typ des Funkgeräts RT30 der RED-Richtlinie 2014
/53/EU und der ROHS-Richtlinie 2011/65/EU und
die WEEE-Richtlinie 2012/19/EU entspricht.
Der vollständige Text der EU-Konformitätserklärung
ist unter folgender Internetadresse verfügbar:
www.retevis.com
HINWEIS: Die mit diesem Funkgerät gelieferten
zugelassenen Batterien sind für ein Tastverhältnis
von 5-5-90 ausgelegt (5% Senden - 5% Empfangen
- 90% Standby), obwohl dieses Funkgerät den
FCC-Grenzwerten entspricht und im Betrieb einges-
etzt werden kann Faktoren von bis zu 50% sprechen.
RF-Expositionsstandards und -richtlinien (falls
zutreffend)
Ihr Retevis Walkie Talkie entspricht den folgenden
Normen und Richtlinien zur RF-Exposition:
• American National Standards Institute (ANSI)/
Institute of Electrical & Electronic Engineers (IEEE)
C95. 1-2005
• Institute of Electrical and Electronic Engineers
(IEEE) C95.3-2002
• International Commission on Non-Ionizing Radiation
Protection (ICNIRP)
• International Electrotechnical Com-mission
IEC62209-2:2010
Installation et démontage de clip de ceinture
1. Insérez le clip de ceinture dans la fente et
poussez-le vers le bas pour l'installation (comme
indiqué sur la figure 1).
2. Pour démonter le clip, détacher le loquet de clip
et poussezle vers de haut.
Installation de batterie
1. Démontez le clip de ceinture et ouvrez le couvercle
de compartiment de batterie.
2. Installez 3 AAA piles, veuillez faire attention à la
polarité correcte de batterie.
3. Installez le couvercle et le clip de ceinture.
Europe D503N
DCS
446.09375MHz
Fréquence de fonctionnement
Spécifications
Tension de travail
Plage de température de
fonctionnement
Dimension
Poids
Puissance RF
3.6~4.5V
119*48*35mm
96g
0.5W
Paramètres techniques
-20℃~50℃
Instructions d’installations
Pièces et Commandes de Radio
Avant la première utilisation, veuillez vérifier si le
produit à l'intérieur de la boîte est en bon état. S'il y
a des dommages ou des pièces manquantes, n'hé-
sitez pas à contacter le transporteur ou le vendeur.
Liste des accessoires dans le packaging
Liste de contenu
Talkie walkie
Clip de ceinture
Mode d’emploi
Quantité
2
2
1
Avant d'utiliser ce produit, lisez le
mode d'emploi pour une utilisation
en toute sécurité contenu dans le
livret Sécurité du produit et Expos-
ition aux RF joint avec votre radio.
Attention
1 2
Français
Microphone
Indicateurr
Alimentation/
Tonalité d’appel
Haut-
Talk(Parler)
Indicateur

3 4
Allumer / Éteindre
• Maintenez le bouton enfoncé jusqu’à un bip
court et l’indicateur LED clignant.
• Bitte halten Sie die Taste ca.3 Sekunden ged-
rückt, bis Sie eine kurze Piepton hören.
Réception
Lorsque le talkie walkie est allumé et en réception,
l’indicateur LED clignote en Vert.
Transmission
Pour lancer un appel, appuyez sur le bouton TALK
et relâchez-le jusqu’à la fin de la parole. L’indicateur
LED clignote en rouge. Il vaut mieux garder la
distance de 5cm du microphone lors de parler.
Arrêt automatique
S’il n’y a aucun opération dans les 30 minutes, la
Instructions d’opération
Bedienungsanleitung
radio s’éteint automatiqueemnt pour économiser
l’énergie. Veuillez allumer la radio pour continuer
l’utilisation.
Tonalité d’appel
Utilisé pour le début ou la fin de la parole, ou anno-
ncer les autres talkies walkies sur le même canal;
Une fois pressé le bouton PTT, tous les talkies wa-
lkies dans la portée de même fréquence et même
CTCSS/DCS auront recevoir cette tonalité d’appel.
Ce talkie walkie dispose d’une sorte de tonalité
d’appel, ne peut pas être modifié.
TOT (Time Out Timer)
La transmission et réception continues ne peuvent
pas dépasser 180s.
Remarques:
1. Cette carte de garantie doit être conservée par
l'utilisateur, pas de remplacement en cas de perte.
2. La plupart des nouveaux produits bénéficient
d'une garantie du fabricant de deux ans à compter
de la date d'achat. Plus de détails, veuillez lire
http://www.retevis.com/after-sale/
3. L'utilisateur peut obtenir la garantie et le service
après-vente comme ci-dessous:
• Contactez le vendeur où vous achetez.
• Produits réparés par notre centre de réparation
local
4. Pour le service de garantie, vous devrez fournir
Garantie
Pic 1 Pic 2 Pic 3
【】
【】

5 6
Numéro de modèle
Numéro de série
Date d’achat
Distributeur
Téléphone:
Nom d’acheteur
Téléphone:
Pays
Adresse:
Code postal
Email:
Garantie
une preuve d'achat de reçu du vendeur pour la
vérification.
Exclusions de la couverture de la garantie:
1. Pour tout produit endommagé par accident.
2. En cas de mauvaise utilisation ou d'abus du produit
ou à la suite de modifications ou de réparations
non autorisées.
3. Si le numéro de série a été modifié, effacé ou
supprimé.
Conformité aux normes d'exposition RF (le cas
échéant, référence au marquage de sécurité du
produit)
Votre talkie walkie Retevis a été conçue et testés
pour satisfaire à un certain nombre de normes et de
directives nationales et internationales (répertoriées
ci-dessous) relative à l'exposition humaine à l'énergie
électromagnétique à radiofréquence.
Le marquage CE signifie: Par la présente, Shenzhen
Retevis Technology Co., Ltd. déclare que le type
d'équipement radio [RT30] est conforme à la Directive
RED 2014/53/EU et à la Directive ROHS 2011/65/EU
et la directive DEEE 2012/19/EU. Le texte intégral
de la déclaration de conformité EU est disponible à
l'adresse internet suivante: www.retevis.com
Remarque: Les batteries agréées, fournies avec
cette radio, sont conçues pour un facteur d’utilisation
de 5-5-90 (5% émission-5% réception-90% veille)
alors que cette radio est conforme aux limites d’e-
xposition de la FCC et peut fonctionner dans des
facteurs de fonctionnement allant jusqu’à 50%
d’émission.
Normes d'exposition à l'énergie RF et lignes
directrices (le cas échéant)
Votre talkie-walkie Retevis est conforme aux normes
et directives d'exposition à l'énergie RF suivantes:
• American National Standards Institute (ANSI)/
Institute of Electrical & Electronic Engineers (IEEE)
C95. 1-2005
• Institute of Electrical and Electronic Engineers
(IEEE)C95.3-2002
• International Commission on Non-Ionizing Radiation
Protection (ICNIRP)
• International Electrotechnical Com-mission
IEC62209-2:2010
Europa D503N
DCS
446.09375MHz
FREQUENZA
ISTRUZIONI SULLA RADIO
SPECIFICAZIONE
Tensione di lavoro
Temperatura di lavoro
Dimensioni
Peso
Potenza RF
3.6~4.5V
-20~50°C
119*48*35mm
96g
0.5W
SPECIFICHE GENERALI
DISIMBALLAGGIO E CONTROLLO DEL
PRODOTTO
Disimballare con cautela il ricetrasmettitore. Si con-
siglia di identificare i prodotti elencati nella seguente
tabella prima di scartare il materiale d'imballaggio.
Se alcuni articoli mancano o sono stati danneggiati
durante la spedizione, presentare immediatamente
un reclamo al corriere.
Descrizione
Walkie Talkie
Clip da cintura
Manuale utente
Quantità
2
2
1
Lista imballaggio
Prima di utilizzare questo prodotto,
leggere attentamente le istruzioni
contenuto nel libretto per un utilizzo
sicuro del prodotto Retevis RT30M,
inclusa la parte sulla sicurezza del
prodotto e la conformità all'esposizione
alle energie RF.
ATTENZIONE
1 2
Italiano
Microfono
Indicatore
LED
Tasto Power
/Calll
Altoparlante
Tasto TALK
(PTT)
Indicatore LED

3 4
Come installare e rimuovere la clip da cintura
Far scorrere la clip nella fessura sul retro della radio
fino a quando non scatta in posizione.
Per rimuovere
Tirare delicatamente la linguetta di blocco, quindi
sollevare la clip da cintura per rimuoverla dalla radio.
Come installare o sostituire le batterie
• Assicurarsi che la radio sia spenta;
• Rimuovere la clip da cintura;
• Far scorrere e sollevare il coperchio del vano
batteria;
• Inserire 3 batterie AAA con polarità corretta in radio;
• Chiudere il coperchio della batteria e collegare la
clip da cintura.
Nota: Rimuovere le batterie se le radio non vengono
utilizzate per un lungo periodo di tempo.
INSTALLAZIONE
Come accendere / spegnere la radio
• Tenere premuto (tasto di accensione/spegnimento)
per tre secondi. Un breve segnale acustico e un
lampeggio dell'indicatore LED indicano che la radio
è accesa;
• Per spegnere la radio, è necessario tenere premuto
fino a quando viene emesso un segnale acustico.
Ricezione
La radio è pronta a ricevere segnali quando è
accesa e non viene effettuata alcuna trasmissione.
L'indicatore LED diventa verde quando vengono
ricevuti i segnali.
Trasmissione
• Per parlare con un'altra radio, tenere premuto il
tasto "TALK." L'indicatore LED diventa rosso
quando la radio sta trasmettendo.
• Si prega di parlare direttamente al microfono e
tenerlo una distanza circa 2” pollici dalla bocca,
per ottenere la massima chiarezza.
• Rilasciare il tasto quando finisci di parlare.
Tono di chiamata
• Permette di trasmettere un tono alle altre radio del
tuo gruppo per avvisare che vuoi incominciare a
parlare o finito di parlare.
• Quando la radio è accesa, premere una volta per
inviare un avviso di chiamata. Quindi tutte le altre
radio che operano sullo stesso canale e all'interno
OPERAZIONI
OPERAZIONI
Pic 1 Pic 2 Pic 3

5 6
improprio;
• Modifiche o montaggio non autorizzate;
• Utilizzo in ambiente inadatto o normale deperimento
d'uso.
Numero modello
Numero seriale
Data di acquisto
Venditore
Telefono
Nome o acquirente
Telefono
Nazione
Indirizzo
CAP
E-mail
ATTENZIONE: Questo certificato deve essere
compilato in modo leggibile e chiaro (in corsivo),
ed presentare la un documento di acquisto.
GARANZIA
Timbro e firma
del venditore
del raggio di comunicazione lo riceveranno.
Nota: Su questa radio è disponibile un solo tono di
chiamata.
TOT (Time-out Timer)
La radio interromperà automaticamente la trasmiss-
ione quando il tasto "TALK" viene premuto per più
di 180 secondi.
Spegnimento automatico
La radio si spegnerà automaticamente dopo 30
minuti di inattività.
Questa scheda di garanzia è una pagina importante
per l'utente per godere del servizio di garanzia, si
prega di conservare bene.
Maggior parte dei nuovi prodotti ha una garanzia del
produttore di 2 anni dalla data di acquisto. Ulteriori
informazioni, visita sul sito.
http://www.retevis.com/after-sale/
L'utente può ottenere il servizio di riparazione dei
seguenti modi:
• Recarsi al negozio dove ha acquisto la radio.
• I nostri agenti di riparazione locali.
Per il servizio di garanzia, è necessario fornire con
un documento di acquisto, comprovante la data
effettiva di acquisto.
Questa garanzia non copre:
• Se non presenta la garanzia o documento di
acquisto, Se il numero di serie è stato alterato,
cancellato o rimosso.
• Se i difetti o danni dovuti a impiego o esercizio
GARANZIA

7 1
Conformità agli standard esposizione RF (Se pe-
rtinente, riferimento alla marcatura di sicurezza
effettiva del prodotto)
Il walkie-talkie Retevis è progettato ed testato in
conformità con una serie di norme e linee guida
nazionali e internazionali (elencate sotto) per
l'esposizione umana all'energia elettromagnetica
RadioFrequency.
Il marchio CE significa: Con la presente, Shenzhen
Retevis Technology Co., Ltd. dichiara che il tipo di
apparecchiatura radio [RT30] è conforme alla direttiva
RED 2014/53/EU e alla direttiva ROHS 2011/65/EU
e la direttiva WEEE 2012/19/EU. Il testo completo
della dichiarazione di conformità EU è disponibile al
seguente indirizzo internet: www.retevis.com
NOTA: Le batterie approvate, fornite con questa radio,
sono classificate per un fattore di lavoro 5-5-90 (5%
ascolto, 5% parlato, 90% standby) anche se questa
radio è conforme ai limiti di esposizione professionale
FCC e può operare a dovere i fattori fino al 50%
parlato.
Standard e linee guida sull'esposizione RF (Se
del caso)
Walkie talkie di Retevis è conforme ai seguenti sta-
ndard e linee guida sull'esposizione all'energia RF:
• American National Standards Institute (ANSI) /
Institute of Electrical & Electronic Engineers (IEEE)
C95. 1-2005
• Institute of Electrical and Electronic Engineers
(IEEE) C95.3-2002
• International Commission on Non-Ionizing Radiation
Protection (ICNIRP)
• Commissione elettrotecnica internazionale
IEC62209-2:2010
Producto inspección,Antes de usar al principio,revise
si el producto en el paquete es en un estado bueno,
si tiene el signo de daño o partes pedidos,pongese
contacto con el venderdor o la transportista.
Accesorios en el paquete
Lista del paquete
Walkie talkie
Pinza de clip
Instrucción Manual
Cantidad
2
2
1
Piezas de radio y controles
Antes de usar este producto,leer esta
instrucción de uso de seguridad que
se incluyen en el folleto Seguri dad
del producto y exposición a radiofre-
cuencia que viene con su radio.
Precaución
Especificaciones
Voltaje de trabajo
Temperatura de funcionamiento
Dimensión total
Peso
Potencia Rf
3.6V~4.5V
-20℃~50℃
119*48*35mm
96g
0.5W
PARÁMETROS TÉCNICOS
Europa D503N
DCS
446.09375MHz
Frecuencia de trabajo
Instalar y desinstalar del Belt clip
Inserta el clip del cinturón en la ranura del clip del
cinturón y empújalo hacia abajo para completar la
instalación.
Si quiere quitar el belt clip,primero abre la espiga y
empuje el clip hacia arriba.
Instalar la batería
Quita el belt clip;
abre la tapa de batería;
Instalar los 3 pilas,por favor, preste atención a la
polaridad correcta;
Cerrar la atpa y belt clip.
(Nota:Quita las baterías si no lo usa de largo tiempo)
Instalación
1 2
Español
Micrófono
Indicator
Apagar
Encender/tono
de llamada
Altavoz
TALK(Hablar)
Indicator

3 4
Encender/Apagar
• Mantener pulsando, cuando hace un sonido corta
y la luz LCD se parpadea, se enciende.
• Mantener pulsando más de 3 segundos, hace un
sonido corta, se apaga.
Recibir llamada
Cuando el walkie talkie en el estado encendido y no
se habla, no está en uso como un buscapersonas y
la unidad está recibiendo. Si el canal configurado
actualmente recibe un mensaje, el LED parpadea
en verde.
Transmitir llamada
Si quiere hablar,mantener pulsando botón TALK.
soltar el botón después de terminar la conversación,
LED indicador se parpadea en rojo, la distancia
mejor es 5 centímet ros al micrófono.
Instrucción de uso
Tono de llamada
Esta función se utiliza para inicair o terminar una
llamada, o avisar otros walkie talkies del mismo
canal, cuando pulsar botón, todos los walkie talkies
encendidos con el mismo canal y subcanal en dist-
ancia efectica puede recibir el tono, sólo tiene un
tono de llamada, no se puede ajustar.
Límite de tiempo de transmitir
Transmitir y recibir continua no se excede 180
segundos.
Apagar automáticamente
Se apaga sin usar después de 30 minutos para
ahorrar la energía,encenderlo antes del uso de la
proxima vez.
Instrucción de uso
Garantía
Notas:
1. Esta tarjeta de garantía debe ser guardada por el
usuario, no se reemplaza si se pierde.
2. La mayoría de los productos nuevos tienen una
garantía de fabricante de 2 años a partir de la
fecha de compra. Más detalles, leer
http://www.retevis.com/after-sale/ por favor.
3. El usuario puede obtener la garantía y el servicio
posventa de la siguiente manera:
• Póngase en contacto con el vendedor donde
compra.
• Productos reparados por nuestro centro de
reparación local
Pic 1 Pic 2 Pic 3

5 6
Número de modelo
Número de serie
Fecha de compra
Distribuidor
Teléfono
Nombre del usuario
Teléfono
País
Dirección
Código postal
Correo electrónico
Garantía
4. Para el servicio de garantía,deberá proporcionar
un comprobante de compra del vendedor real
para la verificación
Exclusiones de la cobertura de la garantía:
1. A cualquier producto dañado por accidente.
2. En caso de mal uso o abuso del producto o como
resultado de intercambio o reparaciones no
autorizadas.
3. Si el número de serie ha sido alterado, borrado o
eliminado.
Cumplimiento con los estándares de exposición
a RF (si corresponde, referencia a la marca de
seguridad del producto real)
Su walkie talkie Retevis está diseñado y probado
para cumplir con una serie de normas y pautas
nacionales e internacionales (enumeradas a conti-
nuación) para la exposición humana a la energía
electromagnética de radiofrecuencia.
El marcado CE significa: Por la presente, Shenzhen
Retevis Technology Co., Ltd. declara que el tipo de
equipo de radio RT30 cumple con la Directiva RED
2014/53/EU y la Directiva ROHS 2011/65/EU y la
Directiva WEEE 2012/19/EU
NOTA: Las baterías aprobadas, suministradas con
esta radio, están clasificadas para un factor de
servicio 5-5-90 (5% habla-5% escucha-90% en
espera) aunque esta radio cumple con los límites
de exposición ocupacional de la FCC y puede operar
en servicio factores de hasta 50% de conversación.
Normas y directrices sobre exposición a la energía
de RF (si corresponde)
Su walkie talkie Retevis cumple con los siguientes
estándares y pautas de exposición a la energía de
RF:
•Instituto Estadounidense de Estándares Nacionales
(ANSI) / Instituto de Ingenieros Eléctricos y Electr-
ónicos (IEEE) C95. 1-2005
• Instituto de Ingenieros Eléctricos y Electrónicos
(IEEE) C95.3-2002
• Comisión Internacional de Protección contra las
Radiaciones No Ionizantes (ICNIRP)
• Comisión Electrotécnica Internacional
IEC62209-2: 2010

MADE IN CHINA
7/F, 13-C, Zhonghaixin Science&Technology Park,
No.12 Ganli 6th Road, Jihua Street, Longgang District, Shenzhen, China
Importer: Germany Retevis Technology GmbH
Address: Uetzenacker 29,38176 wendeburg
Web:www.retevis.com
E-mail:[email protected]
Facebook:facebook.com/retevis
Other manuals for RT30M
1
Table of contents
Languages:
Other Retevis Two-way Radio manuals

Retevis
Retevis CTCSS105 User manual

Retevis
Retevis RT18 User manual

Retevis
Retevis RT65 User manual

Retevis
Retevis RA685 User manual

Retevis
Retevis RB75 User manual

Retevis
Retevis T-628 Manual

Retevis
Retevis RT21 User manual

Retevis
Retevis RT602 User manual

Retevis
Retevis RT-35 User manual

Retevis
Retevis RT-35 User manual

Retevis
Retevis RB19 User manual

Retevis
Retevis RT622 User manual

Retevis
Retevis RT-628 Manual

Retevis
Retevis RT642 User manual

Retevis
Retevis RT41 User manual

Retevis
Retevis A518 User manual

Retevis
Retevis RT36 User manual

Retevis
Retevis RT31 User manual

Retevis
Retevis RT32 User manual

Retevis
Retevis RB19P User manual