manuals.online logo
Brands
  1. Home
  2. •
  3. Brands
  4. •
  5. REVELL
  6. •
  7. Toy
  8. •
  9. REVELL Easy Plane User manual

REVELL Easy Plane User manual

DNiemals den laufenden Propeller berühren!
Nicht in der Nähe von Menschen, Tieren,
Gewässern oder Stromleitungen iegen – die
Aufsicht von Erwachsenen ist nötig.
FR Ne jamais toucher les hélices pendant le
fonctionnement ! Ne pas faire voler l’appareil à proximité
de personnes, d’animaux, de l’eau ou de lignes
électriques – la surveillance d’un adulte est indispensable.
GB Never touch rotating
propellers! Do not y the toy
above anyone’s head! Adult
supervision is required!
DHiermit erklärt die Revell GmbH, dass sich
dieses Produkt in Übereinstimmung mit den
grundlegenden Anforderungen und den übrigen
einschlägigen Bestimmungen der Richtlinie
1999/5/EC bendet. Die Konfor mitätserklärung
ist unter www.revell-control.de zu nden.
FR Revell GmbH déclare par la
présente que ce produit est conforme
aux exigences et autres dispositions de
la directive 1999/5/CE. La déclaration
de conformité est consultable sur le
site www.revell-control.de.
GB Revell GmbH hereby declares that
this product conforms with the basic
requirements and the additional appli-
cable provisions of Directive 1999/5/EC.
The Declaration of Conformity can be
found at www.revell-control.de.
DeutschEnglishFrançais
Wichtige Merkmale / Important characteristics /
Caractéristiques importantes
DAircraft Easy Plane:
- Voll Proportionale 27-MHz-
Fernsteuerung mit 2 Kanälen
- Flugzeug-Rumpf aus stabilem
Hartschaum
- Einfach und schnell
zusammengebaut
- Besonders eigenstabile
Flugeigenschaften
GB Aircraft Easy Plane:
- Fully proportional 27-MHz
remote control with 2
channels
- Sturdy hard foam fuselage
- Quick and easy to build
- Especially stable ight
characteristics
FR Aircraft Easy Plane:
- Télécommande 27 Mhz
à 2 canaux, entièrement
proportionnelle
- Fuselage en mousse
rigide stable
- Facile et rapide à assembler
- Qualités de vol particulière-
ment stables
23966
© 2014 Revell GmbH,
Henschelstr. 20-30, D-32257
Bünde. A subsidiary of Hobbico,
Inc. REVELL IS THE REGISTERED
TRADEMARK OF REVELL GMBH,
GERMANY. Made in China.
www.revell-control.de
DElektroschrottgesetz: Nach
Gebrauchsende bitte alle Batterien
entnehmen und separat entsorgen.
Alte elektrisch betriebene Geräte bei
den Sammelstellen der Gemeinden
für Elektroschrott abgeben. Die
übrigen Teile gehören in den
Hausmüll. Danke für die Mithilfe!
GB Electrical and electronic waste
ordinance: After the end of use,
remove all batteries and separately
dispose of all electrically operated
devices at the communal collection
centres for electrical and electronic
waste. Dispose of the remaining parts
with household waste. Thank you for
your cooperation!
FR Réglementation sur les déchets
d‘équipement électrique et électronique : À la
n de leur utilisation, retirer toutes les piles et
les éliminer séparément. Remettre les vieux
appareils électriques aux centres de collecte
des déchets d‘équipement électrique et
électronique de votre commune. Le reste peut
être jeté dans les ordures ménagères. Merci
pour votre collaboration !
NiMH
DAkkuanfor-
derung für das
Flugzeug:
Leistung:
DC 4,8 V / 0,86 Wh
Batterien:
4 x 1,2 V NiMH-Akku
(mitgeliefert)
Kapazität: 180 mAh
Batterie-/Akku-
anforderung für
die Fernsteuerung:
Stromversorgung:
DC 12 V
Batterien: 8 x 1,5 V
“AA“ (nicht mitge-
liefert)
GB Battery require-
ments for the
aircraft:
Rated output:
DC 4,8 V / 0,86 Wh
Batteries: 4 x 1,2
V NiMH battery
(included)
Capacity: 180 mAh
Battery require-
ments for the
remote control unit:
Power supply:
DC 12 V
Batteries: 8 x 1,5 V
“AA“ (not included)
FR Exigence relative
à l’accu de l’avion :
Puissance :
DC 4,8 V / 0,86 Wh
Batteries :
4 x 1,2 V NiMH
rechargeable (fournis)
Capacité : 180 mAh
Informations sur les
accumulateurs/piles
de la télécommande :
Alimentation :
DC 12 V
Piles/batteries : 8 x 1,5 V
“AA“ (non livrées)
Fernsteuerung
Remote control
Télécommande
Propeller
Propeller
Hélice
Bedienungsanleitung
Operating manual
Mode d‘emploi
Schraubendreher
Screwdriver
Tournevis
Akku
Battery
Accu
Klebstoff
Adhesive
Colle
Fahrwerk
Landing gear
Train d’atterrissage
Windfahne
Vane
Anémomètre
Akkuabdeckung und
Propeller-Abzieher
Battery cover and
propeller puller
Couvercle du compar-
timent de batteries et
arrache-hélices
Tragfläche
Wing
Voilure
Leitwerke
Control surfaces
Empennages
Rumpf
Fuselage
Fuselage
Inhalt / Contents / Contenu
27 MHz
Radio ContRol
V 01.06
2 3
• Cet avion convient aux enfants
de plus de 14 ans. La surveillance
des parents est nécessaire lors
du vol.
• Tenir à l’écart les mains, le visage,
les cheveux et les vêtements
amples de l’hélice.
• Eteindre la télécommande et l’avion
lorsqu’ils ne sont pas utilisés.
• Retirer les piles de la télécom-
mande lorsque celle-ci n‘est pas
utilisée.
• Toujours garder l’avion en vue an
de ne pas perdre le contrôle sur
celui-ci.
• Pour la télécommande, nous
recommandons l‘usage de piles
alcalines au manganèse. Pour
préserver l‘environnement, les
piles jetables de la télécommande
peuvent être remplacées par des
piles rechargeables (batteries).
• Changez les piles dès que la
télécommande ne fonctionne plus
parfaitement.
• Veuillez conserver ce mode
d‘emploi.
• L’utilisateur doit utiliser cet avion
uniquement conformément aux
consignes d’utilisation gurant
dans les présentes instructions de
service.
• Ne pas faire voler l’avion à proximité
des aéroports, des personnes, des
animaux, des plans d’eau et des
lignes électriques.
• La batterie NiMH de l’avion doit
toujours être chargée sur la télécom-
mande. Le processus de chargement
doit être soumis à une surveillance
constante et doit être interrompu
après 10 minutes maximum ou
lorsque la batterie chauffe.
• Éviter tout contact de l’avion avec
l’eau, sous peine d’endommager
ses composants électroniques.
• Toujours garder les yeux xés
sur l‘appareil, an d‘éviter qu‘il
ne percute et ne blesse le pilote,
d‘autres personnes ou des animaux.
• Cet appareil volant n’est pas adapté
aux personnes présentant des
facultés physiques ou mentales
réduites. Nous recommandons
aux personnes ne possédant
pas de connaissances dans les
maquettes d’avions la mise en
service sous la direction d’un
pilote expérimenté.
Entretien et soin :
• Nettoyer l’avion uniquement à
l’aide d’un chiffon propre.
• Protéger le modèle, la télécom-
mande et les piles de tout rayonne-
ment lumineux direct et/ou de
toute source de chaleur directe.
Consignes de sécurité concernant
les piles de la télécommande :
• Ne pas recharger les piles jetables.
• Les piles rechargeables doivent
être retirées de la télécommande
avant leur chargement.
• Les piles rechargeables doivent être
rechargées en présence d‘un adulte.
• Ne pas mélanger des piles de
type différent ou des piles neuves
et des piles usagées.
• Seules les piles recommandées
ou de même type peuvent être
utilisées.
• Respecter la polarité indiquée (+ et -)
lors de l‘insertion des piles.
• Les piles vides doivent être retirées
de la télécommande.
• Ne pas court-circuiter les bornes
de raccordement. Retirer les piles
de la télécommande si celle-ci
n‘est pas utilisée pendant une
période prolongée.
L’avion est équipé d’un accumu-
lateur Ni-MH. Veuillez respecter
les consignes de sécurité
suivantes :
• Ne jamais jeter les batteries dans
le feu, ne pas les conserver dans
des endroits chauds.
• Pour le chargement, utiliser
uniquement la télécommande
prévue à cet effet. L‘utilisation
d‘un autre chargeur peut endom-
mager durablement la batterie
ainsi que les composants qui la
jouxtent et causer des dommages
corporels !
• Toujours effectuer le chargement
sur une surface non inammable
et dans un environnement sécurisé
contre le feu.
• Surveiller la batterie du début à la
n du chargement.
• Ne jamais démonter ni modier
les contacts de la batterie. Ne
pas endommager ni percer les
cellules de la batterie. Il y a risque
d‘explosion !
• La batterie doit être maintenue
hors de portée des enfants.
• Lors de leur élimination, les bat-
teries doivent être vides ou leur
capacité de charge doit être nulle.
Recouvrir les pôles non protégés
de ruban adhésif an d‘éviter les
courts-circuits !
Consignes de sécurité :
• Ne jamais altérer la structure
de l‘appareil, sous peine de
l‘endommager ou de le rendre
dangereux.
• An d‘éviter les risques, ne jamais
se tenir en position assise (sur
le sol ou un siège) pour utiliser
l‘appareil. Commander l‘appareil
dans une position vous permettant
de l‘éviter rapidement si nécessaire.
• Toujours mettre hors tension
l‘appareil et la télécommande après
chaque utilisation. Dans le cas
contraire, un démarrage involontaire
pourrait avoir lieu.
D
• Achtung! Dieses Flugzeug ist kein
Spielzeug, sondern ein komplexes
Fluggerät, das bei unsachgemäßer
Handhabung Personen- und
Sachschäden verursachen kann.
Der Pilot ist für den gefahrlosen
Betrieb verantwortlich!
• Diese Anleitung muss vor Inbe-
triebnahme vollständig gelesen
und verstanden werden!
• Dieses Flugzeug ist für den
Gebrauch im Freien bei keinem
bis wenig Wind geeignet.
• Dieses Flugzeug ist ab 14 Jahren
geeignet. Die Aufsicht der Eltern
ist beim Fliegen erforderlich.
• Hände, Gesicht, Haare und lose
Kleidung vom Propeller fernhalten.
• Fernsteuerung und Flugzeug
ausschalten, wenn sie nicht im
Einsatz sind.
• Batterien aus der Fernsteuerung
nehmen, wenn sie nicht im
Einsatz ist.
• Das Flugzeug stets im Auge
behalten, um die Kontrolle nicht
zu verlieren.
• Wir empfehlen für die Fern-
steuerung neue Alkali-Mangan-
Batterien. Einwegbatterien für
diese Fernsteuerung können durch
auadbare Batterien (Akkumula-
toren) umweltfreundlich ersetzt
werden.
• Sobald die Fernsteuerung nicht
mehr zuverlässig funktioniert,
sollten neue Batterien eingelegt
werden.
• Diese Bedienungsanleitung bitte
aufbewahren.
• Der Benutzer sollte dieses Flugzeug
nur gemäß den Gebrauchshin-
weisen in dieser Bedienungsan-
leitung betreiben.
• Das Flugzeug nicht in der Nähe
von Flughäfen, Personen, Tieren,
Gewässern und Stromleitungen
iegen.
• Den NiMH-Akku des Flugzeugs
immer an der Fernsteuerung
laden. Den Ladvorgang immer
überwachen und spätestens nach
10 Minuten oder wenn der Akku
warm wird unterbrechen.
• Das Flugzeug niemals mit Wasser
in Verbindung bringen, da dadurch
die Elektronik beschädigt werden
kann.
• Das Fluggerät stets beobachten,
damit es nicht gegen den Piloten,
andere Menschen oder Tiere iegt
und sie verletzt.
• Generell ist darauf zu achten, dass
das Modell auch unter Berücksich-
tigung von Funktionsstörungen
und Defekten niemanden verletzen
kann.
• Dieses Fluggerät ist nicht geeignet
für Menschen mit körperlichen
oder geistigen Einschränkungen.
Personen ohne Kenntnisse im
Modellug empfehlen wir die
Inbetriebnahme unter Anleitung
eines erfahrenen Piloten.
Wartung und Pege:
• Das Flugzeug bitte nur mit einem
sauberen Tuch abwischen.
• Modell, Fernsteuerung und
Batterien vor direkter Sonnen-
einstrahlung und/oder direkter
Wärmeeinwirkung schützen.
Batterie-Sicherheitshinweise
zur Fernsteuerung:
• Nicht wiederauadbare Batterien
dürfen nicht geladen werden.
• Auadbare Batterien müssen vor
dem Auaden aus der Fernsteuer-
ung herausgenommen werden.
• Auadbare Batterien dürfen nur
unter Aufsicht von Erwachsenen
geladen werden.
• Ungleiche Batterietypen oder
neue und gebrauchte Batterien
dürfen nicht zusammen verwen-
det werden.
• Es dürfen nur die empfohlenen
Batterien oder die eines gleich-
wertigen Typs verwendet werden.
• Batterien müssen mit der richti-
gen Polarität (+ und -) eingelegt
werden.
• Leere Batterien müssen aus der
Fernsteuerung herausgenommen
werden.
• Die Anschlussklemmen dürfen
nicht kurzgeschlossen werden.
Batterien bitte aus der Fernsteu-
erung nehmen, wenn sie längere
Zeit nicht gebraucht werden.
Das Flugzeug wird mit einem
auadbaren NiMH-Akku be-
trieben. Bitte die folgenden
Sicherheitshinweise beachten:
• Akkus niemals ins Feuer werfen
oder an heißen Orten aufbewahren.
• Zum Auaden nur die dafür
vorgesehene Fernsteuerung ver-
wenden. Die Verwendung eines
anderen Ladegerätes kann zu
einer dauerhaften Beschädigung
des Akkus sowie benachbarter
Teile führen und körperliche
Schäden verursachen!
• Für den Auadevorgang ist immer
auf eine feuerfeste
Unterlage und eine brandsichere
Umgebung zu achten.
• Während des Auf- und Endlade-
vorgangs den Akku nicht unbeauf-
sichtigt lassen.
• Die Kontakte des Akkus niemals
auseinanderbauen oder verändern.
Die Zellen des Akkus nicht
beschädigen oder aufstechen.
Es besteht Explosionsgefahr!
• Die Batterie darf nicht in die
Reichweite von Kindern gelangen.
• Bei der Entsorgung müssen Akkus
entladen bzw. die Batteriekapazität
muss erschöpft sein. Freiliegende
Pole mit einem Klebestreifen
abdecken, um Kurzschlüsse zu
vermeiden!
Sicherheitshinweise:
• Das Produkt niemals baulich
verändern, denn es könnte be-
schädigt werden oder eine Gefahr
darstellen.
• Um Risiken zu vermeiden, das
Fluggerät niemals bedienen, wenn
Sie auf dem Boden oder auf einem
Stuhl sitzen. Das Fluggerät in einer
Position bedienen, aus der heraus
gegebenenfalls schnell ausge-
wichen werden kann.
• Das Fluggerät und die Fern-
steuerung stets nach Gebrauch
ausschalten. Ansonsten könnte
unbeabsichtigt ein Startbefehl
erfolgen.
GB
• Attention! This aircraft is not a
toy. It is a complex ying device
which can cause personal injury
and property damage when
handled improperly. It is solely the
pilot’s responsibility to ensure its
safe operation!
• This manual must be read and
understood in its entirety prior to
operating the aircraft!
• This aircraft is suitable for use
outdoors with little to no wind.
• This aeroplane is suitable for
children from 14 years of age and
upwards. Parents must supervise
their children.
• Keep your hands, face, hair and
loose clothing away from the
propeller.
• Switch off the remote control and
the aeroplane if they are not
being used.
• Remove the batteries from the
remote control when it is not in
use.
• Always keep an eye on the
aeroplane so that you do not lose
control over it.
• We recommend new alkali manga-
nese batteries for the remote
control. Single use batteries for this
remote control can be replaced
with environmentally-friendly
rechargeable batteries.
• As soon as the remote control
no longer functions reliably, new
batteries should be inserted.
• Please keep this operating manual
safe for later use.
• The user should only operate this
aeroplane according to the instruc-
tions for use in these operating
instructions.
• Do not y the aeroplane close to
airports, people, animals, water-
ways or lakes and power lines.
• Always charge the NiMH bat-
tery of the aircraft at the remote
control. Always monitor the charg-
ing process and discontinue the
process within 10 minutes or if
the battery becomes warm.
• Never allow the aircraft to come
into contact with water, because
the electronics can be damaged.
• Always watch the aircraft to ensure
it does not y into and injure the
pilot, other people or animals.
• In general, it must be ensured
that the model cannot injure an-
yone in consideration of potential
malfunctions and defects.
• This aircraft is not suitable for people
with physical or mental disabilities.
We recommend that people who
have no prior experience of model
aeroplane-ying y their aeroplane
for the rst time under instruction
from an experienced pilot.
Maintenance and care:
• Please only wipe off the aircraft
with a clean cloth.
• Protect the model, remote control
and batteries from direct solar
radiation and/or the direct inuence
of heat.
Remote control battery safety
instructions:
• Non-rechargeable batteries may
not be charged.
• Rechargeable batteries must be
removed from the remote control
prior to recharging.
• Rechargeable batteries may only
be charged under the supervision
of an adult.
• The combination of different types
of batteries as well as new and
used batteries must be avoided.
• Only recommended batteries or
those of an equivalent type may
be used.
• Batteries must be inserted accor-
ding to the correct polarity (+ and -).
• Depleted batteries must be re-
moved from the remote control.
• The connection terminals may not
be short-circuited. Please remove
the batteries from the remote
control if it is not to be used for an
extended period of time.
The aircraft has a rechargeable
NiMH battery. Please observe
the following safety instructions:
• Never throw batteries into a re
or place them on hot objects.
• Use only the provided remote
control for charging. The use of a
different charger may lead to the
permanent damage of the battery
and neighbouring parts, as well as
physical injury!
• Always ensure that the charging
process takes place on a reproof
surface in a re-resistant environ-
ment.
• Do not leave the battery unsuper-
vised during the charging and
discharging process.
• Never disassemble or alter the
battery contacts. Do not damage
or puncture the battery cells.
There is a risk of explosion!
• The batteries must be kept out of
reach of children.
• When disposing of batteries,
they must be discharged or their
capacity must be fully depleted.
Cover exposed terminals with
adhesive tape in order to prevent
short-circuiting!
Safety instructions:
• The product may never be struc-
turally modied. This may lead to
it becoming damaged or posing a
danger.
• Avoid the risk of danger by never
operating the aircraft while sitting
on the ground or in a chair. Operate
the aircraft from a position that
allows easy evasion if needed.
• Always switch off the aircraft
and the remote control after
use. Otherwise, it is possible for
the model to be uninten tionally
started.
F
• Attention ! Cet avion n‘est pas
un jouet, mais un appareil de vol
complexe qui peut causer des
dommages corporels ou matériels
en cas de mauvaise utilisation.
Le pilote est responsable de
l‘utilisation sûre de l‘appareil !
• Ce mode d‘emploi doit être lu
dans son intégralité et compris
avant toute mise en service !
• Cet avion s’utilise en plein air,
par vent faible ou inexistant.
Sicherheitshinweise / Safety guidelines / Consignes de sécurité
Deutsch
Deutsch
English
English
Français
Français
Flugzeug und Fernsteuerung / Aircraft and remote control /
Avion et télécommande
FLUGZEUG: / AIRCRAFT: / AVION :
Akku-Fach /
Battery
compartment /
Compartiment
pour accu
Akku /
Battery /
Accu
Seitenruder / Rudder /
Gouverne de direction Propeller /
Propeller /
Hélices
Tragäche / Wing /
Voilure
Fahrwerk /
Landing gear /
Train d’atterrissage
Höhenruder /
Elevator /
Elévateur
Flugzeug-Akku /
Aircraft battery /
Accu de l’avion
FERNSTEUERUNG: / CONTROLLER: / TÉLÉCOMMANDE :
Schubregler (Gas) /
Thrust regulator
(acceleration) /
Régulateur de
poussée (gaz)
Links-Rechts-Steuerung /
Left-right control /
Commande gauche-droite
Power-LED / Power LED /
Témoin d’alimentation
Lade-Anzeige /
Charge indicator /
Indicateur de chargement
Antenne /
Antenna /
Antenne
ON-/OFF-Schalter /
ON/OFF switch /
Interrupteur
MARCHE/ARRÊT
Ladebuchse /
Charging socket /
Connecteur de charge
Batteriefach-Abdeckung /
Battery compartment cover /
Couvercle du compartiment à piles
4 5
Deutsch English Français
DeutschEnglishFrançais
1 Fluggrundlagen / 1 Flying principles / 1 Principes de vol
2 Zusammenbau / 2 Assembly / 2 Montage
1
DDas Ziel ist, mit genau dosiertem Gas das
Flugzeug nur ein klein wenig steigen zu
lassen. Gibt man dauernd Vollgas, wird das
Flugzeug zuerst steil nach oben iegen,
um danach abzukippen und dem Boden
zuiegen. Das kann man nur unterbinden,
indem man - sobald das Flugzeug
horizontal/geradeaus iegt, das Gas
drastisch reduziert und Vollgas in den
Abwärtsugpassagen gibt.
GB The goal is for the aircraft to climb slightly
by means of precisely applied throttle. If
you apply full throttle continuously, the
aircraft will rst perform a steep upward
climb, then abruptly tilt forward and dive
towards the ground. This can only be
prevented by drastically reducing the
throttle as soon as the aircraft ies
horizontally/straight ahead, then applying
full throttle during the downward travel.
FR Il s’agit de faire monter très lentement
l’avion avec une quantité de gaz bien
précise. Si l’on met trop longtemps les
pleins gaz, alors l’avion monte abrupte-
ment puis tombe en à-pic vers le sol.
Ceci ne peut être évité qu’en réduisant
fortement les gaz une fois que l’avion suit
une trajectoire horizontale et rectiligne, et
en mettant les pleins gaz lors des phases
descendantes.
DLuftschraube auf die Motorwelle
aufstecken. Dem Bausatz liegen vier
Luftschrauben bei, zwei davon dienen
als Ersatz.
GB Fit the propeller on the motor shaft.
Four propellers are included in the
assembly kit; two of these are spares.
FR Monter l’hélice sur l’arbre du moteur.
Le kit fournit quatre hélices, dont deux
servent de pièces de rechange.
3
D Die Tragächenauage ist werksseitig
bereits mit doppelseitig klebendem
Band versehen. Davon vorsichtig die
Schutzfolie abziehen.
GB The wing saddle is already provided
with double-sided adhesive tape at the
factory. Carefully remove the protective
lm from the tape.
FR La surface d’appui de la voilure est
déjà dotée d’une bande adhésive
double face. En retirer délicatement
la membrane de protection.
2
DBeim Aufschieben auf einen kleinen
Spalt von weniger als einen Millimeter
zwischen Luftschraube und Motor
achten.
GB When tting the propeller, leave a small
gap of less than one millimetre
between the propeller and motor.
FR En vissant, veiller à conserver un espace
de moins d’un millimètre entre l’hélice
et le moteur.
4
DDie Buchse der Motoranschlusskabel an
der Tragäche mit dem Stecker, der im
Rumpnneren zu nden ist, zusammen-
stecken.
GB Fit the socket of the motor connection
cable together with the plug in the inside
of the fuselage.
FR Brancher la prise du câble de raccorde-
ment du moteur au connecteur de la
voilure situé à l’intérieur du fuselage.
D An der Tragäche ist ein Rechteck
angebracht, das exakt in die Rumpf-
öffnung passt. Das Rechteck dient zum
exakten Ausrichten der Fläche.
GB There is a rectangle on the wing which
ts exactly in the fuselage opening.
The rectangle is provided for the precise
alignment of the wing.
FR Sur la voilure gure un rectangle, aux
dimensions exactes de l’ouverture du
fuselage. Le rectangle permet un
alignement précis de la surface.
5
7
D Ist die Tragäche rechtwinklig und
gerade, wird sie mit leichtem Andrücken
an den Rumpf xiert.
GB If the wing is perpendicular and straight,
it can be xed on the fuselage with light
pressure.
FR Si la voilure est rectiligne et en angle
droit, exercer une légère pression sur le
fuselage pour la xer.
9
DDas Seitenruder mit dem dem Bausatz
beiliegenden Klebstoff - wie am Bild zu
sehen - nur an der Unterseite leicht
bestreichen. Bitte Klebstoff sparsam
verwenden.
GB Lightly apply the adhesive included with
the kit to the underside of the rudder
only - as shown in the gure. Please
apply the adhesive sparingly.
FR Badigeonner délicatement la partie
inférieure de la gouverne de direction à
l’aide de la colle fournie dans le kit,
comme décrit sur l’image. Veuillez utiliser
la colle avec parcimonie.
D Beim Aufsetzen der Tragäche auf den
Rumpf darauf achten, dass kein Kabel
eingeklemmt wird und die Tragäche
zuerst sauber anhand des zuvor
beschriebenen Rechtecks am Rumpf
ausrichten, ohne dass das Doppelklebe-
band Kontakt mit der Tragäche
bekommt.
GB When mounting the wing on the
fuselage, make sure that the cables are
not clamped and that the wing is
cleanly aligned with the fuselage by
means of the rectangle described above
without allowing the double-sided
adhesive tape to come into contact with
the wing.
FR Lors de l’assemblage de la voilure et du
fuselage, veiller à ce qu’aucun câble ne
soit pincé et que la voilure soit correcte-
ment alignée par rapport au fuselage,
en se référant au rectangle décrit
précédemment, et que la bande
adhésive double face n’entre pas en
contact avec la voilure.
6
8
DDie Schutzfolie des Doppelklebebands
am Heck des Flugzeugs vorsichtig
abziehen.
GB Carefully pull the protective lm off the
double-sided adhesive tape on the rear
of the aircraft.
FR Retirer délicatement la membrane
protectrice de la bande adhésive double
face, située sur le rotor de queue de l’avion.
11
DAnschließend das Höhenruder in die
obere Kante des Seitenruders stecken.
GB Then insert the elevator in the upper
edge of the rudder.
FR Enn, insérer la gouverne de profondeur
dans la nervure supérieure de la
gouverne de direction.
13
DDas Fahrwerk seitlich zusammendrücken
und in den dafür vorgesehenen Schlitz
einstecken.
GB Press the landing gear together on the
sides and insert it in the slot provided for
this purpose.
FR Presser le train d’atterrissage entre vos
doigts et l’insérer dans l’écartement
prévu à cet effet.
15
DDie Windfahne am oberen Ende der
Fernsteuerantenne einhängen.
GB Attach the vane on the upper end of the
remote control antenna.
FR Suspendre l’anémomètre à l’extrémité
supérieure de l’antenne.
10
DNun das Seitenruder mit dem vorderen
Ende in die Aussparung am Heck einführen.
GB Now guide the rudder into the recess,
starting with the front end.
FR À présent, insérer l’extrémité avant de la
gouverne de direction dans l’encoche de la
queue.
12
DNun alles zusammen herunterdrücken.
GB Now press everything together.
FR Maintenant, pousser le tout vers le bas.
14
DDie Antenne ins obere Loch einführen
und im Uhrzeigersinn festdrehen.
GB Guide the antenna into the hole on the
top and tighten clockwise.
FR Insérer l’antenne dans l’orice supérieur
et visser dans le sens des aiguilles d’une
montre.
Kein Gas / No throttle /
Pas de gaz Vollgas / Full throttle /
Plein gaz
Wenig Gas / A little throttle /
Peu de gaz
D Um das Modell Easy Plane gezielt steuern
zu können, müssen zwei wichtige Dinge
immer beachtet werden: Zum Steigen gibt
man Gas, zum Sinken lässt man den
Gasknüppel (der linke an der Fernsteuer-
ung) nach oder gar ganz los. Daraus ergibt
sich folgende Eigenschaft: Gibt man stetig
Vollgas, wird das Flugzeug in einem
leichten Bogen immer weiter steigen. Und
zwar solange, bis das Modell durch den
steilen Aufwärtsug wieder an Geschwind-
igkeit verliert - und dann aufgrund zu
langsamer Fluggeschwindigkeit abrupt die
Nase nach unten nimmt und in Richtung
Boden abkippt. Dauerhaft Vollgas ist also
zu vermeiden und lässt das Flugzeug
abstürzen.
GB In order to be able to control the Easy
Plane model, two important things must
always be remembered: To rise, you
accelerate, to descend, you ease up on the
throttle joystick (the left joystick on the
remote control) or release it completely.
The following characteristic arises: If you
constantly apply full throttle, the aircraft
will continually rise along a slight arc. This
will continue until the model begins to
lose speed again due to the steep climb -
then the nose will abruptly tilt forward and
dive towards the ground as a result of the
insufcient speed. Therefore, continuous
throttle should be avoided, because the
aircraft can crash.
FR Pour commander avec précision le modèle
Easy Plane, deux principes fondamentaux
doivent être respectés : pour augmenter
l’altitude de l’avion, appuyer sur la com-
mande des gaz, pour diminuer l’altitude de
l’avion, lâcher progressivement ou totale-
ment la commande des gaz (levier gauche
de la télécommande). Il en résulte les
caractéristiques suivantes : si vous maintenez
constamment les pleins gaz, l’avion prendra
de l’altitude en suivant une légère courbe.
Et ceci, jusqu’à ce que le modèle perde à
nouveau de la vitesse de par son ascension
verticale. En raison de la perte de vitesse, le
nez de l’avion se dirige brusquement vers le
bas et tombe en à-pic. De ce fait, il est
conseillé de ne pas utiliser les pleins gaz trop
longtemps, pour éviter un crash de l’avion.
6 7
3 Einsetzen der Batterien / 3 Insert batteries / 3 Mise en place des piles 5 Flugvorbereitung / 5 Flight preparation / 5 Préparation de l’avion
7 Start des Flugzeugs / 7 Starting the aircraft / 7 Décollage de l’avion
Deutsch English Français
DeutschEnglishFrançais
DZum Starten erst
die Fernsteuerung
einschalten.
GB First switch on the
remote control.
FR Pour commencer,
allumer la
télécommande.
DZuerst die Antenne der Fernsteuer-
ung auf die volle Länge ausziehen.
Nicht zu fest zerren, die Antenne
könnte kaputt gehen. Das Modell
immer gegen den Wind starten. Die
Windfahne an der Antenne zeigt die
Windrichtung an.
GB First extend the antenna on the
remote control to its full length.
Pulling out the antenna violently
can break it, so be gentle. Always
start the model against the wind.
The vane on the antenna indicates
the wind direction.
FR Tout d’abord, étirer l’antenne dans
sa totalité. Ne pas tirer trop fort,
l’antenne pourrait se casser. Faire
toujours décoller le modèle face au
vent. L’anémomètre xé sur l’antenne
indique la direction du vent.
D Das Easy Plane wird per Wurfstart gestartet. Hierzu ist die richtige
Wurftechnik entscheidend: Das Flugzeug muss in einer geraden
Linie kräftig über der Schulter gerade nach vorn gegen den Wind
geworfen werden.
GB The Easy Plane is started by hand launch. For this purpose, the
correct launching technique is essential: The aircraft must be
forcefully thrust forwards, against the wind, in a straight line
above the shoulder.
FR Il faut lancer l’avion Easy Plane pour le faire décoller. Pour ce
faire, la technique de lancée est déterminante : l’avion doit être
lancé avec force, par-dessus l’épaule et face au vent ; il doit
suivre une trajectoire rectiligne.
DAkkus wie in Punkt 3 beschrieben
einsetzen und Schalter an der Flugzeug-
unterseite auf ON stellen.
GB Insert the batteries as described under
point 3 above and set the switch on the
underside of the aircraft to the ON position.
FR Insérer les batteries en suivant les
indications du point 3 et mettre
l’interrupteur situé sous l’avion en
position ON.
Fernsteuerung / Controller / Télécommande
D
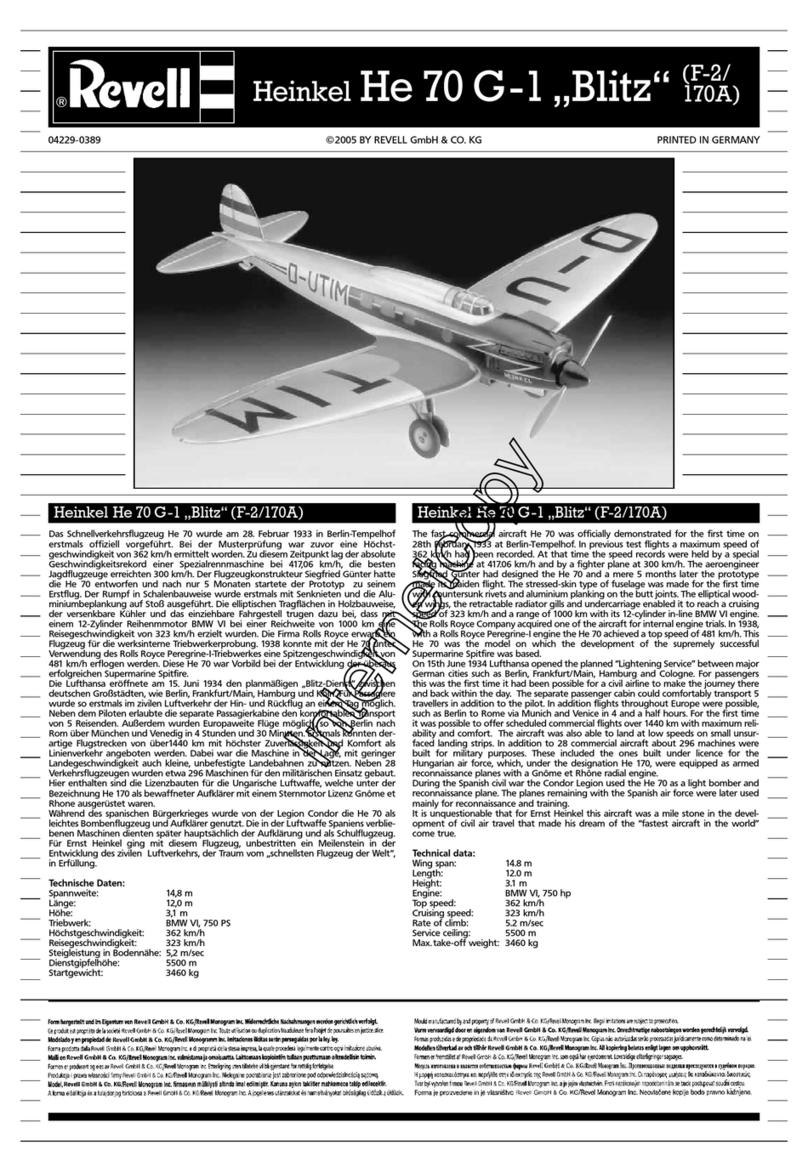
Das Batteriefach der Fernsteuerung durch
gleichzeitiges Drücken und nach unten Schieben
an der geriffelten Fläche des Deckels öffnen.
GB Open the battery compartment in the
remote control by simultaneously pressing
the ridged surface and sliding it down.
FR Ouvrir le compartiment à piles de la
télécommande en appuyant sur la zone
striée tout en poussant vers le bas.
DDie Batterien 8 x 1,5 V AA Mignon
gemäß den Angaben im Batteriefach
der Fernsteuerung einsetzen.
GB Insert 8 x 1.5 V AA Mignon batteries
corresponding to the indicators in the
battery compartment in the remote control.
FR Insérer les 8 piles 1,5 V AA Mignon en
respectant les indications de polarité
gurant à l’intérieur du compartiment.
DDanach die Abdeckung des Batterie-
fachs wieder aufsetzen.
GB Then t the cover on the battery
compartment again.
FR Puis, remettre le couvercle du
compartiment à piles.
Flugzeug / Aircraft / Avion
DDen Stecker des Flugzeugs mit der
Buchse des Akkus miteinander verbinden.
GB Connect the plug connector of the aircraft
to the socket of the battery.
FR Connecter la che de l’avion à la prise de
la batterie.
D Die Kabel in die Aussparung im
Akkufach verstauen und darüber den
Akku am hinteren Ende des Batterief-
achs platzieren.
GB Stow the cable in the recess in the
battery compartment and t place the
battery above it on the rear end of the
battery compartment.
FR Loger le câble dans la cavité du
compartiment de batterie puis placer la
batterie au fond du compartiment.
DDanach die Abdeckung des Akkufachs
aufsetzen und mit der beiliegenden
Schraube xieren
GB Then mount the cover of the battery
compartment and fasten it in place with
the accompanying screw.
FR Refermer le compartiment de batterie
et xer à l’aide de la vis fournie.
6 Windstärke-Test / 6 Wind velocity test / 6 Force du vent
DHängt die Fahne gerade herunter,
herrscht Windstille und es kann ohne
Einschränkungen geogen werden.
GB If the vane hangs down, there is no
wind and ying can take place without
limitation.
FR Si le drapeau est incliné vers le bas,
il n’y a pas de vent et le vol peut
librement avoir lieu.
DHerrscht leichter Wind zeigt die
Windfahne dies mit einem Neigungs-
winkel von ungefähr 45° an. Zudem
kann man an ihr die Windrichtung
ablesen. Das Modell darf immer nur
gegen den Wind gestartet werden.
GB The vane indicates light wind with an
angle of approximately 45°. You can
also use the vane to determine the
wind direction. The model may only be
started against the wind.
FR Par vent faible, le drapeau s’incline à
45° environ. En outre, l’anémomètre
permet de connaître la direction du
vent. Le modèle doit toujours être lancé
face au vent.
DBläst der Wind die Fahne horizontal ist
der Wind zum Fliegen zu stark.
GB If the wind blows the vane horizontally,
the wind is too strong for ying.
FR Si le drapeau est à l’horizontale, alors le
vent est trop fort pour voler.
D Das Easy Plane eignet sich für wenig bis
gar keinen Wind. Um festzustellen, ob der
Wind zu stark sein könnte, liegt dem
Bausatz eine Windfahne bei.
GB The Easy Plane is suitable for little to no
wind. In order to determine whether the
wind is too strong, a vane is included with
the assembly kit.
FR L’avion Easy Plane s’utilise par vent faible
ou inexistant. Pour évaluer la force du
vent, le kit fournit un anémomètre.
4 Laden des Flugakkus / 4 Charging the aircraft battery / 4 Chargement de l’accumulateur de l’avion
DZum Laden des Akkus gibt es an der
Hinterseite der Fernsteuerung eine
Ladebuchse. Die Fernsteuerung zum
Laden Ausschalten. Nach dem Einstecken
beginnt der Ladevorgang automatisch.
GB There is a charge socket on the rear side
of the remote control for the charging of
the battery. Switch off the remote control
to charge it. After insertion, the charging
process begins automatically.
FR Pour charger la batterie, une prise de
chargement est prévue à l’arrière de la
télécommande. Éteindre la télécom-
mande. Le processus de chargement
démarre automatiquement, dès le
branchement de la prise.
DAn der Fernsteuerung blinkt während
des Ladevorgangs nun eine grüne LED.
Ist der Akku voll, leuchtet die grüne LED
dauerhaft.
GB Then a green LED on the remote control
blinks during the charging process. If the
battery is fully charged, the green LED
illuminates continuously.
FR Durant le processus de chargement, un
témoin lumineux vert clignote sur la
télécommande. Lorsque la batterie est
chargée, le témoin vert reste allumé.
DDer Ladevorgang ist spätestens nach 10
Minuten abgeschlossen und der Akku
muss abgesteckt werden. Zugleich ist es
nötig, den Akku während der Ladephase
ständig zu überwachen. Wird er warm
oder gar heiß ist er voll und muss
unverzüglich abgesteckt werden.
GB The charging process is nished within
10 minutes and the battery must be un -
plugged. At the same time, it is necessary
to continuously monitor the battery during
the charging phase. If it becomes warm or
even hot, it is fully charged and must be
unplugged immediately.
FR Le processus de chargement dure 10
minutes maximum, au terme des-
quelles, la batterie doit être retirée. Il
est nécessaire de surveiller en perma-
nence la phase de chargement. Si la
batterie est chaude, voire brûlante, cela
signie qu’elle est chargée et qu’elle
doit être immédiatement débranchée.
8 9
Deutsch English Français
DeutschEnglishFrançais
D Elementar wichtig ist hierbei, dass das
Flugzeug mit HALBGAS (Gasknüppel in
Mittelstellung) gestartet wird. Gibt
man beim Start zuviel Gas, steigt das
Modell nach oben weg und verliert
durch den starken Aufwärtsug rasch
an Geschwindigkeit, was das Flugzeug
nach kurzer Strecke nach unten
durchsacken lässt. Meist stürzt es
dann zu Boden. Gewünscht ist ein
gleichmäßiger Steigug, der mit etwa
Halbgas erreicht werden kann.
GB As a fundamental rule, it is important
for this process, that the aircraft is
started with half throttle (throttle
joystick in centre position). If too
much throttle is applied when start-
ing, the model takes off upwards and
quickly loses speed due to the upward
climb, which causes the aircraft to
plunge downwards after a short
distance. Then it usually crashes to the
ground. A steady climb is desirable.
This can be achieved by applying
approximately half throttle.
FR À cet effet, il est important de lancer
l’avion en position MI-GAZ (levier des
gaz en position médiane). Si l’avion
décolle avec trop de gaz, le modèle
s’envole vers le haut puis perd
rapidement de l’altitude en raison de
la forte ascension, ce qui entraîne la
chute de l’avion après un cours vol.
Dans la plupart des cas, l’avion
s’écrase au sol. Il est souhaitable de
maintenir une ascension régulière en
utilisant la position mi-gaz.
DFalsch, nicht nach
oben werfen.
GB Wrong, do not launch
upwards.
FR Incorrect, ne pas
lancer vers le haut.
DFalsch, nicht nach unten
werfen.
GB Wrong, do not launch
downwards.
FR Incorrect, ne pas lancer
vers le bas. DFliegt das Modell von selbst eine leichte Linkskurve, trimmt
man das Seitenruder leicht nach rechts. Auf dem Bild ist der
Ausschlag zur Verdeutlichung übertrieben dargestellt. Die
Korrekturen sollten nur ganz leicht, etwa 1-2 Millimeter
ausgeführt werden.
GB If the model automatically pulls slightly left, trim the rudder
slightly to the right. The rudder throw shown in the image is
exaggerated for clarication purposes. Corrections should only
be very slight, approximately 1-2 millimetres.
FR Si le modèle effectue de lui-même une légère courbe vers la
gauche, équilibrer la gouverne de direction légèrement vers la
droite. Sur l’image, la correction est exagérée à des ns de
compréhension. Les corrections doivent être très légères, de
l’ordre de 1 à 2 millimètres.
DFliegt das Modell von selbst eine leichte Rechtskurve, trimmt
man das Seitenruder leicht nach links. Auf dem Bild ist der
Ausschlag zur Verdeutlichung übertrieben dargestellt. Die
Korrekturen sollten nur ganz leicht, etwa 1-2 Millimeter ausge-
führt werden.
GB If the model automatically pulls slightly right, trim the rudder
slightly to the left. The rudder throw shown in the image is
exaggerated for clarication purposes. Corrections should only be
very slight, approximately 1-2 millimetres.
FR Si le modèle effectue de lui-même une légère courbe vers la
droite, équilibrer la gouverne de direction légèrement vers la
gauche. Sur l’image, la correction est exagérée à des ns de
compréhension. Les corrections doivent être très légères, de
l’ordre de 1 à 2 millimètres.
8 Flugsteuerung / 8 Flight controls / 8 Commande du vol
9 Trimmen des Modells / 9 Trimming the model / 9 Équilibrage du modèle
DZum Sinken Gas reduzieren. Selbst im
Segelug ohne Motorantrieb ist noch
lenken mit den Motoren möglich.
GB Reduce the throttle to decrease
altitude. Steering with the motors is
also possible when gliding without
motor propulsion.
FR Pour réduire l’altitude du modèle,
réduire les gaz. Le pilotage par les
moteurs est toujours possible,
même en vol à voile sans com-
mande motorisée.
DFür Links- oder Rechtskurven den
Seitenruderknüppel in die jeweilige
Richtung drücken. Dabei darauf
achten, dass sobald das Modell die
gewünschte Richtung eingeschla-
gen hat, den Seitenruderknüppel
unverzüglich wieder in die Neutral-
position zurückbewegen. Betätigt
man zu lange den Seitenruderknüp-
pel kann das Modell abstürzen.
GB To curve left or right, press the
rudder joystick in the corresponding
direction. In the process, make sure
to move the rudder joystick back to
the neutral position once the model
travels in the desired direction. If
the rudder joystick is operated too
long, the model can crash.
FR Pour tourner à gauche ou à droite,
pousser le levier de la gouverne
de direction dans la direction
souhaitée. Une fois que le modèle a
atteint la direction souhaitée, veiller
à remettre sans tarder le levier de
la gouverne de direction en position
neutre. L’action prolongée du levier
de la gouverne de direction peut
provoquer la chute du modèle.
DDas Modell steigt mit zunehmender
Fluggeschwindigkeit. Das Bedeutet, um
Höhe zu gewinnen, muss man mehr
Gas gegen. Das funktioniert allerdings
nur, wenn man nicht zu stark steigt.
Gibt man zum Beispiel längere Zeit
Vollgas, wird der Anstellwinkel des
Flugzeugs zu hoch (es steigt zu steil)
und die Fluggeschwindigkeit verringert sich trotz Vollgas auf ein
Nivea, das die Strömung an den Tragächen reißen lässt: das
Flugzeug kippt nach vorn über und geht in einen starken Sinkug
über. Hat man genug Höhe, lässt man das Modell einfach ausgleiten
und gibt dann wieder leicht Gas. Für gerade, horizontale Flüge ist
etwas weniger als Halbgas nötig.
GB The model climbs as the ying speed increases. That means that
you must apply more throttle to increase altitude. However, this
only works if the climb is not too steep. If, for example, full throttle
is applied for a long time, the approach angle of the aircraft
becomes too high (the rise is too steep) and the ying speed
lowers, despite the full throttle, to a level which allows the ow to
pull down on the wings: the aircraft tilts over forwards and
performs a sharp dive. If the aircraft is high enough, it can simply
glide out and then light throttle can be applied again. Somewhat
less than half throttle is required for straight, horizontal ight.
FR Le modèle prend de l’altitude avec une vitesse de vol croissante.
Cela signie que pour gagner de l’altitude, il faut mettre plus de
gaz. Cependant, ceci ne peut fonctionner que si l’avion ne monte
pas trop rapidement. Si par exemple, le mode plein gaz est utilisé
trop longuement, l’angle d’attaque de l’avion sera trop élevé (il
s’élève trop verticalement) et la vitesse de vol se réduit malgré les
pleins gaz, pour atteindre un niveau insufsant pour les voilures :
l’avion se dirige vers le bas et tombe en à-pic. Après avoir atteint
une altitude sufsante, laisser simplement glisser le modèle, puis
mettez un peu plus de gaz. Les vols horizontaux et rectilignes
nécessitent un peu moins que la position mi-gaz.
DZieht das Modell im Flug ohne zu lenken
von selbst nach links oder rechts, muss es
getrimmt werden. Hierzu biegt man die
Hinterkante des Seitenruders leicht in die
entgegengesetzte Richtung.
GB If the model automatically pulls to the left
or right during ight without steering, it
must be trimmed. For this purpose, bend
the rear edge of the rudder slightly in the
opposite direction.
FR Si le modèle tire de lui-même vers la
gauche ou vers la droite, il doit faire l’objet
d’un équilibrage. Pour ce faire, il faut tourner
légèrement le bord arrière de la gouverne
de direction dans la direction opposée.
DSteigt das Flugzeug zu stark nach oben
oder gewinnt es selbst bei Vollgas kaum
Höhe, muss das Höhenruder nachgetrimmt
werden.
GB If the model climbs too steeply or hardly
climbs at all despite full throttle, the
elevator must be trimmed.
FR Si l’avion monte trop fortement ou s’il
atteint une faible altitude malgré les pleins
gaz, le gouverne de profondeur doit faire
l’objet d’un rééquilibrage.
DSteigt das Modell zu stark, das Höhenruder LEICHT an beiden
Seiten nach unten biegen. Auf dem Foto wurde die Biegung
übertrieben stark dargestellt. Tatsächlich darf höchstens einen
Millimeter nach oben oder unten gebogen werden.
GB If the model climbs too heavily, bend the elevator SLIGHTLY
downwards on both sides. The bend shown in the image was
exaggerated. In reality, it may not be bent more than one
millimetre upwards or downwards.
FR Si le modèle monte trop fortement, déplacer LÉGÈREMENT la
gouverne de profondeur vers le bas, des deux côtés. Sur la
photo, la correction est très exagérée. En réalité, la correction
vers le haut ou vers le bas doit être d’un millimètre maximum.
DGewinnt das Modell selbst mit Vollgas keine oder nur sehr wenig
an Höhe, muss das Höhenruder an beiden Seiten LEICHT nach
oben gebogen werden. Auf dem Foto wurde die Biegung
übertrieben stark dargestellt. Tatsächlich darf höchstens einen
Millimeter nach oben oder unten gebogen werden.
GB If the model does not gain any or very little altitude even with
full throttle, the elevator must be bent SLIGHTLY upwards on both
sides. The bend shown in the image was exaggerated. In reality,
it may not be bent more than one millimetre upwards or
downwards.
FR Si le modèle gagne très peu ou pas d’altitude de lui-même,
déplacer LÉGÈREMENT la gouverne de profondeur vers le haut,
des deux côtés. Sur la photo, la correction est très exagérée. En
réalité, la correction vers le haut ou vers le bas doit être d’un
millimètre maximum.
10
11 Geeignete Flugumgebungen / Suitable ight environment / 11 L’environnement approprié au vol
D
• Wählen Sie immer eine große offene Fläche
ohne Hindernisse, um Ihr Modell zu iegen.
• Beim Starten unbedingt sicherstellen, dass sich
alle Lebewesen – auch der Pilot – weiter als 1-2
Meter vom Fluggerät entfernt benden.
• Fliegen Sie niemals in der Nähe von Strom-
leitungen, öffentlichen Straßen, Parkanlagen,
Gleisen oder Wohnungen.
• Das Fluggerät stets beobachten, damit es
nicht gegen den Piloten, andere Menschen
oder Tiere iegt und sie verletzt.
GB
• Always select a large, open area without
obstructions in order to y your model.
• On starting, always ensure that all living
things – including the pilot – are situated
more than 1-2 metres away from the aircraft.
• Never y close to power lines, public roads,
car parks, train lines or houses.
• Always observe the aircraft to ensure that it
does not y into the pilot, other people or
animals and injure them.
FR
• Choisir toujours une surface dégagée et
étendue sans obstacles an de faire voler
votre maquette.
• Lors du décollage, s’assurer impérativement
que tous les êtres vivants – y compris le
pilote – se trouvent à une distance minimum
de 1-2 mètres de l’appareil de vol.
• Ne jamais voler à proximité des lignes
électriques, des routes publiques, des
parkings, des quais ou des habitations.
• Surveiller constamment l’appareil de vol
an qu’il ne vole pas contre le pilote,
d’autres personnes ou animaux et qu’il ne
les blesse pas.
Deutsch English Français
Fehlerbehebung / Resolution of errors / Correction des erreurs
D
Problem:
Der Propeller bewegt sich nicht.
Ursache:
• Der Kontrollschalter der Fernsteuerung steht
auf „OFF“.
• Der Akku ist zu schwach bzw. leer.
Abhilfe:
• Den Kontrollschalter auf „ON“ stellen.
• Den Akku auaden (siehe Kapitel
„Auaden des Akkus“).
Problem:
Funk-Steuerung funktioniert nicht.
Ursache:
• Der Kontrollschalter steht auf „OFF“.
• Die Batterien wurden falsch eingelegt.
• Die Batterien haben nicht mehr genügend
Energie.
Abhilfe:
• Den Kontrollschalter auf „ON“ stellen.
• Überprüfen Sie, ob die Batterien korrekt
eingelegt sind.
• Neue Batterien einlegen.
Problem:
Das Flugzeug lässt sich mit der
Funk-Steuerung nicht steuern.
Ursache:
• Der Schalter der Funk-Steuerung steht
auf „OFF“.
• Das Antennenkabel am Flugzeug ist nicht
abgewickelt.
• Die Antenne der Funk-Steuerung ist ggf.
nicht richtig eingesetzt und/oder nicht
vollständig ausgezogen.
Abhilfe:
• Den Kontrollschalter der Funk-Steuerung
auf „ON“ stellen.
• Wickeln Sie das Antennenkabel des
Flugzeugs vollständig ab.
• Antenne prüfen und ganz ausziehen.
Problem:
Das Flugzeug steigt nicht oder iegt
dauernd Kurven.
Ursache:
• Höhenruder nicht richtig eingestellt.
• Seitenruder nicht richtig eingestellt.
Abhilfe:
• Höhen- und Seitenruder richtig einstellen
(Siehe Kapitel 9)
GB
Problem:
The propeller does not move.
Causes:
• The control switch on the remote control
is set to “OFF”.
• The battery is low or empty.
Solutions:
• Turn the ON/OFF switch to “ON”.
• Recharge the battery (see “Charging
the aircraft battery” section).
Problem:
The radio control does not work.
Causes:
• The ON/OFF switch is “OFF”.
• The batteries were not inserted correctly.
• The batteries are too weak.
Solutions:
• Set ON/OFF switch to “ON”.
• Check that the batteries are correctly
inserted.
• Insert new batteries.
Problem:
The aircraft cannot be controlled with
the radio control.
Causes:
• The switch on the radio control is set
to “OFF”.
• The antenna cable on the aeroplane is
not uncoiled.
• The antenna on the radio control is
not inserted corrected and/or not fully
extended.
Solutions:
• Set the control switch on the radio control
to “ON”.
• Unwind the antenna cable of the aeroplane
completely.
• Check antenna and extend to full height.
Problem:
The aeroplane does not rise,
or constantly ies in circles.
Causes:
• Elevators incorrectly adjusted.
• Rudder incorrectly adjusted.
Solutions:
• Adjust elevators and rudder correctly
(See Chapter 9)
FR
Problème :
Les hélices ne tournent pas.
Causes:
• L’interrupteur de contrôle de la télécom-
mande se trouve sur «ARRÊT».
• L’accumulateur est trop faible et/ou déchargé.
Solution :
• Mettre l’interrupteur ON/OFF sur « ON ».
• Recharger la batterie (voir chapitre «
Chargement de l’accu de l’avion »).
Problème :
La radiocommande ne fonctionne pas.
Causes:
• L’interrupteur ON/OFF est sur « OFF ».
• Les piles n’ont pas été introduites correctement.
• Les piles n’ont plus assez d’énergie.
Solution :
• Mettre l’interrupteur ON/OFF sur « ON ».
• S’assurer que les piles ont été correcte-
ment introduites.
• Introduire de nouvelles piles
Problème :
L’avion ne répond pas à la radiocommande.
Causes:
• L’interrupteur et la radiocommande sont sur
« OFF ».
• Le câble d’antenne se trouvant sur l’avion
n’est pas déroulé.
• L’antenne de la radiocommande n’est pas
positionnée correctement et/ou n’est pas
sortie complètement.
Solution :
• Placer l’interrupteur de contrôle de la
radiocommande sur « ON ».
• Déroulez entièrement le câble d’antenne
de l’avion.
• Examiner l’antenne et la tirer complètement.
Problème :
L’avion ne monte pas ou vole constam-
ment en virage.
Causes:
• Elévateur mal réglé.
• Gouvernail de direction mal réglé.
Solution :
• Régler correctement l’élévateur et le
gouvernail de direction (voir chapitre 9)
Servicehinweise / Service guidelines / Informations de service
www.revell-control.de
D
Unter www.revell-control.de
nden Sie unsere Telefon-
Hotline, Bestellmöglichkeiten
und Austausch-Tipps für Ersatz-
teile sowie weitere nützliche
Informationen zu allen Model-
len von Revell Control.
GB
At www.revell-control.de,
you can nd our possibilities
to order, replacement tips
for spare parts, and further
useful information on all
Revell Control models.
FR
Sur www.revell-control.de,
vous trouverez nos possibilités
de commande, nos conseils
pour le changement des pièces
ainsi que d’autres informa-
tions utiles concernant tous les
modèles de Revell Control.
10 Allgemeine Flugtipps / 10 General ight tips / 10 Conseils généraux de vol
D
• Die Regler immer langsam und mit Gefühl
bewegen.
• Werfen Sie das Modell ruhig und horizontal
gegen den Wind.
• Das Flugzeug immer im Auge behalten und
nicht auf die Fernsteuerung sehen!
• Um eine Kurve zu iegen, genügt es oft
schon, den Steuerungsregler ganz leicht in
die entsprechende Richtung anzutippen. Bei
den ersten Flugversuchen neigt man dazu,
das Flugzeug zu heftig zu steuern. Der
Steuerungsregler sollte immer langsam und
vorsichtig bewegt werden. Keinesfalls schnell
oder ruckartig.
• Fliegen Sie keine zu engen Kurven, sonst
neigt sich das Modell zu sehr, verliert Auftrieb
und kann abstürzen.
• Das Modell gegen den Wind landen lassen.
• Achtung! Wenn das Flugzeug auf Sie zuiegt,
müssen Sie „verkehrt herum“ herum steuern,
was die Flugrichtung betrifft!
• Sie können mit einem vollen Akku etwa
7 min. lang iegen. Planen Sie Ihren Flug
dementsprechend und denken Sie rechtzeitig
an die Landung!
• Achten Sie darauf, den Schubregler der
Fernbedienung nach einer „Bruchlandung“
sofort wieder in die unterste Position zu
bringen, um Beschädigungen der Elektronik
und der Propeller zu verhindern.
• Zwei Flugzeuge mit der gleichen Frequenz
können nicht gleichzeitig benutzt werden.
Bitte achten Sie darauf, dass Sie in Ihrer
Umgebung der einzige sind, der diese
Frequenz benutzt.
GB
• Always move the regulators slowly and
gently.
• Throw the model calmly and horizontally
against the wind direction.
• Always keep an eye on the aeroplane
and do not look at the remote control!
• To turn the plane, it is often sufcient to jog
the control regulator lightly in the appropriate
direction. During initial ying attempts,
learners are often tempted to control the
aeroplane too severely. The control regulator
should always be moved slowly and carefully
- never quickly or jerkily.
• Do not y into very tight curves, otherwise
the model will tip too much, lose lift and
may crash.
• Land the model against the wind.
• Caution! If the aeroplane ies directly
towards you, you must control it “in reverse”
in relation to the direction of ight!
• With a full battery you can y for approxi-
mately 7 minutes. Plan your ight accordingly
and think about landing in good time!
• After a “crash landing”, make sure that the
thrust controller on the remote control is
immediately brought back to the lowest
position in order to prevent damage to the
electronics and propeller.
• Two aircraft cannot be used at the same time
with the same frequency. Please make sure
that you are the only one in your vicinity
using this frequency.
FR
• Déplacer toujours les régulateurs lentement et
avec intuition.
• Lancer la maquette lentement et horizontale-
ment à contre-vent.
• Toujours garder en vue l’avion et ne pas
regarder sur la télécommande !
• Pour prendre un virage, il suft souvent
d’efeurer très légèrement le régulateur de
commande dans la bonne direction. Lors des
premiers essais en vol, on a tendance à
piloter l’avion avec force. Le régulateur de
commande doit toujours être déplacé
lentement et avec précaution. En aucun cas,
rapidement ou par à-coups.
• Ne pas prendre de virages trop étroits, sinon
la maquette s’incline trop, perd en portance
et peut tomber.
• Faire atterrir la maquette à contre-vent.
• Attention ! Si l’avion vole dans votre direction,
vous devez piloter «à l’envers» en ce qui
concerne la direction de vol !
• Avec une batterie complètement chargée,
l’appareil peut voler pendant 7 minutes
environ. Planiez votre vol en conséquence
et pensez à atterrir à temps !
• Après un « atterrissage en catastrophe »,
veillez à ce que la commande des gaz de la
télécommande soit immédiatement position-
née le plus bas possible, an d’éviter
d’endommager les composants électroniques
et les hélices.
• Deux avions réglés à la même fréquence ne
peuvent pas être utilisés simultanément.
Veillez à être la seule personne aux alentours
à utiliser cette fréquence.
DeutschEnglishFrançais
11
12
NL Raak nooit de draaiende propellers
aan! Vlieg niet in de buurt van mensen,
dieren, planten of elektrische snoeren –
toezicht van volwassenen is nodig.
IT Non toccare mai l’elica in movimento!
Non volare nelle vicinanze di persone,
animali, ussi d’acqua o condutture elettriche
– e’ necessaria la sorveglianza di un adulto.
ES ¡No tocar nunca las hélices mientras estén
funcionando! No volar cerca de personas,
animales, agua ni cables eléctricos. Es necesaria
la vigilancia de personas adultas.
NL Hiermee verklaart Revell GmbH, dat
dit product in overeenstemming is met
de fundamentele eisen en de overige
toepasselijke bepalingen van de richtlijn
1999/5/EC. U kunt de conformiteitsverklaring
vinden op www.revell-control.de.
IT Con la presente Revell GmbH,
dichiara che questo prodotto rispetta i
requisiti di base e le ulteriori clausole
applicabili della direttiva 1999/5/CE. La
dichiarazione di conformità è disponibile
all’indirizzo www.revell-control.de.
ES Revell GmbH declara que este
producto cumple los requisitos esenciales
y cualesquiera otras disposiciones apli-
cables o exigibles de la Directiva 1999/5/CE.
La declaración de conformidad puede
consultarse en www.revell-control.de.
Belangrijke kenmerken / Características importantes /
Caratteristiche importanti
NL Aircraft Easy Plane:
- Volledig proportionele
27-MHz-zender met 2 kanalen
- Romp van stevig hardschuim
- Eenvoudig en snel
samengebouwd
- Zeer stabiele
vliegeigenschappen
ES Aircraft Easy Plane:
- Emisora de 27 MHz comple-
tamente proporcional con 2
canales
- Fuselaje del avión en
espuma dura resistente
- Ensamblado rápido y
sencillo
- Características de vuelo
especialmente estables
IT Aircraft Easy Plane:
- Radiocomando a 27-MHz
completamente proporzionale
a 2 canali
- Fusoliera in espanso rigido
stabile
- Facile e veloce da assemblare
- Caratteristiche di volo parti-
colarmente stabili
23966
© 2014 Revell GmbH,
Henschelstr. 20-30, D-32257
Bünde. A subsidiary of Hobbico,
Inc. REVELL IS THE REGISTERED
TRADEMARK OF REVELL GMBH,
GERMANY. Made in China.
www.revell-control.de
NL Wetgeving voor inzameling van
afgedankte elektrische en elektronische
apparatuur: Verwijder alle verbruikte
batterijen afzonderlijk. Lever oude elektrische
apparaten in bij uw gemeentelijke inzamel-
punt voor afgedankte elektrische en elektro-
nische apparatuur. De overige onderdelen
horen bij het huisvuil. Dank voor uw
medewerking!
ES Legislación sobre residuos eléctricos:
cuando el producto alcance el nal de
su vida útil saque todas las baterías y
deséchelas en el contenedor de recogida
selectiva apropiado. Deseche los aparatos
eléctricos fuera de uso en el punto limpio
destinado para ello en su municipio.
Deseche las demás piezas en la basura
normal. ¡Gracias por su colaboración!
IT Legge sui riuti elettronici:
Una volta concluso l’utilizzo,
rimuovere le batterie e smaltire
separatamente i vecchi apparecchi
elettrici presso i punti di raccolta
comunali per i riuti elettrici ed
elettronici. Le altre parti si
smaltiscono come riuti domestici.
Grazie per la collaborazione!
NiMH
NL Accuvereisten
voor het vliegtuig:
Nominaal vermogen:
DC 4,8 V / 0,86 Wh
Accu: 4 x 1,2 V
NiMH-Akku
(meegeleverd)
Capaciteit: 180 mAh
Benodigde batte-
rijen/accu’s voor
de zender:
Voeding:
DC 12 V
Batterijen: 8 x 1,5
V “AA“ (niet meege-
leverd)
ES Requisitos de
la batería para el
avión:
Potencia nominal: DC
4,8 V / 0,86 Wh
Batería: 4 x 1,2 V
acumulador NiMH
(suministradas)
Capacidad: 180 mAh
Especicaciones
de la batería de la
emisora:
Alimentación:
DC 12 V
Baterías: 8 x 1,5 V “AA“
(no suministradas)
IT Batteria per
l‘aereo su richiesta:
Potenza nominale:
DC 4,8 V / 0,86 Wh
Batterie:
4 x batteria ricari-
cabile 1,2 V NiMH
(fornite in dotazione)
Capacità: 180 mAh
Requisiti per batterie
monouso/ricaricabili
del radiocomando:
Alimentazione
elettrica:
DC 12 V
Batterie: 8 x 1,5 V “AA“
(non fornita)
Zender
Emisora
Telecomando
Propeller
Hélice
Elica
Bedieningshandleiding
Manual de instrucciones
Istruzioni per l‘uso
Schroevendraaier
Destornillador
Cacciavite
Accu
Acumulador
Batteria
Lijm
Adhesivo
Colla
Landingsgestel
Tren de aterrizaje
Carrello
Windvaan
Manga de
viento
Banderuola
Accuafdekking en
propellertrekker
Tapa de baterías y
extractor de hélices
Coperchio batteria
ed estrattore elica
Draagvlak
Ala
Ala
Staartvlakken
Estabilizadores
Impennaggio
Vliegtuigromp
Fuselaje del avión
Fusoliera
Inhoud / Contents / Contenu
27 MHz
Radio ContRol
NederlandsEspañolItaliano
Notes
V 01.06
14 15
• Rimuovere le batterie dal teleco-
mando quando non viene usato.
• Tenere sempre sott’occhio l’aereo
per non perderne il controllo.
• Per il radiocomando si consigliano
batterie nuove alcaline/manga-
nese. Le batterie monouso per
questo radiocomando possono
essere sostituite con batterie
ricaricabili (accumulatori) per un
maggior rispetto dell’ambiente.
• Sostituire le batterie appena il
radiocomando inizia a funzionare
in modo anomalo.
• Rispettare queste istruzioni per l’uso.
• L’utilizzatore deve azionare questo
veicolo solo secondo le indicazioni
per l’uso contenute nelle seguenti
istruzioni.
• Non fare volare l’aereo nelle
vicinanze di aeroporti, persone,
animali, acque e condutture
elettriche.
• Caricare sempre la batteria NiMH
dell’aeromobile al radiocomando.
Monitorare sempre l’operazione
di carica e interrompere al max
dopo 10 minuti o quando la
batteria si scalda.
• Non esporre l’aeromobile
all’umidità poiché questo potrebbe
comportare danni all’elettronica.
• Tenere il velivolo sempre in vista
in modo che non possa scontrarsi
con il pilota, con altre persone o
animali e ferirli.
• In generale, assicurarsi che il
modello non possa provocare
lesioni alle persone vericando
anche la presenza di problemi di
funzionamento e difetti.
• Questo velivolo non è adatto per
persone con limitazioni siche
o mentali. Alle persone senza
conoscenze in materia di voli di
modellini consigliamo la messa
in esercizio dietro istruzione di un
pilota esperto.
Cura e manutenzione:
• Pulire l’aeromobile con un panno
pulito.
• Proteggere il modellino, il
radiocomando e le batterie
dall’esposizione diretta alla luce
solare e/o dall’effetto diretto del
calore.
Istruzioni di sicurezza delle
batterie per il radiocomando:
• Non ricaricare batterie monouso.
• Le batterie ricaricabili devono
essere estratte dal radiocomando
per la ricarica.
• Le batterie ricaricabili possono
essere ricaricate solo sotto la
supervisione di un adulto.
• Non utilizzare insieme tipi di
batterie diversi e batterie usate.
• Utilizzare solo le batterie consi-
gliate o un tipo simile.
• Inserire le batterie rispettando la
giusta polarità (+ e -).
• Le batterie scariche devono essere
rimosse dal radiocomando.
• I morsetti di raccordo non devono
essere cortocircuitati. Rimuovere
le batterie dal radiocomando,
quando non vengono utilizzate
per molto tempo.
Il velivolo è dotato di una
batteria NiMH. Si prega di
attenersi alle seguenti istru-
zioni di sicurezza:
• Non gettare mai le batterie nel
fuoco e tenerle lontano da fonti
di calore.
• Per caricare usare solo il radioco-
mando in dotazione. L’utilizzo di
un altro caricabatterie può portare
a danni permanenti alle batterie
e alle parti adiacenti e causare
lesioni siche alle persone!
• Per l’operazione di caricamento
assicurarsi di avere sempre una
base resistente al fuoco, in un
ambiente tutelato dal pericolo di
incendi.
• Non lasciare le batterie incustodite
durante la fase di caricamento e
scaricamento.
• Non smontare o modicare i con-
tatti delle batterie. Non danneg-
giare o perforare le celle della
batteria. Vi è il rischio di esplosione!
• Tenere la batteria lontana dalla
portata dei bambini.
• Scaricare le batterie per lo
smaltimento e/o attendere che si
siano esaurite. Coprire i poli liberi
con nastro adesivo per evitare
cortocircuiti!
Istruzioni di sicurezza:
• Non modicare mai struttural-
mente il prodotto, potrebbe
venire danneggiato o diventare
pericoloso.
• Per evitare rischi utilizzare l’aereo
sempre in una posizione da cui
possa facilmente essere schivato.
Utilizzare l’aereo sempre in una
posizione, da cui possa facil-
mente essere schivato.
• Spegnere sempre velivolo e
radiocomando dopo l’uso. In caso
contrario potrebbero vericarsi
un avvio involontario.
NL
• Let op! Dit vliegtuig is geen
speelgoed, maar een geav-
anceerde vliegmachine. Bij
onvakkundig gebruik kan het
persoonlijk letsel en materiële
schade veroorzaken. De piloot is
verantwoordelijk voor een veilige
bediening!
• Deze handleiding moet voor
ingebruikneming volledig gelezen
en begrepen worden!
• Dit vliegtuig is geschikt voor
gebruik in de open lucht bij
windstilte of weinig wind.
• Dit vliegtuig is geschikt vanaf
14 jaar. Het toezicht van de ouders
is bij het vliegen noodzakelijk.
• Handen, gezicht, haar en losse
kleding van de propeller verwijderd
houden.
• Afstandsbediening en vliegtuig
uitschakelen wanneer zij niet
worden gebruikt.
• Batterijen uit de afstandsbediening
halen, wanneer deze niet wordt
gebruikt.
• Het vliegtuig altijd in het oog
houden, om de controle over
het vliegtuig niet te verliezen.
• Voor de zender raden wij het
gebruik van alkali-mangaan-
batterijen aan. In plaats van weg-
werpbatterijen kunt u milieuvrien-
delijkere oplaadbare batterijen
(accu’s) gebruiken voor de zender.
• Wanneer de zender niet meer
goed werkt, moeten de batterijen
worden vervangen.
• Bewaar deze handleiding goed.
• De gebruiker mag dit vliegtuig
alleen overeenkomstig de gebruiks-
instructies in deze bedieningshand-
leiding gebruiken.
• Het vliegtuig niet in de omgeving
van luchthavens, personen, dieren,
wateren en stroomleidingen
vliegen.
• Laad de NiMH-accu van het vlieg-
tuig altijd op met behulp van de
zender. Houd steeds toezicht op
het laadproces en onderbreek dit
na maximaal 10 minuten of als de
accu warm wordt.
• Laat het vliegtuig niet in aanraking
komen met water; hierdoor kan
de elektronica beschadigd raken.
• Houd de vliegtuig steeds in het
oog, zodat deze niet tegen de
piloot, andere mensen of dieren
aanvliegt en hen letsel toebrengt.
• In zijn algemeenheid moet ervoor
worden gezorgd dat niemand ge-
wond kan raken door de model-
vliegtuig, ook als er storingen
optreden of de vliegtuig defect
raakt.
• Dit vliegtuig is niet geschikt
voor mensen met lichamelijke
of geestelijke beperkingen.
Personen zonder kennis op gebied
van modelvliegen bevelen wij de
inbedrijfstelling onder leiding van
een ervaren piloot aan.
Onderhoud en verzorging:
• Neem het vliegtuig uitsluitend af
met een schone doek.
• Voorkom blootstelling van het
model, de zender en de accu/
batterijen aan direct zonlicht en/of
inwerking van intense warmte.
Veiligheidsaanwijzingen met
betrekking tot de batterijen
voor de zender:
• Niet-oplaadbare batterijen mogen
niet worden opgeladen.
• Oplaadbare batterijen moeten
voor het laden uit de zender
worden verwijderd.
• Oplaadbare batterijen mogen
alleen onder toezicht van volwas-
senen worden opgeladen.
• Gebruik geen batterijen van
verschillende typen of nieuwe en
gebruikte batterijen door elkaar.
• Gebruik uitsluitend de aanbevolen
batterijen of batterijen van een
gelijkwaardig type.
• Plaats batterijen altijd met de
polen (+ en -) in de juiste richting.
• Verwijder lege batterijen uit de
zender.
• De aansluitklemmen/polen
mogen niet worden kortgesloten.
Verwijder de batterijen uit de
zender wanneer deze langere tijd
niet wordt gebruikt.
Het vliegtuig is voorzien van een
NiMH-accu. Houd u aan de vol-
gende veiligheidsvoorschriften:
• Werp accu’s nooit in vuur en
bewaar ze niet op hete plekken.
• Gebruik uitsluitend de zender van
het vliegtuig om de accu op te
laden. Bij gebruik van een andere
lader kan de accu onherstelbaar
beschadigd raken; dit kan ook
leiden tot schade aan naburige on-
derdelen en tot persoonlijk letsel!
• Laad de accu steeds op op een
vuurvaste ondergrond en in een
brandveilige omgeving.
• Laat de accu niet onbeheerd
achter tijdens het laden.
• Demonteer de contacten van de
accu in geen geval en probeer ze
niet aan te passen. Beschadig de
cellen van de accu niet en maak
ze niet open. Er bestaat ontploff-
ingsgevaar!
• Houd de accu/batterijen buiten
bereik van kinderen.
• Accu’s moeten ontladen zijn of de
accucapaciteit moet uitgeput zijn
voordat u ze weggooit. Dek vrij-
liggende polen af met plakband
om kortsluiting te voorkomen!
Veiligheidsaanwijzingen:
• Pas het product nooit structureel
aan; hierdoor kan het beschadigd
raken of gevaar veroorzaken.
• Om risico’s te voorkomen mag u
de vliegtuig nooit zittend bedie-
nen. Bedien hem altijd in een
positie vanwaaruit u eventueel
snel kunt uitwijken.
• Schakel de vliegtuig en de zender
na gebruik steeds uit. Anders kan
de vliegtuig onbedoeld opstijgen.
ES
• ¡Atención! Este avión no es
un juguete sino una aeronave
compleja, que si se usa de forma
indebida puede provocar lesiones
personales y daños materiales.
El piloto es responsable de que su
uso no entrañe peligro alguno.
• Lea este manual por completo
y familiarícese con el contenido
antes de poner en funcionamiento
el producto.
• Este avión es adecuado para
vuelo exterior sin viento o muy
poco viento.
• Este avión es apropiado a partir
de los 14 años de edad. Es impre-
scindible la supervisión de los
padres durante el vuelo.
• Mantener alejados de la hélice,
las manos, la cara, los cabellos y
la ropa suelta.
• Desconectar el control remoto y
el avión cuando no se encuentran
en uso.
• Extraer las pilas del control remoto
cuando este no se encuentra en uso.
• Mantener siempre el avión dentro
de la visual para no perder el
control sobre el aparato.
• Recomendamos usar pilas
alcalinas nuevas para la emisora.
Las pilas no recargables que se
utilizan en esta emisora y otros
aparatos eléctricos pueden susti-
tuirse por baterías
recargables respetuosas con el
medio ambiente.
• Cambie las baterías en cuanto
la emisora deje de funcionar de
forma able.
• Guarde este manual para referen-
cias futuras.
• El usuario debe operar este avión
sólo de acuerdo a las indicaciones
de uso de estas instrucciones de
manejo.
• El avión no debe volar en las
cercanías de aeropuertos, perso-
nas, animales, aguas o líneas de
corriente.
• La batería NiMH del avión se debe
cargar siempre con la emisora. El
proceso de carga se debe super-
visar en todo momento y nalizar
tras 10 minutos como máximo o
cuando la batería se caliente.
• El avión no debe entrar en contacto
con agua, ya que en caso contrario
podría resultar dañada la elec-
trónica.
• Tenga la aeronave siempre a la
vista para que no colisione con
otros pilotos, personas ni animales
ocasionando lesiones.
• Por norma se debe prestar
atención a que no exista el riesgo
de provocar lesiones personales
incluso en caso de fallos de funci-
onamiento o defectos.
• Recomendamos a las personas
sin conocimientos de aeromodel-
ismo realizar la puesta en servicio
bajo las instrucciones de un piloto
experimentado.
Mantenimiento y cuidados
• Utilice solo un paño limpio y
suave para limpiar el avión.
• No exponga el modelo, la emisora
ni las baterías directamente a la
luz solar ni fuentes de calor.
Instrucciones de seguridad de
las baterías de la emisora
• Las baterías no recargables (pilas)
no se deben recargar.
• Las baterías recargables deben
sacarse de la emisora antes de
cargarlas.
• Las baterías recargables solo de-
ben recargarse bajo la supervisión
de un adulto.
• No se deben utilizar baterías de
distinto tipo, ni tampoco mezclar
baterías nuevas y usadas.
• Solo está permitido utilizar las
baterías recomendadas o unas
equivalentes.
• Las baterías deben colocarse res-
petando la polaridad (+ y -).
• Las baterías descargadas deben
sacarse de la emisora.
• Bajo ninguna circunstancia se
deben cortocircuitar los contactos.
Saque las baterías de la emisora
cuando no vaya a utilizarse
durante un periodo de tiempo
prolongado.
El avión está equipado con
una batería NiMH. Respete
las siguientes indicaciones de
seguridad:
• Bajo ninguna circunstancia se
deben arrojar las baterías al fuego
ni guardarlas en lugares con tem-
peraturas elevadas.
• Para cargar la batería solo se debe
utilizar la emisora suministrada.
La utilización de un cargador
distinto puede provocar daños
permanentes en la batería y
componentes
próximos, aparte de lesiones
personales.
• El proceso de carga se debe reali-
zar siempre sobre una supercie
ignífuga y un entorno seguro
contra incendios.
• La batería no debe dejarse desa-
tendida durante los procesos de
carga y descarga.
• Bajo ninguna circunstancia se
deben desmontar o modicar los
contactos de la batería. Las celdas
de la batería no se deben dañar
ni perforar. Existe el riesgo de
explosión.
• La batería debe mantenerse
alejada del alcance de los niños.
• Las baterías deben estar descar-
gadas, o su capacidad agotada,
antes de poder desecharlas. Cubra
los contactos descubiertos con
cinta aislante para evitar cortocir-
cuitos.
Instrucciones de seguridad
• El producto no debe modicarse
bajo ninguna circunstancia, ya que
en caso contrario podría resultar
dañado o entrañar algún peligro.
• Para evitar riesgos, la aeronave no
se debe utilizar estando sentado
en el suelo o en una silla. La aero-
nave se debe utilizar desde una
posición que permita apartarse
rápidamente.
• La aeronave y la emisora se deben
apagar siempre cuando no se
usen. En caso contrario se podría
producir un comando de arranque
involuntario.
IT
• Attenzione! Questo aeromobile
non è un giocattolo ma un ve-
livolo complesso che può causare
danni a cose e lesioni a persone
se usato in modo scorretto.
Il pilota è responsabile della
sicurezza durante l’utilizzo!
• Queste istruzioni devono essere
lette e comprese prima dell’utilizzo.
• Questo aeromobile è adatto per
uso esterno in condizioni di vento
scarso o assente.
• Questo aereo è adatto a partire
dai 14 anni. Durante il volo è
necessaria la sorveglianza dei
genitori.
• Tenere lontano dall’elica mani,
viso, capelli e capi di abbiglia-
mento larghi.
• Spegnere il telecomando e l’aereo
quando non vengono usati.
Veiligheidsaanwijzingen / Instrucciones de seguridad / Istruzioni di sicurezza
Vliegtuig en afstandsbediening / Avión y control remoto /
Aereo e telecomando
Accuvak /
Compartimiento
del acumulador /
Scomparto batteria
Accu /
Acumulador /
Batteria
Richtingsroer /
Timón de dirección /
Timone di direzione Propeller /
Hélice /
Elica
Draagvlak / Ala /
Ala
Lanngsgestel /
Tren de aterrizaje /
Carrello
Hoogteroer /
Timón de altura /
Timone di profondità
Vliegtuigaccu /
Batería del avión /
Batteria aereo
AFSTANDSBEDIENING: / CONTROL REMOTO: / TELECOMANDO
Stuwkrachtregelaar (gas) /
Regulador de
empuje (acelerador) /
Regolatore di
accelerazione (gas)
Besturing links/rechts /
Palanca de viraje /
Comando sinistra-destra
Power-indicatie /
Indicación de potencia /
Visualizzazione Power
Laadindicator /
Indicador de carga /
Spia caricamento
Antenne /
Antena /
Antenna
ON-/OFF-schakelaar /
Interruptor ON/OFF /
Interruttore ON-/OFF
Laadbus /
Hembrilla de carga /
Bussola di ricarica
Batterijvak afdekking /
Compartimiento portapilas /
Coperchio dello scomparto batterie
VLIEGTUIG: / AVIÓN: / VELIVOLO:
Nederlands Español Italiano
NederlandsEspañolItaliano
16 17
1 Vliegprincipes / 1 Fundamentos de vuelo / 1 Nozioni di base di volo
2 In elkaar zetten / 2 Montaje / 2 Montaggio
1
NL Het is de bedoeling om het vliegtuig
geleidelijk te laten stijgen met precies
gedoseerd gas. Als continu vol gas wordt
gegeven, zal het vliegtuig eerst steil naar
boven vliegen om vervolgens af te glijden
en richting de grond te vliegen. Dit kan
alleen worden voorkomen door drastisch
gas terug te nemen zodra het vliegtuig
horizontaal/rechtdoor vliegt. Geef alleen
vol gas wanneer het vliegtuig teveel daalt.
ES El objetivo es dosicar exactamente la
aceleración para que el avión ascienda
solo un poco. Si se mantiene la posición de
aceleración máxima de forma continuada
el avión ascenderá en vertical hacia arriba
para a continuación cabecear y descender
hacia el suelo. Esto solo se puede evitar
reduciendo drásticamente la aceleración
en cuanto el avión vuele en recto y
nivelado y acelerando de nuevo a fondo
cuando el avión descienda.
IT L’obiettivo è quello di dosare con preci-
sione l’accelerazione per permettere una
leggera salita in quota. Se si accelera
completamente in modo permanente,
l’aeromobile dapprima volerà rapidamente
verso l’alto per poi precipitare verso il
pavimento. Ciò si può impedire solo
quando non appena il velivolo vola
orizzontalmente/in rettilineo, si decelera e
si accelera completamente durante le fasi
di discesa.
NL Steek de propellers op de motorassen.
De bouwset omvat vier propellers,
waarvan er twee als reserve dienen.
ES Monte la hélice en el eje del motor. El
kit de montaje incluye cuatro hélices,
dos de ellas son de repuesto.
IT Montare l’elica all’albero motore. Il kit di
montaggio comprende quattro eliche,
due delle quali servono come ricambio.
3
NL Het deel van de romp waarop het
draagvlak wordt aangebracht, is in de
fabriek voorzien van dubbelzijdig
plakband. Trek voorzichtig het
beschermfolie weg.
ES La supercie de apoyo del ala se
suministra ya con una cinta adhesiva de
doble cara. Despegue con cuidado la
lámina de protección.
IT Il supporto dell’ala è già dotato di
fabbrica di nastro biadesivo. Rimuoverne
con attenzione la pellicola protettiva.
2
NL Let er bij het aanbrengen van een
propeller op, dat er een kleine spleet
van minder dan een millimeter tussen
de propeller en de motor blijft.
ES Durante el montaje se debe prestar
atención a mantener una separación
inferior a un milímetro entre la hélice y
el motor.
IT Durante il montaggio, fare attenzione
che ci sia un piccolo spazio di meno di
un millimetro fra l’elica e il motore.
4
NL Verbind de stekker van de motoraansluit-
kabel aan het draagvlak met de aansluit-
kabel binnenin de romp.
ES Enchufe la hembrilla del cable de
conexión del motor en el ala al conector
ubicado en el interior del fuselaje.
IT Attaccare la spina del cavo motore
sull’ala con il connettore, che si trova
all’interno della fusoliera.
NL Op het draagvlak is een rechthoek
aangebracht, die precies in de opening in
de romp past. Deze zorgt ervoor, dat het
draagvlak precies wordt uitgelijnd ten
opzichte van de romp.
ES En el ala se encuentra un rectángulo que
encaja exactamente en la abertura del
fuselaje. El rectángulo sirve para alinear
exactamente el ala.
IT Sull’ala è applicato un rettangolo, che si
adatta esattamente all’apertura della
fusoliera. Il rettangolo consente
l’allineamento esatto dell’ala.
5
7
NL Als het draagvlak haaks en recht staat ten
opzichte van de romp, bevestigt u het
door het met lichte druk op het dubbelzij-
dige plakband aan te brengen.
ES Una vez el ala esté alineado en ángulo
recto y horizontal, fíjelo al fuselaje
presionándolo ligeramente.
IT Quando l’ala si trova ad angolo retto e
dritta, viene ssata con una leggera
pressione sulla fusoliera.
9
NL Smeer de onderzijde van het roerblad
licht in met de meegeleverde lijm (zie
afbeelding). Gebruik slechts weinig lijm.
ES Aplique un poco del adhesivo suminis-
trado con el kit de montaje en la parte
inferior del timón de dirección según se
muestra en la gura. Utilice el adhesivo
con moderación.
IT Applicare un leggero strato di colla
fornita con il kit, sulla parte inferiore
del timone - come si vede sulla gura.
Usare la colla con parsimonia.
NL Let er bij het aanbrengen van het
draagvlak op de romp op, dat er geen
kabel ingeklemd raakt. Lijn het draagvlak
eerst precies uit aan de hand van de
eerder genoemde rechthoek, voordat het
tweezijdige plakband in contact komt
met het draagvlak.
ES Al colocar el ala en el fuselaje se debe
prestar atención a que no quede
atrapado ningún cable y que el ala
quede alineado exactamente, con ayuda
del rectángulo indicado anteriormente,
en el fuselaje sin que haga contacto con
la cinta adhesiva de doble cara.
IT Quando si ssa l’ala alla fusoliera,
assicurarsi che nessun cavo sia incastrato
e allineare prima l’ala pulita mediante il
rettangolo precedentemente descritto
sulla fusoliera, senza che il nastro
biadesivo venga a contatto con la stessa.
6
8
NL Trek het beschermfolie van het dubbelzij-
dige plakband aan de staart van het
vliegtuig voorzichtig los.
ES Despegue con cuidado la lámina de
protección de la cinta adhesiva de doble
cara en la cola del avión.
IT Rimuovere accuratamente la pellicola
protettiva del nastro biadesivo sul retro
del velivolo.
11
NL Steek vervolgens het hoogteroer van
achteren over het roerblad, tegen het
hogere deel van de onderzijde aan.
ES Introduzca el timón de profundidad en el
borde superior del timón de dirección.
IT Quindi ssare l’equilibratore al bordo
superiore del timone.
13
NL Druk het landingsgestel samen en steek
het in de daarvoor bedoelde sleuf.
ES Presione los lados del tren de aterrizaje e
introdúzcalo en la ranura.
IT Comprimere il telaio e inserirlo nella
fessura disponibile.
NL Bevestig de windvaan aan het bovenste
uiteinde van de antenne.
ES Fije la manga de viento en el extremo
superior de la antena de la emisora.
IT Appendere la banderuola nell’estremità
superiore dell’antenna del radiocomando.
10
NL Steek nu het voorste uiteinde van het
roerblad in de uitsparing in de staart van
het vliegtuig.
ES Introduzca el extremo delantero del timón
de dirección en el hueco en la cola del
avión.
IT Ora introdurre il timone con l’estremità
anteriore nella cavità della parte posteriore.
12
NL Druk het samenstel van staartvlakken nu
naar beneden, tegen de romp.
ES Presione todos los componentes.
IT Quindi comprimerli tutti verso il basso.
14
NL Steek de antenne in het gat bovenin de
zender en schroef hem vast (met de klok
mee draaien).
ES Introduzca la antena en el oricio
superior y apriétela a derechas.
IT Inserire l’antenna nel foro superiore e
ruotarla in senso orario.
Geen gas / Aceleración 0 /
Nessuna accelerazione Vol gas / Max. aceleración /
Accelerazione completa
Weinig gas / Poca aceleración /
Poca accelerazione
NL Ga als volgt te werk om de Easy Plane
doelmatig te besturen: geef gas om te
stijgen (linkerhendel op de zender naar
voren drukken), neem gas terug om te
dalen (gashendel gedeeltelijk of helemaal
naar beneden bewegen). Het vliegtuig
gedraagt zich als volgt: als men continu vol
gas geeft, zal het geleidelijk steeds steiler
omhoog gaan vliegen. Na verloop van tijd
vliegt het dan echter te steil omhoog,
waardoor de neus - door de te lage
vliegsnelheid - abrupt naar beneden
kantelt, richting de grond. Het is dan ook
geen goed idee om continu met vol gas
te vliegen; het vliegtuig zal hierdoor
neerstorten.
ES Para controlar el modelo Easy Plane
correctamente es necesario tener en
cuenta siempre dos puntos importantes:
aumentar la aceleración con la palanca gas
(palanca izquierda de la emisora) hace que
el avión ascienda, mientras que reducirla
hace que descienda. En consecuencia, si se
mantiene la palanca de gas en la posición
de aceleración máxima de forma ja, el
avión describirá una ligera curva ascendente
continua hasta que debido al vuelo
ascendente, cada vez más vertical, pierda
velocidad; esta velocidad de vuelo
demasiado lenta provocará que el morro
baje repentinamente y el avión comience
a descender. Por lo que se debe evitar
mantener la posición de aceleración
máxima de forma continuada ya que
puede provocar que el avión se estrelle.
IT Al ne di comandare il modellino Easy
Plane in modo mirato, devono essere
sempre rispettati due punti importanti: Per
salire di quota accelerare, per scendere di
quota allentare o rilasciare completamente
la leva di accelerazione (lato sinistro del
radiocomando). A tal ne si creano i
seguenti comportamenti: Con un’accele-
razione completa e costante, il velivolo
salirà continuamente formando un leggero
arco, no a quando il modellino, mediante
un ripido volo ascendente perderà di
nuovo velocità. Quindi a seguito di una
lenta velocità di volo più lenta la punta
volgerà verso il basso e si dirigerà verso il
pavimento. Evitare anche un’accelerazione
completa permanente e la caduta del
velivolo.
Nederlands Español Italiano
NederlandsEspañolItaliano
15
18 19
3 Batterijen plaatsen / Colocar las pilas / Inserire le batterie 5 Voorbereidingen om te vliegen / 5 Preparación para el vuelo / 5 Preparazione al volo
7 Het vliegtuig laten opstijgen / 7 Despegue del avión / 7 Partenza dell’aeromobile
NL Schakel om te
starten eerst de
zender in.
ES Encienda primero
la emisora.
IT Per avviare
accendere il
radiocomando.
NL Trek eerst de antenne van de
zender uit tot zijn volle lengte. Trek
er niet te hard aan, de antenne kan
kapot gaan. Start het model steeds
tegen de wind in. De windvaan aan
de antenne geeft de windrichting
aan.
ES Primero extienda completamente la
antena de la emisora. No se debe
tirar con demasiada fuerza, ya que
en caso contrario la antena podría
sufrir daños. El modelo solo se
debe despegar contra el viento.
La manga de viento en la antena
indica la dirección del viento.
IT In primo luogo, estrarre l’antenna
del radiocomando per l’intera
lunghezza. Non tirare troppo,
l’antenna potrebbe rompersi. Far
partire sempre il modellino contro
vento. La banderuola sull’antenna
indica la direzione del vento.
NL Werp de Easy Plane in de lucht om hem op te laten stijgen. Het
is essentieel hiervoor de juiste werptechniek te gebruiken: werp
het vliegtuig krachtig over de schouder, recht naar voren tegen
de wind in.
ES El avión Easy Plane se despega lanzándolo. Para ello es determi-
nante la técnica de lanzamiento correcta. El avión se debe lanzar
contra el viento con fuerza siguiendo una trayectoria recta por
encima del hombro.
IT Easy Plane si avvia mediante lancio manuale. A tal ne, una
corretta tecnica di lancio è cruciale: L’aeromobile deve essere
lanciato diritto con forza in linea retta sopra la spalla in avanti
contro vento.
NL Breng de accu aan in het vliegtuig, zoals
beschreven in punt 3 en zet de schake-
laar onderaan het vliegtuig op ON.
ES Coloque las baterías según se indica en
el punto 3 y coloque el interruptor en la
parte inferior del avión en la posición
ON.
IT Utilizzare le batterie come descritto al
punto 3 e portare l’interruttore sul lato
inferiore dell’aeromobile su ON.
Afstandsbediening / Control remoto / Telecomando
NL Open het batterijvak van de zender door
het geribbelde oppervlak in te drukken
en tegelijk naar beneden te schuiven.
ES Abra el compartimento de baterías de la
emisora presionando y empujando hacia
abajo a la vez en la supercie ranurada.
IT Aprire il vano batterie del radiocomando
premendo e spingendo contemporanea-
mente verso il basso sulla supercie
corrugata.
NL Plaats de batterijen (8 x 1,5 V AA
Mignon) in de zender met inachtneming
van de indicaties in het batterijvak.
ES Coloque las 8 baterías 1,5 V AA Mignon
en la emisora según las indicaciones en
el compartimento de baterías.
IT Inserire le batterie 8 x 1,5 V AA Mignon
secondo le indicazioni nel vano batteria
del radiocomando.
NL Breng daarna het deksel weer aan over
het batterijvak.
ES Coloque la tapa del compartimento de
baterías.
IT Dopo di che rimontare il coperchio del
vano batterie al suo posto.
Vliegtuig / Avión / Velivolo
NL Verbind de stekker van het vliegtuig met
het contact van de accu.
ES Enchufe el conector del avión en la
hembrilla de la batería.
IT Collegare insieme il connettore del
velivolo con la presa della batteria.
NL Duw de kabel in de uitsparing in het
accuvak en leg de accu er overheen,
achterin het accuvak.
ES Guarde los cables en el hueco del
compartimento de baterías y coloque la
batería encima en el extremo trasero
del compartimento de baterías.
IT Inlare i cavi nella cavità nel vano
batteria e inserire la batteria
nell’estremità posteriore del vano
batterie.
NL Breng vervolgens de afdekking van het
accuvak aan en bevestig het met de
daarvoor bedoelde schroef.
ES Coloque la tapa del compartimento de
baterías y fíjela con el tornillo.
IT Poi mettere il coperchio del vano
batteria e ssarlo con la vite acclusa.
6 Controle van de windsterkte / 6 Comprobación de la fuerza del viento / 6 Test sull’intensità del vento
NL Als de windvaan recht naar beneden
hangt, is het windstil en kan er zonder
problemen met het vliegtuig worden
gevlogen.
ES Si la manga de viento cuelga hacia
abajo, quiere decir que no hay viento
y que se puede volar sin limitación
alguna.
IT Se la bandiera è abbassata, non c’è
vento e si può volare senza restrizioni.
NL Bij lichte wind hangt de windvaan naar
beneden in een hoek van ca. 45°. Aan de
vaan ziet u ook in welke richting de wind
waait. Het model mag alleen tegen de
wind in opstijgen.
ES Si la manga de viento ondea con un
ángulo de inclinación de unos 45º,
quiere decir que hay un poco de viento.
Además, también indica la dirección del
viento. El modelo solo se debe despegar
contra el viento.
IT Se c’è poco vento la banderuola
presenta un angolo di inclinazione di
circa 45°. Inoltre, si può rilevare la
direzione del vento. Il modellino può
essere avviato solo contro vento.
NL Als de windvaan horizontaal staat, waait
het te hard om te vliegen.
ES Si la manga de viento ondea horizontal-
mente, quiere decir que el viento es
demasiado fuerte como para poder
volar.
IT Se la bandiera è orizzontale c’è troppo
vento per volare.
NL De Easy Plane kan vliegen bij weinig tot
geen wind. Om vast te stellen of de wind
niet te sterk is, wordt er een windvaan
meegeleverd bij de bouwset.
ES El avión Easy Plane es adecuado para
vuelo exterior sin viento o muy poco
viento. Para comprobar si el viento es
demasiado fuerte, el kit de montaje
incluye una manga de viento.
IT Easy Plane è adatto per volare in condizioni
di vento scarso o assente. Per determinare
se il vento è troppo forte, il kit comprende
una banderuola.
4 Laden van de vliegtuigaccu / 4 Carga de la batería del avión / 4 Ricarica della batteria dell’aereo
NL De zender heeft aan de achterzijde een
aansluiting om de accu van het vliegtuig
op te laden. Schakel de zender uit om de
accu op te laden. Nadat de accu is
verbonden met de zender, begint het
laden automatisch.
ES En el extremo trasero de la emisora se
encuentra una hembrilla de carga para
cargar la batería. Para la carga se debe
apagar la emisora. El proceso de carga
comienza automáticamente cuando se
enchufa la batería.
IT Per caricare la batteria, sul retro del
radiocomando è disponibile una presa di
carica. Disinserire il radiocomando per
caricare. Dopo aver collegato il processo
di carica si avvia automaticamente.
NL Op de zender knippert tijdens het laden
een groene led. Wanneer de accu vol is,
gaat de groene led continu branden.
ES Durante el proceso de carga parpadea
un LED en verde en la emisora. El LED
se enciende en verde de forma ja
cuando la batería está cargada.
IT Ora sul radiocomando lampeggia un LED
verde durante la carica. Quando è
completamente carica, il LED verde
passa a luce ssa.
NL Het laden duurt maximaal 10 minuten;
hierna moet de accu worden losge-
koppeld van de zender. Controleer de
accu tijdens het laden continu. Als de
accu warm of zelfs heet wordt, is hij
vol en moet hij onmiddellijk worden
losgekoppeld.
ES El proceso de carga naliza a los
10 minutos como máximo debiéndose
desconectar la batería transcurrido este
periodo. Además, se debe supervisar la
batería durante todo el proceso de
carga. Si se observa que aumenta de
temperatura o se calienta excesivamente
se debe desconectar inmediatamente.
IT L’operazione di carica è completata al
max. dopo 10 minuti e la batteria deve
essere scollegata. Allo stesso tempo è
necessario monitorare costantemente la
batteria durante la fase di carica. Se è
calda o bollente è carica e deve essere
scollegata subito.
Nederlands Español Italiano
NederlandsEspañolItaliano
20 21
NL De gashendel moet hierbij in de
middelste stand staan (half gas).
Als er teveel gas wordt gegeven
tijdens het starten, stijgt het model te
steil op en verliest daardoor snelheid,
waardoor het na korte tijd weer
hoogte verliest. Meestal stort het dan
neer. Het is beter om geleidelijk hoger
te gaan vliegen. Dit gaat het best door
ongeveer met half gas te vliegen.
ES Es Elemental que durante el despegue
la palanca de gas se encuentra en
la posición central (medio gas). Si
durante el despegue la aceleración
es excesiva, el modelo ascenderá en
vertical perdiendo debido a ello
rápidamente velocidad y con el
resultado de que al poco tiempo
cabeceará hacia abajo. La mayoría de
las veces acabará estrellándose contra
el suelo. El objetivo es un vuelo
ascendente uniforme que se puede
lograr a aprox. medio gas.
IT E’ molto importante qui che
l’aeromobile venga avviato con
una media accelerazione (leva di
accelerazione in posizione centrale).
Se alla partenza si accelera troppo,
il modellino vola via e perde velocità
a causa della ripida salita, e dopo un
breve distanza perde subito quota. La
maggior parte delle volte cade a terra.
Si raccomanda pertanto una salita
uniforme, che può essere raggiunta
con un’accelerazione media.
NL Onjuist: niet naar
boven werpen.
ES Incorrecto, no lanzar
hacia arriba.
IT Non corretto, non
lanciare verso l’alto.
NL Onjuist: niet naar beneden
werpen.
ES Incorrecto, no lanzar hacia
abajo.
IT Non corretto, non lanciare
verso il basso. NL Als het model vanzelf een auwe bocht naar links maakt,
wordt het getrimd door de achterkant van het roerblad wat naar
rechts te buigen. Op de afbeelding is de uitslag van het roerblad
voor de duidelijkheid overdreven weergegeven. De correcties
moeten minimaal zijn, buig niet meer dan ongeveer 1 à 2
millimeter.
ES Si el modelo vuela por sí mismo ligeramente hacia la derecha,
se debe trimar el timón de dirección ligeramente hacia la
izquierda. En la gura se muestra a modo de ejemplo el ajuste
de trimado de forma exagerada. Los ajustes deben ser míni-
mos, entre 1 y 2 milímetros aproximadamente.
IT Se il modellino vira leggermente a sinistra, regolare il timone
leggermente a destra. Nella foto viene rappresentata la
deviazione in modo eccessivo per chiarezza. Le correzioni
devono essere eseguite solo leggermente, circa 1-2 millimetri.
NL Als het model vanzelf een auwe bocht naar rechts maakt, moet
de achterkant van het roerblad wat naar links worden gebogen.
Op de afbeelding is de uitslag van het roerblad voor de duideli-
jkheid overdreven weergegeven. De correcties moeten minimaal
zijn, buig niet meer dan ongeveer 1 à 2 millimeter.
ES Si el modelo vuela por sí mismo ligeramente hacia la derecha, se
debe trimar el timón de dirección ligeramente hacia la izquierda.
En la gura se muestra a modo de ejemplo el ajuste de trimado
de forma exagerada. Los ajustes deben ser mínimos, entre 1 y 2
milímetros aproximadamente.
IT Se il modellino vira leggermente a destra da solo, regolare il
timone leggermente a sinistra. Nella foto viene rappresentata la
deviazione in modo eccessivo per chiarezza. Le correzioni devono
essere eseguite solo leggermente, circa 1-2 millimetri.
8 Vliegbesturing / 8 Control de vuelo / 8 Comando del volo
9 Trimmen van het model / 9 Trimado del avión / 9 Regolazione del modellino
NL Neem gas terug om te dalen.
Zelfs in zweefvlucht, zonder
motoraandrijving, kan er worden
gestuurd met de motoren.
ES Reduzca la aceleración cuando
quiera descender. El avión se puede
dirigir con los motores incluso al
volar planeando con los motores
apagados.
IT Per scendere di quota decelerare.
Anche nel deltaplano senza
azionamento motore è possibile
condurre con i motori.
NL Druk de stuurknuppel (rechterhendel
op de zender) in de gewenste
richting om een bocht naar links of
naar rechts te maken. Beweeg de
hendel direct weer naar de neutrale
stand wanneer het model in de
gewenste richting vliegt. Als de
stuurknuppel te lang naar een kant
wordt gedrukt, kan het model
neerstorten.
ES Para virar a la izquierda o la derecha
se debe empujar la palanca del
timón de dirección hacia el lado
correspondiente. Al virar se debe
prestar atención a que se debe
soltar la palanca del timón de
dirección y dejarla en la posición
neutra en cuando el modelo haya
tomado la dirección deseada. Si se
acciona la palanca de dirección
durante demasiado tiempo, el
modelo puede estrellarse.
IT Per la virata a sinistra o destra
spingere la leva del timone nella
direzione appropriata. Assicurarsi che
una volta che il modellino ha preso
la direzione desiderata, la leva del
timone ritorni immediatamente in
posizione neutra. Se si preme la leve
del timone troppo a lungo il
modellino potrebbe precipitare.
NL Het model stijgt door sneller te gaan
vliegen. Om hoogte te winnen, moet
dus meer gas worden gegeven. Dit
werkt echter alleen, als het vliegtuig
niet te steil omhoog vliegt. Als er
bijvoorbeeld langere tijd vol gas wordt
gegeven, wordt de invalshoek van het
vliegtuig te groot (het vliegt te steil
omhoog). De vliegsnelheid neemt hierdoor, ondanks het feit dat er
met vol gas wordt gevlogen, af en daarmee ook de draagkracht.
Het vliegtuig kantelt naar voren en gaat in een sterke duikvlucht.
Als het vliegtuig voldoende hoogte heeft, laat u het model
eenvoudig naar beneden glijden en geeft dan weer een beetje gas.
Om horizontaal op dezelfde hoogte te blijven vliegen, is iets minder
dan half gas nodig.
ES El modelo asciende a medida que aumenta la velocidad de vuelo.
Esto signica que para ganar altura es necesario acelerar más.
Aunque esto solo funciona cuando no se asciende demasiado.
Si, por ejemplo, se acelera al máximo durante demasiado tiempo,
el ángulo de ataque del avión será demasiado alto (es decir, el
avión asciende demasiado en vertical) y la velocidad de vuelo se
reducirá, a pesar de acelerar al máximo, a un nivel al que se
interrumpe el ujo en el ala, por lo que el avión cabeceará
pasando a un descenso muy pronunciado. Si la altura es suci-
ente, tan solo es necesario dejar que el modelo retome la
trayectoria planeando para a continuación volver a acelerar
moderadamente. Para volar en recto y nivelado es suciente con
mantener la aceleración aprox. a medio gas.
IT Il modellino sale con l’aumentare della velocità di volo. Ciò signica
che per guadagnare altezza, si deve accelerare di più. Questo
funziona solo se non si sale troppo velocemente. Se, ad esempio,
si accelera totalmente per lungo tempo, l’angolo di calettamento
del velivolo è elevato (sale troppo ripidamente) e la velocità di volo
diminuisce, nonostante l’accelerazione completa a un livello, che il
usso d’aria sull’ala si separa: l’aereo si inclina in avanti e cade in
picchiata. In caso di quota a sufcienza, far semplicemente slittare il
modellino e poi accelerare leggermente. Per voli orizzontali in
rettilineo è necessaria poco meno di una media accelerazione.
NL Als het model tijdens de vlucht vanzelf
naar links of naar rechts trekt, zonder dat
de stuurknuppel wordt bediend, moet het
getrimd worden. Buig hiertoe de achter-
kant van het roerblad een klein beetje in
de tegenovergestelde richting.
ES Si el modelo durante el vuelo deriva a
izquierdas o derechas por sí mismo sin
que se accione la palanca de mando, es
necesario trimarlo. Para ello se debe
doblar ligeramente el borde trasero del
timón de dirección en la dirección
contraria.
IT Se il modellino durante il volo tende a
sinistra o a destra senza virare, ha
bisogno di essere regolato. A tal ne,
piegare leggermente il bordo posteriore
del timone nella direzione opposta.
NL Als het vliegtuig te sterk omhoog vliegt of
als het zelfs bij vol gas nauwelijks hoogte
wint, dan moet het hoogteroer getrimd
worden.
ES Si el modelo asciende de forma demasia-
do acusada o no gana apenas altura al
acelerar al máximo, es necesario trimar el
timón de profundidad.
IT Se l’aeromobile sale troppo bruscamente o
a pieno regime raggiunge appena l’altezza,
l’elevatore deve essere riadeguato.
NL Als het model te sterk stijgt, moet het hoogteroer aan beide
zijden EEN BEETJE naar beneden worden gebogen. Op de foto is
de buiging voor de duidelijkheid overdreven weergegeven. In
de praktijk mag het hoogteroer hooguit een millimeter naar
boven of naar beneden worden gebogen.
ES Si el modelo asciende de forma demasiada acusada, es
necesario doblar el timón de profundidad LIGERAMENTE hacia
abajo en ambos lados. En la gura se muestra este ajuste de
forma exagerada. En la práctica solo se debe doblar un
milímetro hacia arriba o abajo.
IT Se il modellino sale troppo velocemente, piegare LEGGERMENTE
l’elevatore verso il basso su entrambi i lati. Nella foto la piega è
stata esagerata notevolmente. Piegare verso l’alto o verso il
basso di max. un millimetro.
NL Als het model zelfs bij vol gas niet of nauwelijks hoogte winnen,
dan moet het hoogteroer aan beide zijden EEN BEETJE naar boven
worden gebogen. Op de foto is de buiging voor de duidelijkheid
overdreven weergegeven. In de praktijk mag het hoogteroer
hooguit een millimeter naar boven of naar beneden worden
gebogen.
ES Si el modelo no gana altura, o muy poca, incluso acelerando al
máximo, es necesario doblar el timón de profundidad LIGERA-
MENTE hacia arriba en ambos lados. En la gura se muestra este
ajuste de forma exagerada. En la práctica solo se debe doblar un
milímetro hacia arriba o abajo.
IT Se in caso di salita a pieno regime il modellino raggiunge
un’altezza scarsa o non sale affatto, l’elevatore deve essere
LEGGERMENTE piegato verso l’alto su entrambi i lati. Nella foto la
piega è stata esagerata notevolmente. Piegare verso l’alto o
verso il basso di max. un millimetro.
Nederlands Español Italiano
NederlandsEspañolItaliano
22
11 De geschikte vliegomgeving / El entorno apropiado de vuelo / 11 L’ambiente adeguato per il volo
NL
• Kies altijd een grote open vlakte zonder
hindernissen om uw model te vliegen.
• Zorg er bij het starten absoluut voor, dat
alle leefwezens – ook de piloot – verder dan
1-2 meter van het vliegtuig verwijderd zijn.
• Vlieg nooit in de omgeving van stroom-
leidingen, openbare wegen, parkeerinstal-
laties, spoorwegen of huizen.
• Observeer het vliegtuig altijd, zodat het niet
tegen de piloot, andere mensen of dieren
vliegt en deze verwondt.
ES
• Seleccione siempre una supercie amplia
sin obstáculos para volar su modelo.
• Al despegar, asegurar imprescindiblemente
que todos los seres vivos; también el piloto;
se encuentren más allá de 1 a 2 metros del
aparato de vuelo.
• No vuele jamás en las cercanías de líneas
de corriente, carreteras públicas, aparca-
mientos, ferrocarriles o viviendas.
• Observar siempre el aparato de vuelo para
que no vuele contra el piloto, otras personas
o animales y los lesione.
IT
• Scegliere sempre una supercie aperta
senza ostacoli per fare volare il modellino.
• Durante l’avvio assicurarsi sempre che
qualsiasi essere umano – compreso il pilota
– si trovi a una distanza superiore a 1-2 metri
dall’aereo.
• Non volare mai nelle vicinanze di condutture
elettriche, strade aperte, parcheggi, binari o
abitazioni.
• Il velivolo deve sempre essere osservato
in modo tale che non voli addosso al pilota,
ad altre persone o animali e li ferisca.
Nederlands Español Italiano
Fouten oplossen / Solución de fallos / Eliminazione degli errori
NL
Probleem:
De propeller beweegt zich niet.
Oorzaak:
• De controleschakelaar van de afstandsbes-
turing staat op „OFF“.
• De accu is te zwak of leeg.
Oplossing:
• Zet de ON/OFF-schakelaar op “ON”.
• Laad de accu op (zie gedeelte
“Opladen van de vliegtuigaccu“).
Probleem:
De afstandsbesturing functioneert niet.
Oorzaak:
• De ON/OFF-schakelaar staat op “OFF”.
• De batterijen zijn onjuist geplaatst.
• De batterijen hebben niet voldoende
energie meer.
Oplossing:
• Zet de ON/OFF-schakelaar op “ON”.
• Controleer of de batterijen goed
geplaatst zijn.
• Nieuwe batterijen plaatsen
Probleem:
Het vliegtuig kan niet met de
afstandsbesturing worden bestuurd.
Oorzaak:
• De schakelaar van de afstandsbesturing
staat op „OFF“.
• De antennekabel van het vliegtuig is niet
afgewikkeld.
• De antenne van de afstandsbesturing is
evt. niet correct geplaatst en/of niet volle-
dig uitgetrokken.
Oplossing:
• Zet de controleschakelaar van de afstands-
besturing op „ON“.
• Wikkel de antennekabel van het vliegtuig
volledig af.
• Controleer de antenne en schuif deze
helemaal uit.
Probleem:
Het vliegtuig stijgt niet of vliegt
continu bochten.
Oorzaak:
• Hoogteroer niet correct ingesteld.
• Richtingsroer niet correct ingesteld.
Oplossing:
• Hoogte- en richtingsroer correct instellen
(zie hoofdstuk 9).
ES
Problema:
La hélice no se mueve.
Causa:
• El interruptor del control remoto se
encuentra en “OFF”.
• El acumulador es demasiado débil o bien
está descargado.
Solución:
• Colocar el interruptor ON/OFF en la
posición “ON”.
• Recargar la batería. (véase el capítulo
“Recarga de la batería del avión”).
Problema:
El control remoto no funciona.
Causa:
• El interrruptor ON/OFF está en la posición “OFF”.
• Las pilas se han insertado incorrectamente.
• Las pilas ya no tienen suciente energía.
Solución:
• Colocar el interruptor ON/OFF en la
posición “ON”.
• Compruebe si las pilas se han insertado
correctamente.
• Insertar pilas nuevas
Problema:
El avión no permite ser controlado
con el control remoto.
Causa:
• El interruptor del control remoto se
encuentra en “OFF”.
• El cable de la antena en el avión no
está desenrollado.
• La antena del control remoto en caso dado
no está correctamente colocada y/o no
totalmente extraída.
Solución:
• Colocar el interruptor de control del control
remoto en “ON”.
• Desenrolle completamente el cable de
la antena del avión.
• Vericar la antena y sacarla del todo.
Problema:
El avión no asciende y vuela
permanentemente en curvas.
Causa:
• Timón de profundidad no ajustado
correctamente.
• Timón de dirección no ajustado
correctamente.
Solución:
• Ajustar correctamente el timón de pro-
fundidad y de dirección (véase capítulo 9)
IT
Problema:
L’elica non si muove.
Causa:
• L’interruttore di controllo del telecomando
è posizionato su “OFF”.
• La batteria è troppo debole o esaurita.
Rimedio:
• Posizionare l’interruttore di controllo su „ON“.
• Ricaricare la batteria (vedi capitolo „ri-
carica della batteria“).
Problema:
Il radiocomando non funziona.
Causa:
• L’interruttore di controllo è posizionato su „OFF“.
• Le batterie sono state inserite in modo errato.
• Le batterie non hanno più energia sufciente.
Rimedio:
• Posizionare l’interruttore di controllo su „ON“.
• Controllare se le batterie sono state inserite
correttamente.
• Inserire nuove batterie.
Problema:
L’aereo non può essere comandato con
il radiocomando.
Causa:
• L’interruttore del radiocomando è
posizionato su „OFF“.
• Il cavo dell’antenna sull’aereo non è sbobinato.
• L’antenna del radiocomando potrebbe
essere stata inserita in modo errato e/o
non essere stata estratta completamente.
Rimedio:
• Posizionare l’interruttore di controllo del
radiocomando su „ON“.
• Sbobinare completamente il cavo
dell’antenna dell’aereo.
• Controllare l’antenna ed estrarla completa-
mente.
Problema:
L’aereo non sale o vola continuamente
curve.
Causa:
• Timone di profondità non impostato
correttamente.
• Timone direzionale non impostato
correttamente.
Rimedio:
• Impostare correttamente il timone
di profondità e il timone direzionale
(vedi capitolo 9)
Service-instructies / Indicaciones de servicio técnico / Indicazioni per l’assistenza tecnica
www.revell-control.de
NL
Op www.revell-control.de
vindt u bestelmogelijkheden en
vervangingstips voor reserve-
onderdelen, alsmede andere
nuttige informatie over alle
modellen van Revell Control.
ES
Bajo www.revell-control.de
encontrará nuestras posibili-
dades de pedido, intercambio
de sugerencias para repuestos
así como otras informaciones
útiles sobre todos los modelos
de Revell Control.
IT
Nel sito www.revell-control.de
trovate i prodotti acquistabili,
i suggerimenti sullo scambio
dei ricambi nonché altre utili
informazioni su tutti i modelli
della Revell Control.
10 Algemene vliegtips / 10 Sugerencias generales de vuelo / 10 Suggerimenti generali sul volo
NL
• De regelaars altijd langzaam en met gevoel
bewegen.
• Werp het model rustig en horizontaal tegen
de wind in.
• Houd het vliegtuig altijd in het oog en kijk
niet naar de afstandsbesturing!
• Om een bocht te vliegen volstaat het vaak
al,de besturingsregelaar lichtjes in de
overeenkomstige richting aan te tippen.
Bij de eerste vliegpogingen neigt men ertoe,
om het vliegtuig te hevig te besturen.
De besturingsregelaar dient steeds langzaam
en voorzichtig te worden bewogen. In geen
geval snel of rukachtig.
• Vlieg geen te nauwe bochten, anders neigt
het model te zeer, verliest stijgkracht en kan
neerstorten.
• Laat het model tegen de wind in landen.
• Let op! Wanneer het vliegtuig naar u toe
vliegt, moet u „andersom“ sturen, voor wat
de vliegrichting betreft!
• Met een volle accu kan het vliegtuig
ongeveer 7 minuten lang vliegen.
• Zet de gashendel na een crash onmiddellijk
in de onderste stand (motoren uit) om te
voorkomen dat de elektronica en de
propellers beschadigd raken.
• Er kan niet tegelijk gevlogen worden met
twee vliegtuigen met dezelfde frequentie.
Zorg ervoor, dat u de enige in de omgeving
bent, die deze frequentie gebruikt.
ES
• Mover siempre los reguladores despacio y
con tacto.
• Arroje el modelo con calma y horizontalmente
en contra del viento.
• ¡Mantener siempre la vista en el avión y no
mirar sobre el control remoto!
• Para volar una curva frecuentemente es
suciente pulsar muy ligeramente el
regulador de pilotaje en la dirección corres-
pondiente. En los primeros intentos de vuelo
se tiende a pilotar el avión con excesiva
vehemencia. El regulador de pilotaje siempre
debe ser movido lenta y cuidadosamente.
De ningún modo rápido o con sacudidas.
• No vuele curvas excesivamente cerradas,
sino el modelo se inclina demasiado, pierde
fuerza ascencional y puede caer a tierra.
• Hacer aterrizar el modelo en contra del viento.
• ¡Atención! ¡Cuando el avión vuela en su
dirección tiene que pilotar “al revés” lo que se
reere a la dirección de vuelo!
• Con la batería completamente cargada se
puede volar durante aprox. 7 min.
• Preste atención a que en caso de un
“aterrizaje forzoso” se coloque la palanca de
gas en la emisora inmediatamente en la
posición más baja para evitar daños en la
electrónica y las hélices.
• No se pueden utilizar a la vez dos aviones
que tengan la misma frecuencia. Preste
atención a que sea el único en su entorno
que use esa frecuencia.
IT
• Spostare i regolatori sempre lentamente e
con delicatezza.
• Lanciare il modellino con calma e in
orizzontale controvento.
• Tenere sempre sott’occhio il veicolo e non
guardare sul telecomando!
• Per volare una curva , spesso è sufciente
toccare leggermente il regolatore di
controllo nella rispettiva direzione. Durante i
primi tentativi di volo si tende a comandare
l’aereo con troppa violenza. Il regolatore di
controllo deve essere spostato sempre
lentamente e delicatamente. Mai veloce-
mente o a scatti.
• Non volare curve troppo strette altrimenti il
modellino si inclina troppo, perde quota e
può cadere.
• Fare atterrare il modellino controvento.
• Attenzione! Se l’aereo vola verso di voi,
comandare “in senso opposto” per ciò che
riguarda la direzione di volo!
• Con una batteria completamente carica è
possibile volare per circa 7 min.
• Essere sicuri di portare subito il regolatore di
accelerazione del radiocomando dopo un
“atterraggio di fortuna” nella posizione
inferiore per evitare di danneggiare
l’elettronica e l’elica.
• Due aerei con la stessa frequenza non
possono essere utilizzati contemporanea-
mente. Assicurarsi di essere gli unici nella
propria zona a utilizzare tale frequenza.
NederlandsEspañolItaliano
23
24
Notes

Other REVELL Toy manuals

REVELL Heinkel He 177 A-6 & Hs293 User manual

REVELL

REVELL Heinkel He 177 A-6 & Hs293 User manual

REVELL Eurocopter Medicopter 117 User manual

REVELL

REVELL Eurocopter Medicopter 117 User manual

REVELL Control HELICOPTER FLYBALL User manual

REVELL

REVELL Control HELICOPTER FLYBALL User manual

REVELL McDonnell Douglas DC-10 User manual

REVELL

REVELL McDonnell Douglas DC-10 User manual

REVELL G.T.S. Finnjet User manual

REVELL

REVELL G.T.S. Finnjet User manual

REVELL Fairey Gannet A.S.1./4 User manual

REVELL

REVELL Fairey Gannet A.S.1./4 User manual

REVELL TPz 1 Fuchs User manual

REVELL

REVELL TPz 1 Fuchs User manual

REVELL 03994 User manual

REVELL

REVELL 03994 User manual

REVELL KIT 1428 User manual

REVELL

REVELL KIT 1428 User manual

REVELL BR 43 with Short Tender 2'2 T 30 User manual

REVELL

REVELL BR 43 with Short Tender 2'2 T 30 User manual

REVELL Queen Elizabeth 2 User manual

REVELL

REVELL Queen Elizabeth 2 User manual

REVELL Proto CX User manual

REVELL

REVELL Proto CX User manual

REVELL Schnellboot Fast Attack Boat Gepard-Klasse... User manual

REVELL

REVELL Schnellboot Fast Attack Boat Gepard-Klasse... User manual

REVELL Fokker DR.1 User manual

REVELL

REVELL Fokker DR.1 User manual

REVELL Vought F4U-1A CORSAIR User manual

REVELL

REVELL Vought F4U-1A CORSAIR User manual

REVELL F/A-18C Hornet User manual

REVELL

REVELL F/A-18C Hornet User manual

REVELL JAPANESE A6M5 ZERO User manual

REVELL

REVELL JAPANESE A6M5 ZERO User manual

REVELL KIT 5228 User manual

REVELL

REVELL KIT 5228 User manual

REVELL Supermarine SPITFIRE Mk.I User manual

REVELL

REVELL Supermarine SPITFIRE Mk.I User manual

REVELL 5256 User manual

REVELL

REVELL 5256 User manual

REVELL C-17A Globemaster III User manual

REVELL

REVELL C-17A Globemaster III User manual

REVELL KIT 1185 User manual

REVELL

REVELL KIT 1185 User manual

REVELL Eurocopter EC135 User manual

REVELL

REVELL Eurocopter EC135 User manual

REVELL KIT 1727 User manual

REVELL

REVELL KIT 1727 User manual

Popular Toy manuals by other brands

spacewalker F3701 instruction manual

spacewalker

spacewalker F3701 instruction manual

Hasbro Disney/Pixar TOY STORY AND BOYOND Squad Leader... quick start guide

Hasbro

Hasbro Disney/Pixar TOY STORY AND BOYOND Squad Leader... quick start guide

MJX 1519A instruction manual

MJX

MJX 1519A instruction manual

Fisher-Price View-Master SUPER SOUNDS H4159 instruction sheet

Fisher-Price

Fisher-Price View-Master SUPER SOUNDS H4159 instruction sheet

Lionel Southern Pacific Overnight Freight owner's manual

Lionel

Lionel Southern Pacific Overnight Freight owner's manual

Mattel HotWheels SHARK SLAMMER CITY quick start guide

Mattel

Mattel HotWheels SHARK SLAMMER CITY quick start guide

pitsco Trebuchet user guide

pitsco

pitsco Trebuchet user guide

Vollmer 43682 Mounting instruction

Vollmer

Vollmer 43682 Mounting instruction

Hasbro Zynga Kre-O CityVille Invasion Police Station Zombie... manual

Hasbro

Hasbro Zynga Kre-O CityVille Invasion Police Station Zombie... manual

Eduard H8K2 Emily rear interior quick start guide

Eduard

Eduard H8K2 Emily rear interior quick start guide

LGB 20323 instruction manual

LGB

LGB 20323 instruction manual

Eduard FE380 instruction sheet

Eduard

Eduard FE380 instruction sheet

Viessmann 6006 Operation manual

Viessmann

Viessmann 6006 Operation manual

Halo 96996 instructions

Halo

Halo 96996 instructions

Seagull Models SEA 94 Pilatus PC-9 Assembly manual

Seagull Models

Seagull Models SEA 94 Pilatus PC-9 Assembly manual

Eduard MH-60S interior Assembly instructions

Eduard

Eduard MH-60S interior Assembly instructions

goliath Doggie Doo quick start guide

goliath

goliath Doggie Doo quick start guide

MGA Entertainment LALALOOPSY TINIES Sew Magical! Sew Cute! Jewelry... quick start guide

MGA Entertainment

MGA Entertainment LALALOOPSY TINIES Sew Magical! Sew Cute! Jewelry... quick start guide

manuals.online logo
manuals.online logoBrands
  • About & Mission
  • Contact us
  • Privacy Policy
  • Terms and Conditions

Copyright 2025 Manuals.Online. All Rights Reserved.