EnglishDeutsch
 logo
Brands
  1. Home
  2. •
  3. Brands
  4. •
  5. REVELL
  6. •
  7. Toy
  8. •
  9. REVELL KIT 0328 User manual

REVELL KIT 0328 User manual

This manual suits for next models

2

Other REVELL Toy manuals

REVELL Messerschmitt Bf 109 F2/4 User manual

REVELL

REVELL Messerschmitt Bf 109 F2/4 User manual

REVELL PzKpfw. IV Ausf. H User manual

REVELL

REVELL PzKpfw. IV Ausf. H User manual

REVELL THE FLYING BULLS Bell AH-1 Cobra User manual

REVELL

REVELL THE FLYING BULLS Bell AH-1 Cobra User manual

REVELL BAe Hawk T.Mk1 User manual

REVELL

REVELL BAe Hawk T.Mk1 User manual

REVELL F4U-5 Corsair User manual

REVELL

REVELL F4U-5 Corsair User manual

REVELL KIT 1874 User manual

REVELL

REVELL KIT 1874 User manual

REVELL Minenleger VII D User manual

REVELL

REVELL Minenleger VII D User manual

REVELL Norton Manx 500cc User manual

REVELL

REVELL Norton Manx 500cc User manual

REVELL M60 A3 & M9 Raumschild User manual

REVELL

REVELL M60 A3 & M9 Raumschild User manual

REVELL Douglas DC-7C User manual

REVELL

REVELL Douglas DC-7C User manual

REVELL 04894 User manual

REVELL

REVELL 04894 User manual

REVELL C-17A Globmaster RAF/Qatar User manual

REVELL

REVELL C-17A Globmaster RAF/Qatar User manual

REVELL 05115 User manual

REVELL

REVELL 05115 User manual

REVELL Enzo Ferrari User manual

REVELL

REVELL Enzo Ferrari User manual

REVELL Hospital Ship S.S. HOPE User manual

REVELL

REVELL Hospital Ship S.S. HOPE User manual

REVELL Canberra PR.9 User manual

REVELL

REVELL Canberra PR.9 User manual

REVELL 2010 FORD SHELBY GT 500 User manual

REVELL

REVELL 2010 FORD SHELBY GT 500 User manual

REVELL KIT 5483 User manual

REVELL

REVELL KIT 5483 User manual

REVELL Eurocopter EC135 User manual

REVELL

REVELL Eurocopter EC135 User manual

REVELL A-6E Navy Attack Bomber User manual

REVELL

REVELL A-6E Navy Attack Bomber User manual

REVELL Russian WWI Battleship Gangut User manual

REVELL

REVELL Russian WWI Battleship Gangut User manual

REVELL KIT 2376 User manual

REVELL

REVELL KIT 2376 User manual

REVELL 03190 User manual

REVELL

REVELL 03190 User manual

REVELL Piper PA-18-150 Float Plane User manual

REVELL

REVELL Piper PA-18-150 Float Plane User manual

Popular Toy manuals by other brands

marklin 37321 instruction manual

marklin

marklin 37321 instruction manual

Canon PAPER CRAFT Assembly instructions

Canon

Canon PAPER CRAFT Assembly instructions

GREAT PLANES Pitts M-12S instruction manual

GREAT PLANES

GREAT PLANES Pitts M-12S instruction manual

NOCH 14261 manual

NOCH

NOCH 14261 manual

Hausler 450 SE V2 quick start

Hausler

Hausler 450 SE V2 quick start

Dynaflite Daydream instruction manual

Dynaflite

Dynaflite Daydream instruction manual

Kenner Batman 63651 instructions

Kenner

Kenner Batman 63651 instructions

LEGO 8527 instructions

LEGO

LEGO 8527 instructions

Multiplex EasyStar II Building instructions

Multiplex

Multiplex EasyStar II Building instructions

iKarus ECO 8 Assembly instruction

iKarus

iKarus ECO 8 Assembly instruction

Walkera 38 User handbook

Walkera

Walkera 38 User handbook

Hasbro TRANSFORMERS BUMBLEBEE manual

Hasbro

Hasbro TRANSFORMERS BUMBLEBEE manual

MD MXION SWD user manual

MD

MD MXION SWD user manual

Mattel Disney Pixar Cars Cozy Cone Spiral Rampway instructions

Mattel

Mattel Disney Pixar Cars Cozy Cone Spiral Rampway instructions

marklin 39671 user manual

marklin

marklin 39671 user manual

LEGO TECHNIC 8735 instructions

LEGO

LEGO TECHNIC 8735 instructions

Mattel HOTWHEELS DWL04 instructions

Mattel

Mattel HOTWHEELS DWL04 instructions

Ravensburger 3D Puzzle La Tour Eiffel manual

Ravensburger

Ravensburger 3D Puzzle La Tour Eiffel manual

https://manuals.online logo
https://manuals.online logoBrands
  • About & Mission
  • Contact us
  • Privacy Policy
  • Terms and Conditions

Copyright 2026 Manuals.Online. All Rights Reserved.

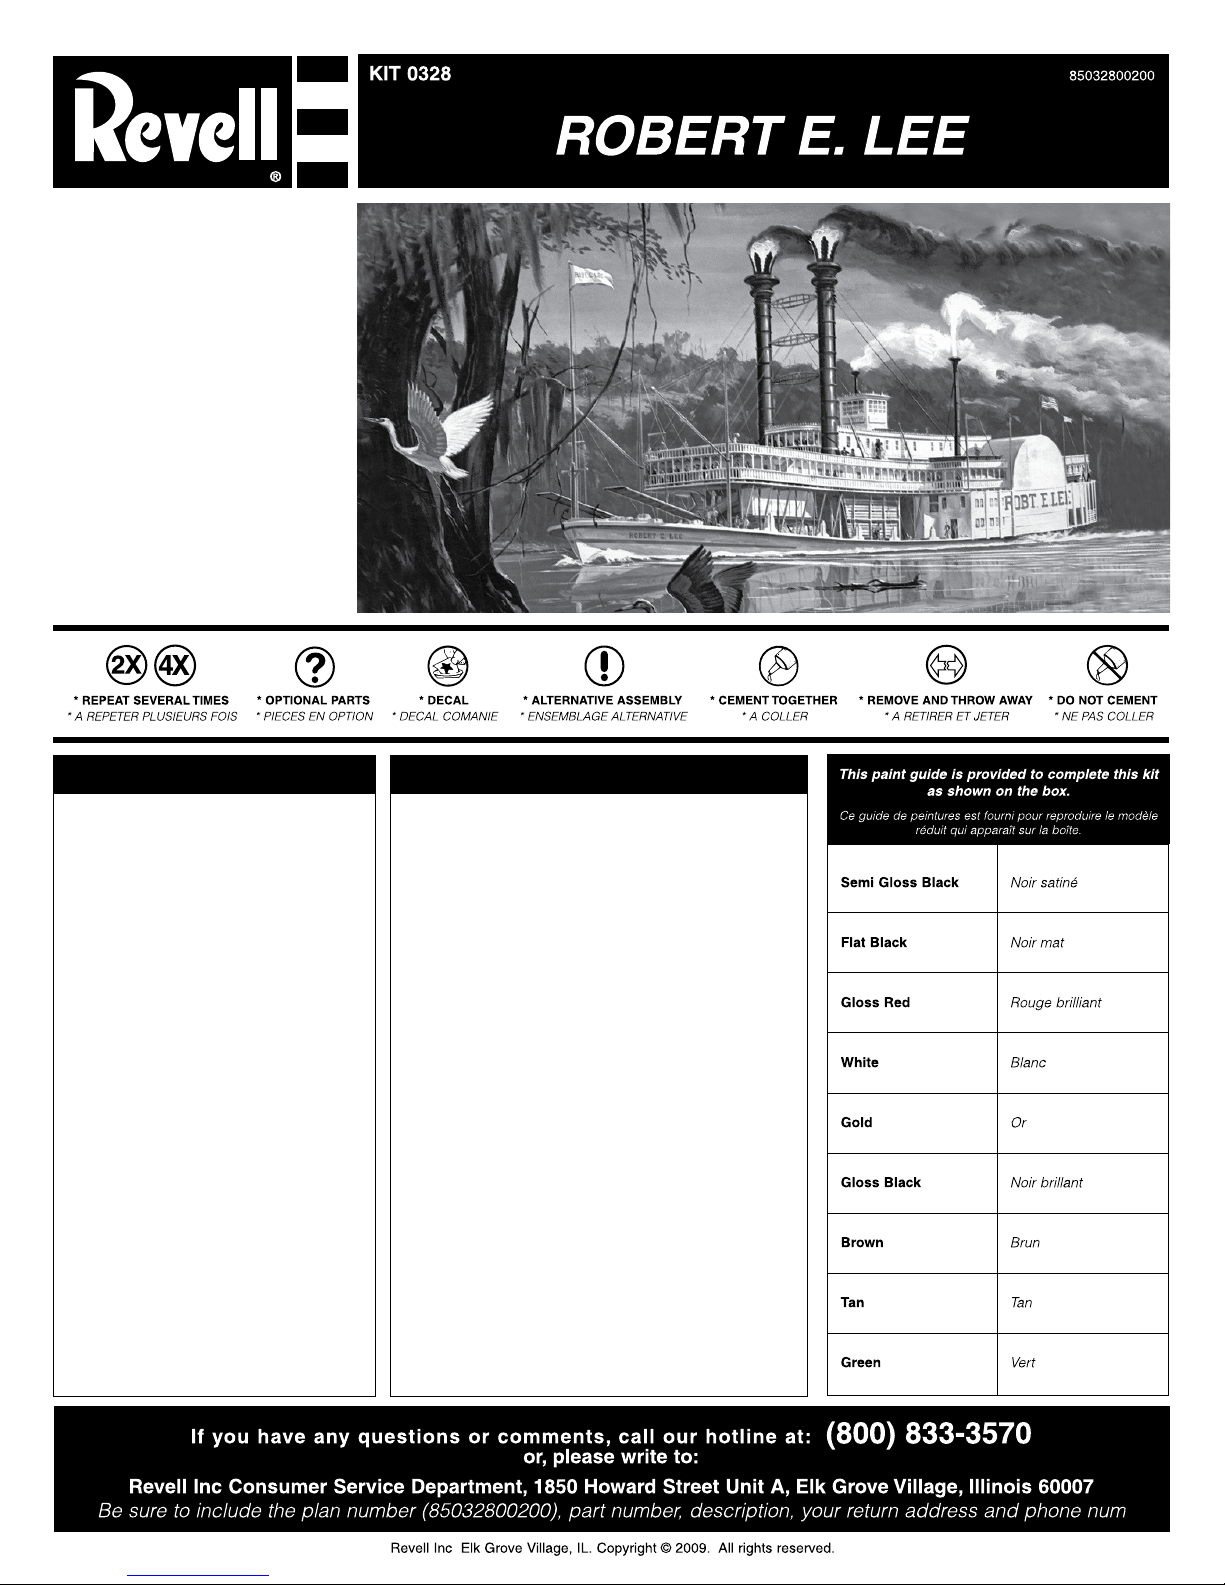
Built in 1866, the Robert E. Lee was the fast-
est steamboad afloat in an age when speed
was everything. Records were set in everything
but safety as fool hardy skippers tied down
steam escape safety valves and stoked over-
heated boilers to the point of explosion and fire.
The greatest steamboat race of all time occurred
when Robert E. Lee was challenged by the
steamer Natchez (a craft rumored to have been
built for the express purpose of beating the Lee).
Captain John W. Cannon readied Lee by stripping
all of her excess weight and anything that created
wind resistance. He refused cargo and loaded her
up with hot fuels. On the day of the race her one
line was cast off with a single axe-blow, gaining
her the lead. Captain Cannon also fueled from
waiting boats down river instead of putting in for
shore. Then, heavy fog rolled in and Natchez put
in until visibility returned. Capt. Cannon pushed
on aided by river pilots and sheer guts. 3 days,
18 hours, and 14 minutes after the race begun,
the Robert E. Lee reached New Orleans. She had
beated the Natchez by 6 1/2 hours and set a new
record which stands even to this day. Your Revell
model is an accurate reproduction of the steamer
Robert E. Lee at the time of her historic victory.
* Study the assembly drawings.
* Each plastic part is identified by a number.
* In the assembly drawings, some parts will be
marked by a star (★) to indicate chrome
plated plastic.
* For better paint and decal adhesion, wash
the plastic parts in a mild detergent solution.
Rinse and let air dry.
* Check the fit of each piece before
cementing in place.
* Use only cement for polystyrene plastic.
* Scrape plating and paint from areas
to be cemented.
* Allow paint to dry thoroughly before
handling parts.
* Any unused parts may be discarded.
DECAL APPLICATION INSTRUCTIONS
1. Cut desired decal from sheet.
2. Dip decal in water for a few seconds.
3. Place wet decal on paper towel.
4. Wait until decal is movable on paper backing.
5. Place decal in position on model, face up and
slide backing away.
6. Press out air bubbles with a soft damp cloth.
7. Milkiness that may appear is for better decal
adhesion and will dry clear. Wipe away any
excess adhesive.
8. Do not touch decal until fully dry.
9. Allow the decals 48 hours to dry before
applying clear coat.
NOTE: Decals are compatible with
setting solutions or solvents.
READ THIS BEFORE YOU BEGIN LIRE CE QUI SUIT AVANT DE COMMENCER
* Etudier les schémas de montage.
* Chaque pièce en plastique est identifiée par un numéro.
* Sur les schémas de montage, certaines pièces sont
marquées d'une étoile (★) pour indiquer qu'elles sont en
plastique chromé.
* Pour une meilleure prise de la peinture et des autocollants,
laver les pièces en plastique avec une solution détergente
peu concentrée. Les rincer et les laisser sécher à l'air.
* Vérifier que chaque pièce s'ajuste bien avant
de la coller en place.
* N'utiliser que de la colle pour polystyrène.
* Gratter les parties à coller pour enlever le chrome et la peinture.
* Laisser la peinture bien sécher avant de manipuler les pièces.
* Toute pièce inutilisée peut être jetée.
DIRECTIVES D'APPLICATION DES AUTOCOLLANTS
1. Découper l'autocollant désiré de la feuille.
2. Tremper l'autocollant dans de l'eau pendant quelques secondes.
3. Placer l'autocollant mouillé sur une serviette en papier.
4. Attendez que l'autocollant puisse être déplacé sur son support
en papier.
5. Mettre l'autocollant en position sur le modèle face sur
le dessus et faire glisser le support pour l'enlever.
6. Appuyer avec un chiffon doux humide pour éliminer les bulles d'air.
7. La substance laiteuse qui peut apparaître est destinée à
améliorer l'adhésion de l'autocollant et devient incolore au
séchage. Essuyer pour enlever tout excédent d'adhésif.
8. Ne pas toucher l'autocollant tant qu'il n'est pas bien sec.
9. Laisser l'autocollant sécher pendant 48 heures avant
d'appliquer une couche transparente.
REMARQUE: Les autocollants sont compatibles avec
les solutions de fixage ou les solvants.
main DECK anD hull aSSEmBlY
1
MAKE SURE
PARTS 44L,
44R ARE IN
A VERTICAL
POSITION
*
PADDLE WHEEL ASSEMBLY
3
DECK ASSEMBLY
2
WHEELS / RUDDER ASSEMBLY
4
HURRicAnE DEcK ASSEMBLY
5
railing assembly
6
WHeel HOUse assembly
7
TEXAS CABIN / SALON DECK ASSEMBLY
8
FRONT DECK ASSEMBLY
9
*
MAKE SURE
PARTS ARE IN
A VERTICAL
POSITION
REAR DECK AssEmbly
10
smOKE sTACK AssEmbly
11
90
FLAG POLE
WHITE
*90
FLAG POLE
WHITE
*
90
FLAG POLE
WHITE
*
*
MAKE SURE
PARTS ARE IN
A VERTICAL
POSITION
ROBERT. E. LEE
(BOTH SIDES)
STACK ASSEMBLY
12
FLAG / RIGGING ASSEMBLY
13
*
MAKE SURE
STACKS AND
VENTS ARE IN
A VERTICAL
POSITION