manuals.online logo
Brands
  1. Home
  2. •
  3. Brands
  4. •
  5. REVELL
  6. •
  7. Toy
  8. •
  9. REVELL SUMMER ACTION CIRCLER User manual

REVELL SUMMER ACTION CIRCLER User manual

© 2015 Revell GmbH, Henschelstr. 20-30,
D-32257 Bünde. A subsidiary of Hobbico, Inc.
REVELL IS THE REGISTERED TRADEMARK OF
REVELL GMBH, GERMANY. Made in China.
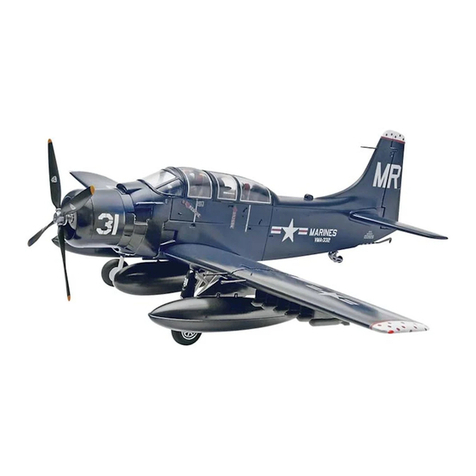
23715
CirCler
Free Flying ELECTRIC PLANE
LIEFERUMFANG / CONTENTS / CONTENU DE LA LIVRAISON /
OMVANG VAN DE LEVERING / CONTENIDO / CONTENUTO
A
A
B
C
D
B
D
C
e
D
A:Propeller
B: Starthaken
C: Ladeanschluss
D: Befestigungs-
magnet
GB
A:Propeller
B: Start hook
C: Charging
connection
D: Fastening magnet
F
A: Hélice
B: Crochet de
décollage
C: Port de charge
D: Aimant de xation
NL
A: propeller
B: starthaak
C: laadaansluiting
D: bevestigings-
magneet
E
A: Hélice
B: Gancho de disparo
C: Conexión de carga
D: Imán de jación
I
A: Elica
B: Gancio di avvio
C: Connettore
di caricamento
D: Magnete
di ssaggio
D
A: Abschussrampe
B: Ladestation
C: LED-Ladeanzeige
D: Abzug
E: Batteriefach
GB
A: Launch ramp
B: Charging station
C: LED charging light
D: Trigger
E: Battery compartment
F
A: Rampe de lancement
B: Station de charge
C: Témoin de charge
D: Détente
E: Compartiment
à piles
NL
A: lanceerplatform
B: laadstation
C: laadindicatie-led
D: trekker
E: batterijvak
E
A: Rampa de disparo
B: Estación de carga
C: LED de indicador
de carga
D: Gatillo
E: Compartimento
de baterías
I
A: Rampa di lancio
B: Stazione di
caricamento
C: Indicatore di
caricamento LED
D: Grilletto
E: Vano batteria
DHiermit erklärt die Revell GmbH, dass sich dieses
Produkt in Übereinstimmung mit den grundlegenden
Anforderungen und den übrigen einschlägigen
Bestimmungen der Richtlinie 1999/5/EC bendet.
Die Konfor mi tätserklärung ist unter www.revell.de zu nden.
GB Revell GmbH hereby declares that this product conforms with
the basic equirements and the additional applicable provisions of
Directive 1999/5/EC. The Declaration of Conformity can be found at
www.revell.de.
FRevell GmbH déclare par la présente que ce produit est
conforme aux exigences et autres dispositions de la directive
1999/5/CE. La déclaration de conformité est consultable sur le
site www.revell.de.
NL Hiermee verklaart Revell GmbH, dat dit product in overeen-
stemming is met de funda
mentele eisen en de overige toe passelijke
bepalingen van de richtlijn 1999/5/EC. Op www.revell.de vindt u de
conformiteitsverklaring.
ERevell GmbH declara que este producto cumple los requisitos
esenciales y cualesquiera otras disposiciones aplicables o exigibles
de la Directiva 1999/5/CE. La declaración de conformidad puede
consultarse en www.revell.de.
ICon la presente Revell GmbH, dichiara che questo prodotto
rispetta i requisiti di base e le ulteriori clausole applicabili della
direttiva 1999/5/CE. La dichiarazione di conformità è disponibile
all’indirizzo www.revell-control.de.
8+ DNicht für Kinder unter 36 Monaten geeignet.
GB Not suitable for children under 36 month.
FNe convient pas aux enfants de moins de 36 mois.
NL Niet geschikt voor kinderen jonger dan 36 maanden.
ENo apropiado para niños menores de 36 meses.
INon adatto a bambini di età inferiore a 36 mesi.
V01.10
D
1. Die Abschussrampe zurückschieben, bis sie einrastet.
2. Zuerst haken Sie den Starthaken in die Abschussrampe ein. Danach
legen Sie vorsichtig das Model, indem der Ladeanschluss verbaut ist,
langsam auf die Abschusspistole. KEINE GEWALT ANWENDEN. Wird der
Ladeanschluss nicht richtig auf die Ladestation gesteckt, kann der Circler
beschädigt werden und unter Umständen Verletzungsgefahr bestehen.
Nun lädt das Flugzeug ca. 10-15 Sek. Währenddessen leuchtet die
LED - Ladeanzeige hinten an der Startpistole und unten am Modell.
Sobald die LED an der Startpistole erlischt, ist das Flugzeug geladen.
Hinweis: Das Flugzeug ist nach dem Auaden direkt startbereit.
Sobald dieses die Abschussrampe verlässt, startet der Propeller.
3. Bitte die Startpistole ein wenig nach oben geneigt halten. Nun den
Abzug drücken und das Modell gegen den Wind abschießen.
ACHTUNG: Das Flugzeug iegt automatisch im Kreis, bis zur Landung.
BITTE DARAUF ACHTEN: Bei Nichtnutzung bitte das Flugzeug auf gar
keinem Fall auf die Startpistole setzten. Bitte nicht auf Menschen
oder Tiere zielen. Wählen Sie ein großes Feld, da der Flugradius bis zu
50m betragen kann. Schießen Sie das Modell nur bei guter Sicht ab.
Versuchen Sie nicht, das Modell im Flug zu fangen, sondern warten
Sie bis zur automatischen Landung.
GB
1. Pull the launch ramp back until it locks in place.
2. First hook the start hook in the launch ramp. Then slowly and carefully
place the model, in which the charging connection is installed,
on the launch pistol. DO NOT USE FORCE If the charging connection is
not correctly inserted on the charging station, the Circler may become
damaged and, under certain circumstances, become an injury risk.
Now the aircraft charges approx. 10-15 seconds. During this time, the
LED charge lights on the rear of the start piston and on the bottom of
the model illuminate. Once the LED on the launch pistol goes out, the
aircraft is charged. Note: The aircraft is ready for use immediately after
charging. The propeller starts once it leaves the launch ramp.
3. Please hold the launch pistol tilted slightly upward.
Now press the trigger and launch the model against the wind.
ATTENTION: The aircraft automatically ies in a circle until it lands.
PLEASE NOTE for the launch of the aircraft: When not in use, please be
sure to never place the aircraft on the launch pistol. Please do not aim
at people or animals. Fly in a large eld, because the ight radius can
be up to 50 m. Only launch the model when you have clear sight.
Do not attempt to catch the model in ight. Wait until it lands on its own.
2
1 2 3
MONTAGE / ASSEMBLY / ASSEMBLAGE / MONTAGE / MONTAJE / MONTAGGIO
3
1
STARTBESCHREIBUNG / STARTING DESCRIPTION / DESCRIPTION DU DÉCOLLAGE / STARTBESCHRIJVING / DESCRIPCIÓN DEL DISPARO / DESCRIZIONE AVVIO
MONTAGE / ASSEMBLY / ASSEMBLAGE / MONTAGE / MONTAJE / MONTAGGIO
STARTBESCHREIBUNG / STARTING DESCRIPTION / DESCRIPTION DU DÉCOLLAGE / STARTBESCHRIJVING / DESCRIPCIÓN DEL DISPARO / DESCRIZIONE AVVIO
D1. Die Batteriefachabdeckung der Fernsteuerung
aufschrauben und öffnen.
2. Drei Batterien mit der richtigen Polarität einlegen.
3. Die Batteriefachabdeckung wieder schließen.
NL
1. Schuif de lanceerbalk naar achteren tot hij vastklikt.
2. Haak eerst de starthaak vast in de lanceerbalk. Leg daarna
voorzichtig het deel van de romp waarin de laadaansluiting zich
bevindt op het lanceerpistool. GEBRUIK GEEN GEWELD. Als de
laadaansluiting niet op de juiste wijze op de laadcontacten wordt
gestoken, kan de Circler beschadigd raken en kan in sommige
gevallen gevaar van letsel ontstaan. Het vliegtuig wordt nu 10 à 15
seconden opgeladen. Gedurende deze tijd branden de indicatieleds
achterop het lanceerpistool en onderaan het model. Wanneer de
led op het lanceerpistool uitgaat, is het vliegtuig opgeladen.
Opmerking: Het vliegtuig is na het opladen direct klaar voor de
start. Zodra het vliegtuig is gelanceerd, begint de propeller te draaien.
3. Houd het lanceerpistool enigszins naar boven gericht. Haal nu de
trekker over en lanceer het model tegen de wind in.
LET OP: Het vliegtuig blijft tot de landing automatisch in cirkels vliegen.
LET OP HET VOLGENDE bij het lanceren van het vliegtuig: Wanneer het
vliegtuig niet wordt gebruikt, mag het in geen geval op het lanceer-
pistool blijven zitten. Richt niet op mensen of dieren. Zoek een groot
veld op: het vliegtuig vliegt in een ruime cirkel met een straal van
soms wel 50 m. Lanceer het model alleen bij goed zicht. Probeer niet
het model tijdens de vlucht te vangen, maar wacht tot het vanzelf
landt.
E
1. Empuje la rampa de disparo hacia atrás hasta que se enclave.
2. Enganche primero el gancho de disparo en la rampa de disparo.
A continuación coloque con cuidado y lentamente el modelo, en el
que se encuentra montada la conexión de carga, en la pistola de
disparo. NO APLIQUE FUERZA. Si la conexión de carga no se enchufa
correctmente en la estación de carga, el Circler puede resultar dañado,
e incluso bajo determinadas circunstancias representar un peligro de
lesiones. El avión se carga durante 10 a 15 segundos aprox; durante
esta fase parpadean el LED del indicador de carga en la parte posterior
de la pistola de disparo y el LED en la parte inferior del modelo.
El avión está cargado en cuanto se apaga el LED de la pistola de disparo.
Nota: el avión está listo para ser lanzado inmediatamente después de
la carga. En cuanto sale de la rampa de disparo arranca la hélice.
3. Sujete la pistola de disparo ligeramente inclinada hacia arriba.
Tire del gatillo y dispare el modelo contra el viento.
ATENCIÓN: el avión vuela realizando automáticamente un círculo
hasta aterrizar.
ASEGÚRESE SIEMPRE de que el avión no se encuentre en la pistola
de disparo cuando no se esté utilizando, no se apunte a personas ni
animales, se seleccione un lugar amplio, ya que el radio de vuelo puede
ser de hasta 50 m, se dispare el modelo solo cuando se tenga plena
visión del entorno, no se intente coger el modelo en vuelo, sino que se
debe esperar a que aterrice automáticamente.
F
1. Escamoter la rampe de lancement jusqu’à ce qu’elle s’enclenche.
2. Accrocher d’abord le crochet de décollage sur la rampe de lancement.
Ensuite, poser délicatement le modèle, qui comporte un port de
charge intégré, sur le pistolet de lancement. NE PAS FORCER.
Si le port de charge n’est pas enfoncé correctement sur la station de
charge, le Circler pourrait être endommagé et constituer un risque
de blessure. L’avion se recharge pendant env. 10 à 15 sec. Pendant
ce temps, les témoins de charge situés à l’arrière du pistolet et sous
le modèle sont allumés. Dès que la diode du pistolet de lancement
s’éteint, l’avion est complètement rechargé.
Remarque : Une fois rechargé, l’avion est immédiatement
opérationnel. Dès que l’aéronef quitte la rampe de lancement,
l’hélice commence à tourner.
3. Maintenir le pistolet de lancement en relevant légèrement l’avant.
Presser alors la détente et lancer le modèle face au vent.
ATTENTION: L’avion vole automatiquement en rond jusqu’à son
atterrissage.
Lors du décollage de l’avion, RESPECTER LA CONSIGNE SUIVANTE:
Lorsque l’avion n’est pas utilisé, ne surtout pas le placer sur le pistolet de
lancement. Ne pas viser les personnes et les animaux. Choisir un champ
étendu car le rayon de vol peut atteindre 50 m. Lancer le modèle
uniquement si la visibilité est sufsante. Ne pas essayer d’intercepter le
modèle en vol mais attendre qu’il atterrisse automatiquement.
I
1. Spostare indietro la rampa di lancio no al suo scatto.
2. Prima agganciare il gancio di avvio nella rampa di lancio.
Successivamente mettere con attenzione il modellino lentamente
sulla pistola da sparo, con il connettore di caricamento montato.
NON FORZARE! Inserire il connettore in modo scorretto nella
stazione di ricarica può causare danni al Circler e in alcuni casi
comportare anche rischi per la sicurezza delle persone. Ora il velivolo
si carica per ca. 10-15 sec. Nel frattempo l’indicatore di caricamento
LED posteriore sulla pistola di avvio e sotto il modellino si accende.
Non appena il LED sulla pistola di avvio si spegne, il velivolo è
carico. Suggerimento: Dopo il caricamento il velivolo è pronto per il
funzionamento. Non appena lascia la rampa di lancio, l’elica si avvia.
3. Tenere leggermente inclinata verso l’alto la pistola di avvio. Ora
premere il grilletto e sparare il modellino controvento.
ATTENZIONE: Il velivolo vola automaticamente nel cerchio,
no all’atterraggio.
PRESTARE ATTENZIONE quando il velivolo si avvia. In caso di inutilizzo,
non posizionare per alcun motivo il velivolo sulla pistola di avvio.
Non mirare persone o animali. Scegliere un’area ampia che possa
contenere un raggio di volo no a 50 m. Sparare il modellino solo in
caso di buona visibilità. Non cercare di afferrare il modellino in volo,
ma attendere no all’atterraggio completo.
NL 1. Schroef de afdekking van het batterijvak van de
zender los en open het.
2. Plaats drie batterijen met de polen in de juiste richting.
3. Sluit de afdekking van het batterijvak weer.
GB 1. Unscrew and open the battery compartment cover
of the remote control.
2. Insert three batteries, observing the correct polarity.
3. Close the battery compartment cover again.
E1. Desenrosque los tornillos de la tapa del compartimento
de baterías de la emisora y retírela.
2. Coloque tres baterías observando la polaridad.
3. Cierre la tapa del compartimento de baterías.
F1. Dévisser et ouvrir le couvercle du compartiment à
piles de la radiocommande.
2. Insérer trois piles en respectant la polarité.
3. Refermer le couvercle du compartiment à piles.
I1. Svitare e aprire il coperchio del vano batteria del radiocomando.
2. Inserire tre batterie con la polarità corretta.
3. Chiudere il coperchio del vano batteria.
ACHTUNG! / ATTENTION! / ADVERTISSEMENT! / LET OP! /¡ATENCIÓN! / AVVERTENZA!
DEin unachtsamer und sorgloser Einsatz kann erhebliche Schäden verursachen. Den Circler nicht in der Nähe
von Personen, Tieren, Gewässern, Stromleitungen und Straßen betätigen. Bitte benutzen Sie das Produkt nur mit
wenig oder gar keinem Wind. Die Gebrauchsanleitung bitte sorgfältig lesen und aufbewahren.
GB Inattentive and careless use can lead to considerable damage. Do not use the Circler near people, animals,
bodies of water, power lines or roads. Only use the product with little or no wind. Please carefully read and retain the instructions for use.
FLe manque d‘attention et la négligence peuvent être la cause de dommages importants. Ne faites pas voler le Circler à proximité de
personnes, d‘animaux, de cours d‘eau, de lignes électriques et de routes. Veuillez utiliser l‘article uniquement en l‘absence de vent ou
par vent très faible. Veuillez lire attentivement et conserver le mode d‘emploi.
NL Als vliegtuig onoplettend en zorgeloos wordt gebruikt, kan aanmerkelijke schade het gevolg zijn.Lanceer de Circler niet in de buurt
van personen, dieren, open water, elektriciteitsleidingen en wegen. Gebruik het product alleen bij weinig of geen wind. Lees de
handleiding zorgvuldig door en bewaar deze.
EUn uso sin la atención y el cuidado debidos puede ocasionar daños considerables. No lance el Circler cerca de personas, animales,
zonas acuáticas, conducciones eléctricas ni viales públicos. Utilice el producto únicamente cuando el viento sea débil o nulo. Lea el
manual de instrucciones con atención y consérvelo con cuidado.
IUn utilizzo scorretto e irresponsabile può causare danni anche gravi. Non utilizzare Circler vicino a persone, animali, corsi d‘acqua,
linee elettriche e strade. Utilizzare il prodotto solo in condizioni di vento scarso o senza vento. Leggere attentamente il manuale d’uso e
conservarlo.

Other REVELL Toy manuals

REVELL REXX User manual

REVELL

REVELL REXX User manual

REVELL 04580 User manual

REVELL

REVELL 04580 User manual

REVELL Harbour Tug Boat User manual

REVELL

REVELL Harbour Tug Boat User manual

REVELL Fokker DR.1 User manual

REVELL

REVELL Fokker DR.1 User manual

REVELL Tiger II Ausf. B User manual

REVELL

REVELL Tiger II Ausf. B User manual

REVELL KIT 5481 User manual

REVELL

REVELL KIT 5481 User manual

REVELL Control ARGUS User manual

REVELL

REVELL Control ARGUS User manual

REVELL 2211 User manual

REVELL

REVELL 2211 User manual

REVELL 4763-0389 User manual

REVELL

REVELL 4763-0389 User manual

REVELL 05896 User manual

REVELL

REVELL 05896 User manual

REVELL PzKpfw V Panther Ausf G User manual

REVELL

REVELL PzKpfw V Panther Ausf G User manual

REVELL MIG-31 User manual

REVELL

REVELL MIG-31 User manual

REVELL Kanonenjagdpanzer (KaJaPa) User manual

REVELL

REVELL Kanonenjagdpanzer (KaJaPa) User manual

REVELL A-6E Navy Attack Bomber User manual

REVELL

REVELL A-6E Navy Attack Bomber User manual

REVELL Lockheed Martin F-16MLU Solo Display User manual

REVELL

REVELL Lockheed Martin F-16MLU Solo Display User manual

REVELL Fokker D VII User manual

REVELL

REVELL Fokker D VII User manual

REVELL M4 Sherman Tank (Hedgehog) User manual

REVELL

REVELL M4 Sherman Tank (Hedgehog) User manual

REVELL KIT 1866 User manual

REVELL

REVELL KIT 1866 User manual

REVELL Heinkel He 70 G-1 Blitz User manual

REVELL

REVELL Heinkel He 70 G-1 Blitz User manual

REVELL KIT 5857 User manual

REVELL

REVELL KIT 5857 User manual

REVELL Lockheed PV-1 VENTURA User manual

REVELL

REVELL Lockheed PV-1 VENTURA User manual

REVELL 1932 FORD HIGHBOY HOT ROD User manual

REVELL

REVELL 1932 FORD HIGHBOY HOT ROD User manual

REVELL ACROBAT XP User manual

REVELL

REVELL ACROBAT XP User manual

REVELL BATTLE GAME POWER TRACKS User manual

REVELL

REVELL BATTLE GAME POWER TRACKS User manual

Popular Toy manuals by other brands

Opitec Rattle Snake manual

Opitec

Opitec Rattle Snake manual

LEGO 10731 Assembly instruction

LEGO

LEGO 10731 Assembly instruction

Eduard M-10 Mid Production Assembly instructions

Eduard

Eduard M-10 Mid Production Assembly instructions

Musio B user guide

Musio

Musio B user guide

Hasbro Zoids Matrix Dragon 83178 instruction manual

Hasbro

Hasbro Zoids Matrix Dragon 83178 instruction manual

SG Models Master P-47D Thunderbolt Assembly manual

SG Models

SG Models Master P-47D Thunderbolt Assembly manual

Enabling Devices 4551 user guide

Enabling Devices

Enabling Devices 4551 user guide

EScale Seafire Assembly manual

EScale

EScale Seafire Assembly manual

Hasbro Star Wars Republic Gunship 87862 instruction manual

Hasbro

Hasbro Star Wars Republic Gunship 87862 instruction manual

GRAUPNER PEP 4318 manual

GRAUPNER

GRAUPNER PEP 4318 manual

LEGO creator 31008 Building instructions

LEGO

LEGO creator 31008 Building instructions

Radica Games PINBALL 73021 instruction manual

Radica Games

Radica Games PINBALL 73021 instruction manual

Carson Sea Shark FD instruction manual

Carson

Carson Sea Shark FD instruction manual

EXHOBBY VOLANTEX RC user manual

EXHOBBY

EXHOBBY VOLANTEX RC user manual

LEGO 70410 manual

LEGO

LEGO 70410 manual

Mega Bloks Collector Series instructions

Mega Bloks

Mega Bloks Collector Series instructions

Fisher-Price LOVING FAMILY B2089 instruction sheet

Fisher-Price

Fisher-Price LOVING FAMILY B2089 instruction sheet

Eduard SB2C landing flaps manual

Eduard

Eduard SB2C landing flaps manual

manuals.online logo
manuals.online logoBrands
  • About & Mission
  • Contact us
  • Privacy Policy
  • Terms and Conditions

Copyright 2025 Manuals.Online. All Rights Reserved.