RHINO 232 User manual


About your Alarm System .................................................................................................................................. 4
Introduction ......................................................................................................................................................................................................................... 4
About this Manual ............................................................................................................................................................................................................ 4
Zones and Areas ................................................................................................................................................................................................................ 4
Access Codes ....................................................................................................................................................................................................................... 4
Keypad and Display ......................................................................................................................................................................................................... 5
Status Indicators ......................................................................................................................................................................................................... 6
Function Keys ................................................................................................................................................................................................................ 6
Emergency Keys .......................................................................................................................................................................................................... 6
Operating the Alarm System ........................................................................................................................... 7
Introduction ......................................................................................................................................................................................................................... 7
Before Arming the System .......................................................................................................................................................................................... 7
Away Arm ............................................................................................................................................................................................................................... 7
Away Arming with the Remote Control ............................................................................................................................................................. 8
Stay Arm ................................................................................................................................................................................................................................. 8
Stay Arming with the Remote Control ............................................................................................................................................................... 9
Panic Alarm ......................................................................................................................................................................................................................... 9
Disarming the System with the Remote Control ......................................................................................................................................... 9
Disarming the System with the Keypad ............................................................................................................................................................10
Reset after an Alarm with the Keypad ...............................................................................................................................................................
Bypassing Zones ............................................................................................................................................................................................................... 12
Chime On/Off .......................................................................................................................................................................................................................13
View Chime Log .................................................................................................................................................................................................................13
User Settings and Test Functions ........................................................................................................................................................................... 14
Remote Outputs .........................................................................................................................................................................................................14
General Volume ..........................................................................................................................................................................................................14
Chime Volume .............................................................................................................................................................................................................15
Alarm Volume ...............................................................................................................................................................................................................
15
Maximum Backlight Brightness ........................................................................................................................................................................ 15
Minimum Backlight Brightness ........................................................................................................................................................................15
Maximum Keypad Brightness ...........................................................................................................................................................................15
Minimum Keypad Brightness ............................................................................................................................................................................ 16
Silent Stay 1 and Silent Stay 2 ........................................................................................................................................................................... 16
Walk Squawk ................................................................................................................................................................................................................ 16
Reset Panel ..................................................................................................................................................................................................................... 17
Smart Phone Application ...................................................................................................................................18
Installation Information ......................................................................................................................................19
Zones ........................................................................................................................................................................................................................................ 19
Users .........................................................................................................................................................................................................................................20
Installer Information ....................................................................................................................................................................................................... 20
Alarm Receiving Centre Information ................................................................................................................................................................... 21
CONTENTS
10
Reset after an Alarm with the Remote Control .............................................................................................................................................11
Users ................................................................................................................................................................................................................................... 17
System Maintenance .............................................................................................................................................18
Limited Warranty .....................................................................................................................................................22
-
-
-
ABOUT YOUR ALARM PANEL
Introduction
Your alarm system consists of a self-contained control panel which is connected to the mains
power supply and various detection devices that communicate with the control panel via the
Rhino proprietary wireless protocol. The control panel will normally be installed where it is most
convenient for the user. Please read this manual carefully and have your installer instruct you on
your system’s operation. Become familiar with the features that have been implemented on your
system. All users of this system should be equally instructed in its use.
About this Manual
This manual provides a thorough explanation of all system functions that are available to the
master user, including troubleshooting and programming user access codes in addition to
performing basic system functions. Standard users of the system will not need to know all of this
information. The section “Operating your Alarm System” explains general operating procedures for
arming and disarming the system. The remaining sections of the manual are reserved for more
detailed system information.
Monitoring
This system is capable of transmitting alarms, troubles and emergency information to a control
room. If you inadvertently initiate an alarm, immediately call the control room to prevent an
unnecessary response.
Your installer must enable the monitoring function before it will work.
Zones and Areas
A zone is an area of protection that has one or more detection devices connected to it (motion
detectors, glass-break detectors, door contacts or shock sensors). A single zone might be a room, a
hallway or a door or window. One or more zones can be assigned to areas thus allowing each area
to armed and disarmed independently from each other.
Access Codes
The Rhino 232 control panel can have up to a total of 20 users. User 00 is the engineer and cannot
be accessed by the normal users. As a user of the alarm system, you will be assigned a 4, 5 or 6
digit access code. Access codes are used to arm and disarm the system. Some access codes can
perform additional system functions, such as programming system options, bypassing zones and
performing system tests. Your access code may not allow you to access certain system functions.
For instance, if your code is only allowed to arm the system you will not be able to disarm the
system, once the system is armed.
4 Rhino 232 User Manual |

No Description
1 LED Status Indicators
2 LCD Display
3 Number keys, Clear and Enter
4 Function and Navigation keys
2 3
4 5 6
7 8 9
CLEAR ENTER
0
ARM
i
1P
1
2
3 4
POWER TROUBLESTATUS
Keypad and Display
The Rhino 232 features a Graphics Display which is designed for high-visibility and ease of use. A
set of dedicated system status LEDs for Power, Status and Trouble are also provided.
BYPASS
STAY
CHIME
Rhino 232 User Manual 5 |

Name LED Description
Power Green Mains AC power is present.
Status Green/Red Green: Disarmed; Red: Armed;
Orange: Partially Armed
Trouble Yellow The system has one or more
faults.
Key Description
ARM Used for Away Arming your system
STAY Used for Stay Arming your system
BYPASS Used for Bypassing one or more detection zones
CHIME Used for turning the Chime feature on and off
Panic or Silent panic Key (Duress)
↑Used to move the cursor up
↓Used to move the cursor down
i View Chime Log, Enter Installer Menu, Enter User Menu
Event Press Keys
1 and 3
4 and 6
7 and 9
Status Indicators
The LED status indicators are described below:
Function Keys
The function keys are described below:
Emergency Keys
The alarm system can provide three immediate emergency alarms by pressing and holding the
following keys for three seconds:
The emergency keys can be individually enabled or disabled by the installer. The Panic alarm (Police) can be
individually programmed for either an audible or silent operation.
6 Rhino 232 User Manual |

OPERATING THE ALARM SYSTEM
Introduction
Before attempting to operate the alarm system ensure you have familiarised yourself with all the
procedures covered in this section..
Before Arming the System
Before attempting to arm the system, ensure that all protected areas are secure by closing any
doors, etc. If the system is not ready for arming the panel’s display shows the zones that are active.
Active zones are scrolled in
sequence on the LCD
Away Arm
The away arming mode is used for protecting all detection zones within your area and is normally
used when leaving the premises or area unoccupied. Before attempting to arm, check that your
area is ready for arming. To away arm your area, please proceed as follows:
Enter your user code ****
Press the ARM key
If the Quick Away Arm feature is enabled, you may omit Step 1 from the above procedure, and simply press
the ARM key.
The exit timer will count down.
Vacate the premises now.
The alarm panel is now armed.
****
Rhino 232 User Manual 7 |

Away Arming with Remote Control
The away arming mode is used for protecting all detection zones within the premises and is
normally used when leaving the premises unoccupied. Before attempting to arm, check that your
system is ready for arming.
To away arm the system, please proceed as follows:
Leave the premises via the
designated exit route
Press the ARM button on the
remote control
The status lamp on the remote
control will flash RED and the
armed tone will sound
NB. When using a remote to away arm the panel, the panel arms instantly with no exit delay.
Stay Arm
The stay arming mode is used for protecting some of the detection zones and is normally used
when the premises or area remains occupied. For example, your system may be configured to
provide perimeter protection when selecting the stay arm mode. To stay arm your alarm system,
please proceed as follows:
Enter your user code ****
Press the STAY key
Note: Your stay arm(s) may be
labelled differently by the installer
Press the keys and then ENTER
OR
use the 1 and 2 keys to select
your stay arm mode
****
8 Rhino 232 User Manual |

The alarm panel is now stay armed
If the Quick Stay Arm feature is enabled, you can skip Step 1 and simply press the STAY key.
Stay Arming with the Remote Control
To stay arm your alarm system using the remote control, please proceed as follows:
Press the STAY button on
the remote control
The status lamp on the remote
control will flash YELLOW and
the stay armed tone will sound
The panel will arm in stay 1 mode
when using a remote
Panic Alarm
The remote control has a panic alarm button which can be pressed at any time to generate a
panic alarm.
Press the PANIC button on
the remote control
The status lamp on the remote
control will flash RED and the
remote will beep
If using the keypad:
Press the PANIC button on
the keypad
Disarming the System with a Remote Control
When the system is away armed, you must enter the protected area via the designated entry
route normally the front or back door. On entering the premises, the entry timer and entry tone
starts. You must press the disarm button on your remote control before the entry timer expires.
To disarm your alarm system during normal entry, please proceed as follows:
Press the DISARM button on
the remote control
The status lamp on the remote
control will flash GREEN and a
single ‘bleep’ tone will sound
Rhino 232 User Manual 9 |

Disarming the System with the Keypad
When the system or area is away armed, you must enter the protected area via the designated
entry route (normally the front or back door). On entering the premises, the entry timer and entry
tone starts. You must enter a valid access code before the entry timer expires.
To disarm your alarm system during normal entry, please proceed as follows:
Enter the premises via the
designated entry door.
The entry mode will start
If you are already in the premises
Enter your user code ****
Press the ENTER key
The entry tone stops and the
alarm panel is now disarmed
Disarming with Duress
Enter code and then push the panic button.
Reset after an Alarm with the Keypad
After an alarm has occurred in the protected area, the display will indicate the source of the alarm
on disarming the area. The alarm indication will remain on the display until the alarm condition
has been reset.
10 Rhino 232 User Manual |

To reset the system after an alarm, please proceed as follows:
Follow steps 1, 2 and 3 to disarm
the alarm panel
Press the CLEAR key
Reset after an Alarm using the Remote Control
Press the DISARM button on
the remote control
The status lamp on the remote
control will flash GREEN and a
single ‘bleep’ tone will sound
Rhino 232 User Manual 11 |

Bypassing Zones
When a zone is bypassed it is prevented from causing an alarm. This feature can be used to
temporarily remove the protection of one or more detection zones when arming the system.
To bypass one or more zones, please proceed as follows:
Enter your user code ****
Press the BYPASS key
Press the keys to select the zone
Press the ENTER key
OR
Type in the two digit zone number
e.g. 02, to bypass one zone
The selected zone(s) are now
bypassed
The bypassed zones are shown in
turn on the display
The status lamp turns ORANGE
when zones have been bypassed
Press ARM or STAY to arm
the alarm panel
If the Quick Bypass feature is enabled, you may omit Step 1 when bypassing zones from the
above procedure. If the “Reinstate Bypassed Zones on Disarm” option is enabled by your
installer, the selected zones are automatically reinstated when the system is disarmed. To
reinstate a bypassed zone simply select the zone at Step 3 in the above procedure.
12 Rhino 232 User Manual |

Chime On/Off
This option allows the chime feature to be turned on and off. If the chime feature is on then any
zone that is programmed to chime when activated will cause the system to generate a chime
response. . To turn chime on or off, please proceed as follows:
Press the CHIME key
Chime toggles ON and OFF
View Chime Log
Each time a chime zone is activated, the zone number, date and time are recorded in a separate
“Chime Log”. To view the chime log, please proceed as follows:
Press the key
Press the keys to scroll through
th chime log
Press the CLEAR key to clear
the chime log
Press the key to exit the
chime log
Rhino 232 User Manual 13 |

User Settings and Test Functions
A number of settings can be changed by the user. The user can also test some of the functions on
the Rhino 232 alarm panel. The following functions are available:
1. Remote Outputs
2. General Volume
3. Chime Volume
4. Alarm Volume
5. Maximum Backlight Brightness
6. Minimum Backlight Brightness
7. Maximum Keypad Brightness
8. Minimum Keypad Brightness
9. Silent Stay 1
10. Silent Stay 2
11. Walk Squawk
12. Reset Panel
13. Users (on firmware version V1.18 or later)
In order to get into the Settings Menu, do the following:
Enter your user code ****
Press the key
Use the keys to select the
function you wish to change
Press the ENTER key
Remote Outputs
If your alarm panel has been ptogrammed to activate remote outputs e.g, your gate, these can be
activated from this menu.
Use the keys to select the
output to be activated
Press the ENTER key to
activate the output
Press ENTER when done
General Volume
This changes the tone volume on the keypad.
Use the keys to change
the volume
1 is the softest
10 is the loudest
14 Rhino 232 User Manual |

8.
Press ENTER when done
Chime Volume
To change the volume of the chime tones:
Use the keys to change
the volume
0 is OFF
10 is the loudest
Press ENTER when done
Alarm Volume
This changes the internal speaker volume when the system is in alarm.
Use the keys to change
the volume
0 is OFF
10 is the loudest
Press ENTER when done
Maximum Backlight Brightness
This is the maximum brightness of the display when it is active. The value can be set between 0
(display backlight is off) and 100 (display backlight is on its brightest.).
Use the keys to change
the volume
Press ENTER when done
Minimum Backlight Brightness
This is the brightness of the display when it is not being used. The value can be set between 0
(display backlight is off) and 100 (display backlight is on its brightest.).
Use the keys to change
the volume
Press ENTER when done
Maximum Keypad Brightness
This is the brightness of the keypad when it is being used. The value can be set between 0 (off)
and 100 (brightest).
Use the keys to change
the volume
Press ENTER when done
Rhino 232 User Manual 15 |

Silent Stay 1
When the panel is armed in Stay 1 Mode, the keypad tones can be turned off. This can be
important if the panel is mounted in a bedroom or other quiet place. To make the keypad silent in
stay mode, do the following:
Use the keys to select
OFF or ON
When ON is selected, the
keypad will not make a
noise when it is armed
in stay mode
Press ENTER when done
Press ENTER to select
Silent Stay 2
Same as point 9 above, but stay arming on Stay 2 mode.
Walk Squawk
The walk squawk mode allows the owner to test all the sensors (e.g. PIR and door contacts) which
are used by the alarm panel. When the walk squawk is turned on, the panel will make a sound
when the zone is activated.
Use the keys to choose
walk squawk OFF or ON
Press ENTER to select
ON or OFF
Press ENTER to save the setting
Press CLEAR to exit the
Settings Menu
Minimum Keypad Brightness
This is the brightness of the keypad when it is not being used. The value can be set between 0 (off)
and 100 (brightest).
Use the keys to change
the volume
Press ENTER when done
16 Rhino 232 User Manual |

Walk around the premises to check the sensors in the zones. Every time a sensor is activated, the
panel will make a sound. When all the zones have been checked, turn the walk squawk off in the
Settings Menu. Walk squawk will automatically be turned off after 10 minutes.
Users
Only the master user can add or edit other users in this menu. Other user types cannot access this
menu.
Use the keys to choose the
user to be added or edited
Press ENTER to select
Press ENTER and assign the user
with a pin code, user type, user-
name and remote. Press ENTER
to save each setting edited
Reset Panel
Resetting the panel will cause it to restart. None of the settings or programming will be affected.
Press ENTER to reset the panel
Rhino 232 User Manual 17 |

SMART PHONE APPLICATION
The MiRhino app allows you to access and control your Rhino 232 alarm panel from your
smartphone. The app is available for both Android and Apple phones.
In order to use the MiRhino app it is necessary to register the modem and alarm panel by
scanning the QR code on the alarm panel housing and creating a username and password. Once
the device is linked , the user will be able to access the alarm panel remotely through the app.
SYSTEM MAINTENANCE
With normal use the system requires little maintenance, other than that required by local
regulations. The following points should be observed:
Do not wash the security alarm panel, keypads and detectors with a wet cloth. A light dusting
with a slightly moistened cloth should remove normal accumulation of dust.
The alarm panel standby battery test is designed to determine the battery condition. We
recommend, however, that the standby batteries are replaced every five years.
For other system devices such as smoke detectors, passive infrared, ultrasonic or microwave
motion detectors or glass-break detectors, consult the respective manufacturer’s literature for
testing and maintenance.
18 Rhino 232 User Manual |

INSTALLATION INFORMATION
Zones
Type Location Bypass Chime
No
Rhino 232 User Manual 19 |

Type Name Areas Remote
No Cell Number
Users
Installer Information
Installation Company
Address:
Telephone (Normal):
Telephone (Emergency):
Email:
Website:
Notes:
20 Rhino 232 User Manual |
Table of contents
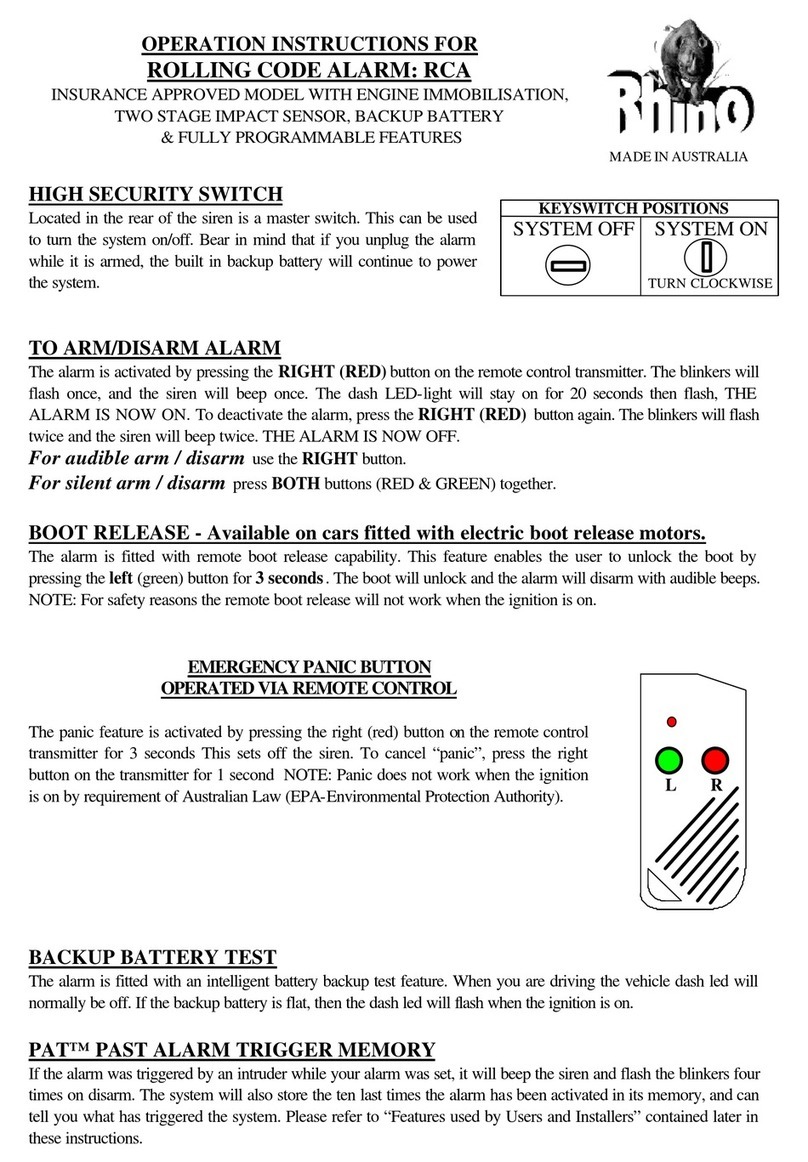
Other RHINO Security System manuals

RHINO
RHINO RCA User manual

RHINO
RHINO RA96 User manual

RHINO
RHINO Watchguard Digital V2 User manual

RHINO
RHINO Watchguard Digital V2 User manual

RHINO
RHINO RCA-2 User manual

RHINO
RHINO PelcoD 2400bps on RS485 User manual

RHINO
RHINO RA97 User manual

RHINO
RHINO ADVANCED PANIC PACK User manual

RHINO
RHINO 832 User manual