manuals.online logo
Brands
  1. Home
  2. •
  3. Brands
  4. •
  5. RHINO
  6. •
  7. Security System
  8. •
  9. RHINO Watchguard Digital V2 User manual

RHINO Watchguard Digital V2 User manual

Introduction:
Thisguideaimstogiveyouaquickoverviewofthe5basicstepsrequiredtoinstallyourWatchguardDigitalSecurity
System,aswellasitsbasicoperation.Itisimportantthatyoufollowthestep‐by‐stepinstructionsdetailedinthefull
installationmanualtoensurecorrectoperationandfullunderstandingofthesystem.

Oncethelocationsforthemaincontrolunitandsirenarechosen,connectpowersuppliesandturnonthemaincontrol
boxkeyswitchandthesirenkeyswitch.Nowtesttheiroperationbeforemountingtheunitspermanentlytoensurethat
theyarewithinthewirelessradiorange.
STEP1.    
MAINCONTROLUNIT
Chooseaconvenientmountinglocationtoinstallthemaincontrol
uniti.e.closetoaphoneoutletandpowerpoint.Drillmounting
holes(7mmDiameter)intothechosenlocation.Mounttheuniton
thewallusingthesuppliedscrewsandwallplugs.

CONNECTIONS
Removecoverplatethenconnectthephonelineintotheleftside
phonesocket.Ifyouareusingaphone/fax/PCalreadyatyour
availablephonepoint,youmayplugtheleadfromyourexisting
deviceintotherightsidesocket.Plugthepowersupplyintoa
powerpointandswitchon.Straightenthewireantennafor
maximumwirelessrange.Nowturnthemainkeyswitchtothe
ONposition(donotpresstheremotes).
WATCHGUARDDIGITALV2
QuickStartGuide
Antenna
ON
OFF
AC POWER
SOCKET
STEP2.
WIRELESSPIRDECTECTORS
Powerthedetectorby
openingthecaseand
removingtheplasticinsert
betweenthebattery
terminals.Wait3minutes
forthedetectortowarm
up.Duringthistimeyou
canworkoutwhereyou
wouldliketolocateyour
detectors.
Totesteachdetector’s
mountinglocation:
PutDIPswitch1and3on
theMainControlUnitup.
Whileholdingthedetector
inthemountingposition
openandclosethe
detectorcase.
Themainunitwillbeep
once.Ifthedetector
passes,youwillheara
secondsetofbeepsafew
secondslater.Ifthisdoes
notoccur,youmust
repositionthedetectorand
retest.
Nowyoucanmountyour
detectors.Drilla5mm
diameterholeintothewall.
Pushthewallplugintothe
holethenscrewinthe
mountingbracket.The
detectorcannowbe
pressedontotheswivel
bracket.Re‐testthe
detectorbyopening&
closingthecaseandthen
walkingbackandforward
infrontofthedetector.The
mainunitwillbeepeach
timetheRedPIRDetection
LEDilluminates.
Whencompletedforeachindividualdetector,returnallthemain
unitdipswitchestoofftoexitthistestmode.

Phone
Line
Powersupply
Cover
Plate
STEP3.(Optional)
WIRELESSSIREN
SettheMainControlUnit
intowirelesssirenautotest
modebysettingDIPswitches
1and5toON.
Turntheexternalsiren
keyswitchtoONandthen
holdthesireninthedesired
mountingposition.
Whenthismodeisentered
thestrobeonthesirenwill
flashevery5seconds,and
themainunitwillbeepout
thesignalstrengthevery5
seconds.Notethatthesiren
mustbemoveduntila
minimumof3beepsisheard
fromthemainunit.Reset
dipswitchestooff.
Mountthesirenifwireless
sirenautotestwas
successful.

Drillmountingholes,(7mm
diameter,25mmminimumin
depth)intothechosenwall.
(Ifbrick,usethegreenstar
plugs&pressoneintoeach
hole.Nowmakea12mm
diameterholeandpushthe
wiresthroughthewalland
upintotheceilingforpower.

Screwthetop2sirenscrews
halfwayinandplacetheunit
ontothewallsupporting
itselffromthetop2screws,
thenscrewinandtightenthe
bottomtwomounting
screwsthenfinishtightening
thetoptwoscrews.Runthe
powersupplywirethrough
therooftotheclosestpower
point,connectpowersupply
andswitchon.
STEP4.
OPERATION(EnsuremainunitkeyswitchisON)
PressButton1
PressButton2
PressButtons1&2Together

AWAYmode
Pressoncetoarmthesysteminnormal
AWAYmode.Theinternalscreamerwill
beepat1‐secondintervalsforthe30‐
secondexitdelayandtheoutsidesiren
willbeeponce.Thestrobewillflashonce.
STAYmode
Presstwicewithin3secondstoarmthe
systeminSTAYmode.Theinternal
screamerwillbeepat2‐secondintervals
forthe30‐secondexitdelayandthe
outsidesirenwillgivealowtonebeep
afterthesecondpress.
Panicmode
Pressandhold(3seconds)toactivate
PANICmode,theoutsidesirenwillsound
andthestrobewillflashbuttheinternal
screamerwillnotsound.







DISARMING
Pressoncetodisarmthesystem.The
sirenwillbeeptwice.Thestrobewillflash
for5seconds.






QUIETARMINGandDISARMING
(i.e.NoExternalSirenBeeps)
ForquietAWAYarmingorDISARMING
pressbothbuttonstogether,once
ForquietSTAYarmingpressbothbuttons
togethersimultaneously,twicewithin3
seconds.
STEP5.(Optional)
SYSTEMREGISTRATION&MONITORINGSET‐UP

Pleasecall0245774708toenablemonitoring.
IMPORTANTNOTE:
WhentestingtheoperationofthesystemyouwillNOT
becontactedbySecureNetifthealarmistriggeredbut
thencancelled(disarmed)within30seconds.
OFF
ON





Other manuals for Watchguard Digital V2

1

Other RHINO Security System manuals

RHINO 832 User manual

RHINO

RHINO 832 User manual

RHINO Watchguard Digital V2 User manual

RHINO

RHINO Watchguard Digital V2 User manual

RHINO 232 User manual

RHINO

RHINO 232 User manual

RHINO RA97 User manual

RHINO

RHINO RA97 User manual

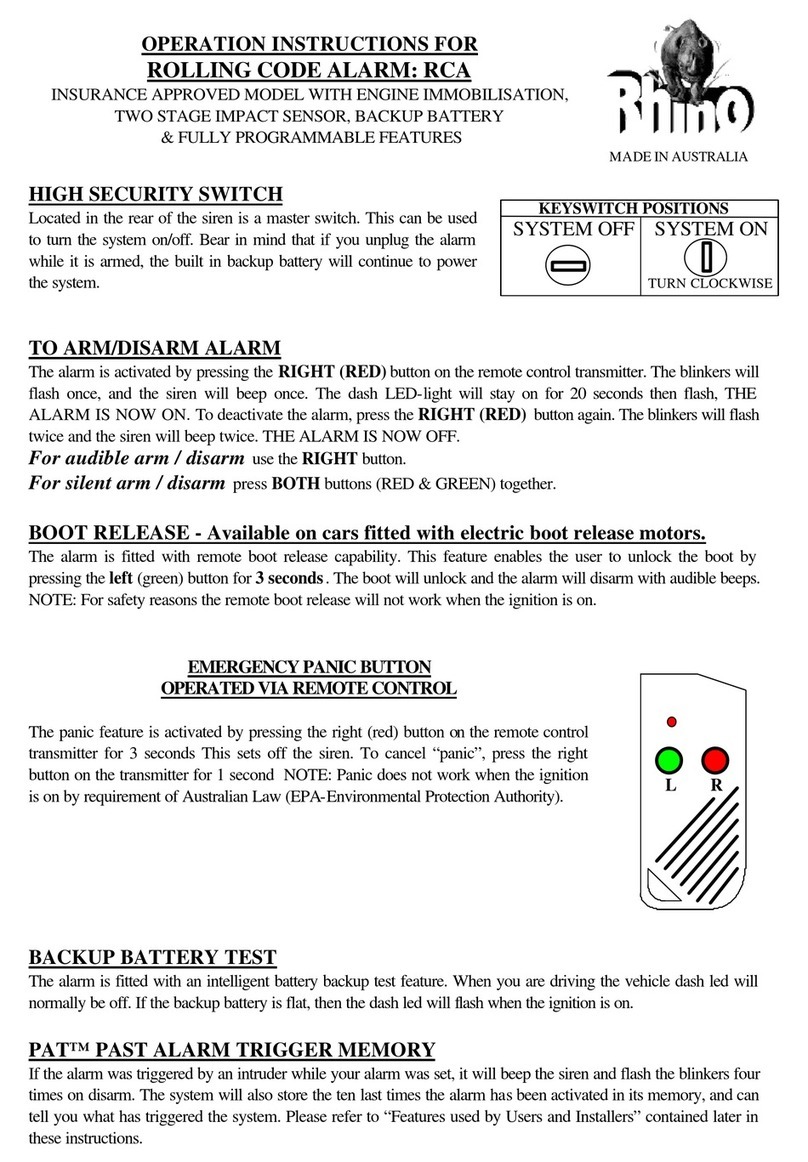
RHINO RCA User manual

RHINO

RHINO RCA User manual

RHINO PelcoD 2400bps on RS485 User manual

RHINO

RHINO PelcoD 2400bps on RS485 User manual

RHINO RCA-2 User manual

RHINO

RHINO RCA-2 User manual

RHINO RA96 User manual

RHINO

RHINO RA96 User manual

RHINO ADVANCED PANIC PACK User manual

RHINO

RHINO ADVANCED PANIC PACK User manual

Popular Security System manuals by other brands

Panasonic WV-ASC970 Operation guide

Panasonic

Panasonic WV-ASC970 Operation guide

FortrezZ WWA-01AA user manual

FortrezZ

FortrezZ WWA-01AA user manual

Tynetec Aidcall ZXT434 manual

Tynetec

Tynetec Aidcall ZXT434 manual

STI STI-SA5500 quick start guide

STI

STI STI-SA5500 quick start guide

Thales Datacryptor Ethernet user manual

Thales

Thales Datacryptor Ethernet user manual

FRIEDLAND SA1 Installation & operating manual

FRIEDLAND

FRIEDLAND SA1 Installation & operating manual

Hawk HA-EMS02 User & installation manual

Hawk

Hawk HA-EMS02 User & installation manual

Dantel 46022-12 Installation & operation manual

Dantel

Dantel 46022-12 Installation & operation manual

Samsung Galaxy SmartTag2 user manual

Samsung

Samsung Galaxy SmartTag2 user manual

Pataco TURTLE SI8S instruction manual

Pataco

Pataco TURTLE SI8S instruction manual

Vimar ELVOX TVCC manual

Vimar

Vimar ELVOX TVCC manual

Devolo MT02758 manual

Devolo

Devolo MT02758 manual

GST DI-9204E quick start guide

GST

GST DI-9204E quick start guide

E2S IS-mA1M instruction manual

E2S

E2S IS-mA1M instruction manual

Honeywell SUGPACK-UK Quick installation guide

Honeywell

Honeywell SUGPACK-UK Quick installation guide

Whelen Engineering Company RB6 Series installation guide

Whelen Engineering Company

Whelen Engineering Company RB6 Series installation guide

FBI XL-1T Installation and setup guide

FBI

FBI XL-1T Installation and setup guide

E2S SONFL1H-HO Series Instructions/service manual

E2S

E2S SONFL1H-HO Series Instructions/service manual

manuals.online logo
manuals.online logoBrands
  • About & Mission
  • Contact us
  • Privacy Policy
  • Terms and Conditions

Copyright 2025 Manuals.Online. All Rights Reserved.