manuals.online logo
Brands
  1. Home
  2. •
  3. Brands
  4. •
  5. Ricoh
  6. •
  7. Printer
  8. •
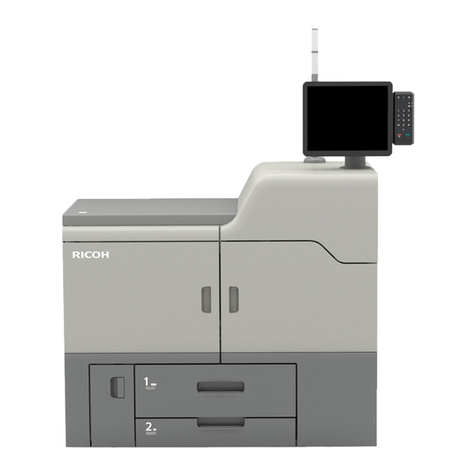
  9. Ricoh D074 Series Installation guide

Ricoh D074 Series Installation guide

Taurus-C1 Training
1
Slide 1
D074/D075/M044 Service Training
This is a complete training course for the D074/D075/M044 series main engine.
Changes to the peripherals are also covered.
Changes based on previous slide numbering:
Modified
25 (paper thickness spec for bypass)
26 (output capacity for ring binder)
34 (change to drum PM interval; dev unit not a PM item)
136 (outline of installation – developer already installed in
the factory)
147-152 (developer installation procedure) – moved to
after slide 352, for PCDU servicing procedures (slide 152
modified: SPs after installing developer)
364 (sponge seals in PCDU)
421 (after replacing parts in the ITB cleaning unit)
428 (after replacing the ITB)
Slide added after 252 (re-installing a PCDU)
Deleted slide 359 (information about re-installing a PCDU
was repeated from an earlier slide)
Deleted slides 470-472, 474-476, 478 (fusing unit PM
modified)
Inserted four new slides after old slide 477 (new slides are
now 472-475) – concerns hot roller replacement
1.0317-08-2011
Changes to slides based on previous version’s slide
numbering:
140 (using the correct screw types)
249 (caution about excessive force)
3 new slides added after 249 (reinstalling a PCDU)
1.0206-06-2011
Changes to slides based on previous version’s slide
numbering: 10, 34, 49, 135, 140, 166, 176, 207, 218, 219,
232, 233, 278, 358, 422, 429, 444, 445, 446, 458, 459,
471, 472, 473, 500, 501
New slide inserted after slide 162, 205, 353, 426, 474 (2
slides inserted here), 500, 501
1.0130-04-2011
Initial version1.0011-03-2011
DescriptionVersion HistoryDate of change
Taurus-C1 Training
2
Slide 2
Product Outline
No additional notes
Taurus-C1 Training
3
Slide 3
Three Models
Taurus-C1a (D074)
65 ppm (A4/LT LEF, full color, black-and white)
Memory: 2.5 GB (GW controller), 2 GB (Fiery controller)
HDD: 320 GB (GW controller), 160 GB (Fiery controller)
Taurus-C1b (D075)
75 ppm (A4/LT LEF, full color, black-and white)
Memory: Same as Taurus-C1a
HDD: Same as Taurus-C1a
Taurus-P1 (M044)
75 ppm (A4/LT LEF, full color, black-and white)
Memory: 1.5 GB (GW controller), 2 GB (Fiery controller)
HDD: 320 GB (GW controller), 160 GB (Fiery controller)
Model Names
¾Taurus-C1b: Pro C751EX
¾Taurus-C1a: Pro C651EX
¾Taurus-P1: Pro C751
HDD capacity for the Fiery controller is less than for the AG series (was 500
GB). In the AG series, the HDD was supplied by Ricoh. In the Taurus series, it is
supplied by EFI.
The process speed is the same for all models (352 mm/s). The difference in the
ppm spec is made by a different size of the gap between sheets.
Taurus-C1 Training
4
Slide 4
Copier Model – Basic System
(1): Main Unit 1st Tray (1000 sheets x 2) – Tray 1
(2): Main Unit 2nd Tray (500 sheets) – Tray 2
(3): Optional A3/DLT LCIT 1st Tray (1000 sheets) – Tray 3
(4): Optional A3/DLT LCIT 2nd Tray (2000 sheets) – Tray 4
(5): Optional A3/DLT LCIT 3rd Tray (1000 sheets) – Tray 5
(6): Optional Bypass Tray (500 sheets) – Tray 6
(7): Optional Finisher (two different ones are available)
This shows the copier model with minimal optional peripherals attached.
Only one LCIT can be installed.
There is no A4/LT LCIT option.
Two finisher models are available: The D512 (corner stapling and booklet
stapling), and the D513 (corner stapling only).
¾The finisher (7) in the illustration above is the Booklet Finisher D512 .
Taurus-C1 Training
5
Slide 5
Printer Model – Basic System
(1): Main Unit 1st Tray (1000 sheets x 2)
(2): Main Unit 2nd Tray (500 sheets)
(3): Optional A3/DLT LCIT 1st Tray (1000 sheets)
(4): Optional A3/DLT LCIT 2nd Tray (2000 sheets)
(5): Optional A3/DLT LCIT 3rd Tray (1000 sheets)
(6): Optional Bypass Tray (500 sheets)
(7): Optional Finisher (two different ones are available)
This shows the printer model with minimal optional peripherals attached. The
only obvious difference from the copier is that there is no ARDF.
The following are the same as for the copier model:
¾Only one LCIT can be installed.
¾There is no A4/LT LCIT option.
¾Two finisher models are available: The D512 (corner stapling and booklet
stapling), and the D513 (corner stapling only).
The finisher (7) in the illustration above is the Booklet Finisher D512 .
Taurus-C1 Training
6
Slide 6
Full System - 1
(1) Main machine D074/D075/M044 (7) Multi Folding Unit (D521)
(2) Decurl Unit (8) Ring Binder (D519)
(3) A3/DLT LCIT (D516) (9) High Capacity Stacker (D515)
(4) Multi Bypass Tray (D517) (10) Finisher (D512)
(5) Buffer Pass Unit (D548) (11) Trimmer Unit (D520)
(6) Cover Interposer Tray (D518)
There will be more details on the peripherals later.
Taurus-C1 Training
7
Slide 7
Full System - 2
If the Trimmer Unit is not installed, the booklet tray (12) for
the Booklet Finisher (D512) must be installed to hold
stapled booklets.
The booklet tray must be removed from the finisher in order
to install the Trimmer Unit.
No additional notes
Taurus-C1 Training
8
Slide 8
Full System - 3
The other finisher (D513) only does corner and flat stapling
(no booklet stapling).
The Trimmer Unit cannot be installed with this finisher (the
Trimmer Unit processes booklet-stapled stacks only).
No additional notes
Taurus-C1 Training
9
Slide 9
Other Options
Original Tray
USB 2.0/SD Slot Type E (TBD)
A3/11"x17" Tray Unit (B331-12)
Punch Unit (D449) for Finisher (D512/D513)
VM Card Type R (with App 2 Me)
@Remote
No additional notes
Taurus-C1 Training
10
Slide 10
Security and Encryption Card
The Data Overwrite Security and Data Encryption
applications are provided from the factory on one
SD card.
The machine is shipped with this SD card in Slot
1.
The customer must enable these applications
with user tools.
No additional notes
Taurus-C1 Training
11
Slide 11
System Layout
This is the same as the AG-C1/P1 and Aries.
Taurus-C1 Training
12
Slide 12
New Fiery Controller
The Color Controller Type E-41a is standard this series. It
is an external type controller with the same design concept
as the QX100 controller for the AG-series.
Standard Fiery
Controller (E-41a) E-41a with
Optional FACI
The E-41a is not compatible with the E-41. Always use the correct controller for
the machine.
The FACI Kit allows the operator to manage jobs more efficiently near the
machine.
¾FACI: Fiery Advanced Controller Interface
The standard controller also has a DVD drive.
Taurus-C1 Training
13
Slide 13
Printing
The machine has a GW controller, but it does not
carry the GW printer application.
All printing features are provided by the external
Fiery E-41a controller.
No additional notes
Taurus-C1 Training
14
Slide 14
Scanning
The machine is equipped with a GW (Ricoh)
scanner and a Fiery scanner as standard
features.
Both scanner features are available even when
GW and Fiery controllers are connected to the
network at the same time.
No additional notes
Taurus-C1 Training
15
Slide 15
@Remote
@Remote can acquire only a limited amount of
information via the Fiery controller network port.
For full functionality with @Remote, the system
must be connected via the GW controller network
as well.
This means the machine needs two IP addresses
for full function support with @Remote.
No additional notes
Taurus-C1 Training
16
Slide 16
View with Front Covers Open
The left drawer contains the PTB (paper transport belt),
fusing unit, paper cooling unit, and the 1st half of the
duplex path.
The right drawer contains the PTR (paper transfer roller)
unit, paper registration, and the 2nd half of the duplex path
PCDUs
ITB
Cleaning
Unit
Right
Drawer
Left
Drawer
ITB Unit
No additional notes
Taurus-C1 Training
17
Slide 17
Internal Component Layout
1. Attention Light: Not built-in. Must be installed during the installation procedure.
2. Operation Panel: Not built-in. Must be installed during the installation
procedure.
3. ARDF
4. Toner Bank
5. Scanner Unit
6. Laser Units: There are two laser units. Each laser unit handles two colors
(YM, CK).
7. PCDUs: One for each color (YMCK). Each unit contains the drum (and charge
unit), development unit, and cleaning unit.
8. ITB Unit
9. Right Drawer
10. Left Drawer
11. Vertical Transport Unit
12. Paper Feed Unit (Tray 1)
13. Tray 1 (Tandem Tray)
14. Paper Feed Unit (Tray 2)
15. Tray 2 (Universal Tray)
16. Used Toner Bottle: Holds used toner transported from the PCDU
development units, PCDU cleaning units, ITB cleaning unit, and PTR cleaning
unit. The machine can continue to print while the bottle is removed.
Taurus-C1 Training
18
Slide 18
Paper Feed Paths
1. Original Path: ARDF (D074/D075 Only)
2. Paper Bank: Tray 1 (Tandem: 2,000 sheets), Tray 2 (Universal: 500 sheets)
3. Vertical Paper Path
4. LCIT: Tray 3 (1,000 sheets), Tray 4 (2,000 sheets), Tray 5 (1,000 sheets)
5. Multi Bypass Unit: Tray 6 (500 sheets)
6. Paper Entrance: From LCIT and Multi Bypass Unit (options)
7. Paper Registration Unit: Corrects paper skew and side-to-side registration for
all paper (including paper fed from the LCIT/Multi Bypass Unit)
8. Paper Transfer: Toner image transferred from ITB to paper
9. Transport Belt: Transports paper between paper transfer roller and fusing unit.
Three fans hold the paper in the paper path. Fans (not rollers) are used to hold
the paper in the paper path because the toner is not yet fused.
10. Fusing Unit: Fuses toner image to paper
11. Paper Cooling: Cools paper to reduce curl before it exits or descends to the
duplex paper path
12. Paper Exit: Common paper exit for all paper
13. Inverter/Exit Tray: Paper is fed into this tray, and reverse fed to invert it for
face-down output.
14. Purge Tray: Bottom of the inverter/exit tray. All paper in the paper path of the
main machine is shunted here when a jam occurs downstream.
15. Paper Invert/Switchback: Paper is stopped and reverse fed here to feed it
into the duplex paper path for printing the 2nd side of the sheet.
16. Duplex Paper Path: Transports paper back to the upper horizontal feed path
for paper registration and printing on the second side.
Taurus-C1 Training
19
Slide 19
Paper Input
Six possible paper sources.
The paper from each source goes to the paper registration unit.
This unit corrects skew (with a paper buckle adjustment) and side-
to-side registration (with a CIS element and sliding shift roller).
Paper Registration
Unit
Paper is fed from six possible sources:
(1): Tray 1 of the paper bank in the main machine, a tandem tray that holds
2,000 sheets of paper.
(2): Tray 2 of the paper bank in the main machine, a universal tray that holds 500
sheets of paper.
(3) To (5): The optional LCIT has three trays: (3) Tray 3 (1,000 sheets), (4) Tray
4 (2,000 sheets), (5) Tray 5 (1,000 sheets.)
(6): Tray 6, the optional Multi Bypass Tray (500 sheets), is installed on top of the
LCIT.
The paper from each source is sent to the paper registration unit. The registration
unit corrects skew (paper buckle adjustment) and side-to-side registration (with a
CIS element and sliding shift roller).
There is no registration mechanism in the LCIT. All paper registration is
performed in the registration unit of the main machine.
The LCIT has an exit roller lift motor and lift sensor that work together to release
the paper so that it can be free during paper registration in the main machine.
¾See the Paper Registration section of the course for more details.
Due to the shortness of the paper path, solenoids have been added in the paper
path between the paper bank (1st Tray, 2nd Tray) of the main machine and the
paper registration unit. These solenoids retract the transport rollers to free the
paper for paper registration.
¾See the Paper Registration section of the course for more details.
Taurus-C1 Training
20
Slide 20
Paper Feed (Straight Through)
(1) Paper registration for skew and side-to-side correction
(2) Toner image transfer to paper
(3) Transport to the fusing unit via transport belt
(4) Fusing unit
(5) Paper cooling unit, and over the exit junction gate
(6) Paper exit for face-up delivery
No additional notes

This manual suits for next models

8

Other Ricoh Printer manuals

Ricoh Aficio 2238C User manual

Ricoh

Ricoh Aficio 2238C User manual

Ricoh pro c901 User manual

Ricoh

Ricoh pro c901 User manual

Ricoh LCIT RT5130 Quick start guide

Ricoh

Ricoh LCIT RT5130 Quick start guide

Ricoh SP 110 SU User manual

Ricoh

Ricoh SP 110 SU User manual

Ricoh SP 213SFw User manual

Ricoh

Ricoh SP 213SFw User manual

Ricoh SH-P1 Series Installation guide

Ricoh

Ricoh SH-P1 Series Installation guide

Ricoh AFICIO MP 6001 User manual

Ricoh

Ricoh AFICIO MP 6001 User manual

Ricoh 8025e User manual

Ricoh

Ricoh 8025e User manual

Ricoh BP20 - Aficio B/W Laser Printer User manual

Ricoh

Ricoh BP20 - Aficio B/W Laser Printer User manual

Ricoh SP 210 User manual

Ricoh

Ricoh SP 210 User manual

Ricoh P800 User manual

Ricoh

Ricoh P800 User manual

Ricoh G186 User manual

Ricoh

Ricoh G186 User manual

Ricoh Pro C900s Original instructions

Ricoh

Ricoh Pro C900s Original instructions

Ricoh B022 User manual

Ricoh

Ricoh B022 User manual

Ricoh IM 7000 User manual

Ricoh

Ricoh IM 7000 User manual

Ricoh TC-II User manual

Ricoh

Ricoh TC-II User manual

Ricoh Aficio GX e3300N User manual

Ricoh

Ricoh Aficio GX e3300N User manual

Ricoh SP 1210N User manual

Ricoh

Ricoh SP 1210N User manual

Ricoh BRG-P1w Quick start guide

Ricoh

Ricoh BRG-P1w Quick start guide

Ricoh Aficio CL4000DN User manual

Ricoh

Ricoh Aficio CL4000DN User manual

Ricoh Priport JP8000 User manual

Ricoh

Ricoh Priport JP8000 User manual

Ricoh Aficio SP4210N User manual

Ricoh

Ricoh Aficio SP4210N User manual

Ricoh AP2610N User manual

Ricoh

Ricoh AP2610N User manual

Ricoh Ri 100 User manual

Ricoh

Ricoh Ri 100 User manual

Popular Printer manuals by other brands

SEWOO LK-T41 user manual

SEWOO

SEWOO LK-T41 user manual

Canon LBP-810 user guide

Canon

Canon LBP-810 user guide

Kyocera TASKalfa PA4500ci Operation guide

Kyocera

Kyocera TASKalfa PA4500ci Operation guide

Astro Machine ASTROJET 2650P quick start guide

Astro Machine

Astro Machine ASTROJET 2650P quick start guide

Konica Minolta Magicolor 2490 MF Parts guide

Konica Minolta

Konica Minolta Magicolor 2490 MF Parts guide

Lexmark 18H0500 - Z 54 Color Jetprinter Inkjet... user guide

Lexmark

Lexmark 18H0500 - Z 54 Color Jetprinter Inkjet... user guide

Canon iP6700D - PIXMA Color Inkjet Printer Specifications

Canon

Canon iP6700D - PIXMA Color Inkjet Printer Specifications

Konica Minolta Magicolor 7440 installation guide

Konica Minolta

Konica Minolta Magicolor 7440 installation guide

Canon imagePASS-A2 Service guide

Canon

Canon imagePASS-A2 Service guide

Tektronix Phaser 780 Color supplementary guide

Tektronix

Tektronix Phaser 780 Color supplementary guide

Lexmark C 750 Replacement guide

Lexmark

Lexmark C 750 Replacement guide

ASTRO ASTROJET IMAGE BLASTER Installation and operating manual

ASTRO

ASTRO ASTROJET IMAGE BLASTER Installation and operating manual

Tally Dascom DT-210 user guide

Tally Dascom

Tally Dascom DT-210 user guide

Epson TM-TM88V-i Technical reference guide

Epson

Epson TM-TM88V-i Technical reference guide

Godex EZ-4206 user manual

Godex

Godex EZ-4206 user manual

Rimage Everest 600 user guide

Rimage

Rimage Everest 600 user guide

Fuji Xerox DocuCentre-IV C3373 Quick reference guide

Fuji Xerox

Fuji Xerox DocuCentre-IV C3373 Quick reference guide

Epson TM-L90 series Start here

Epson

Epson TM-L90 series Start here

manuals.online logo
manuals.online logoBrands
  • About & Mission
  • Contact us
  • Privacy Policy
  • Terms and Conditions

Copyright 2025 Manuals.Online. All Rights Reserved.