manuals.online logo
Brands
  1. Home
  2. •
  3. Brands
  4. •
  5. Ricoh
  6. •
  7. Printer
  8. •
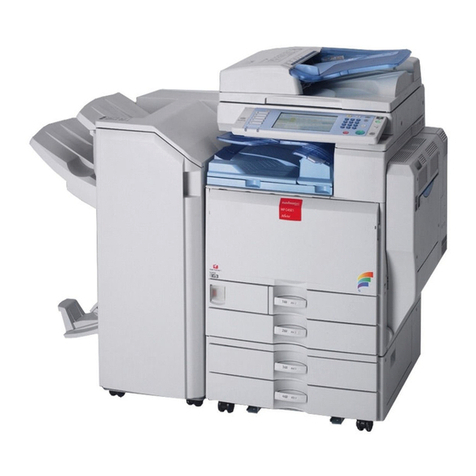
  9. Ricoh PRO C7200 User instructions

Ricoh PRO C7200 User instructions

Other manuals for PRO C7200

8

Other Ricoh Printer manuals

Ricoh C2408 User manual

Ricoh

Ricoh C2408 User manual

Ricoh Aficio AP4510 User manual

Ricoh

Ricoh Aficio AP4510 User manual

Ricoh CL7000 - Aficio D Color Laser Printer User manual

Ricoh

Ricoh CL7000 - Aficio D Color Laser Printer User manual

Ricoh Aficio SP 3400N User manual

Ricoh

Ricoh Aficio SP 3400N User manual

Ricoh Aficio GX7000 User manual

Ricoh

Ricoh Aficio GX7000 User manual

Ricoh BookletMaker SR85 User manual

Ricoh

Ricoh BookletMaker SR85 User manual

Ricoh Aficio A080 User manual

Ricoh

Ricoh Aficio A080 User manual

Ricoh SP 210 User manual

Ricoh

Ricoh SP 210 User manual

Ricoh Aficio SP C730DN User manual

Ricoh

Ricoh Aficio SP C730DN User manual

Ricoh MT-P2 User manual

Ricoh

Ricoh MT-P2 User manual

Ricoh Aficio GX e3300N User manual

Ricoh

Ricoh Aficio GX e3300N User manual

Ricoh P800 User manual

Ricoh

Ricoh P800 User manual

Ricoh CL3500N - Aficio Color Laser Printer User manual

Ricoh

Ricoh CL3500N - Aficio Color Laser Printer User manual

Ricoh Aficio SP 3500N User manual

Ricoh

Ricoh Aficio SP 3500N User manual

Ricoh Pro C9500 Assembly instructions

Ricoh

Ricoh Pro C9500 Assembly instructions

Ricoh FW780 User manual

Ricoh

Ricoh FW780 User manual

Ricoh Aficio SP 3410DN Installation instructions

Ricoh

Ricoh Aficio SP 3410DN Installation instructions

Ricoh Aficio SP 3500N Quick start guide

Ricoh

Ricoh Aficio SP 3500N Quick start guide

Ricoh VT3500 User manual

Ricoh

Ricoh VT3500 User manual

Ricoh IM CW2200 User manual

Ricoh

Ricoh IM CW2200 User manual

Ricoh SP C360DNW User manual

Ricoh

Ricoh SP C360DNW User manual

Ricoh SP3 User manual

Ricoh

Ricoh SP3 User manual

Ricoh P C200W User manual

Ricoh

Ricoh P C200W User manual

Ricoh SP 210 User manual

Ricoh

Ricoh SP 210 User manual

Popular Printer manuals by other brands

Evolis Elypso user guide

Evolis

Evolis Elypso user guide

Lexmark 522n - C Color Laser Printer Service manual

Lexmark

Lexmark 522n - C Color Laser Printer Service manual

Panduit COUGAR LS9Q Operator's manual

Panduit

Panduit COUGAR LS9Q Operator's manual

Olivetti PG L2140 Operation guide

Olivetti

Olivetti PG L2140 Operation guide

Samsung SL-M2820DW user manual

Samsung

Samsung SL-M2820DW user manual

Kyocera FS-9530DN specification

Kyocera

Kyocera FS-9530DN specification

Canon LASER SHOT LBP-1210 Specifications

Canon

Canon LASER SHOT LBP-1210 Specifications

Canon PIXMA PRO-1 Series Getting started

Canon

Canon PIXMA PRO-1 Series Getting started

Canon LBP113w Getting started

Canon

Canon LBP113w Getting started

Lexmark Infoprint 1332 user manual

Lexmark

Lexmark Infoprint 1332 user manual

Epson M1120 user guide

Epson

Epson M1120 user guide

TransAct POSJET 1500 Spare parts

TransAct

TransAct POSJET 1500 Spare parts

Telpar MTP-1500 user manual

Telpar

Telpar MTP-1500 user manual

Star DP8340 SERIES user manual

Star

Star DP8340 SERIES user manual

MGI JETVARNISH 3DS user manual

MGI

MGI JETVARNISH 3DS user manual

Kyocera TASKalfa PA4500ci Operation guide

Kyocera

Kyocera TASKalfa PA4500ci Operation guide

Emaar EP-360 user manual

Emaar

Emaar EP-360 user manual

Fujitsu DL7400 user manual

Fujitsu

Fujitsu DL7400 user manual

manuals.online logo
manuals.online logoBrands
  • About & Mission
  • Contact us
  • Privacy Policy
  • Terms and Conditions

Copyright 2025 Manuals.Online. All Rights Reserved.

Adjustment Settings
for Operators
CIP Training
Pro C7200 series
CIP Training Pro C7200 series
Adjustment Settings for Operators
CIP Training C7200 series
Adjustment Settings for Operators
This section explains Adjustment Settings for Operators and how to specify them.
How to Use the [Adjustment Settings for
Operators] Screen
This section explains how to use the Adjustment Settings for Operators.
1
5
3
24
DWP560
6
To Print Screen
1. [-]
Press this key to collapse the hierarchical display of the adjustment items and display the group names of those
items.
2. [Reset]
Press this key to reset the settings/modifications currently configured. You cannot reset he settings/
modifications after pressing [Apply].
3. [Apply]
Press this key to apply the settings/modifications.
4. [To Print Screen]
Press this key to display the print screen. You can use this screen to view the changes you have made.
5. Adjustment items
Adjustment items are displayed in this area. When you select an item, its configuration screen will then open.
6. Configuration screen
Configure or modify the settings of the adjustment item you select.
209
CIP Training Pro C7200 series
Adjustment Settings for Operators
CIP Training C7200 series
Adjustment Settings for Operators
Accessing the Adjustment Settings for
Operators
1. Press [Adjustment Settings for Operators] at the upper left of the screen.
2. Select and change adjustment settings.
The method for changing the selected adjustment setting depends on the setting that you want to
change. For details, see page 210 "Features of the Displayed Items and Setting Operations".
3. Press [Apply].
4. Press [Home] ( ) at the bottom of the screen in the center.
Features of the Displayed Items and Setting Operations
The following operations are available for each adjustment item:
• Value setting
• Item setting
• Executing
• Display only
Value setting
Press [ ] or [ ] to increase or decrease the value respectively, or use the numeric keypad to enter
the value.
For some settings, move the slider right or left to increase or decrease the setting value.
6. Adjustment Settings for Operators
CIP Training Pro C7200 series
Adjustment Settings for Operators
CIP Training C7200 series
Adjustment Settings for Operators
A numeric keypad appears to the left when you press the input box. Use the keypad to enter a
value.
• [×]: Press to delete the entered value character by character.
• [Clear]: Clear the entered value.
•[+/-]: Change the sign of the entered value from + (positive) to - (negative) and vice versa.
• [Enter]: Confirm the entered value.
For some items, you can select a value from the pull-down list that appears when you press the
input box. Select a value from the list.
Item setting
Select the item you require.
CIP Training Pro C7200 series
Adjustment Settings for Operators
CIP Training C7200 series
Adjustment Settings for Operators
Executing
Press [Execute] to perform a selected function.
Display Only
You can check the setting of the selected item.
Printing with Adjusted Settings
To print with the settings you have adjusted, be sure to select the paper tray and paper size to which the
settings apply.
• Settings adjustable for each paper tray
• Settings adjustable for each paper size
Settings adjustable for each paper tray
These are settings adjustable for each paper tray.
Print jobs are processed with the adjusted settings when printing from a tray with the applied
settings.
CIP Training Pro C7200 series
Adjustment Settings for Operators
CIP Training C7200 series
Adjustment Settings for Operators
Settings adjustable for each paper size
These are settings adjustable for each paper size.
Print jobs are processed with the adjusted settings when printing with a paper size that has the
applied settings.
• For details about selecting the paper tray and paper size for printing, see the manuals for the
related functions.
CIP Training Pro C7200 series
Adjustment Settings for Operators
CIP Training C7200 series
Adjustment Settings for Operators
Menu Items and Functions
Machine: Image Position
For details about the following items, see page 222 "Machine: Image Position".
No. Item Description
0101 Image Position: Across
Feed: Side 1
Adjust the image position (up and down) on side 1
across the feeding direction.
0102 Image Position: Across
Feed: Side 2
Adjust the image position (up and down) on side 2
across the feeding direction.
0103 Image Position: With Feed:
Side 1
Adjust the image position (left and right) on side 1 along
the feeding direction.
0104 Image Position: With Feed:
Side 2
Adjust the image position (left and right) on side 2 along
the feeding direction.
0105 Perpendicularity
Adjustment
Adjust the image skew (perpendicularity) across the
feeding direction.
0106 Switch Paper Edge
Detection Sensor
Specify the level for detecting the paper edge for
correcting the image position along the feeding
direction.
Machine: Image Quality
For details about the following items, see page 229 "Machine: Image Quality".
No. Item Description
0201 Execute Image Quality
Adjustment
Execute image control or color registration adjustment
manually.
0202 Maximum Image Density Adjust the toner adhesion amount to the intermediate
transfer belt during the image density adjustment.
0203 Line Width Adjust the intensity of the laser for rasterizing the image
data.
0204 Density Difference: Across
Feed
Adjust the vertical density deviation of images in the
direction perpendicular to the paper feed direction.
Machine: Paper Feed/ Output
For details about the following items, see page 231 "Machine: Paper Feed/ Output".
CIP Training Pro C7200 series
Adjustment Settings for Operators
CIP Training C7200 series
Adjustment Settings for Operators
No. Item Description
0301 3-Tray LCIT: Fan Setting Specify the fan operation of the 3-Tray LCIT.
0302 3-Tray LCIT: Fan Volume
Setting
Adjust the fan volume for the 3-Tray LCIT to separate
sheets of paper in close contact.
0303 Pickup Assist Setting Specify the operation of the Paper Feed Roller in the
trays of the main unit, bypass tray, and 3-tray LCIT.
0304 Correct Output Paper Curl Specify the method for straightening curled sheets.
Select the method according to the direction and degree
of curl.
0305 Detect JAM099 Specify whether or not to detect double feed (multi-sheet
feeding). This setting is invalid when you are printing
from the tray for which custom paper is allocated.
0306 Detect JAM080 Specify whether or not to detect error as a paper jam
when the image deviation in the feeding direction
exceeds a certain degree.
0307 Detect/Control
JAM097/098
Specify whether or not to correct the image position and
skew in the vertical direction when a deviation in the
direction is detected.
0308 Detect JAM048 Specify whether or not to detect an error as a paper jam
when a problem is detected while the registration mark
is checked for image position correction.
0311 Buffer Pass Unit Fan
Activation Setting
Select the condition for activating the fan in the Cool
Feeding Unit. When the fan stops, the mechanical noise
is lower.
Machine: Maintenance
For details about the following items, see page 236 "Machine: Maintenance".
No. Item Description
0501 Execute Process
Adjustment
Execute the following adjustments for printing at once:
•image density, color deviation, charge roller
cleaning, charge bias, and transfer current
correction
CIP Training Pro C7200 series
Adjustment Settings for Operators
CIP Training C7200 series
Adjustment Settings for Operators
No. Item Description
0502 Screw-on Cap to Replace Close the Toner Bottle Cap.
Open the toner bottle cover (the cover of the toner
dispensing section) before executing this function.
Afterward, remove the toner bottle by pushing the knob
below the bottle.
0503 Execute Charge Roller
Cleaning
Cleans the Charge Roller.
0507 Execute Developer
Refreshing
Replace some of the liquid developer in the development
unit.
0509 Smooth Fusing Belt Smooth the Fuser Belt to remove vertical and horizontal
lines from the printouts.
0510 Fusing Belt Smoothing
Setting
Specify the condition to execute Fuser Belt smoothing.
0511 Fuser Unit Speed
Adjustment
Correct the deviation in the rotation speed of the Fuser
Unit.
0514 Temperature / Humidity
Inside
Display the internal temperature and humidity.
0515 Temperature / Humidity
Outside
Display the external temperature and humidity.
0519 Display Parts Life Counter Display the usage rate of the spare parts.
Finishing: Finisher
For details about the following items, see page 240 "Finishing: Finisher".
No. Item Description
0601 Staple Position: Across
Feed 1
Adjust the vertical position of the staple (applied at an
edge) when using Finisher SR5050 or Booklet Finisher
SR5060.
0602 Staple Position: Across
Feed 2
Adjust the vertical distance (up and down) between the
staples (dual) when using Finisher SR5050 or Booklet
Finisher SR5060.