3
Tool Use and Care
•Use clamps or other practical way to secure and
support the workpiece to a stable platform. Holding
the work by hand or against your body is unstable and
may lead to loss of control.
•Do not force tool. Use the correct tool for your
application. The correct tool will do the job better
and safer at the same rate for which it is designed.
•Do not use tool if switch does not turn the tool ON
or OFF. Any tool that cannot be controlled with the
switch is dangerous and must be repaired.
•Disconnect the plug from the power source before
making any adjustments, changing accessories or
storing the tool. Such preventive safety measures
reduce the risk of starting the tool accidentally.
•Store idle tools out of the reach of children and
other untrained persons. Tools are dangerous in
the hands of untrained users.
•Maintain tools with care. Keep cutting tools sharp
and clean. Properly maintained tools with sharp cut-
ting edges are less likely to bind and are easier to con-
trol.
•Check for misalignment or binding of moving
parts, breakage of parts and any other condition
that may affect the tool’s operation. If damaged,
have the tool serviced before using. Many accidents
are caused by poorly maintained tools.
•Use only accessories that are recommended for
your tool. Accessories that may be suitable for one
tool may become hazardous when used on another
tool.
•Keep handles dry and clean; free from oil and
grease. Allows for better control of the tool.
Service
•Tool service must be performed only by qualified
repair personnel. Service or maintenance performed
by unqualified repair personnel could result in risk of
injury.
•When servicing a tool, use only identical replace-
ment parts. Follow instructions in the Maintenance
Section of this manual. Use of unauthorized parts or
failure to follow maintenance instructions may create
a risk of electrical shock or injury.
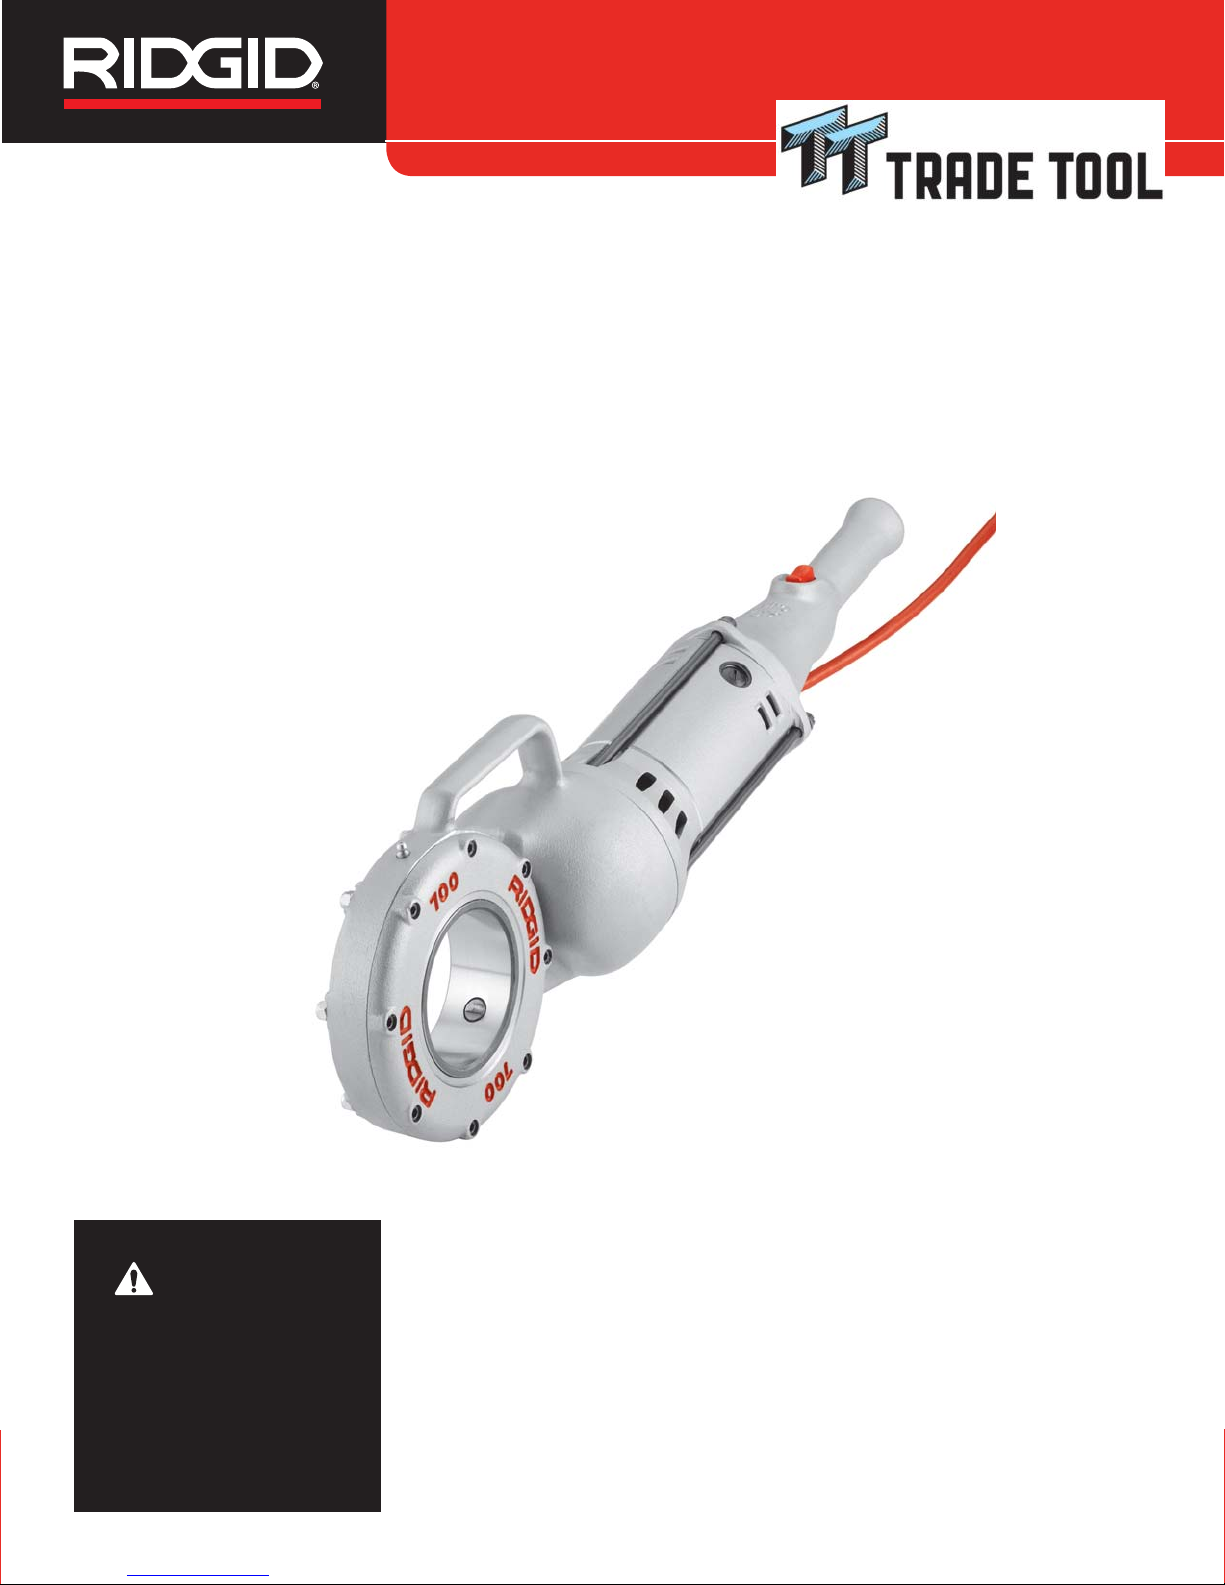
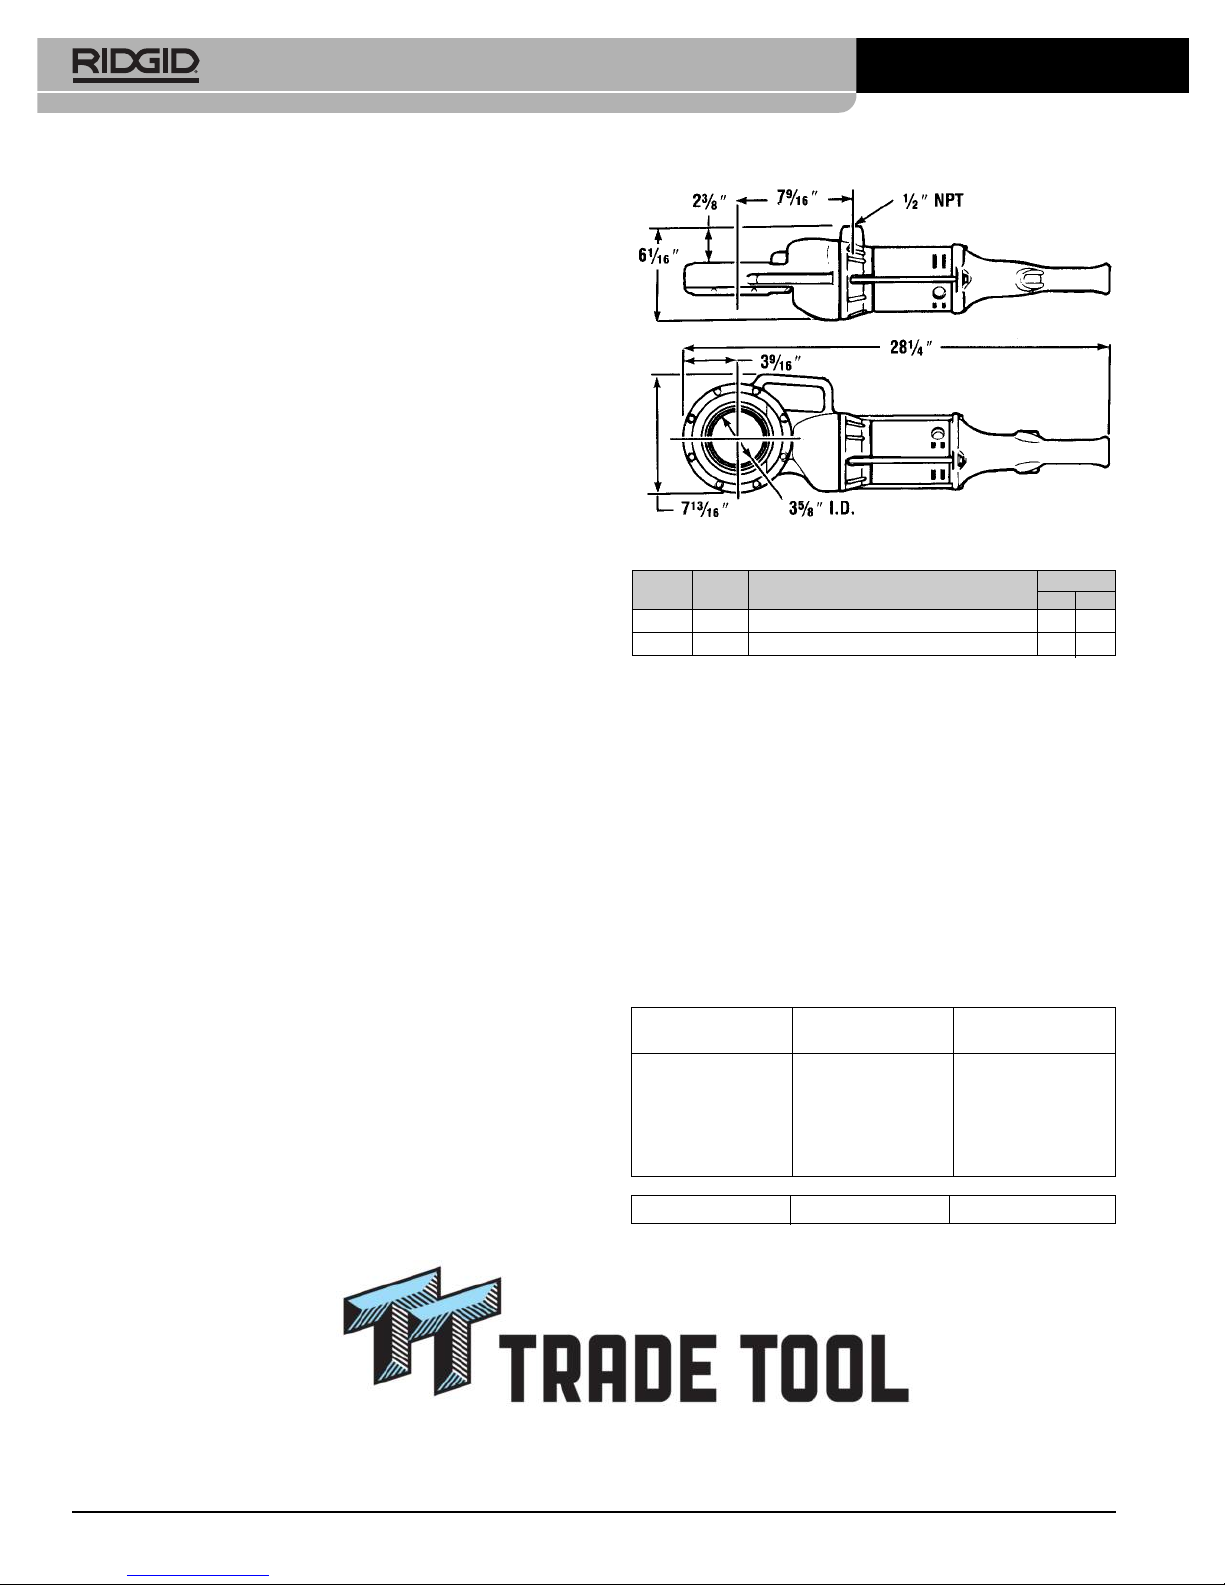
No. 700 Portable Power Drive
Specific Safety Information
WARNING
Read this operator’s manual carefully before using
the 700 Power Drive. Failure to understand and fol-
low the contents of this manual may result in
electrical shock, fire and/or serious personal injury.
Call Ridge Tool Technical Service Department at (800)
519-3456 if you have any questions.
Power Drive Safety
•The Power Drive is made to turn threaders and
other equipment. Follow instructions in this Oper-
ator’s Manual on proper use when threading. When
using it to power other equipment, read and follow
the safety and operating instructions provided
with that equipment. Other uses may increase the
risk of serious injury.
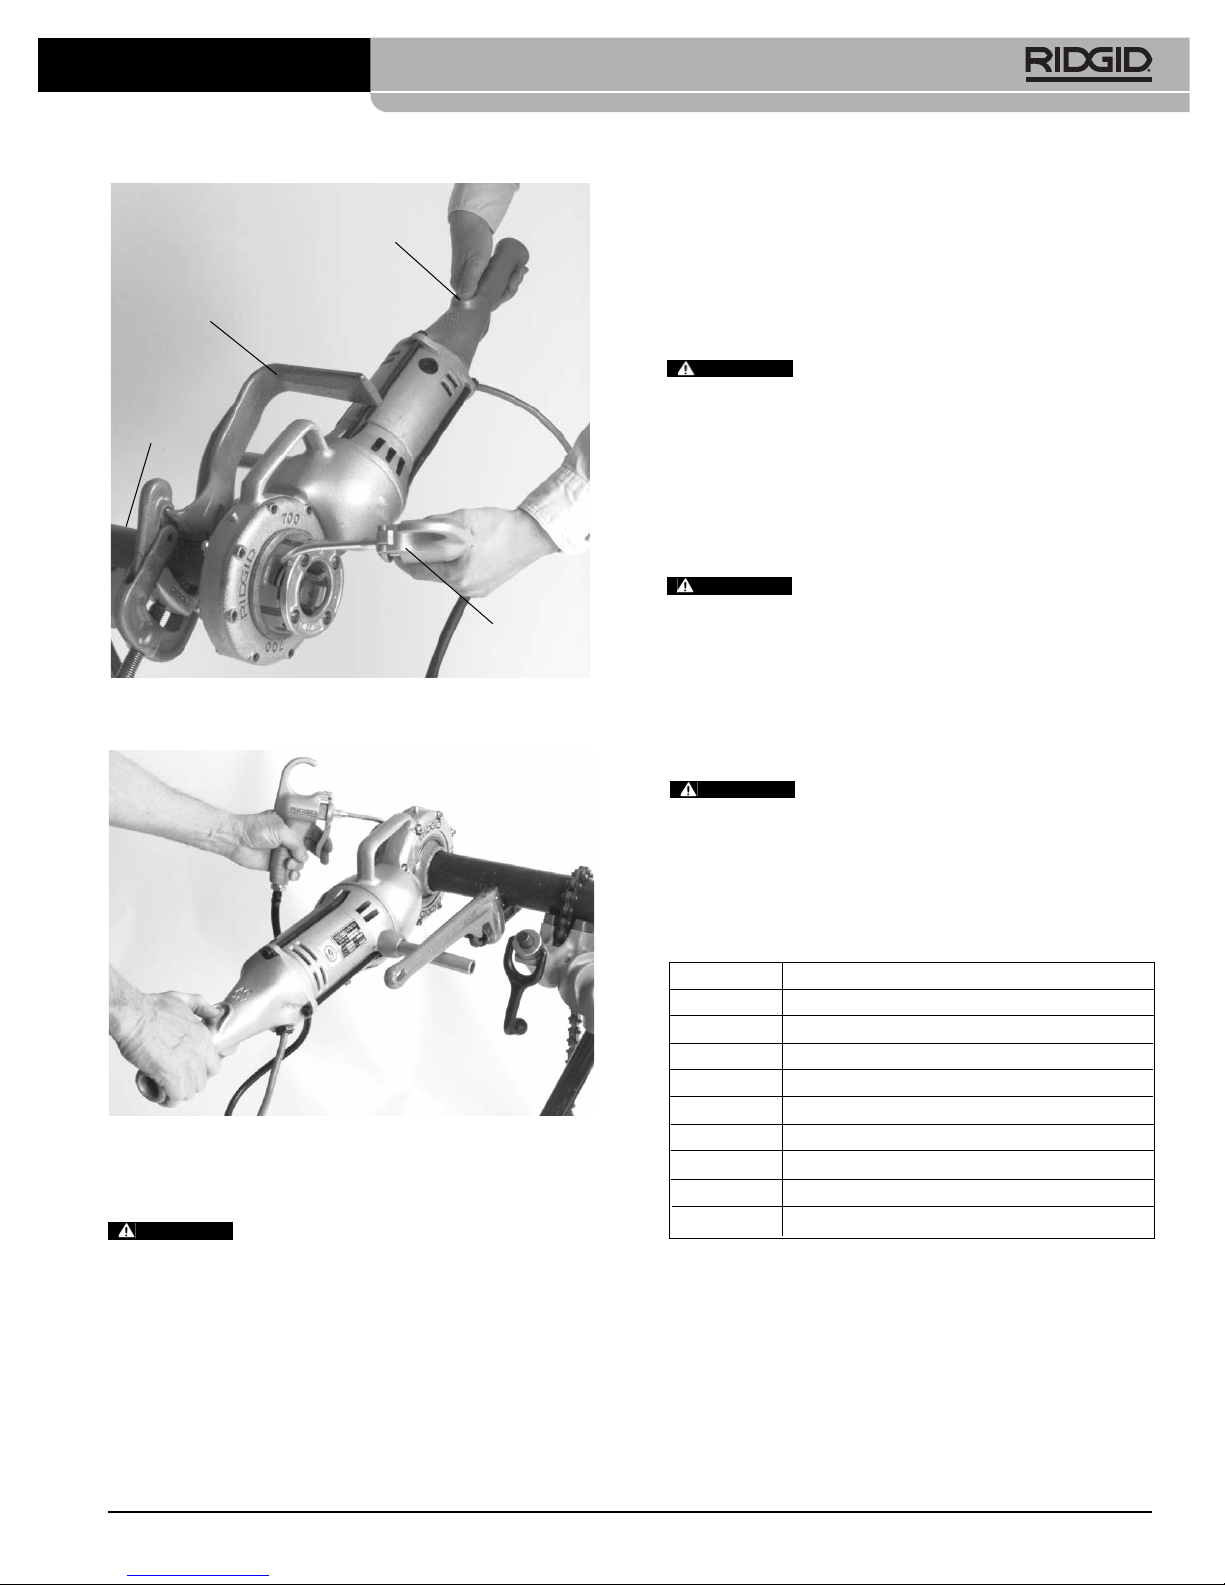
•When threading one inch or larger pipe, secure
Power Drive using a No. 775 Support Arm. Hold
Power Drive firmly. If the Power Drive cannot be
secured by a Support Arm, use other mechanical
means such as a pipe wrench. Resists high handle
forces developed during use and prevents losing con-
trol of the tool.
•Do not use this power drive if switch is broken.
This switch is a safety device that lets you shut off the
motor by removing your finger.
•Do not wear gloves or loose clothing when oper-
ating Power Drive. Keep sleeves and jackets but-
toned. Do not reach across rotating tool parts or
workpiece. Clothing can be caught resulting in entan-
glement and serious injury.
•When using to power equipment other than thread-
ers, the 700 Power Drive may have to be secured
to resist high handle forces. Handle forces that are
developed will depend on the application. High handle
forces may cause serious injury.
•Do not use dull or damaged dies. Sharp cutting
dies require less torque and the Power Drive is easier
to control.
Description, Specifications and
Standard Equipment
Description
The RIDGID Model 700 Power Drive provides rotation-
al motion for threading pipe, conduit and rod (bolt stock)
and other purposes. Forward and Reverse rotation can
be selected with the REV/OFF/FOR switch.