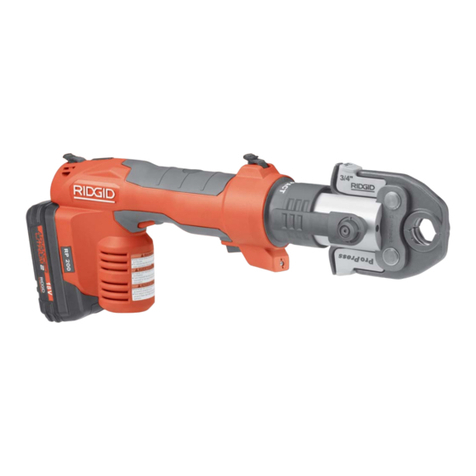
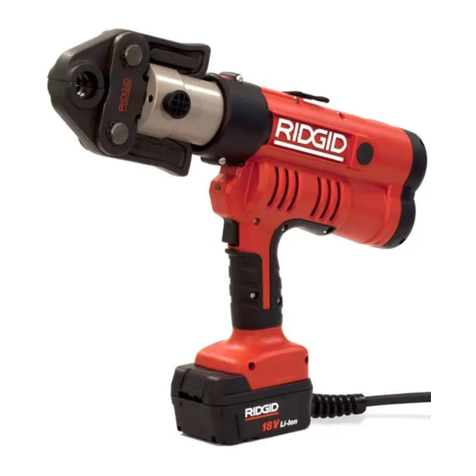
RIDGID Compact 100-B User manual

WARNING!
Read this Operator’s Manual
carefully before using this tool.
Failure to understand and fol-
low the contents of this manu-
al may result in extensive
property damage and/or seri-
ous personal injury.
Pressing Tool
OPERATOR’S
MANUAL
Compact
100-B
For ProPress®Compact Jaws
and Fittings
For PureFlow™Pex Compact Jaws
and Fittings

Ridge Tool Companyii
Compact 100-B Pressing Tool
Table of Contents
Recording Form for Machine Serial Number..............................................................................................................1
General Safety Information
Work Area Safety........................................................................................................................................................2
Electrical Safety..........................................................................................................................................................2
Personal Safety ..........................................................................................................................................................2
Tool Use and Care......................................................................................................................................................2
Service........................................................................................................................................................................3
Specific Safety Information
Pressing Tool Safety ..................................................................................................................................................3
Battery Safety ............................................................................................................................................................3
Description, Specifications, and Standard Equipment
Description..................................................................................................................................................................3
Specifications..............................................................................................................................................................4
Standard Equipment ..................................................................................................................................................5
Inspecting the Pressing Tool and Jaw Sets
Compact 100-B Battery Charger ................................................................................................................................5
Attaching Pressing Jaws ............................................................................................................................................5
Tool and Work Area Set-Up
Battery Charging Procedure ......................................................................................................................................6
Important Charging Notes ..........................................................................................................................................6
Battery Disposal..........................................................................................................................................................7
Nickel-Cadmium Batteries ..........................................................................................................................................7
Nickel-Metal Hydride Batteries....................................................................................................................................7
Operating Instructions
Using ProPress®Compact Jaw Sets ..........................................................................................................................7
Preparing the Tube ..................................................................................................................................................7
Inserting the Tube Into the Fitting ............................................................................................................................8
Using PureFlow™ Compact Jaw Sets........................................................................................................................8
Preparing The Tube..................................................................................................................................................8
Inserting the Tube Into the Fitting ............................................................................................................................9
Pressing the Fitting ....................................................................................................................................................9
Inspecting the Pressed Connection..........................................................................................................................10
Minimum Distance Between Fittings ........................................................................................................................11
Pressing in Tight Quarters........................................................................................................................................11
Maintenance Instructions
Daily Cleaning and Lubrication ................................................................................................................................11
Jaws..........................................................................................................................................................................11
Required Maintenance at RIDGID Authorized Service Center ................................................................................12
Accessories
ProPress®System For Copper Tubing......................................................................................................................12
Storage ........................................................................................................................................................................13
Service and Repair......................................................................................................................................................13
Troubleshooting..........................................................................................................................................................14
Compact 100-B Diagnostic Codes ............................................................................................................................15
Lifetime Warranty ........................................................................................................................................Back Cover

Compact 100-B Pressing Tool
For ProPress®Compact Jaws and Fittings
For PureFlow™Pex Compact Jaws and Fittings
Compact 100-B Pressing Tool
Record Serial Number below and retain product serial number which is located on nameplate.
Serial
No.

Ridge Tool Company2
Compact 100-B Pressing Tool
General Safety Information
WARNING! Read and understand all instructions. Failure
to follow all instructions listed below may
result in electric shock, fire, and/or serious
personal injury.
SAVE THESE INSTRUCTIONS!
Work Area Safety
•Keep your work area clean and well lit. Cluttered
benches and dark areas invite accidents.
•Do not operate tools in explosive atmospheres,
such as in the presence of flammable liquids,
gases, or dust. Power tools create sparks which
may ignite the dust or fumes.
•Keep by-standers, children, and visitors away
while operating a tool. Distractions can cause you to
lose control.
Electrical Safety
•Double Insulated tools are equipped with a polar-
ized plug (one blade is wider than the other). This
plug will fit in a polarized outlet only one way. If the
plug does not fit fully in the outlet, reverse the
plug. If it still does not fit, contact a qualified elec-
trician to install a polarized outlet. Do not change
the plug in any way. Double Insulation eliminates
the need for the three wire grounded power cord and
grounded power supply system.
•Avoid body contact with grounded surfaces such
as pipes, radiators, ranges and refrigerators. There
is an increased risk of electrical shock if your body is
grounded.
•Do not expose power tools to rain or wet condi-
tions. Water entering a tool will increase the risk of
electrical shock.
•Do not abuse cord. Never use the cord to carry the
tools or pull the plug from an outlet. Keep cord
away from heat, oil, sharp edges or moving parts.
Replace damaged cords immediately. Damaged
cords increase the risk of electrical shock.
•When operating a tool outside, use an outdoor
extension cord marked “W-A” or “W”. These cords
are rated for outdoor use and reduce the risk of elec-
trical shock.
•Use proper extension cords. (See Chart) Insufficient
conductor size will cause excessive voltage drop, loss
of power and overheating.
Personal Safety
•Stay alert, watch what you are doing and use
common sense when operating a power tool. Do
not use tool while tired or under the influence of
drugs, alcohol, or medications. A moment of inat-
tention while operating power tools may result in seri-
ous personal injury.
•Dress properly. Do not wear loose clothing or
jewelry. Contain long hair. Keep your hair, clothing,
and gloves away from moving parts. Loose clothes,
jewelry, or long hair can be caught in moving parts.
•Avoid accidental starting. Carrying tools with your
finger on the switch invites accidents.
•Do not overreach. Keep proper footing and bal-
ance at all times. Proper footing and balance enables
better control of the tool in unexpected situations.
•Use safety equipment. Always wear eye protec-
tion. Dust mask, non-skid safety shoes, hard hat, or
hearing protection must be used for appropriate con-
ditions.
Tool Use and Care
•Do not force tool. Use the correct tool for your
application. The correct tool will do the job better
and safer at the rate for which it is designed.
•Do not use tool if switch does not turn it ON or
OFF. Any tool that cannot be controlled with the
switch is dangerous and must be repaired.
•Remove battery before making any adjustments,
changing accessories or storing the tool. Such
preventive safety measures reduce the risk of starting
the tool accidentally.
•Store idle tools out of the reach of children and
other untrained persons. Tools are dangerous in
the hands of untrained users.
•Check for misalignment or binding of moving
parts, breakage of parts, and any other condition
that may affect the tool’s operation. If damaged,
have the tool serviced before using. Many acci-
dents are caused by poorly maintained tools.
Minimum Wire Gauge for Extension Cord
Nameplate
Amps Total Length (in feet)
0 – 25 26 – 50 51 – 100
0 – 6 18 AWG 16 AWG 16 AWG
6 – 10 18 AWG 16 AWG 14 AWG
10 – 12 16 AWG 16 AWG 14 AWG
12 – 16 14 AWG 12 AWG NOT RECOMMENDED
Ridge Tool Company 3
Compact 100-B Pressing Tool
•Use only accessories that are recommended by
the manufacturer for your model. Accessories that
may be suitable for one tool may become hazardous
when used on another tool.
•Keep handles dry and clean; free from oil and
grease. Allows for better control of the tool.
Service
•Tool service must be performed only by qualified
repair personnel. Service or maintenance performed
by unqualified repair personnel could result in injury.
•When servicing a tool, use only identical replace-
ment parts. Follow instructions in the Maintenance
Section of this manual. Use of unauthorized parts or
failure to follow Maintenance Instructions may create a
risk of electrical shock or injury.
Specific Safety Information
WARNING
Read this Operator’s Manual carefully before using
the RIDGID Compact 100-B Pressing Tool. Failure to
understand and follow the contents of this manual
may result in extensive property damage, severe
personal injury, or death.
Call the Ridge Tool Company, Technical Service De-
partment at (800) 519-3456 if you have any questions.
Pressing Tool Safety
•Only use the Compact 100-B Pressing Tool with
RIDGID Compact ProPress®jaws or RIDGID Com-
pact PureFlow™ Viega jaws and fittings. Other
uses or modifying the Compact 100-B Pressing Tool
for other applications may damage the pressing tool,
damage the jaws and/or cause personal injury.
•Keep your fingers and hands away from jaws dur-
ing pressing cycle. Your fingers or hands can be
crushed, fractured or amputated if they become caught
between the jaws or between these components and
any other object.
•Never attempt to repair a damaged jaw set. A jaw
that has been welded, ground, drilled or modified in
any manner can shatter during pressing resulting in
serious injury. Discard the entire damaged jaw set.
Replace with a new jaw set. Never replace individual
components except for damaged jaw return springs.
Please call Ridge Tool Company, Technical Services
for availability.
•Never use tool with a switch or motor housing
that is damaged. Using a tool with a cracked motor
housing or broken switch can result in electric shock
and severe injury.
Battery Charger Safety
•Charge only Makita®Ni-MH and Ni-Cd rechargeable
batteries in the Makita®battery charger. Other types
of batteries may burst causing personal injury and
damage.
•Do not probe battery charger with conductive ob-
jects. Shorting of battery terminals may cause sparks,
burns or electrical shock.
•Do not insert battery with cracked case into charg-
er. Do not operate charger if it has been dropped or
damaged in any way. Damaged charger increases
the risk of electrical shock.
•Do not burn batteries for any reason. Batteries
explode in fire.
•Charge battery cartridge in temperatures above
50°F (10°C) and below +104°F (40°C). Store tool
and battery pack in locations where temperatures
will not exceed +120°F (49°C). Proper care will pre-
vent serious damage to batteries. Improper care of bat-
teries may result in battery leakage, electrical shock or
burns.
•Do not attempt to use a step-up transformer, an
engine generator or DC power receptacle. May
cause damage to charger resulting in electrical shock,
fire or burns.
•Do not allow anything to cover the charger while in
use. May result in fire.
•Unplug the charger when not in use. Reduces risk
of injury to children and untrained persons.
•Always cover the battery terminals with the battery
cover when the battery cartridge is not used.
Reduces risk of electrical shock.
•Do not charge battery pack in damp or wet envi-
ronment. Do not expose to rain or snow. Increases
the risk of electrical shock.
Description, Specifications and
Standard Equipment
Description
The Compact 100-B Pressing Tool, when used with appro-
priate jaw sets, is designed to mechanically press fittings
onto tubing to create a water-tight and permanent seal.
When the switch on the Compact 100-B is depressed, an
internal electric motor powers a hydraulic pump which
forces fluid into the cylinder of the tool, forcing the ram for-

Only use RIDGID pressing tools and Pro-
Press®jaw sets that are specifically designed for use with
ProPress®copper and bronze fittings. Use of unautho-
rized pressing tools and/or jaw sets to press ProPress®fit-
tings voids the user’s warranty.
NOTE! Contact a RIDGID distributor or consult the
ProPress®product catalog for a list of available
fittings.
When using ProPress®tools and fittings to join 1/2″to 1″
soft copper tubing, users should ensure that tubing is
sufficiently round to slide into the fitting without excessive
effort or mechanical force. If a user finds that a section of
1/2″to 1″soft copper tubing requires more hand-force to
slide into a ProPress®fitting than would a section of hard
copper tubing of the same size, the user should re-round
the soft tubing or find an acceptable section.
PureFlow™ Systems for PEX Tubing Jaw Sets:
RIDGID PureFlow™Compact Jaw Sets are designed to
mechanically press PureFlow™fittings onto 3/8″, 1/2″, 3/4″
and 1″Viega Pextron™, Fostapex™or Pexcel™PEX tub-
ing. An individual jaw set is required for each size tubing.
Only use RIDGID pressing tools and RIDGID
PureFlow™jaw sets that are specifically designed for
use with PureFlow™fittings. Use of unauthorized pressing
tools and/or jaw sets to press PureFlow™fittings voids the
user’s warranty.
NOTE! ProPress®, PureFlow™, Pexcel™, Pextron™
and FostaPex™are registered trademarks of
Viega GmbH & Co. KG.
NOTE! RIDGID jaw sets are offered in two “series”
•Standard Series
•Compact Series
These jaw sets are not interchangeable. That
is, only compact series jaw sets will work with the
Compact 100-B Pressing Tool. Similarly, only
standard series jaw sets will work with standard
series tools. Please refer to the standard series
tools' (320-E, CT-400) operator's manuals for
further information on these tools and jaws.
ward and applying thousands of pounds of pressing force
onto specially designed fittings.
The entire cycle duration is approximately seven (7) sec-
onds. Once the cycle begins to deform a fitting, it will auto-
matically continue until completion, even if the trigger
switch is released. LED displays on the top of the tool indi-
cate problems such as improper temperature, open jaw
mounting pin or maintenance required.
Figure 1 – Compact 100-B Pressing Tool and ProPress®
System Jaw Set
Specifications
Compact 100-B Pressing Tool:
Motor
Voltage ...................14.4 VDC
Amperage...............25.6Amp
Power .....................325 Watts
Weight........................7.5 lbs. (3.4 Kg) with Battery
5.7 lbs. (2.6 Kg) without Battery
Ram Force.....................5,400 Lbs. (24kN)
Operating Temperature
Range...............................32°F to 122°F (0°C to 50°C)
NOTE! The Compact 100-B Pressing Tool and Compact
Jaw Sets are protected under various U.S. and
international patents and patent applications.
ProPress®System For Copper Tubing
Jaw Sets:
RIDGID ProPress®Compact Jaw Sets are designed to
mechanically press fittings onto 1/2″3/4″and 1″soft or hard
copper tubing. An individual jaw set is required for each
size tubing.
Compact 100-B Pressing Tool
Ridge Tool Company4
CAUTION
LED Display
Panel (Top)
ProPress®
Scissor Style
Jaw Set
ProPress®
Jaw Arm
Jaw
Mounting
Pin
Battery
Tool Housing
Switch
Handle
Jaw
Sideplate
Catalog No. Size Weight
16958 1/2″2.15 lbs. (0,98kg)
16963 3/4″2.22 lbs. (1,01 kg)
16978 1″2.28 lbs. (1,03 kg)
CAUTION
Catalog No. Size Weight
17003 3/8″2.39 lbs. (1,08kg)
17008 1/2″2.38 lbs. (1,08 kg)
17013 3/4″2.34 lbs. (1,06 kg)
17018 1″2.60 lbs (1,18 kg)

replaced. Inspect charger for damage. Do not use charg-
er if it has received a sharp blow, been dropped or oth-
erwise damaged.
Attaching Pressing Jaws
Only use RIDGID Jaw Sets. Use with the
RIDGID jaw set intended for the specific fitting system and
tubing material you are installing. Use of other jaw sets will
result in an improper seal that could result in extensive
property damage.
1. Make sure the battery is removed.
2. Pull the jaw set mounting pin to its most open position
(Figure 2).
Figure 2 – Pulling The Jaw Set Mounting Pin Out
3. If pressing tool contains a jaw set, slide it out of the
pressing tool.
Figure 3 – Sliding Jaw Set Into Compact 100-B
4. Select the jaw set that corresponds to the tubing
size and fitting system. Inspect the jaw set. If dirty,
clean jaw sets. Refer to Maintenance Section for
cleaning instructions.
Failure to clean jaws can result in an im-
proper connection that can lead to extensive property
damage. If any cracks are found, discard the damaged
jaw set and obtain replacement.
Standard Equipment
Inspecting The Compact
Pressing Tool and Jaw Sets
WARNING
To prevent serious injury, inspect the Compact
100-B Pressing Tool, battery charger and Compact
Jaw Sets. Never use the Compact 100-B Jaw Set
with damaged or missing parts. The following
inspection procedures should be performed on a
daily basis:
1. Make sure the Compact 100-B Pressing Tool battery
is removed.
2. Inspect the tool housing and switch for damage.
Check for damage such as cracks in the tool housing
and exposed wires.
3. Inspect the jaw sets. If dirty, clean jaw sets. Refer to
Maintenance Section for cleaning instructions. Failure
to properly maintain jaws can result in an improper
connection that can lead to extensive property dam-
age. If any cracks are found, discard the damaged
assemblies and obtain replacement.
Always discard the entire assembly. Never
replace individual components except for jaw return
springs. Failure to replace the entire assembly may result
in component failure and serious injury.
4. Clean any oil, grease or dirt from the tool handles.
This reduces the risk of the tool slipping from your grip.
Compact 100-B Battery Charger
Inspect the power cord and plug for damage. If the cord or
plug is damaged, do not use the charger until the cord is
Ridge Tool Company 5
Compact 100-B Pressing Tool
CAUTION
Catalog
No. Description Weight
16953 Compact 100-B Pressing Tool with 25.4 lbs.
(2) Ni-MH Batteries, Charger (115V), (11,5 kg.)
1/2″, 3/4″, 1″ProPress®Compact Jaw Sets
for Copper Tubing, Carrying Case
16988 Compact 100-B Pressing Tool with 25.4 lbs.
(2) Ni-MH Batteries, Charger (115V), (11,5 kg.)
1/2″, 3/4″, 1″PureFlow™ Compact Jaw Sets
for PEX Tubing, Carrying Case
16948 Compact 100-B Pressing Tool with 12.0 lbs
Carrying Case (5.5 kg)
WARNING
WARNING

A jaw that has been welded, grounded,
drilled or modified in any manner can shatter during
pressing, resulting in sharp flying objects, severe injury or
death. Discard and replace damaged jaw sets.
5. Slide the jaw set into the pressing tool (Figure 3).
6. Push the jaw set mounting pin until it clicks.
NOTE! The Compact 100-B will not work unless the pin
is fully engaged.
Tool and Work Area Set-Up
WARNING
To prevent serious injury, proper set-up of the
pressing tool and work area is required. The
following procedures should be followed:
1. Check work area for:
•Adequate lighting
•Flammable liquids, vapors or dust that may ignite.
Battery Charging Procedure:
WARNING
Before using the battery charger, read all the bat-
tery and charger instructions.
1. Locate the charger so the cord and charger will not be
stepped on, tripped over or be subjected to dam-
age. Do not expose charger to wet environment such
as rain or snow.
2. Charge battery cartridge in temperatures above 50°F
(10°C) and below 104°F (40°C). Store tool and battery
cartridge in location where temperatures do not
exceed 120°F (49°C).
3. Plug the battery charger into the proper A/C voltage
source. The charging light will flash in green color
(Figure 4).
To avoid electric shock and electrical fires,
never use an extension cord that is damaged or does not
meet the following requirements:
•The cord has pins on line plug that are similar in size
and shape to those of the plug on the charger.
•The cord is rated as “W”or “W-A”if being used
outdoors.
•The cord has sufficient wire thickness (16 AWG
below 100′). If the wire thickness is too small, the
cord may overheat, melting the cord’s insulation or
causing nearby objects to ignite.
Do not attempt to use a step-up trans-
former, an engine generator or DC power receptacle.
Figure 4 – Battery Charger
NOTE! New batteries are not charged and must be
charged before use.
4. Insert the battery cartridge so that the plus and minus
terminals on the battery cartridge are on the same
sides as their respective markings on the battery
charger. Insert the cartridge fully into the port so that
it rests on the charger port floor.
5. When the battery cartridge is inserted, the charging
light color will change from green to red and charging
will begin. The charging light will remain lit steadily
during charging. When charging is completed, the
charging light color will change from red to green.
NOTE! Charging time will be approximately 11/4hours
for 2.6 AH Ni-MH standard equipment battery or
one hour for 2.0 AH NiCd optional battery.
WARNING
Charge only Makita®batteries. Other types of bat-
teries may burst causing personal injury.
6. After charging, unplug the charger from the power
source. Always cover the battery terminals with the
battery cover when the battery cartridge is not being
used.
Important Charging Notes
1. When you charge a new battery cartridge or a battery
cartridge which has not been used for a long period of
time, it may not accept a full charge. This is a normal
condition and does not indicate a problem. You can
recharge the battery cartridge fully after discharging it
completely and recharging a couple of times.
Compact 100-B Pressing Tool
Ridge Tool Company6
WARNING
WARNING
WARNING

Ridge Tool Company 7
Compact 100-B Pressing Tool
Nickel-Cadmium Batteries
If equipped with nickel-cadmium battery, the battery must
be collected, recycled or disposed of in an environmentally
sound manner.
Please call 1-800-8-BATTERY for information on Ni-Cd
battery recycling and disposal bans/restrictions in your
area.
Nickel-Metal Hydride Batteries
If equipped with a nickel-metal hydride battery, the battery
can be disposed of in a municipal solid waste stream.
Contact your local government for disposal or recycling
practices in your area.
Operating Instructions
WARNING
The Compact 100-B is designed for use only with
RIDGID Compact Jaw Sets. Use the RIDGID
Compact Jaw intended for the specific fitting sys-
tem and tubing material you are installing.
Keep fingers and hands away from jaws during
pressing cycle. Always wear eye protection to pro-
tect your eyes from dirt and other foreign objects.
Using RIDGID ProPress®Compact Jaw
Sets For 1/2″- 1″Copper Or Bronze Fittings
To obtain a proper seal, the tube end should
be squarely cut and must be inserted in the fitting the cor-
rect depth (refer to Insertion Depth Table). Jaw set must
be square to the tube and properly aligned with the con-
tour of the fitting. Failure to do so may result in an improp-
er seal that can lead to extensive property damage.
To insure a proper seal, 1/2″- 1″ProPress®fit-
tings require a minimum space between the fittings. Refer
to chart on Page 11 for minimum distances.
Preparing the Tube
1. If necessary, cut the desired length of tube using a
tubing cutter.
2. Debur the tube inside and outside diameter using a
rounded file or a deburring tool.
3. Clean the tube end of all dirt, oil and grease.
2. If you charge a battery cartridge from a just-operated
tool or a battery cartridge which has been left in a
location exposed to direct sunlight or heat for a long
time, the charging light may flash in red color. If this
occurs, wait for a while. Charging will begin after the
battery cartridge cools. The battery cartridge will cool
faster if you remove the battery cartridge from the bat-
tery charger.
3. If the charging light flashes alternately in green and
red color, a problem exists and charging is not pos-
sible. The terminals on the charger or battery cartridge
are clogged with dust or the battery cartridge is worn
out or damaged.
4. Batteries should be removed from the Compact 100-
B Pressing Tool when the tool is being stored, espe-
cially when stored for lengthy periods of time. The tool
electronics represent a very slight drain on the battery
when the battery is installed. Leaving a battery plugged
in the tool for long periods of time may result in over-
discharging a battery and can cause permanent bat-
tery damage.
NOTE! Battery performance is severely reduced
when batteries are stored below 32°F (0°C).
For optimal tool performance and battery life
per charge in cold climates, take care to keep
batteries as warm as possible. When battery
temperatures are kept above 32°F (0°C), the
number of press cycles is dramatically im-
proved, especially on larger diameter fittings.
Other suggestions for improving battery perfor-
mance:
•Use the tool to make pressed connections as
soon as possible after transferring the battery
from a warm storage environment to a freezing
or subfreezing operating environment. Planning
ahead in this manner will significantly improve
the number of connections achieved before
battery requires recharging.
•Be sure to fully discharge the battery before
recharging.
•Follow proper recharging procedures as spelled
out on pages 6-7 of this manual.
Battery Disposal
Do not attempt to disassemble the bat-
tery or remove any component projecting from the
battery terminals. Fire or injury may result. Prior to dis-
posal, protect exposed terminals with heavy insulating
tape to prevent shorting.
CAUTION
CAUTION
WARNING

Ridge Tool Company8
Compact 100-B Pressing Tool
Inserting the Tube Into the Fitting
Never lubricate the fitting seal in the Pro-
Press®fitting with anything other than soapy water. Oil
lubricant, dirt or debris may damage the seal. An improp-
er seal can lead to extensive property damage.
1. Check the fitting to make sure the fitting seal is in
place, clean and free of oil or grease (Figure 5).
Figure 5 – Checking the Seal
2. Insert the tube into the fitting using a twisting motion.
Make sure that the tube is fully inserted to the fitting
stop or shoulder (Figure 6).
Figure 6 – Inserting the Tube to Proper Depth
ProPress®System For Copper Tubing:
3. Mark the tube with a permanent marker to indicate
proper depth (Figure 7). Refer to the Insertion Depth
Table above for correct depth.
Tubing that is difficult to insert may have
burrs or could be out-of round. Burrs must be removed
and tubing end should not be damaged. Make sure fitting
is inserted to proper depth. Failure to do so may result in
an improper seal.
Figure 7 – Marking the Tubing
Using PureFlow™ Compact Jaw Sets
for 3/8″– 1″Viega PureFlow™ System on
Pexcel™, Pextron™ or FostaPex™ PEX
Tubing The following instructions for using Pure-
Flow™Compact Jaw Sets are only general guidelines.
Viega (the fitting manufacturer) provides instructions for
pressing PureFlow™system fittings. The Viega instructions
should be followed in the event of conflicting instructions.
Contact a Viega PureFlow™fitting distributor for a copy of
the latest recommended installation instructions.
Preparing The Tube
1. If necessary, cut the desired length of tubing using a
PEX tubing cutter or other appropriate cutting method
being sure to cut the tube square to the tube centerline.
2. For FostaPex™tube only, use end preparation tool to
remove outer PEX and aluminum tube layer to allow
insertion into the stainless steel press sleeve (Figure
8). Hold tube firmly and rotate end prep tool clockwise
until no resistance is felt and tool spins freely.
Figure 8 – Removing Outer Layers From FostaPex™ Tube
3. Clean the tube end of all dirt, oil and grease.
CAUTION
Insertion Depth
Tube Size
(inches) (inches) (mm)
1/213/16 21
3/415/16 24
115/16 24
CAUTION
CAUTION

Inserting the Tube Into the Fitting
1. Slide press sleeve fully over end of tubing (Figure 9).
Figure 9 – Installing Press Sleeve Onto Tube
2. Insert tube into barbed end of fitting until tube contacts
fitting shoulder. Check sight hole to confirm complete
tube insertion (Figure 10).
Figure 10 – Inserting the Tube to Proper Depth on
PureFlow™ Fitting
To obtain a proper seal, the tube end should
be squarely cut and must be inserted fully into the press
sleeve. The end of the tube must be visible through the
sight hole in the press sleeve (refer to Figure 10). The tube
and sleeve must be fully inserted onto barbed end of fitting
up to the fitting shoulder. Failure to do so may result in an
improper seal that can lead to extensive property damage.
Pressing the Fittings
1. Make sure the Compact 100-B Pressing Tool has the
correct jaw set installed.
2. Insert fully charged battery into the base of the handle.
3. Depress ON/OFF button on display panel one time to
turn tool on. All three light emitting diodes (LED’s) will
blink once. Then, the green LED should be solid illu-
minated indicating the tool is ready to press.
NOTE! Tool will automatically turn off if left unused for ten
(10) minutes. To restart tool, it is necessary to
once again depress the ON/OFF button on the
top display panel.
4. Make sure the tubing is inserted to the proper depth
in fitting.
5. Squeeze jaw arms to open the jaw set (Figure 11).
Figure 11 – Opening The Scissor-Style Jaw Set
6. Place open jaws around the fitting. Make sure the
contour of the jaw set is properly aligned with the con-
tour of the fitting for ProPress®systems (Figure 12).
Make sure the raised lip of the stainless steel sleeve
is properly aligned with the jaw set for PureFlow™
systems (Figure 13).
Figure 12 – Placing Scissor-Style Jaw Set Around
ProPress®Fitting
Compact 100-B Pressing Tool
Ridge Tool Company 9
CAUTION
FostaPex™ Tube Pexcel™ or Pextron™ Tube
Complete Tube Insertion
Incomplete Tube Insertion

Figure 13 – Placing Scissor-Style Jaw Set Around
PureFlow™ Fitting
7. Make sure the tool is square to the tubing and depress
the switch (Figure 14). The pressing cycle takes about
six (6) seconds. Once a pressed connection cycle
begins and the rollers contact the jaw arms, the tool
will lock-on and automatically complete the pressed
connection cycle. Releasing the trigger will not stop
the tool once the pressing process has begun. This
assures consistent, repeatable pressed connection
integrity.
To avoid pinch point injuries, keep fingers a-
way from jaws.
Figure 14 – Compact 100-B Square To Tubing
NOTE! If yellow LED service indicator blinks, the tool
should be sent to a RIDGID Authorized Service
Center for required maintenance. The tool will not
run if it is not maintained within 2,000 cycles after
the first blinking yellow LED.
8. Press jaw arms to open the jaw set.
9. Remove the Compact 100-B Pressing Tool from tube.
Avoid sharp edges that may have formed on
the fitting during the pressing operation.
Inspecting The Pressed Connection
CAUTION
The Compact 100-B Pressing Tool will turn off auto-
matically if the battery is too low to successfully
complete a pressed connection. This will be indi-
cated by five blinks of red and green LED’s. After the
blinking red and green LED’s, the tool will auto-
matically shut off. A fully charged battery should be
inserted in the tool and the pressed connection
should be repeated as indicated above. To retract
the rollers and remove the tool from the fitting if bat-
tery dies or tool malfunctions during pressed con-
nection, it is necessary to press the pressure re-
lease black button on the right hand side of the tool
(Figure 15).
Figure 15 – Pressure Release Button Location
NOTE! Fitting must be repressed if tool stops in the
middle of a pressed connection cycle. Failure to
do so may result in a leaking fitting.
1. Inspect the pressed fitting. Look for the following:
•misaligned tubes
•not fully inserted tubes, double check depth marks
(ProPress®Systems) or sight hole (PureFlow™
Systems)
•incorrect jaw alignment with the fitting
If one or more of these problems are found then a
new section of tubing and a new fitting will have to be
prepared, inserted and pressed.
2. Test system in accordance with normal practice and
local codes.
Compact 100-B Pressing Tool
Ridge Tool Company10
CAUTION
CAUTION
Release Button

Minimum Distance Between Fittings
To prevent distortion of the tubing, 1/2″- 1″fittings require
a minimum distance between fittings (refer to chart below).
Failure to provide this distance may result in improper
seal that can lead to extensive property damage.
Compact 100-B Pressing Tool
Ridge Tool Company 11
A (min.)
System Tube Dia. Inches mm
1/2″1/2″13
ProPress 3/4″5/8″16
1″3/4″19
PureFlow ALL 0 0
Pressing In Tight Quarters
The following figures illustrate the clearance require-
ments for jaws and fitting.
Clearance Requirements – Jaw Sets
System Tube Dia. A (min.) B (min.)
Inches mm Inches mm
1/2″3/4″19 2″51
ProPress 3/4″7/8″22 23/8″60
1″1″26 25/8″67
3/8″1/2″13 11/2″38
PureFlow 1/2″1/2″13 13/4″45
3/4″5/8″16 2 51
1″3/4″19 21/4″57
System Tube Dia. A (min.) B (min.) C (min.)
Inches mm Inches mm Inches mm
1/2″7/8″23 13/8″35 21/2″64
ProPress 3/4″1″26 11/2″38 23/4″70
1″11/8″29 15/8″41 3″76
3/8″5/8″16 11/8″29 2″51
PureFlow 1/2″5/8″16 11/8″29 21/4″57
3/4″3/4″19 11/4″32 21/2″64
1″7/8″23 13/8″35 27/8″73
A
A
A
B
B
C
Maintenance Instructions
WARNING
Make sure battery is removed from tool before per-
forming maintenance or making any adjustment.
Compact 100-B Pressing Tools
Daily Cleaning and Lubrication
1. Wipe the tool with a clean dry cloth.
2. Inspect the jaw mounting pin and lubricate the pin with
silicone lubricant as needed.
Jaws
1. Inspect the jaws inside diameter daily. If rusty, dirty or
if there is evidence of copper or bronze fitting materi-
al building up on the jaw or ring inside diameter, (cop-
per build-up is most likely to occur near the tips of
scissor style jaws used on ProPress®fittings as shown
in Figure 16) clean with fine grade ScotchBrite®
(ScotchBrite®is a registered trademark of 3M Com-
pany) metal polishing pads (or equivalent), steel wool
or a steel bristle wire brush. Emery cloth, sandpaper
or other similar abrasive materials should not be
used since they may damage critical press jaw
dimensions.
20°

Figure 16 – Copper Material Build-Up Requiring Jaw
Cleaning
2. Pivot pins on jaws should be cleaned and lubricated
at least once a year with a general purpose “wheel
bearing”type grease. A light coating on the pins and
bores is sufficient.
3. Jaws and sideplates should be visually inspected
daily for obvious cracks or other signs of wear or
damage. If cracks are visible in any parts, they should
be discarded and replaced.
WARNING
A jaw component that has been welded, ground,
drilled or modified in any manner can shatter during
pressing, resulting in sharp flying objects, severe
injury or death. Discard and replace damaged jaws,
press rings or ring actuators.
4. Check return springs in press jaws with each use.
Jaws should open and close freely with only moder-
ate finger effort required.
Required Maintenance at RIDGID
Authorized Service Center
After 20,000 cycles, the tool will show a blinking yellow
LED on the display panel as long as the tool is turned on
to indicate that it is time for maintenance and recalibration.
The tool will not run if it is not maintained within 2,000
more cycles after the yellow blinking LED begins. The dis-
play panel will show a solid yellow LED. This mandatory
maintenance is necessary to assure that the tool remains
in good working condition and provides consistent press
joints.
Compact 100-B Pressing Tool
Ridge Tool Company12
Accessories
Only the following products have been designed to
function with the Compact 100-B Pressing Tool. Other
jaw sets and accessories suitable for use with other
tools may become hazardous and/or produce bad
presses when used with the Compact 100-B. Use only
accessories listed below.
ProPress®System For Copper Tubing:
RIDGID Compact Jaw Sets
Catalog
No. Description
16958 1/2″Compact Jaw Set
16963 3/4″Compact Jaw Set
16978 1″Compact Jaw Set
Catalog
No. Description
12683 14.4V Battery Pack (Original Equipment
Replacement Battery 2.6 Ah Ni-MH)
83407 14.4V Battery Pack (Optional 2.0 Ah Ni-Cd
Battery)
83417 115V Charger
84112 230V Charger
16818 Carrying Case (Plastic)
PureFlow™ System for PEX Tubing
RIDGID Compact Jaw Sets
Catalog
No. Description
17003 3/8″Compact Jaw Set
17008 1/2″Compact Jaw Set
17013 3/4″Compact Jaw Set
17018 1″Compact Jaw Set
Compact 100-B Press Tool Accessories
Fittings:
Contact a RIDGID distributor or consult the ProPress®
product catalog for a list of available fittings.
Contact a Viega distributor for a list of available
PureFlow™fittings.

Service and Repair
Service and repair on this Compact 100-B
Pressing Tool must be performed by a RIDGID Authorized
Service Center. The tool fasteners have been marked to
indicate if service has been performed by unauthorized
individuals. Improper service or repair may lead to exten-
sive property damage, serious injury or death.
For any repairs or maintenance, contact the Ridge Tool
Company, Technical Service Department at (800) 519-
3456 or www.ridgid.com for nearest authorized service
outlet.
If you have any questions regarding the service or repair
of this machine, call or write to:
Ridge Tool Company
Technical Service Department
400 Clark Street
Elyria, Ohio 44035-6001
Tel: (800) 519-3456
E-mail: [email protected]
For name and address of your nearest Independent
Authorized Service Center, contact the Ridge Tool Com-
pany at (800) 519-3456 or http://www.ridgid.com
Compact 100-B Pressing Tool
Ridge Tool Company 13
Storage
Place the tool and jaws in its carrying case. 100-B should
be stored above 32°F (0°C) and below 122°F (50°C).
The tool temperature sensor will not allow the tool to
turn on if oil temperature is not within this temperature
range. This will be indicated by a red blinking LED on the
display panel.
Store the carrying case in a dry, secured,
locked area that is out of reach of children and people
unfamiliar with the Compact 100-B Pressing Tool. The tool
is dangerous in the hands of untrained users.
NOTE! Battery performance is severely reduced
when batteries are stored below 32°F (0°C).
For optimal tool performance and battery life
per charge in cold climates, take care to keep
batteries as warm as possible. When battery
temperatures are kept above 32°F (0°C), the
number of press cycles is dramatically im-
proved, especially on larger diameter fittings.
Other suggestions for improving battery perfor-
mance:
•Use the tool to make pressed connections as
soon as possible after transferring the battery
from a warm storage environment to a freezing
or subfreezing operating environment. Planning
ahead in this manner will significantly improve
the number of connections achieved before
battery requires recharging.
•Be sure to fully discharge the battery before
recharging.
•Follow proper recharging procedures as spelled
out on pages 6-7 of this manual.
WARNING
WARNING
Other manuals for Compact 100-B
1
Table of contents
Other RIDGID Power Tools manuals

RIDGID
RIDGID R866012 User manual

RIDGID
RIDGID 600 User manual

RIDGID
RIDGID RP 330-B User manual

RIDGID
RIDGID 300 Power Drive User manual

RIDGID
RIDGID 1215 User manual

RIDGID
RIDGID 46378 User manual

RIDGID
RIDGID R86240 User manual

RIDGID
RIDGID EB44241 Quick setup guide

RIDGID
RIDGID R860434 User manual

RIDGID
RIDGID Standard Series User manual

RIDGID
RIDGID RP 340-B User manual

RIDGID
RIDGID OCTANE R860443 User manual

RIDGID
RIDGID RP 330-B User manual

RIDGID
RIDGID JobMax R2851 User manual

RIDGID
RIDGID R86044B User manual

RIDGID
RIDGID RP 330 User manual

RIDGID
RIDGID HC-2D User manual

RIDGID
RIDGID R866010 User manual

RIDGID
RIDGID R3101 User manual

RIDGID
RIDGID JP0600 User manual