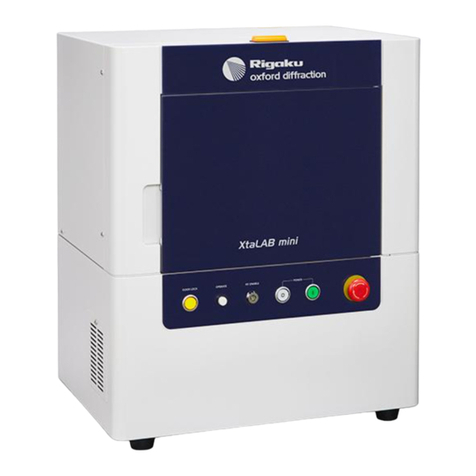
Rigaku Smartlab SE User manual

~Rigaku
~
Smartlab
SE
Getting Started Guide
(

This manual describes the correct use
of
the product
as
well the usage precautions to
be
observed. To obtain
full-expected performance from the product, please read this manual thoroughly.
Also, store this manual
at
an easily accessible place so that you can promptly refer
to
it
whenever it
is
necessary.
) Rigaku Corporation may change the specifications
of
the product and the contents
of
the printed
materials including the manual without notice in the future.
) The contents described in this manual may not
be
disclosed to a third party or copied, in whole or in
part, without the written consent of.Rigaku Corporation.
) In no event will Rigaku Corporation be responsible for the results
of
the use
of
this manual.
) As a rule, only one set
of
instruction manual is supplied for each product.
)
If
there are any missing or incorrectly collated pages
in
the delivered instruction manual, please
contact the sales representative who you purchased the instrument from for instruction manual
replacement.
) Windows is a registered trademark
of
Microsoft Corporation in the United States and other countries.
The®
marks have been omitted.
) Adobe, the Adobe logo, and Reader are either registered trademarks or trademarks
of
Adobe Systems
Incorporated in the United States and/or other countries. The
TM
and@
marks have been omitted.
J The names
of
actual companies and products mentioned herein may be the registered trademarks or
trademarks
of
their respective owners.

(
(
Attention-The
following Software License Agreement ("Agreement")
is
the
document describes the
contents
of
agreement between
the
customer
("Customer")
and
Rigaku
Corporation
("Rigaku")
in
relation to the software which
is
described in the User Manual(s) ("Software").
When
Customer
displays
any
contents
of
the Software on the screen
of
the
terminal
computer
devi1ce,
Customer
is
deemed to have
agreed to this Agreement
and
this Agreement comes into effect between
Customer
and
Rigaku.
Software License Agreement
This Software License Agreement ("Agreement")
is
the agreement which
is
made and entered by and
between the customer ("Customer") and Rigaku Corporation ("Rigaku"),
in
relation
to
each
of
the following
Rigaku software product which Rigaku provides to Customer (the followings are collectively called
as
"Rigaku
Software Product").
(1) Software: "Software" means the software which
is
described
in
the User Manual(s). The Software
is
provided to Customer
by
the form
of
CD (or DVD) (depending on the variety
of
the Software, the number
of
CD (or DVD)
is
different) or being installed
in
the terminal computer device which Customer purchased
from Rigaku. The Software includes its updated version and upgraded version.
(2) Document: "Document" means the User Manual(s) and the Installation Manual. The Document
is
provided to Customer by printed matters, electrical documents or publications described on the website
of
Rigaku.
(3)
Program:
"Program" means the license-key program for which enables the use
of
the Software in the
terminal computer device
in
which the Software installed. The Program is provided to Customer by a USB
dongle.
(4) Recovery
Program:
(Only
in
case that the Software
is
pre-installed in the terminal computer device)
"Recovery Program" means the program for restoring the terminal computer device purchased from
Rigaku to the condition before shipment. The Recovery Program
is
provided
to
Customer by the form
of
CD(orDVD)
.
1. License to Use
Rigaku
Software
Product
I)
Rigaku grants to Customer the non-exclusive license to use the Rigaku Software Product in accordance
with its intended purpose and usage under this Agreement.
2) In case that "Additional License Terms" are attached
to
the updated and/or upgraded version
of
the
Software, upon Customer's agreement to the Additional License Terms, Rigaku grants to Customer the
non-exclusive license to use such updated and/or upgraded version
in
accordance with its intended purpose
and usage.
If
there
is
any conflict between the terms
of
this Agreement and the Additional License Terms, the
Additional License Terms shall prevail.
2.
Restrictions on Duplication
Customer shall not duplicate any
of
the Rigaku Software Product including but not limited to the Document,
the Program and the Recovery Program, excluding the Software.
3. Restriction
of
Modification, Analysis, etc.
Customer shall not modify or alter (including h·anslation and adaptation) the Rigaku Software Product, and
shall not reverse-engineer, decompile or disassemble the Software, the Program and the Recove1y Program. In
case
of
any breach
of
the above, Rigaku may elect the followings;
(1) Termination
of
warranty and the Support Service (defined
in
Article 12)
of
the Rigaku Software
Product, and/or
(2) Termination
of
this Agreement.

4.
Restriction
of
Transfer, Sub-License, etc.
Customer shall not transfer, lend or sub-license the right to use the Rigaku Software Product to any third
party, without prior written approval
by
Rigaku. Even Rigaku approves, Rigaku shall not provide any Support
Service
to
such third party, unless otherwise agreed between Rigaku and such third party.
5.
Caution
and
Indemnification on Security Software
1)
The Software
is
compatible with the following security software, but not with any other.
(1) TrendMicro's "Virus Buster Corporate Edition version
10
.6" or its subsequent version
(2) McAfee's "Internet Security version 12.8" or its subsequent version
(3) Symantec's "Norton Internet Security version 22.8" or its subsequent version
2) Please
do
not use the Software on the computer
to
which any other security software listed above ("Non
Compatible Software")
is
installed, since the Non Compatible Software may cause troubles such
as
described
below. Rigaku shall not be liable for any trouble for such misuse.
(
1)
Deletion
of
the Software,
(2) Change
of
the extension (EXE) that disables the start-up
of
the Software,
(3) Temporary or permanent loss
of
use
of
the Software
by
any other causes.
6.
Liability
of
Customer
to its Member etc.
Customer shall make its member and other concerned personnel to comply with the items which Customer
shall comply with the provisions
of
this Agreement and/or the Additional License Terms.
7.
Attribution
of
Copyrights
Any Copyrights included and/or exists in the Rigaku Software Product attributes
to
Rigaku or the third party
who grants license to Rigaku and shall not be transferred
to
Customer.
8.
License Fee
Fee
of
the license
to
use the Rigaku Software Product shall be included in the price
of
the Rigaku Software
Product.
9.
Site License
In
case that Customer desires
to
obtain additional one or multiple licenses to use the Rigaku Software Product
and such additional license corresponds
to
the conditions
of
the "Site License" which shall be defined separately
by Rigaku, Customer may purchase up to nine (9) numbers
of
the Site License
by
special price ("Site License
Price").
10.
Risk
of
Loss
All risks
of
loss with respect
to
the Rigaku Software Product shall be passed from Rigaku
to
Customer at the
time for each event as follows;
(
1)
In
case that Rigaku or its designee installs the Software: At the time
of
confirmation
of
the Software's
performance without any trouble between Customer and Rigaku,
(2) In case that Customer or its designee installs the Software: At the time
of
delivery
of
the Rigaku
Software Product from Rigaku
to
Customer.
11.
Warranty
1)
THE WARRANTY STIPULATED ON THIS ARTICLE SHALL BE A SOLE AND EXCLUSIVE
WARRANTY PROVIDED BY RIGAKU
IN
RELATION TO THE RIGAKU SOFTWARE PRODUCT.
2) Unless otherwise agreed
in
writing, Rigaku warrants that the Software and the Program shall exert
performance according to the description on the Document during the period stipulated for each
of
the cases

(
(
as follows (each item called as "Warranty Period");
(1) In case that Rigaku or its designee installs the Software: One (1) year from the date when Customer and
Rigaku confirm that the Software performs without any trouble.
(2) In case that Customer or its designee installs the Software: One (1)
ye:ar
from the date
of
delivery
of
the
Rigaku Software Product from Rigaku to Customer.
(3) In case
of
repair
or
replacement under Section 3)
of
this Article: The expiry date
of
Warranty Period
of
above item (1) or (2), or three (3) months from the date ofrepair or replacement, whichever occurs later.
3)
In
case that any trouble, breakage or defect etc. occurs to the Rigaku Software Product during Wananty
Period, Rigaku shall repair or replace free
of
charge. Such repair or replace:ment shall be elected
at
Rigaku's
sole discretion, and conducted at the Customer's address registered to Rigaku when Customer purchased the
Rigaku Software Product or Rigaku's facility.
4)
In
case that any trouble, breakage or defect etc.
of
the Rigaku Software Product
is
attributable
to
one
of
the
followings, Rigaku shall not have any liability
of
warranty
of
Section 3)
of
this Article.
(1) Any modification
or
alteration to the Software or the Program,
(2) Non-compliance
of
the usage instruction described on the Document,
(3) Utilization
of
the Software on the computer to which the Non Compatible Software is installed.
5) Ownership
of
any replaced materials and/or products shall be transferred to Rigaku free
of
charge, and
Customer shall accept such transfer
in
advance.
12. Support Service
During the period stipulated for each
of
the cases as described below, when Customer requests, Rigaku shall
provide the "Support Service" (limited only to repair, replacement, maintenance or training
of
usage) at the
price which described
in
the "Price List" set forth by Rigaku separately. The Supp01t Service shall be conducted
at Customer's address registered to Rigaku when Customer purchased the Rigaku Software Product or Rigaku's
facility.
(1) In case that Rigaku or its designee installs the Software: Three (3) years from the date when Customer
and Rigaku confirm that the Software performs without any trouble.
(2) In case that Customer or its designee installs the Software: Three (3) years from the date
of
delivery
of
the Rigaku Software Product from Rigaku to Customer.
13. Liability ofRigaku
1)
In
case that any damage suffered by Customer on utilization
of
the Rigaku Software Product is attributable
to Rigaku, Rigaku shall compensate for such damages to Customer up to the amount
of
the Rigaku Software
Product price paid by Customer to Rigaku.
2)
In
case that any third party claims to Customer due to infringement
of
copyright and/or the same nature
of
right
in
relation to the Rigaku Software Product, as long as Customer cooperates Rigaku to resolve such
claim, Rigaku shall indemnify, defend and hold harmless Customer and compensate such damages.
3) Customer acknowledges and understands that the updated or upgraded Software may concludes different
analytic results before update or upgrade and Rigaku shall not have any liability other than setting back the
condition
of
the Software before update or upgrade.
14. Alternation
Rigaku may change the contents
of
this Agreement and/or the Additional License Terms with notice to
Customer. Unless otherwise disadvantageous for Customer, such change
slhall
take effect on the date after
ninety (90) days
of
such notice to Customer.
15. Term and Termination
1)
The term
of
this Agreement shall commence from the date when Customer agrees to this Agreement
(however, regarding the updated and upgraded version, the date when Customer agrees to the Additional

License Terms on such version) to the date when Customer ceases to use the Software.
2)
If
Customer breaches any provision
of
this Agreement or the Additional License Terms, and such breach
is
not remedied within a reasonable time stipulated on the Rigaku's notice
of
remedy, Rigaku may terminate this
Agreement.
16. Dispute Resolution
This Agreement and the Additional License Terms shall be construed and governed by and under the laws
of
Japan. All disputes which may arise between Customer and Rigaku, out
of
or
in
relation to or
in
connection with
this Agreement and the Additional License Terms shall be finally settled by arbitration
in
Tokyo,
in
accordance
with the Commercial Arbitration Rules
of
the Japan Commercial Arbitration Association.

(
(
Contents
Introduction ........................................................................................................1
Overall ofSmartLab
SE/SmartLab
Studio
II
.
.. ..
...................
..
................................... 1
Glossary.................................................................................................................. 2
Package Activity..................
..
..
.........
..
..
..
..........
..
............................................... 2
PattActivity...................................................................................................... 2
Manuals and Helps ................................................................................................... 3
Manuals ........................................................................................................... 3
User Manual and Helps ............
..
.......
..
............................................................... 3
How to make a measurement?..............................................................................5
The flow
of
Package Activity
..
........................................................
..
.................... ...
..
5
(1) Turning on the power
of
SmartLab SE ............................................................... 6
(2) Turning on the power
of
control PC for SmartLab SE ............................................ 7
(3) Starting
up
SmartLab Studio
II
.......................................................................... 7
(4)
Turning on the X-ray generator
.. .. .. ..
...................
..
............................................ 9
(5) Choosing a PackageActivity...........................................................................
10
(6) Specifying Conditions
of
PartActivities ............................................................
11
Specifying Optics Alignment Part conditions ..............................................
..
.......
11
Specifying Sample Alignment Part conditions .....................................................
12
Specifying DataAcquisition Part conditions .......................................................
13
(7) Executing Package Activity .................................
..
.........................................
15
(8) Turning
off
the X-ray generator.......................
..
..............................................
17
(9)
Shutting down SmartLab Studio II ................................................................... 18
(10) Turning
off
the power
of
SmartLab SE ................... ........................................ 18
(11) Turning
off
the power
of
control PC for SmartLab SE ............
..
........................
18
Item
No. A00010172/
AOOOI0173
Manual
No. ME13S79COI
2019.
01
(First
Edition)
Rlgoku
SmartLab SE Getting Staited Guide


(
Allgoku
IOverall of
Smartlab
SE/Smartlab
Studio
II
The SmartLab
SE
automated multipurpose X-ray diffractometer is a
general-purpose X-ray diffraction system equipped with a theta-theta goniometer
featuring a horizontal sample mount.
By
changing devices and optical units, the
operator can measure and evaluate a wide variety
of
materials from powder
samples to thin film samples.
SmartLab Studio II
is
a software program designed to control X-ray diffraction
measurement pe1formed by SmaitLab
SE
and analyze the measured data. It has a
function named "PackageActivities" which will navigate you through X-ray
measurement procedure according to the purpose
of
the measurement. In a
Package Activities, a series
of
procedures,
such
as optics alignments, sample
position adjustments, and measurement condition configurations, are packaged.
The user
just
has
to
select a package that meets the purpose
of
the sample
evaluation and enter simple sample information; from then on,
just
by following
the guidance, the user
can
complete the measurement. Most
of
the
optical
components and devices used in SmartLab
SE
are recognized by SmartLab
Studio II.
If
an incorrect slit or analyzer is mounted, SmartLab Studio II will
notify the user by a message to replace the incorrect optics, thus the
measurement
can
always be performed with the best system configuration.
Although each Package Activity
is
designed by expertise who are
well-experienced in that field, users can customize the conditions
of
alignments
or
measurements as necessary to let the PackageActivities be applicable for
special cases as well. Pro Control (manual measurement) is also available, thus a
wide range
of
users can use the system.
Smru1Lab
SE
Getting Stru1ed Guide 1

Introduction I
Glossary
Package
Activity
A
Package
activity refers to a packaged series
of
steps (optics alignment
------>
sample
alignment------>
measurement operations) in an X-ray measurement
procedure. Package activities for specific analytical purposes, such as
Reflectivity Package activity and Texture Package activity, are made ready in
SmartLab Studio
II
.
A Package activity consists
of
multiple
Part
activities, which are steps in an
X-ray measurement procedure, such as
alignm1ent
or measurement.
Part
Activity
A
Part
Activity refers to a single step, such as alignment or measurement, which
are enabled
by
scans and axis movement. Conditions are specified in a Part
Activity beforehand; therefore, using Part Activities allows easy alignment and
measurement operations without the need to enter detailed scan conditions or
axis drive conditions. SmartLab Studio
II
offers Optics Alignment Part, Sample
Alignment Part, and various data measurement Parts, as well as Basic Part which
provides fundamental functions such as axis drive and scan.
Activities
panel
PackageActivities, and
Part
Activities are shown on the Activities panel in
SmartLab Studio
II
<;
.,,,,
G.n<
..
,
.
<.•,11,n
1·
1
GEoe-MltBS)
{'
'Gt-ner-':I
(PR)
( 1
G«-~al{(BJ
(·
1
T,
,rnsrnis-.
ion
SAXS
f·
1
Refle
c.
tion
St.XS
r·
·,
!.11u
0
Are~
,-·, Pole
fl<Ju,e
/'
1
Re
std
w!
Slf~ss
( I
Rdlttt1
11ty
r·.
I Rocking (Ur"l.f:
Al
ignment Activity
-:, , Opt.In.
Al«:Jnrnt"nt
(88J
·
:1
1
Optr:\
Alignnieni t
PB
i
·
;ri
Opb::.s
Ahgnms:nt t(SJ
.;o
Opn•s
Ahgnmcm
(S.
i.\XS
)
•
;;
'
Op
·s
Ahgnm
en!
1M1cro
Are,
1)
·,II
OpbcAl,gnm"nt
{pseudo
PB
!
•
:11
o.,u:s
AJ.9mmnt (
.W-XRO
)
·
:11
Somp'e- Ahgnmenl IPo,·,der,
Ek,!k
l
-:11
C:..,rnp
1
t"
Al
ignment
[Thm
r,!ml
Actl\'ltit-s
MY
S
tn
t
ld
• x
Package
Ac
tivities :
Drag & drop a Package activity
---------
onto the Sequence, and the
Part activities included
in
the
Package activity will
be
displayed.
Part
Ac
ti
viti
es
2 SmartLab SE Getting Started Guide
Rigaku

(
(
Rlgolku
Manuals
and
Helps
IManuals and Helps
SmaitLab Studio II provides several types
of
manuals and help topics. Refer to
the necessary manuals and help topics according to your purpose.
Manuals
Guidelines for safe use
of
the
X-ray
diffractometer
This guideline summarizes the cautions to prevent accidents, such
as
X-ray
exposure, electric shock due to contact with high-voltage parts
of
SmaitLab SE,
and other fatal accidents or injuries.
Read this manual thoroughly before starting to use SmartLab SE for the first
time.
Getting
Started
Guide (this manual)
This "Getting Started Guide" describes the
ov1~rall
information
of
SmartLab SE
and SmartLab Studio II together with the flow
of
a Package Activity which
is
a
typical measurement procedure. When using Sma1tLab SE for the first time, read
this manual. This Getting Staited Guide does not include safety precautions
upon handling Sma1tLab SE. Be sure to read the "Guideline for Safe use
of
the
X-ray Diffractometer" as well.
SmartLab
SE Instruction
Manual
This manual describes the names
of
SmartLab SE paits and units and how to
mount them. When using SmaitLab SE for the first time, make sure to read this
manual beforehand. Read this manual as necessary, such as when replacing
(mounting or removing) optical units or sample attachments.
Others
Instruction manuals other than those described above may be included according
to the optional components. Before using the optional components for the first
time, read all the instruction manuals included with the optional components.
User Manual and Helps
SmartLab Studio II User Manual can be referred to by clicking
Manual
in the
File menu
of
SmaitLab Studio II. The help topics
of
PartActivities can also be
displayed by clicking the 0 button on the title bar
of
a panel.
SmartLab
Studio
II
User
Manual
Sma1tLab Studio II User Manual describes the functions
of
SmartLab Studio II
in detail. Each function is described together with a simple usage example. Read
this reference help for details on the procedure
of
each function. Read this
reference for details on how to create a macro measurement as well.
Help topic
of
Part
Activities
This help topic describes the configuration and the alignment and measurement
flow
of
each PaitActivity.
SmartLab SE Getting Started Guide 3


(
(
Rlgalku
This chapter describes
how
to use PackageActivities, which are typical
measurement methods
of
SmartLab SE.
This Getting Started Guide describes only the overall information
of
Package
Activities.
It
does not describe the configurations and precautions
of
each Package
Activities in detail. For details, refer to the help topic
of
each PackageActivity.
Note that in this Getting Started Guide, the imag,
es
of
General-General (BB)
Package Activity are used as examples.
IThe flow of Package Activity
The following flow shows the overall flow
of
Package Activities, from starting
up SmartLab SE, specifying conditions and executing Package Activities, and up
to shutting down SmartLab SE.
Start
[l]
Turning on the power
of
SmaitLab
SE
[2] Turning on the power
of
control PC for SmartLab SE
[3] Starting up SmartLab Studio II
[4] Turning on the X-ray generator
[5] Choosing a PackageActivity
[6] Specifying the Conditions
of
Pait
Activities
[7] Executing the PackageActivity
[8] Turning
off
the X-ray generator
[9] Shutting down SmaitLab Studio
II
[10] Turning
off
the power
of
SmartLab
SE
[11] Turning offthe power
of
control PC for SmartLab
SE
End
SmartLab SE Getting Started Guide 5

How to make a measurement?
6
I
[1]
Turning
on
the power
of
Smartlab
SE
Power on indicator
Power key
1
Make
sure
that
the power key
is
inserted into the front panel
of
the
instrument.
If
the power key is not inse1ted, insert the power key.
2
Turn
the power key clockwise to the ) position
(further
to the
right
than
the
O position).
When the power key
is
turned, the instrument initialization will start.
It
will take
about 5 minutes for the initialization to be completed. The instrument control in
SmartLab Studio II is unavailable while the initialization
is
in process.
3
The
key automatically moves to the O position
and
the Power-On
indicator
turns
on.
Power
key Power-on indicator
'IT'il[p)
The power-on indicator
is
lighted when SmartLab SE is turned on. The alarm indicator •
will
be
blinking
in
red
in
an error occurs. For details, n!fer to "SmartLab SE Instruction
Manual".
'IT'il[p)
If
you use HyPix-400, refer to the Instruction Manual "Smartlab SE + HyPix-400 System "
before going to the next step.
SmartLab SE Getting Started Guide
Rlgalcu

I
(
(
Rlgalku
(2] Turning
on
the power
of
control PC for
SmartLab
SE
[2]
Turning
on
the power of control
PC
for
Smartlab
SE
Make sure that SmartLab SE
is
connected to the control PC, and then turn
on
the
PC.
1
[3]
Starting up
Smartlab
Studio
II
Double-click the
SmartLab
Studio
II
shortcut
icon on the desktop.
The login window appears.
Bil
5!I
2
Enter
the login name
and
password in the Login
and
Password boxes,
respectively,
and
click the Login button.
SeP,er
name:
DESKTOP-2826FCS¥SQLRIGAKIJ
Login:
i.
A
c1
mini
~~
· -
_.-=1
Passwor
d:
~":!
'l':_'r
pl.-
-1.·"
•11
--~
[ Aut
o~in
Login Cancel - _
_J
Set your password when you log in for the first time.
__
_P
lease login _
__
I
Serve
r nome:
DESK10P
-
2626FCS¥SQLRIGAKU
Login:
[
Ac
1~~irtra; ,
----·
Plea!.e st"t
password
ll.<e
6 to
Iii
,:h.J.rJdrts
'O
(11. 1 n p ' d .
Pas
sword: l
'-'
----.,,
!
!
·1
Auto login
Cancel
SmartLab SE Getting Started Guide 7

How to make a measurement?
Plugin names which are being loaded will be displayed on the splash screen
of
Smai1Lab Studio II. Please wait 30 -60 seconds. The splash screen will
be closed and the main window
of
Smai1Lab Studio
II
will be displayed.
3 Click the XRD Measurement tab to display the XRD Measurement
plugin panel.
.
Em
t
:.
~,
,.,
.
I"'~
:~:
:..
f
..
' ,
:,
(.
~:
...
:i
,.
.,
.
~
.•,
!.:''
,,
r~
8 SmartLab SE Getting Started Guide
Rllgaku

(
(
m
The instrnment
initialization which starts
immediately after the
power
of
SmartLab SE is
turned
on
will take about
5 minutes. While the
initialization is
in
process,
the Execute button cannot
be clicked.
[4]
Turning
on the X-ray
generator
I
[4]
Turning
on
the X-ray generator
Turn on the power
of
the X-ray generator and execute aging according to the
procedure below. The purpose
of
aging
is
to warm up the X-ray generator. It will
take about 7 to
12
minutes for the high voltage applied to become stable.
1 Click Home-Startup/Shutdown to display the Startup/Shutdown
panel.
Slartup
R
un
$;,,µ
!
DO
oo
·
oo
!
Aging
condi
t
ion
! U;e aging lab
l~
rMommtoded
from
fre~ncy
of
ust
nAftH l"Pl,Kin,;
!ht!'
tar~
lt.e
custorni.zed 6ging table
iw
Cak\llated duratio;.:00:12!23
n use t
im
c,
O
Aftt!r
aging
m
ndit
ions
Ag:r,g tab!t:
n::\11~:
Not ustd for inort' lhan J
Wttks
St:t po,-.tr. 1.2
'o:.W
(Vo!lagt: 40
kV
I
(uuf'n
t:
30
mA)
Data &
oww
r Start
up/S
hutdown
Ru
n
e
XGoff
Se
t
to
minimum
2 Set the frequency
of
X-ray
generator
usage, voltage,
and
current.
Select Use aging table recommended from frequency
of
use under Aging
condition.
3 Click the Excute button to
start
aging.
Aging will be performed until the voltage and current applied to the X-ray
tube reach the preset values.
After the aging process is completed, the tube voltage and current values
will be displayed on the H/W status panel.
lJ'n[W
When the X-ray generator is turned on, the X-ray on lamps will turn on.
X-ray
on
la
mp
s
4 Click the
t3
button to close the
Startup/Shutdown
panel.
Rllgolku
SmartLab SE Getting Started Guide 9

How to make a measurement?
10
I
[5]
Choosing a Package Ac:tivity
In
this section, choose a Package Activity according to the purpose
of
the
measurement.
1 Select a Package activity from the Paclkage Activities panel,
and
drag
&
drop
the Package activity on
the
Sequence in the
PackagePart
panel.
Here, select General (BB) from the
General
section, and drag & drop it
on
the Sequence panel.
.
.....
...
r·
~ai{e
et
(l~~-1~1
( 1C....,,....t'iflt1
~
l T
rx:.1J'.1-tJ1!.A.~
("
1
1'<!'
1
1~(1,.,:1~!1
f 'P..·ct·f,,..,~
i
1R,i..;c.,;
t,"1,
I i~<:«1"',r:-I
1_1:w-:.-.:)fa.-,t
I
IPS•.l
11,:::_o-1Y.r:1rs
-;.1cr
~~r.,'(<'1
: 1
~f
·:-1
0:-:
.1
LlignT.t-r
,t
,~e:
·:·1rr.•,.:Jq:;r<<1.11CB1
2
The
conditions settings panels
of
the three
Part
activities will be
displayed on the Sequence.
• x
_ Sequ•nco 0
J
-)
G• ni
ra
l(
BB
)
I
i •o
Op
ti
cs
Alignment (
BB
)
i
I·
Samp
l• Alignment (Pow
d•
r,
Bulk)
i
I ' G•n•rol M•osurem•n! (
BB
) 0
71
I
[__
_______________
__
~
SmartLab SE Getting Started Guide
Algaku

m
To
display a Part Activity
dialog box, click the Part
Activity button on the
Sequence.
[6]
Specifying Conditions of
Part
Activities
I
[6]
Specifying Conditions of Part Activities
Specify the conditions
of
PartActivities displayed on the Sequence according to
the procedure below.
In this section, the
General
-
General
(BB) Package Activities
is
used as an
example.
Specifying Optics
Alignment
Part ccmditions
1 Click the Optics Alignment (BB) buttoin on the Sequence,
and
then
set
conditions in the OpticsAlignment (BB) dialog box
that
appears.
(1)
To
change the optical components and devices to be used
in
the
alignment, select Customize optics, and then click the Customize
( button.
(
Rllgolku
(2) Select Full
if
you perform the aligrunent from the beginning. Select
Quick (only receiving optics)
if
you perform the quick alignment
based on the past alignment results.
(3) Select the name to register the alignment results from the
User
settings box, or click the New button and enter a new registration
name.
Optics Alignment (
BB)
~
Optical.~:!lings
l
521
Use
mi
rror
·• , ~
ul
~optics ~ustomize optics Customize~.
-----------
Al
ig
nme
nt
conditions
,e1
Full
'
~)
Quick (Only recei
vi
ng
op
ti
cs
)
L
i
Reg
-
~tr
ation-
de~
inatio
ri_
'I
Opt
ic
s attribute:
Dfi
ie,' User settings
[---
·,
System
sett
ings
Registration
date
:
P
os
t a
li
gn
me
nt
L
.J
P
rin
t
ou
t results
I Execute I
New
..
.
OK Cancel
-,
I
J
_J
1J'O~
For
details on how to specify the conditions, click the ? button and refer to the help
topic that appears.
SmartLab SE Getting Started Guide
11

How to make a measurement?
12
Specifying
Sample
Alignment
Part
conditions
1 Click the SampleAlignment (Powder, Hulk)
button
on the Sequence
and
set conditions in the SampleAlignment (Powder, Bulk) dialog box
that
appears.
(1) Select the attachment and sample plate to be used
in
the alignment.
(2) Select one
of
the four sample alignment conditions.
(3)
To
customize the scan conditions, select Customize conditions and
then click the Customize button.
Sa
mple Ali
gnmen
t (
Po
wder,
Bu
lk)
Sample alignment
con
d· ons
Attachment
.an
d sample plat
e:
5tanddrd + height reference sam
pl
e plate
•
No
height alignment
Set regis
tered
p
os
ition wrth
out
a
li
gnmen
t
Curv
ed
samp
le (Z sc
an
on
ly
}
Flat sample
•
Rllli
1.-
,,,
1
~1
Jt' ;
o;:
l' , e
<._
' 1
.-..---
l
,1
v'
Pu
t a sample ~very time
Ex
ecute OK
Ca
ncel
m~
For details on how to specify the conditions, click the v.button and refer to the help
topic that appears.
SmartLab SE Getting Started Guide
Rllgaku
Table of contents
Other Rigaku Measuring Instrument manuals