Road Angel Navigator 9000 User manual
USER GUIDE
Road Angel Group Ltd
Email: info@roadangelgroup.com
Web: www.roadangelgroup.com
Clark House
Silverstone Technology Park
Silverstone Circuit
Northants
NN12 8GX

Thank you for choosing the Navigator 9000, from Road Angel.
The Navigator 9000 was designed with the driver of the future in mind. Staying alert to
road and traffic conditions is a challenge -no matter how good a driver you are. That’s
why up-to-the-minute information is essential in making your journeys as safe and stress
free as possible. It’s also becoming increasingly important to be environmentally aware;
reducing those unnecessary and costly miles helps everyone.
That’s why we at Road Angel listen to our customers and keep track of the changes in
our industry. The ROAD ANGEL Navigator 9000 is a useful addition to any vehicle,
alerting you in advance to known hazards and providing point-to-point navigation. It is
simple-to-use and has a full-screen interface. The ROAD ANGEL Navigator 9000 uses a
comprehensive location database with information being included from the Police, Local
Authorities and Department for Transport regarding designated danger spots and safety
camera locations.
Using the latest Global Positioning Satellite (GPS) technology, ROAD ANGEL Navigator
9000 compares your position with the known danger spot locations and gives you an
audible and visual warning as you approach them. An accurate GPS speedometer in the
display gives you time to adjust your driving to the approaching danger.
The safety of you and your passengers is our prime consideration. As such, we at Road
Angel anticipate that your ROAD ANGEL Navigator 9000 will become your perfect
driving companion,enhancing the safety and enjoyment of your journey.
We hope you will be delighted with your ROAD ANGEL Navigator 9000. You are a
valued customer;we welcome feedback of your experiences with the product.
Dave Clark
Founder
Road Angel Group Ltd.

i
Table of Contents
1. Introduction....................................................................1
Unpacking the Box..................................................................................2
Subscriptions..........................................................................................4
Warranty..................................................................................................5
Security...................................................................................................5
Controls and Connectors........................................................................6
Inserting an SD Card..............................................................................7
The Reset Button ...................................................................................7
2. Registration....................................................................8
3. Putting It All Together..................................................10
4. Getting Started.............................................................12
Switching On for the First Time............................................................12
ROAD ANGEL Mode..............................................................................13
Understanding the Icons.......................................................................14
Navigation Mode ...................................................................................15
Tracking Mode .....................................................................................16
Browse Mode.......................................................................................17
Navigation Mode buttons......................................................................18
Changing back to ROAD ANGEL mode.................................................19

ii
5. Hazard Warnings..........................................................20
Camera Locations.................................................................................21
Camera Van Locations..........................................................................22
Traffic Alerts.........................................................................................23
Other Hazards......................................................................................24
Acting on an Alert .................................................................................24
6. Destinations and Routes.............................................25
Entering an Address..............................................................................26
If you know the postcode.......................................................................27
If you don’t know the postcode..............................................................28
Fine-tuning...........................................................................................29
Points of Interest (POI)..........................................................................30
Getting to a POI....................................................................................31
Favourites Options................................................................................33
Bookmarks...........................................................................................34
Recent..................................................................................................35
Trips.....................................................................................................36
Presets.................................................................................................37
Using the Map........................................................................................39
Planning your Route..............................................................................41
Routing and Waylists............................................................................44

iii
7. Getting There...............................................................45
Changing a Route..................................................................................47
Making a Detour...................................................................................48
Editing the Waylist................................................................................49
Traffic Reports ......................................................................................50
Traffic Rerouting...................................................................................51
8. Navigation Settings.....................................................52
Map Settings..........................................................................................53
About Info Layers.................................................................................54
Route Settings.......................................................................................55
General Settings....................................................................................57
9. Hazard and Device Settings........................................58
Hazard Settings.....................................................................................59
Audio...................................................................................................60
Distances.............................................................................................62
Alerts...................................................................................................63
Device Settings .....................................................................................64
Display Settings....................................................................................65
10. Adding and Deleting Danger Zones...........................66
Deleting zones.......................................................................................66
Adding new locations............................................................................67

iv
11. Updating the Database................................................69
Updating by PC/ActiveSync...................................................................70
12. Media and Remote Options.........................................71
Media Options........................................................................................72
Music ...................................................................................................72
Photos..................................................................................................73
Movie...................................................................................................74
Remote Options.....................................................................................75
Text Messages .....................................................................................75
Weather Reports...................................................................................77
13. Background Information.............................................78
About Global Positioning Satellites (GPS)............................................78
The ROAD ANGEL Database................................................................78
Using ROAD ANGEL Navigator 9000 Abroad ........................................79
Speed Cameras and Hazards................................................................80
Alert Icons and Audio Text....................................................................83
Safety...................................................................................................83
Cameras...............................................................................................84
Other....................................................................................................84
Traffic...................................................................................................85
14. Accessories..................................................................86
15. End User License Agreement .....................................87

1
1. Introduction
ROAD ANGEL Navigator 9000 uses the latest global positioning satellite technology
(based on the Sirf3 chipset) to give you point-to-point navigation information. It can alert
you to traffic problems on a planned route (using real-time traffic information received via
GPRS) and automatically calculate a new route to avoid the incident.
ROAD ANGEL Navigator 9000 displays a constantly updated and accurate speed
reading. Should you break down, ROAD ANGEL Navigator 9000 has RescueLoc, a
feature that allows you to pinpoint your location and direct rescue services to your
vehicle. There are audible and visible alerts as you approach hazardous sections of
road:
Accident black spots (as designated by the Police and Local Authorities)
Safety camera locations (including mobile vans)
Average speed monitoring zones
Primary schools
Congestion charging zones
Ungated railway crossings
Your unit, when it is switched on, receives updates automatically by GPRS: the wireless
data service available over the GSM network. You can also manually update your ROAD
ANGEL Navigator 9000 via an Internet-connected PC.
You can also use your ROAD ANGEL Navigator 9000 to:
Browse photos and watch videos
Listen to MP3 music files
Receive text messages and view weather reports.

2
IMPORTANT INFORMATION!
The directors of Road Angel Group Ltd sell ROAD ANGEL Navigator 9000 as a
road safety enhancement device. Driving within the speed limits at all times and
within the limitations of the road condition and your abilities is paramount. The
directors of Road Angel Group Ltd. take no responsibility for the use of ROAD
ANGEL Navigator 9000 for purposes other than those stipulated.
Placement
Position your ROAD ANGEL Navigator 9000 as low as possible on the screen so that it
does not impair your all-round visibility: we recommend you use either a central position
or by the A-post. The device should be mounted securely and all cables must be trained
via locations that do not impact any vehicle controls and importantly do not impede the
intended operation of any Air Bag zones. Do not leave the device in position when you
leave the vehicle unattended for security reasons (see page 5) and because it may suffer
heat damage if left in direct sunlight.
MOT Examinations
For vehicles undertaking MOT examinations, Road Angel or any dashboard mounted
device should either be removed, or adhere to the rules and regulations on positioning.
This normally restricts placement within the swept (windscreen wiper) area of the screen,
located as low as practical to minimise potential loss of visibility.
Safety
Road Angel driver safety and satellite navigation systems are designed with the sole
purpose of making drivers more aware of vehicle speed, the environment and potential
hazards ahead. To ensure Road Angel provides this information effectively and without
distraction, devices incorporate both visual and verbal instructions on the potential
hazard, along with in some cases, colour coded screens to remove the need for the
driver to take their eyes from the road ahead.
Under no circumstances, should Road Angel products be operated by the driver whilst
the vehicle is in motion. Road Angel devices are aimed at increasing driver awareness
and should always be considered secondary to the primary purpose of driving the
vehicle.

3
Unpacking the Box
Empty all the parts out of the box and familiarise yourself with each item. Each pack
contains:
Mains power adapter
Charge the unit before use
for cable-free operation.
12V/24V cigar socket lead
Connects unit to cigar socket for
in-car charging and power.
PC USB cable
Connectsunit to PC for
manual updating using
ActiveSync
Cradle with mounting bracket
ROAD ANGEL Navigator 9000 unit
Fitted with SD card

4
Subscriptions
Your ROAD ANGEL Navigator 9000 subscription allows your unit to receive weather
reports,traffic information and updates to its camera and accident blackspot database
(you can also subscribe to tracking of your device: for more details go to
http://www.roadangelgroup.com/).
Why do you need to subscribe for updates?
With constant additions to the ROAD ANGEL camera and accident blackspot
database (1000+ sites per year), the benefit of your ROAD ANGEL Navigator 9000
and the protection it provides will be dramatically reduced if you fail to remain
subscribed. In this instance, your automatic updates will be disabled.
It is critical to the operation of your ROAD ANGEL Navigator 9000 that your unit
updates regularly. In areas of low GPRS coverage, manual updates via Active Sync
may be necessary (see page 70).
How do you subscribe?
1. You will need to complete an online Direct Debit form after registration (see page 8)
in order for us to process your request. If you prefer, you may print the form and
post it to us (our address is on the front of this manual). Alternatively you can
telephone our subscriptions team on 01327 855586.
2. There are two subscription options: monthly or yearly. Current subscription rates
can be found at http://www.roadangelgroup.com/.
3. Once your account has been set up we will write to you to confirm details of when
your first payment will be due.
Please be aware that all subscriptions are non-refundable and non-transferable.
How long will it take to activate your subscription?
Once we have receipt of your Direct Debit instruction, the process will take less
than 24 hours.

5
Warranty
Your ROAD ANGEL Navigator 9000 is guaranteed for one year from the date of
purchase from all manufacturing defects that occur with normal use. If your unit fails to
perform as specified in these instructions, please visit:
http://www.roadangelgroup.com/warranty
You can also purchase extended warranty and theft-loss insurance. Visit
http://www.roadangelgroup.com/ for details.
Security
Owing to the high number of thefts, we strongly suggest you remove your ROAD ANGEL
Navigator 9000 and its bracket from view when you leave your vehicle. Security can also
be increased by cleaning any marks from your windscreen.

6
Controls and Connectors
These are the main features of your ROAD ANGEL Navigator 9000:
Stylus
External
Antennae
connector (covered)
USB
connector
On/Off button
Charging indicator LED:
Red –charging
Green –fully charged
Earphone
socket
SD Card slot
(see page 7)
Reset
button
7
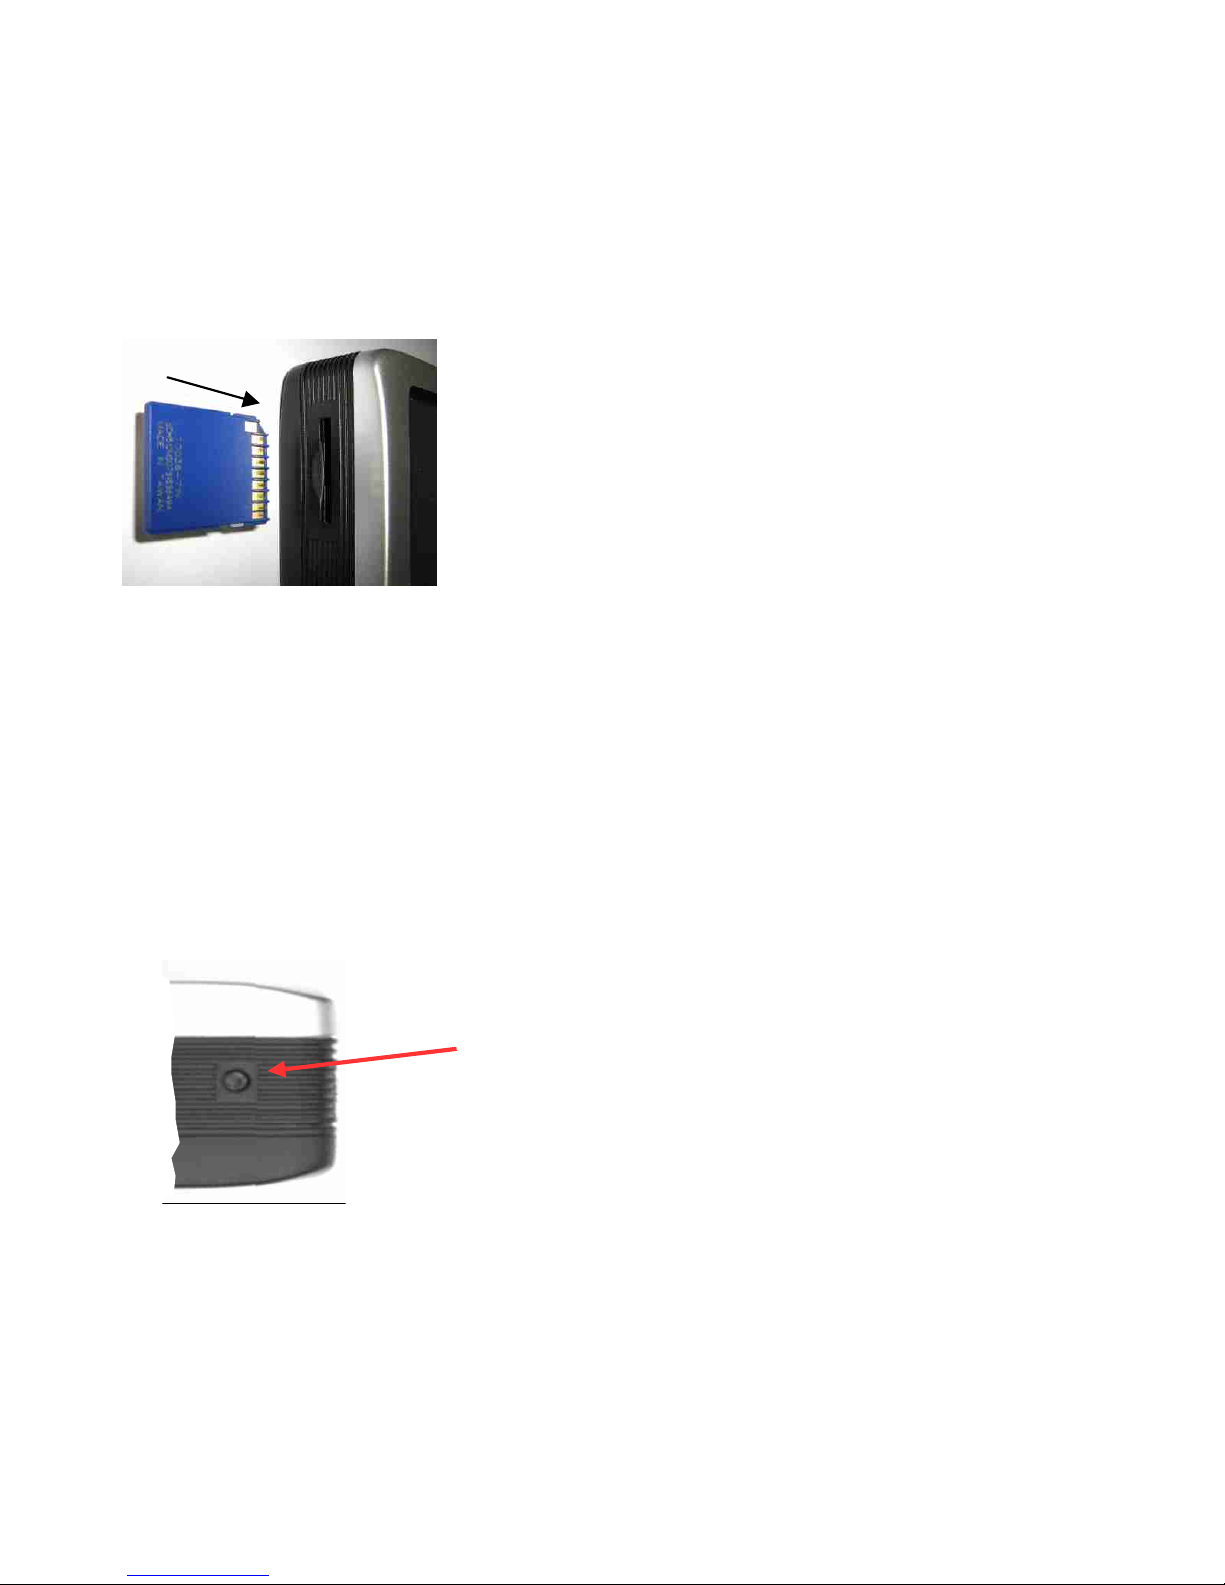
Inserting an SD Card
Insert as shown with SD card label facing to back of unit.
If you remove the card when the unit is in use you may receive an error message:”Fatal
Application Error.MobileNavigator.exe has performed an illegal operation and will be
shut down”. Press the Reset button and switch the unit back on to restart.
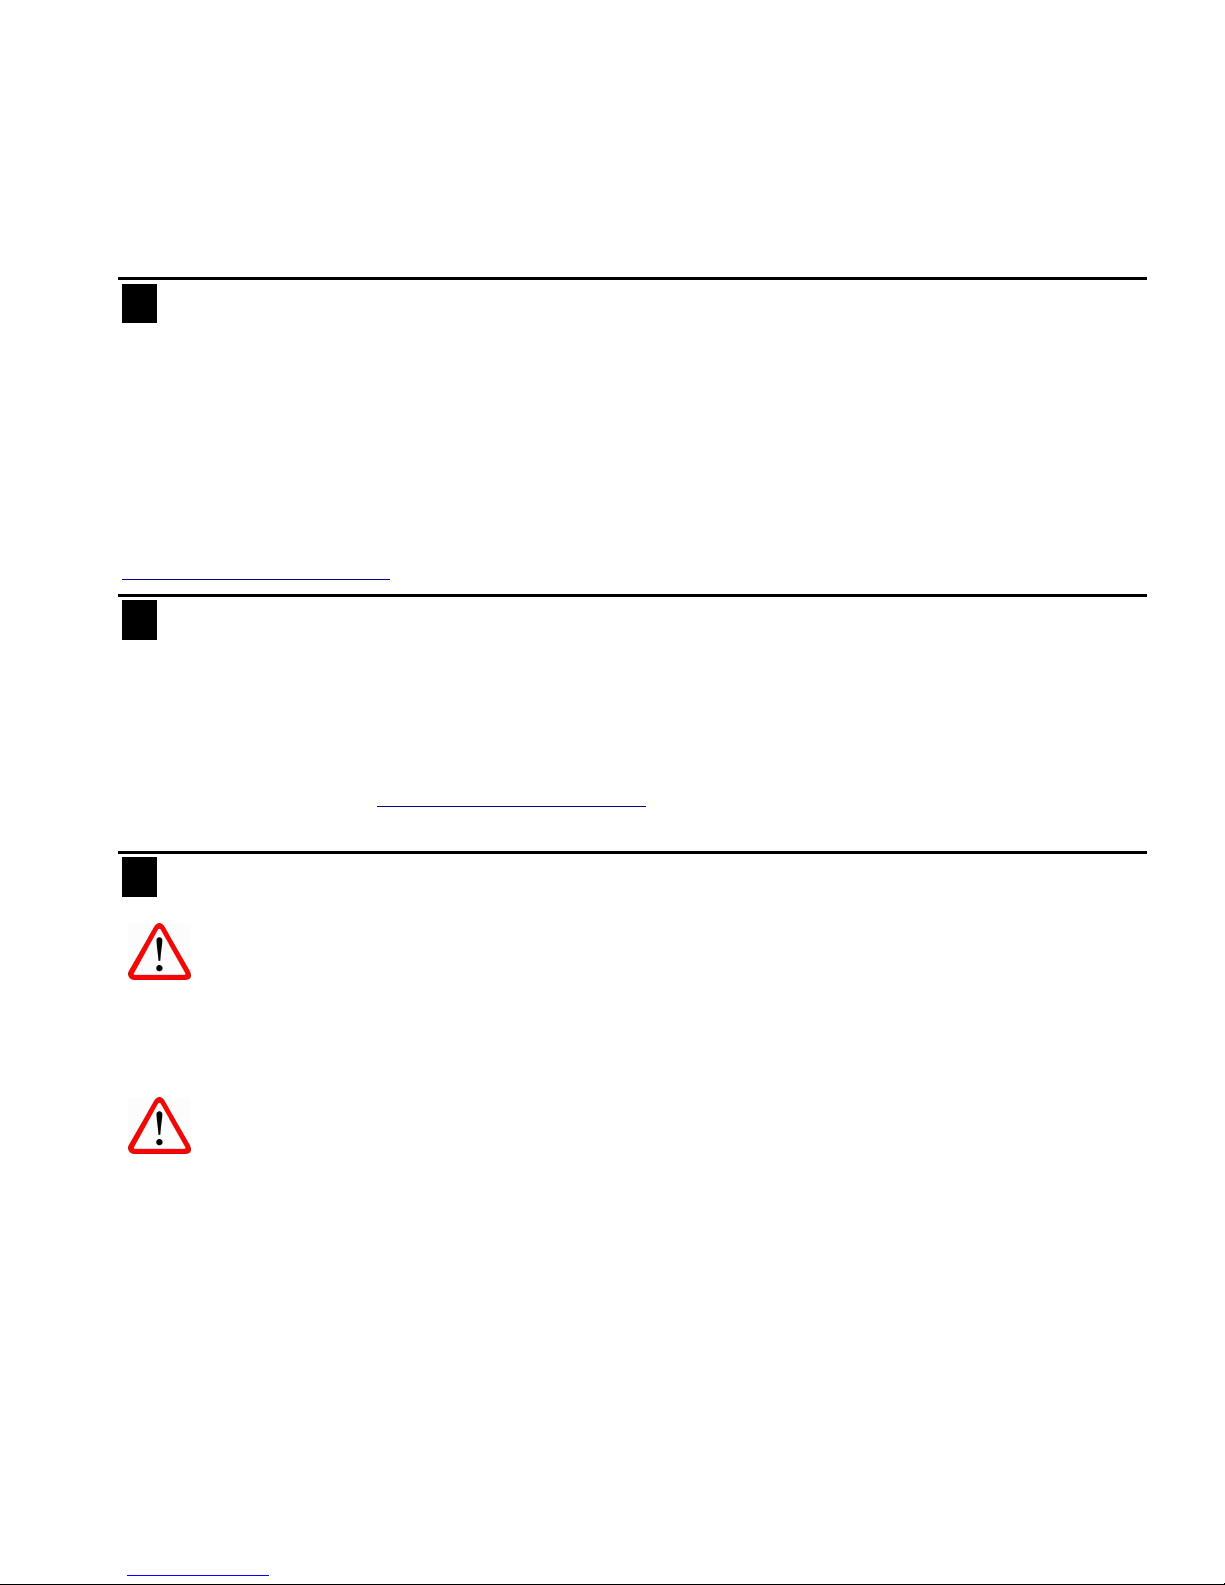
The Reset Button
Your ROAD ANGEL Navigator 9000 has a recessed reset button on its base. Use this:
If you have replaced the SD card, or
If you are having problems with your unit
Press the button using a pencil and then press the On/Off button to restart the unit.
Reset button

8
2. Registration
You can use your ROAD ANGEL Navigator 9000 straight out of the box but
to get the full benefit of up-to-the-minute safety, weather and travel
information you should register the unit, charge its internal battery and wait
for it to receive aSIM update.
Register your unit online:
1. Go to www.roadangelgroup.com
2. Click on the Product Registration link.
3. Follow the on-screen instructions.
You can also register by phone: call 01327
855586 (Mon-Fri 9am-5.30pm).
Charge the unit and get a SIM update:
1. Using the mains charger, connect your
ROAD ANGEL Navigator 9000 and
switch it on. Place it in a location where
there is a GSM signal (watch the phone
icon on the left of the screen as shown
below).
2. When your unit has been registered, it will receive a SIM update from Orange
within the next 24 hours (as long as the unit is on and has a GSM signal). This is
confirmed by a text message.
3. When you have received the SIM update, press the unit's Reset button and restart
your ROAD ANGEL Navigator 9000. Your unit will now receive updates
automatically.
Charging
in progress GSM
coverage
OK
No GSM
coverage Connected for
automatic
updates

9
Why should I register?
Registration is important for two reasons:
Yourunit cannot receive updatesuntil it has been registered.
Without registration, we cannot resolve warranty issues, log queries or solve problems with
your ROAD ANGEL Navigator 9000.
How do I update my ROAD ANGEL Navigator 9000?
Your unit receives updates automatically by GPRS. If you live in an area with low GPRS coverage,
you can update your ROAD ANGEL Navigator 9000 manually by connecting it to a PC using the
supplied USB cable. Please refer to the Updating the Database section on page 69 for details.
How much do updates cost?
Current subscription rates can be found at www.roadangelgroup.com.
10
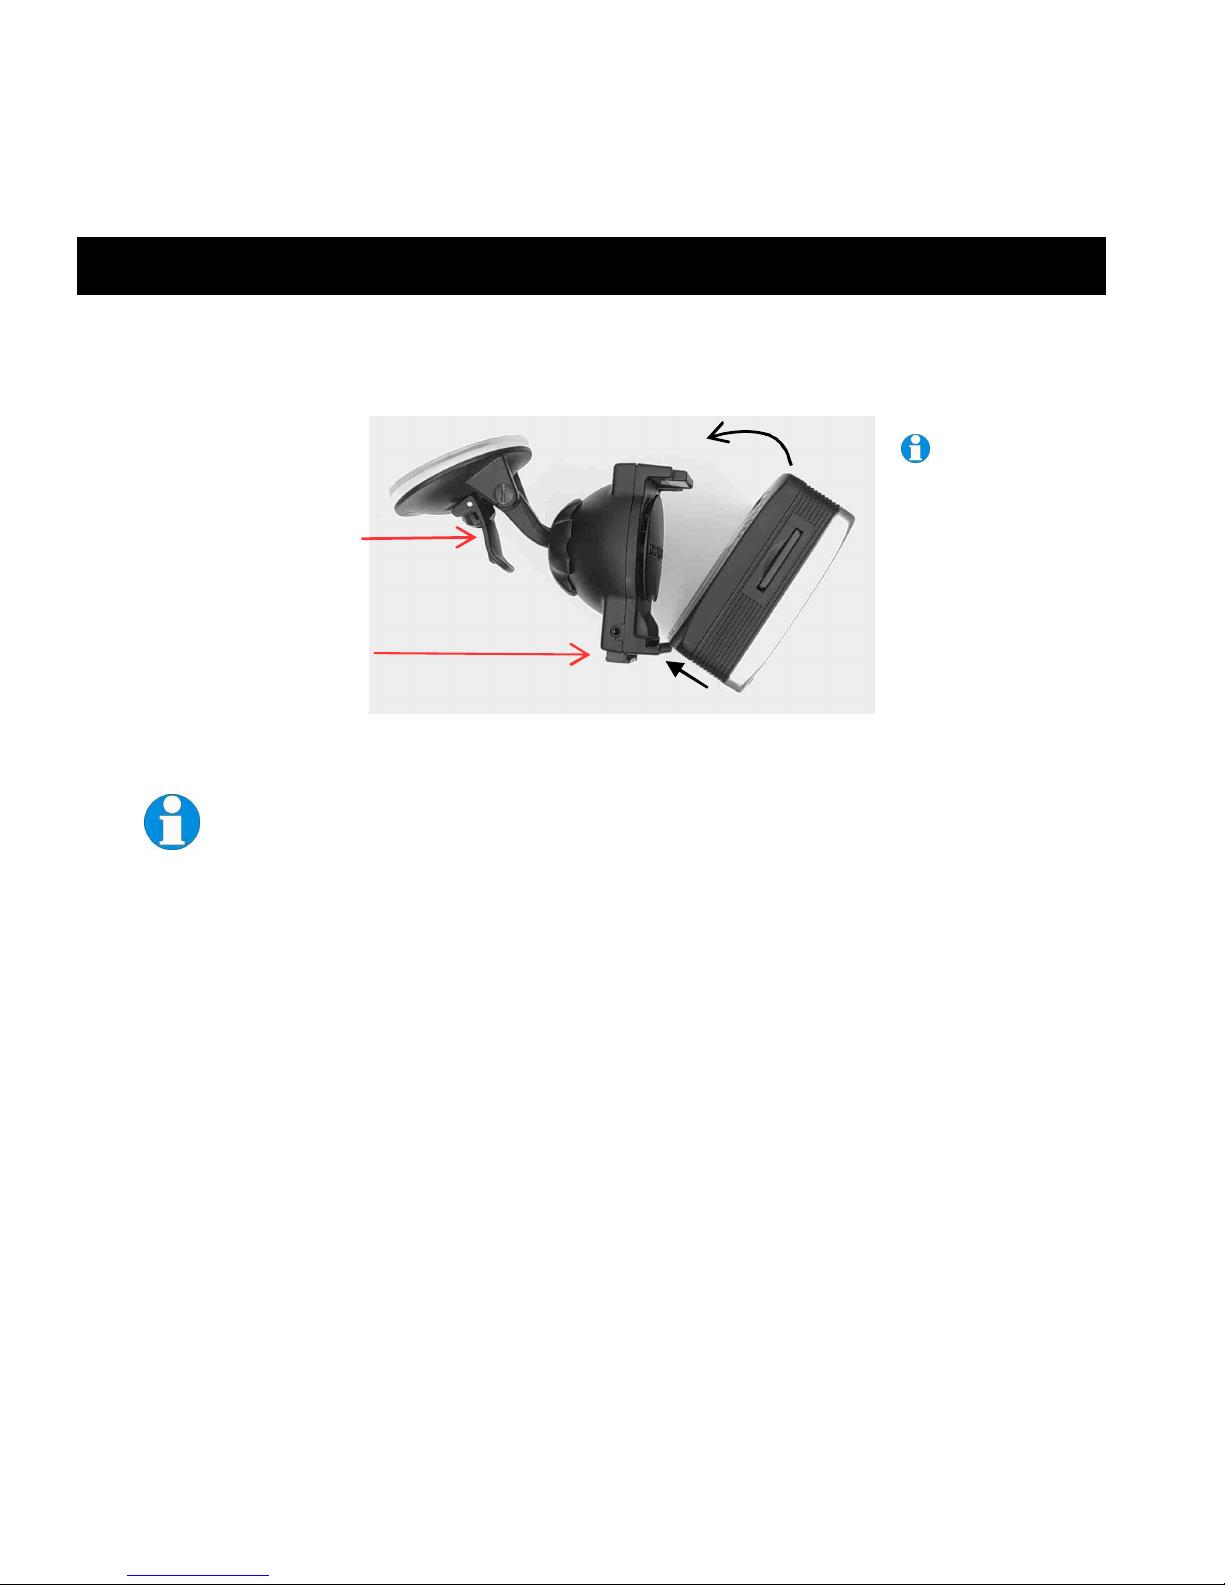
3. Putting It All Together
This section explains how to fit your ROAD ANGEL Navigator 9000 into your vehicle:
1. Align the groove on the bottom edge of the cradle with the slot under the ROAD
ANGEL Navigator 9000:
2. Straighten the ROAD ANGEL Navigator 9000 so that the connector on the top of
the cradle slots into the back of the unit.
To remove the ROAD ANGEL Navigator 9000, press the release button on
the base of the cradle and gently pull the top of the unit forwards.
3. Take the power lead, and plug it into the socket on the rear of the cradle.
4. Hold the suction cup against the windscreen. Adjust the position of the unit by
twisting the mounting bracket’s ball-and-socket joint so that you can clearly see the
screen without the assembly obscuring your view through the windscreen.
5. Pull the locking lever upwards to apply suction. For maximum adhesion, it may help
to dampen the suction cup beforehand.
6. Route the power cable to the cigar socket. Ensure that it does not interfere with any
of the vehicle's controls or airbag modules. If you use your cigar socket for any
other devices, a dual adaptor may be used.
You are now ready to use the unit for the first time.
Locking lever
Release button
If the bracket
should become
loose, ensure
the two side
screws on the
pivot arm are
fastened tightly.
11
Where should I put my ROAD ANGEL Navigator 9000?
ROAD ANGEL Navigator 9000 has a high sensitivity GPS antenna and requires a clear view of the
sky to receive information from GPS satellites. We highly recommend that ROAD ANGEL
Navigator 9000 is positioned in the centre of the front windscreen, low down, just above the
dashboard (see page 2). If screen glare is a problem in this position, try installing the unit beside the
driver's “A-pillar”. Check that the GPS reception operates correctly in this position.
If you want to install ROAD ANGEL Navigator 9000 anywhere else within your vehicle, you may
require an external GPS antenna. Please contact Road Angel Group Ltd or visit
www.roadangelgroup.com for details.
My car has a UV/heated windscreen
UV screens block GPS signals from entering the vehicle, stopping ROAD ANGEL Navigator 9000
from acquiring its position. This can be a problem with certain models of vehicle, i.e. BMW,
Mercedes, Renault, Peugeot & Citroen. Heated screens can also affect GPS signal strength.
If your vehicle has a UV or heated screen, you may need an external antennae (please contact Road
Angel Group Ltd or visit www.roadangelgroup.com for details). Most vehicles fitted with a UV
screen have a defined section behind the rear view mirror where you can fit the antennae.
Can I hardwire the unit?
ROAD ANGEL Navigator 9000 has a 5V regulator built into its power cable.
If the cable is cut and used to hardwire the unit into the vehicle, you will
damage the ROAD ANGEL Navigator 9000.
To hardwire ROAD ANGEL Navigator 9000 into your vehicle, purchase a cigar socket; wire this
into the power system and use with the supplied cable.
Consult an auto electrician if you are unsure how to carry out this
procedure as incorrect hardwiring may affect the validity of vehicle and
product warranty. Consult vehicle manufacturer if in doubt.
12
4. Getting Started
Switching On for the First Time
1. Park your vehicle so that ROAD ANGEL Navigator 9000 has a clear view of the sky
away from obstacles such as tall buildings and over-hanging trees (these may
delay or prevent satellite acquisition).
2. Switch the ROAD ANGEL Navigator 9000 on by pressing the button on the top of
the unit (see page 6).
3. If a “Please Register” prompt is displayed, tap on the Continue button. If you have
registered the unit, it will update itself automatically when it establishes GPRS
connectivity.
If the unit continues to show the “Please Register...” screen at startup, you
may need to update the database manually (see page 70).
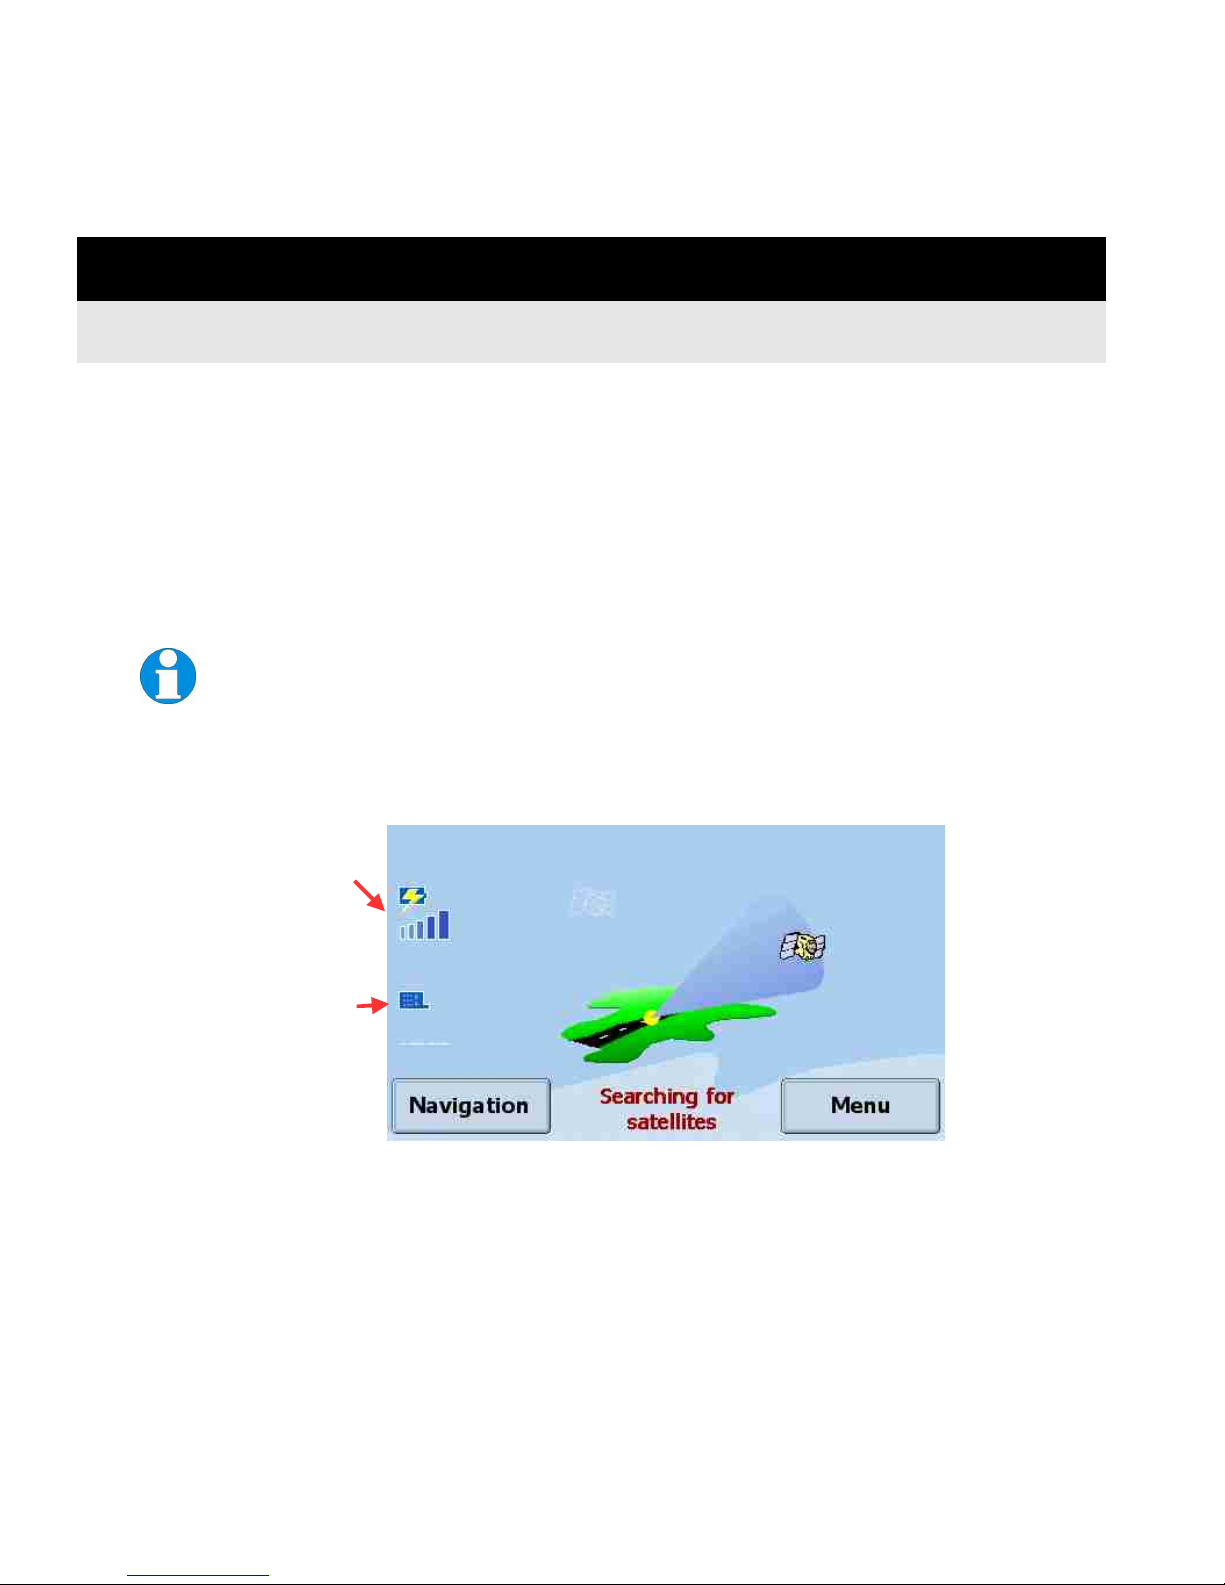
4. ROAD ANGEL Navigator 9000 now tries to identify its location by acquiring
information from GPS satellites. This may take a few minutes. During the
procedure, the unit displays the following screen.
Battery
charging
(see page 14)
GSM coverage
(see page 14)
13
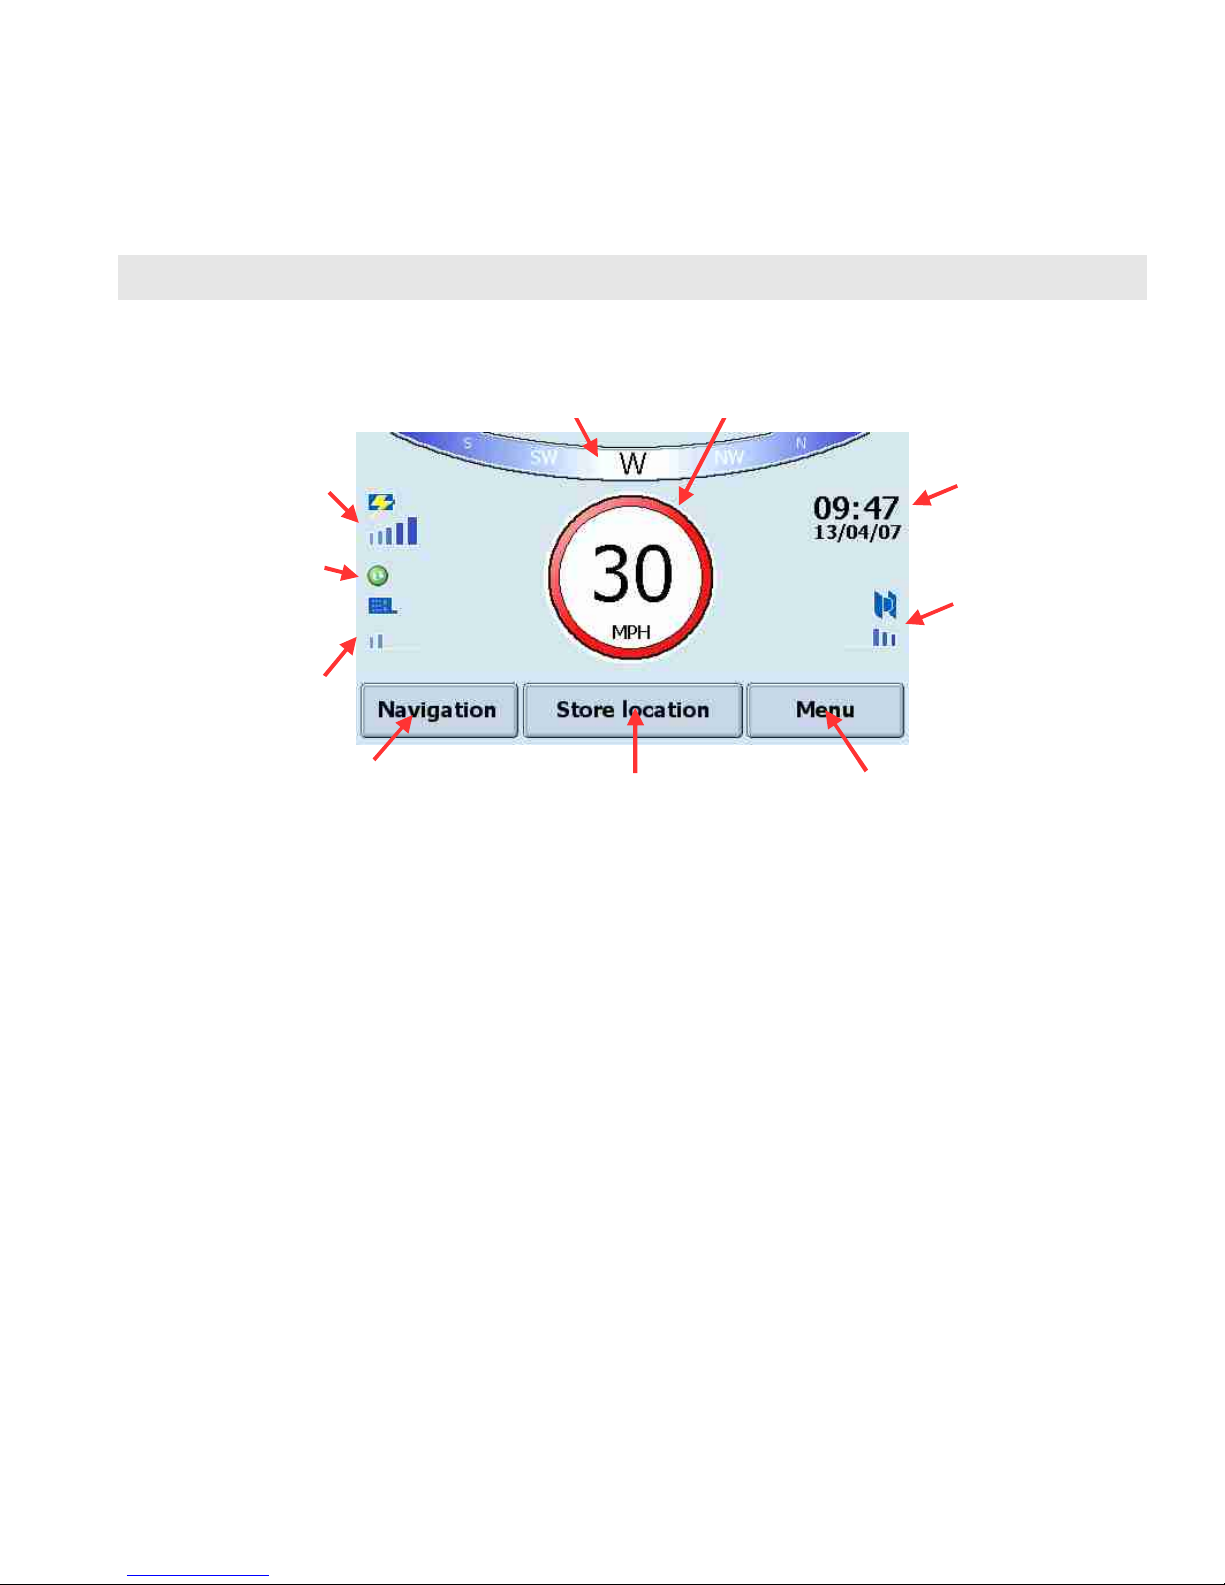
ROAD ANGEL Mode
When ROAD ANGEL Navigator 9000 has identified its position it displays the full screen
ROAD ANGEL mode:
In this mode, you can start driving and ROAD ANGEL Navigator 9000 will show you your
speed and compass heading. If you are approaching a known hazard, it will alert you to
the type and proximity of the hazard (see page 20).
Alternatively, if you want ROAD ANGEL Navigator 9000 to guide you to your destination,
or to view on-screen map information, tap on the Navigation button to change to
Navigation mode. The first time you do this, you will be prompted to choose the
language, voice and time zone for the unit.
You can explore the Media and Remote functions of your ROAD ANGEL Navigator 9000
by tapping on the Menu button (see page 71 - please also read the important safety
information on page 2)
Battery charge
(see page 14)
Update icon
(see page 14)
GSM coverage
(see page 14)
Time &
date
Satellite
reception
(see page 14)
M
enu
button
Access Photo, Music
and Settings
Store location
button
Add current location to
unit’s camera database
Navigation
button
Switch to
Navigation mode
Heading
Speed

14
Understanding the Icons
This table explains the meanings of the icons used on the Searching for satellites and
ROAD ANGEL mode screens:
Battery charging Battery strength GSM network
coverage GPS Satellite
coverage
20% Critical -
charge
unit
Starting up Low
satellite
coverage
40% 20% No signal
60% 40% Error
80% 60% Ready -
poor signal
100% 80% Ready -
low signal Good
satellite
coverage
Update status 100% Ready -
average
signal
Connected via
GPRS Ready -
good
signal
Connected via
ActiveSync Ready -
excellent
signal
Table of contents
Other Road Angel GPS manuals

Road Angel
Road Angel 6000 User manual

Road Angel
Road Angel Pure User manual

Road Angel
Road Angel Gem+ User manual

Road Angel
Road Angel Navigator User manual

Road Angel
Road Angel Pure User manual

Road Angel
Road Angel Trac-it User manual

Road Angel
Road Angel Pure User manual

Road Angel
Road Angel HALO VISION User manual


