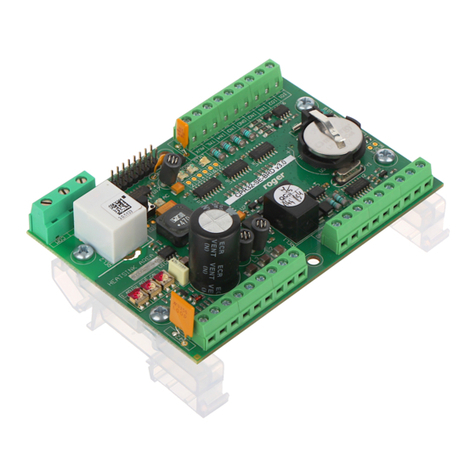
Roger MC16 User manual

MC16 Operating Manual 09.01.2020
Roger Access Control System
MC16 Operating Manual
Product version: 1.0
Firmware version: 1.6.4 and newer
Document version: Rev. A

MC16 Operating Manual 09.01.2020
2/52
1. DESIGN AND APPLICATION
MC16 is access and building automation controller dedicated to RACS 5 system. The controller is offered in
multiple versions and its functionalities are determined by license file on its memory card. The MC16 is
offered as hardware module, controller or as an element of MC16-PAC-KIT which facilitates the installation
and design of RACS 5 system. After the connection of MCT readers and MCX expanders, the controller can
be applied in access control, Time&Attendance, hotel and building automation. The MC16 can control
doors, elevators, lockers (cabinets) and car parks. The controller offers advanced and efficient methods for
management of users and their authorisations (rights). The configuration of controllers in a system is
performed concurrently via LAN/WAN and the total number of controllers does not affect configuration time.
The controller is managed with VISO software which enables operation with local Microsoft SQL Server
Compact database or centralized Microsoft SQL Server database. The system can be managed from
multiple workstations with VISO software by operators with various rights. The communication with MC16
controllers in LAN/WAN is encrypted according to AES128 CBC.
Characteristics
Access controller in RACS 5 system
8 parametric EOL inputs
6 transistor outputs 15VDC/150mA
2 relay outputs 30V/1,5A DC/AC
18VAC, 12VDC and 24VDC power supply
Built-in 12VDC/1,2A power supply unit
Backup battery charging and monitoring
Ethernet communication interface
Encrypted data transmission (AES128 CBC)
Peripheral devices interfaces: RS485, RACS CLK/DTA, Wiegand
8 million event buffer on memory card
Power supply
MC16 controller can be supplied from 230VAC/18VAC transformer with minimal power output 20VA, from
12VDC PSU or from 24VDC PSU. The connection of power supply is shown in fig. 1.
If MC16 controller is supplied with 18VAC or 24VDC, then 12V backup battery can be connected in order to
provide power supply in case of mains supply shortage.
The controller charges backup battery with 300 mA stabilized current up to 13.8V. Backup power supply is
activated automatically in case of main powers supply shortage. If the voltage at backup battery drops below
approx. 10V then the battery is automatically disconnected from MC16 and remains disconnected until
mains power supply returning.
In case of 12VDC power supply, backup battery cannot be directly connected to MC16 and in such case
backup power supply must be provided by 12VDC power supply unit. In case of maximal load at supply
outputs AUX (1A) and TML (0.2A), the controller requires 20W power.
Note: It is recommended to install MC16-PAC controllers within MC16-PAC-KITs which include power
supplies for the controller and door devices. More information on kits power supply is given in their manuals.

MC16 Operating Manual 09.01.2020
3/52
Fig .1 MC16 power supply
Ethernet interface
The communication between MC16 controller and PC is performed via LAN/WAN and it is encrypted
according to AES128 CBC. Communication key is defined by system operator.
In case of controller with firmware 1.3.2 and older two IP addresses i.e. service IP address and normal IP
address were used where Service IP address for low level configuration was stored in IP.ini file on memory
card and it could be modified by manual editing of IP.INI file. In firmware 1.4.2 and newer only single IP
address is used both for low level and high level configuration and there is no need to modify IP.ini file
manually on memory card. Factory default IP address of controller is 192.168.10.213 and it can be changed
with RogerVDM software within low level configuration.
Note: The device has an Ethernet network communication interface. In principle, the device can be used in
both WAN and LAN, while the manufacturer's warranty is covered only for operation in an isolated LAN
reserved exclusively for the access control system or other system in which the device is to be used.
RS485 bus
The communication of MCT and MCX series peripheral devices with MC16 access controller is provided
with RS485 bus which can encompass up to 16 of such devices, each with unique address in range of 100-
115. The bus topology can be freely arranged as star, tree or any combination of them except for loop. The

MC16 Operating Manual 09.01.2020
4/52
matching resistors (terminators) connected at the ends of transmitting lines are not required. In most cases
communication works with any cable type (standard telephone cable, shielded or unshielded twisted pair
etc.) but the recommended cable is unshielded twisted pair (U/UTP cat.5). Shielded cables should be limited
to installations subject to strong electromagnetic interferences. The RS485 communication standard used in
the RACS 5 system guarantees proper communication in a distance of up to 1200 meters as well as high
resistance to interferences.
Communication protocol on RS485 bus of MC16 controller applies proprietary encryption algorithm which is
based on 32b encryption key and it is protected against replication by third party devices.
Note: Do not use more than single pair in UTP cable for RS485 communication bus.
RACS CLK/DTA interface
RACS CLK/DTA interface can be used for communication of controller with older type PRT series terminals.
Up to 4 such devices can be operated via RACS CLK/DTA interface, each with unique address in range of
0-3. Prior to connection of PRT readers it is necessary to make low level configuration of the MC16 and
activate the operation with such readers.
Wiegand interface
Wiegand interface can be used for communication of controller with third party readers. The communication
is performed via controller inputs (IN1-IN8) and up to 4 Wiegand readers can be operated by MC16
controller. Prior to connection of Wiegand readers it is necessary to make low level configuration of the
MC16 and activate the operation with such readers. Input lines which are reserved for Wiegand
communication cannot be used for any other purposes. The controller can operated with Wiegand readers
also via MCX402 and MCX102 expanders.
LED indicators
MC16 controller is equipped with 8 LED indicators on it board. The function of each LED is explained in
table 3.
Inputs
The controller offers 8 general purpose parametric inputs type NO/NC/EOL/DW. Input types and electric
parameters such as response time and parametric resistors are defined within low level configuration
(RogerVDM). Input functions are assigned within high level configuration (VISO). It is possible to double the
number of inputs (3EOL/DW type) and to assign multiple functions to the same input at the same time.
The controller can monitor not only inputs on its board but also inputs located at peripheral devices (MCT,
MCX).
Table 1. Input types
NO input
NC input

MC16 Operating Manual 09.01.2020
5/52
NO input can be in normal or in triggered state. In
normal state CAcontacts are opened. Input
triggering is caused by CAcontacts closing.
NC input can be in normal or in triggered state. In
normal state CAcontacts are closed. Input triggering
is caused by CAcontacts opening.
EOL/NO input
EOL/NC input
EOL/NO input can be in normal, triggered or tamper
(sabotage) state. In normal state CAcontacts are
opened. Input triggering is caused by CAcontacts
closing. The change of measured RTamper resistance
in normal state indicates the tamper (sabotage)
state.
EOL/NC input can be in normal, triggered or tamper
(sabotage) state. In normal state CAcontacts are
closed. Input triggering is caused by CAcontacts
opening. The change of measured RTamper
resistance in normal state indicates the tamper
(sabotage) state.
2EOL/NO input
2EOL/NC input
2EOL/NO input can be in normal, triggered, tamper
(sabotage) or malfunction state. In normal state CA
contacts are opened, while CTcontacts are closed.
Input triggering is caused by CAcontacts closing. CT
contacts opening is recognized as the tamper
(sabotage) state. Input shorting to the ground is
recognized as the malfunction state.
2EOL/NC input can be in normal, triggered, tamper
(sabotage) or malfunction state. In normal state CA
and CTcontacts are closed. Input triggering is
caused by CAcontacts opening. CTcontacts
opening is recognized as the tamper (sabotage)
state. Input shorting to the ground is recognized as
the malfunction state..

MC16 Operating Manual 09.01.2020
6/52
3EOL/NO input
3EOL/NC input
3EOL/NO input can be in normal, triggered,
masking, triggered with masking, tamper (sabotage)
or malfunction state. In normal state CAand CB
contacts are opened while CTcontacts are closed.
Input triggering is caused by CAcontacts closing. CB
contacts closing is recognized as the masking state.
Simultaneous closing of CAand CBcontacts is
recognized as the triggered with masking state. CT
contacts opening is recognized as the tamper
(sabotage) state. Input shorting to the ground is
recognized as the malfunction state.
3EOL/NC input can be in normal, triggered,
masking, triggered with masking, tamper (sabotage)
or malfunction state. In normal state CA, CBand CT
contacts are closed. Input triggering is caused by CA
contacts opening. CBcontacts opening is
recognized as the masking state. Simultaneous
opening of CAand CBcontacts is recognized as the
triggered with masking state. CTcontacts opening is
recognized as the tamper (sabotage) state. Input
shorting to the ground is recognized as the
malfunction state.
3EOL/DW/NO input
3EOL/DW/NO input is operated in the same way as
3EOL/NO input with the exception that masking
state i.e. CBclosing is interpreted as triggering of the
second input. In VISO software DW input type is
represented by two independent inputs. Each can
be used for different purpose and assigned with
different function.
3EOL/DW/NC input
3EOL/DW/NC input is operated in the same way as
3EOL/NC input with the exception that masking
state i.e. CBopening is interpreted as triggering of
the second input. In VISO software DW input type is
represented by two independent inputs. Each can
be used for different purpose and assigned with
different function.
Parametric resistors
The same values of parametric resistors are used for all inputs i.e. 1kΩ; 1,2kΩ; 1,5kΩ; 1,8kΩ; 2,2kΩ; 2,7kΩ;
3,3kΩ; 3,9kΩ; 4,7kΩ; 5,6kΩ; 6,8kΩ; 8,2kΩ; 10kΩ; 12kΩ. Tamper resistor defines a value of resistor used to
detect the tamper (sabotage) state. Alarm A resistor defines a value of resistor used to detect triggered
state. Alarm B resistor defines a value of resistor used to detect an additional triggering state of 3EOL/DW
input type or masking state of 3EOL input type. Alarm A resistor value must differ from value of Alarm B
resistor at least by three positions in the list above. Total resistance of wire used to connect contacts to input
should not exceed 100 Ω. Default values of parametric resistors:
Tamper = 1 kΩ
Alarm A = 2,2 kΩ
Alarm B = 5,6 kΩ
Response time
Response time parameter defines minimal impulse time on the input which triggers the input. Each input can
be configured individually in range of 50 to 5000 ms within low level configuration (RogerVDM).

MC16 Operating Manual 09.01.2020
7/52
Outputs
The controller offers 6 transistor open collector type outputs (15V/150mA rated) and 2 relay outputs with
NO/NC contacts (30V/1.5A DC/AC rated). Additionally 2 transistor outputs CLK and DTA are available if
they are not used for RACS CLK/DTA interface. Electric parameters such as polarity are configured within
low level configuration (RogerVDM). Function are assigned to outputs within high level configuration (VISO).
Multiple functions with different priorities can be assigned to the same output at the same time.
The controller can activate not only outputs on its board but also outputs located at peripheral devices
(MCT, MCX).
Memory card and license
The controller is equipped with FLASH memory card which among others offers event buffer (8 million) and
it stores license file and configuration of the controller. Memory card and adequate license are necessary for
controller functioning. If needed, the license.cfg file can be copied manually into memory card by means of
memory card reader or in case of license upgrade it can be uploaded from VISO software by right clicking
the controller and then selecting Commands->Upload license file.
2. INSTALLATION
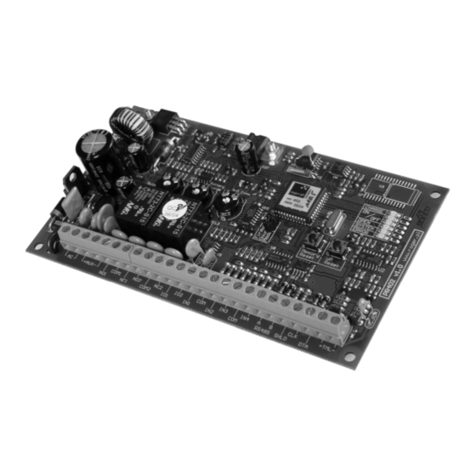
Fig. 2 MC16 controller board
Table 2. MC16 screw terminals
Name
Description
BAT+, BAT-
Backup battery
AC, AC
18VAC or 24VDC input supply
AUX-, AUX+
12VDC/1,0A output supply (door lock)
TML-, TML+
12VDC/0,2A output supply (readers)
IN1-IN8
Inputs
GND
Ground
OUT1-OUT6
15VDC/150mA transistor output lines
A1,B1
RS485 bus
CLK, DTA
RACS CLK/DTA interface

MC16 Operating Manual 09.01.2020
8/52
A2,B2
Not used
NO1, COM1, NC1
30V/1,5A DC/AC relay (REL1)
NO2, COM2, NC2
30V/1,5A DC/AC relay (REL2)
Table 3. LED indicators
Name
Description
LED1
Normal mode
LED2
ON: Service mode (low level configuration)
Pulsing: RAM or Flash SPI memory error
LED3
ON: High level configuration error
Pulsing: Low level configuration error
LED4
No card or memory card error
LED5
Event log error
LED6
License error
LED7
Not used
LED8
Pulsing: Proper functioning
Fig. 3 Typical connection diagram for MC16-PAC-1 controller with MCT readers

MC16 Operating Manual 09.01.2020
9/52
Note: The elementary installation scenario with single door controller and MCT series readers is shown in
fig. 3. Other installation scenarios are shown in AN002, AN029, AN030, AN031 and AN033 application
notes and MC16-PAC-x-KIT installation manuals.
Installation guidelines
Install device in such way as to ensure easy access to its screw terminals, sockets and memory
card.
All electrical connections must be done with disconnected power supply.
All devices connected to the same communication bus (RS485 and RACS CLK/DTA) should be
connected to the same negative potential (GND). Therefore all GND terminals from various power
supply units used in the system should be connected with each other.
Before the decision on using the device, it is recommended to carry out tests confirming the
satisfactory quality of its operation in the target LAN / WAN network. This note does not apply to
isolated LANs reserved exclusively for the access control system (or other system in which the
device is to be used) in which the operation of the device is covered by the manufacturer's warranty.
It should be assumed that a positive test result is not a guarantee of the correct operation of the
device or system because the conditions in the network can change significantly and/or be subject
to cyber attacks.
3. LOW LEVEL CONFIGURATION AND CONTROL
Low level configuration (RogerVDM)
The purpose of low level configuration is to prepare device for operation in RACS 5 system. During initial
low level configuration define own IP address and communication key. Programming of other parameters
depends on the individual installation scenario requirements and is not obligatory.
Programming procedure with RogerVDM software (firmware 1.4.2 or newer)
1. Connect the controller to Ethernet network and define IP address of your computer with RogerVDM
software in the same network as the controller with default IP address 192.168.0.213.
2. Start RogerVDM software, select MC16 v1.x device, firmware version and Ethernet communication
channel.
3. Select from the list or enter manually the IP address of controller, enter 1234 communication key and
establish connection with the controller.
4. In the top menu select Tools and Set communication key to define your own password for MC16
controller.
5. In IP address field define own address for the controller.
6. If the controller is supposed to operate with PRT series and/or Wiegand readers then activate them
7. Optionally enter comments for controller objects to facilitate their identification during further
configuration of the system.
8. Optionally make a backup by clicking Send to File…
9. Click Send to Device to update the configuration of the controller an disconnect selecting Device in the
top menu and then Disconnect.
Low level configuration procedure (firmware 1.3.2 or older):
1. Connect the controller to Ethernet network and define IP address of your computer with RogerVDM
software in the same network as the controller with default IP address 192.168.0.213.
2. Disconnect power supply.
3. Short CLK and DTA lines.
4. Restore power supply, all LED1-8 will flash and then wait min. 6s.
5. Remove connection between CLK and DTA lines (LEDs stop flashing, LED2 is ON).
6. Start RogerVDM software, select MC16 v1.x device, firmware version and Ethernet communication
channel.
7. Enter the Service IP Address (it is specified in IP.INI file on the controller’s memory card), enter the
communication key (factory key is 1234) and establish connection with the controller.
8. In the top menu select Tools and Set communication key to define your own password for MC16
controller.
9. In IP address field define own address for the controller.
MC16 Operating Manual 09.01.2020
10/52
10. If the controller is supposed to operate with PRT series and/or Wiegand readers then activate them
11. Optionally enter comments for controller objects to facilitate their identification during further
configuration of the system.
12. Optionally make a backup by clicking Send to File…
13. Click Send to Device to update the configuration of the controller an disconnect selecting Device in the
top menu and then Disconnect.
Note: In case of modifying low level configuration for controller which is operated in existing installation,
additionally start VISO software detect again the controller, replace and synchronise settings according to
AN015 application note.
Table 4. Low level configuration parameters
Communication
IP address
Device IP address.
Default gateway
Gateway IP address.
Subnet mask
Subnet mask.
RS485 answer timeout [ms]
Parameter defines maximal delay for peripheral device response on
RS485 bus. Range: 25-500. Default value: 250.
RS485 encryption
Parameter enables encryption on RS485 bus. Range: [0]: No, [1]:
Yes. Default value: [0]: No.
RS485 encryption key
Parameter defines key for encryption of communication at RS485
bus. Range: 4-16 ASCII characters.
RACS CLK/DTA readers
Terminal 1 (RACS CLK/DTA ID0)
Parameter enables PRT series reader with ID=0 address. Range: [0]:
OFF, [1]: ON. Default value: [0]: OFF.
Terminal 2 (RACS CLK/DTA ID1)
Parameter enables PRT series reader with ID=1 address. Range: [0]:
OFF, [1]: ON. Default value: [0]: OFF.
Terminal 3 (RACS CLK/DTA ID2)
Parameter enables PRT series reader with ID=2 address. Range: [0]:
OFF, [1]: ON. Default value: [0]: OFF.
Terminal 4 (RACS CLK/DTA ID3)
Parameter enables PRT series reader with ID=3 address. Range: [0]:
OFF, [1]: ON. Default value: [0]: OFF.
Wiegand readers
Terminal 5 (Wiegand 1)
Parameter enables Wiegand reader on IN1/IN2 inputs. Range: [0]:
OFF, [1]: ON. Default value: [0]: OFF.
Terminal 6 (Wiegand 2)
Parameter enables Wiegand reader on IN3/IN4 inputs. Range: [0]:
OFF, [1]: ON. Default value: [0]: OFF.
Terminal 7 (Wiegand 3)
Parameter enables Wiegand reader on IN5/IN6 inputs. Range: [0]:
OFF, [1]: ON. Default value: [0]: OFF.
Terminal 8 (Wiegand 4)
Parameter enables Wiegand reader on IN7/IN8 inputs. Range: [0]:
OFF, [1]: ON. Default value: [0]: OFF.
Wiegand format
Parameter defines data format from Wiegand readers. Range: [0]:
Auto, [1]: Without control bits, [2]: Without extreme bits, [3]: With
control bits. Default value: [0]: Auto.
Terminal settings
Terminal 1-8: Type and class
Parameter defines type and class of authentication factor returned by
terminal. Default value: 0x00100001.
Terminal 1-8: Keypad type
Parameter defines terminal keypad type. Range: [0]: OFF, [1]: Digits,
[2]: Digits 2F, [3]: Digits 4F, [4]: PIN only. Default value: [4]: Only PIN.

MC16 Operating Manual 09.01.2020
11/52
Terminal 1-8: Keypad timeout
Parameter defines terminal keypad timeout. Range: 0-10000. Default
value: 10000.
Input types
IN1-IN8
Parameter defines type of input lines. Range: [1]: NO, [2]: NC, [3]:
EOL/NO, [4]: EOL/NC, [5]: 2EOL/NO, [6]: 2EOL/NC, [7]: 3EOL/NO,
[8]: 3EOL/NC, [9]: 3EOL/DW/NO, [10]: 3EOL/DW/NC. Default value:
[1]: NO.
Input response times
IN1-IN8 [ms]
Parameter defines minimal duration of pulse which is required to
trigger the input. Range: 50-5000. Default value: 300.
Parametric (EOL) input resistances
Tamper [Ohm]
Parameter defines Tamper resistor for parametric (EOL) inputs.
Default value: 1k.
Alarm A [Ohm]
Parameter defines Alarm A resistor for parametric (EOL) inputs.
Default value: 2.2k.
Alarm B [Ohm]
Parameter defines Alarm B resistor for parametric (EOL) inputs.
Default value: 5.6k.
Output reversed polarity
OUT-OUT6, REL1, REL2, CLK,
DTA
Parameter defines default output status. Range: [0]: No, [1]: Yes.
Default value: [0]: No.
Output functions
OUT1-OUT6, REL1, REL2, CLK,
DTA
Parameter defines output function which can be used to control
Wiegand terminal.
Advanced settings
Battery test period [s]
Parameter defines time between successive battery tests. Default
value: 600
AC lost delay [s]
Parameter defines time after which lost AC supply is reported.
Default value: 300.
Device comments
DEV comment
Parameter defines any text or comment which corresponds to the
device. It is later displayed in VISO program.
Configuration ID
Unique number which corresponds to current low level configuration
of device.
Power supply comments
PWR
Parameter defines any text or comment which corresponds to the
object. It is later displayed in VISO program.
Terminal comments
Terminal 1-8
Parameter defines any text or comment which corresponds to the
object. It is later displayed in VISO program.
Input comments
IN1-IN8
Parameter defines any text or comment which corresponds to the
object. It is later displayed in VISO program.
Output comments
OUT1-OUT6, REL1, REL2, CLK,
DTA
Parameter defines any text or comment which corresponds to the
object. It is later displayed in VISO program.

MC16 Operating Manual 09.01.2020
12/52
Memory reset
Memory reset erases all low level configuration settings including empty communication key and default
192.168.0.213 IP address of the controller. In case of firmware 1.3.2 or older the service IP address remains
unchanged and is still kept in IP.INI file on the memory card.
Memory reset procedure:
1. Disconnect power supply.
2. Short CLK and IN4 lines.
3. Restore power supply, all LED1-8 will flash and then wait min. 6s.
4. Remove connection between CLK and IN4 lines (LEDs stop flashing, LED2 is ON).
5. Wait approx. 1.5 min till LED5+LED6+LED7+LED8 are flashing.
6. Restart the controller (switch power supply off and on)
7. Start low level configuration.
Note: In case of controller with firmware 1.4.2, for the first time make low level configuration as in case of
controller with firmware 1.3.2.
Firmware update
New firmware can be uploaded to the controller using RogerVDM software or directly via memory card.
Make a backup of low level configuration and save the settings to file as firmware update usually restores
factory default settings and erases communication key. The file with the latest firmware is available at
www.roger.pl.
Firmware update procedure (RogerVDM):
1. Establish connection with the controller using RogerVDM software.
2. Make a backup of low level configuration by clicking Send to File…
3. In the top menu select Tools and then Update Firmware.
4. Select firmware file and click Update.
5. After firmware upload wait till LED8 is flashing.
6. Start or restore low level configuration with RogerVDM.
Firmware update procedure (memory card):
1. Remove power supply.
2. Remove FLASH memory card from the controller.
3. Copy the new firmware to the memory card and rename it as FW.BUF.
4. Insert the memory card back again to the controller socket.
5. Power up the unit and wait till LED8 is flashing.
6. Start or restore low level configuration with RogerVDM software.
Note: During the firmware update process, it is necessary to ensure continuous and stable power supply for
the MC16 module. The power supply failure may result in device repair by Roger service.
Note: In case of firmware update for controller which is operated in existing installation, additionally start
VISO software detect again the controller, replace and synchronise settings according to AN015 application
note.
4. HIGH LEVEL CONFIGURATION (VISO)
The high level configuration is conducted by means of VISO software and it is dedicated to define the logic
of MC16 controller. It requires configuration of logic objects and their interrelations. Available MC16 objects
and their parameters are listed below.
The configuration of exemplary RACS 5 system is explained in AN006 application note which is available at
www.roger.pl

MC16 Operating Manual 09.01.2020
13/52
Main Board
Main Board is logic object which is created automatically when MC16 controller is enrolled into system and
its hardware resources are detected. The Main Board represents MC16 module and it enables to define
such objects as Inputs, Outputs, Function keys and Local Commands with functions dedicated to the Main
Board. Tamper detectors for peripheral devices (MCT, MCX, PRT) are configured within the Main Board
inputs.
Tab Inputs
The tab enables to define Input objects on the level of Main board. Parameter and functions are listed in the
description of Input objects.
Tab Outputs
The tab enables to define Output objects on the level of Main board. Parameter and functions are listed in
the description of Output objects.
Tab Function keys
The tab enables to define Function key objects on the level of Main board. Parameter and functions are
listed in the description of Function key objects.
Tab Local commands
The tab enables to define Local commands objects on the level of Main board. Parameter and functions are
listed in the description of Local commands objects.
Access Terminals
Access Terminals are logic objects representing physical devices which can be used for user identification
and for starting action(s) by user. Each Access Terminal must be linked with physical reader, keypad,
touchpanel or other device which enables certain actions. Access Terminals are assigned to Access Points
within further configuration.
Area General
Text box Name –enables to name the terminal.
Text box Description –enables to enter custom description of the terminal.
Area Object
Parameter Object –enables selection of physical reader (CDI object).
Info box Device –specifies reader model.
Info box Name –specifies type of object.
Info box Comment –displays comment which was assigned to the reader (DEV) during low level
configuration.
Info box IP Address –specifies IP address of host device (controller) with connected reader.
Info box RS Address –specifies RS485 address of the reader.
Info box Hardware version –specifies hardware version of the reader.
Info box Firmware version –specifies firmware version of the reader.
Access Points
Access Point represents one or more equally treated Access Terminals. Access Point can be used for
access granting at Access Door or for starting other actions in the system e.g. Alarm Zone
arming/disarming, Time&Attendance registration, etc. Access Point can be a component of Access Zone as
Entry, Exit or Internal Point. In such scenario it can be used for anti-passback, occupancy limits, and
neighboring zones. Access Point does not have to be linked to Access Door and it can be used for
identification of users for the purpose of Time&Attendance, building automation control, authentication
before input (button) activation, etc. The identification of user at Access Point must be in accordance with
Authentication Policy (e.g. Card and PIN, Only card, etc.)
Read in/out doors can be linked with two Access Points each with single Access Terminal or with single
Access Point including two Access Terminals. In the first scenario Authorisations (access rights) can be
defined separately for each direction while in the second case there is a single Authorisation for the door
regardless of user movement direction.

MC16 Operating Manual 09.01.2020
14/52
Login Options, Inputs, Outputs, Function keys and Local commands can be defined within Access Point
while Access Terminals and Access Doors can be assigned to Access Point. Access Point based on Login
Options can recognize various method of card reading (single, double long) and link them with various
actions in the system.
Area General
Text box Name –enables to name the point.
Text box LCD Message –enables to specify point’s name which will be used on display.
Parameter Keypad Shortcut –enables to select key which will correspond to the point when interactive
options are applied.
Text box Description –enables to enter custom description for the point.
Tab Authentication
Parameter Default Authentication Policy –specifies default identification method for users at the point
(e.g. card and PIN, Only card, etc.)
Parameter Authentication Policy Schedule –enables assignment of schedule to specify Authentication
Policies for the Access Point in various periods. It requires earlier defining of Authentication Policy type
Schedule.
Parameter Failed Attempts Time [s] –specifies the time when user identification attempts with unknown
Authentication Factor are monitored for the purpose of Access Point blocking.
Parameter Failed Attempts Limit –specifies the number of user identification attempts with unknown
Authentication Factor for the purpose of Access Point blocking.
Parameter Failed Attempts Blocking Time [min] –specifies the time for Access Point blocking when
Failed Attempt Limit is reached within Failed Attempt Time. It is possible to block the point indefinitely and
then the point can be unblocked with [258] input function.
Tab Authorisation Mode
Parameter Default Authorisation Mode –specifies default user authorisation method at Access Point.
Available values:
Normal Authorisation –access is granted after verification of user Authorisations (rights).
Positive Authorisation –access granting does not require user Authorisations (rights).
Negative Authorisation –access is denied regardless of user Authorisations (rights) excluding
Access Credentials with Master exemption.
External Authorisation –regardless of user Authorisations (rights), access is granted when
confirmed by input or function key with the function [185].
Delayed Authorisation –regardless of user Authorisations (rights), access can be blocked by input
or function key with the function [186].
Disabled Authorisation –access is denied regardless of user Authorisations (rights) including
Access Credentials with Master exemption.
Parameter External Authorisation Time –specifies maximal time for activation of the function [185] for
External Authorisation.
Parameter Delayed Authorisation Time –specifies maximal time for activation of the function [186] for
Delayed Authorisation.
Tab Zone Options
Info box Alarm Zone –specifies Alarm Zone to which the Access Point is assigned to.
Info box Entry Point –specifies Access Zone for which the Access Point is Entry Point.
Info box Exit Point –specifies Access Zone for which the Access Point is Exit Point.
Info box Internal Point - specifies Access Zone for which the Access Point is Internal Point.
Option Occupancy Count Enabled –when the option is disabled then occupancy count and anti-passback
are not applied at this Access Point. By default the option is enabled.
Option Lower Limit Enabled –when the option is disabled then access restrictions related to Occupancy
Count Lower Limit are not applied. By default the option is enabled.
Option Upper Limit Enabled –when the option is disabled then access restrictions related to Occupancy
Count Upper Limit are not applied. By default the option is enabled.

MC16 Operating Manual 09.01.2020
15/52
Tab T&A Options
Parameter Default T&A Mode –specifies default Time and Attendance Mode at the Access Point.
Parameter T&A Mode Schedule –enables assignment of schedule to specify T&A Modes for the Access
Point in various periods. It requires earlier defining of Time and Attendance type Schedule.
Option Register T&A Event when physical access is granted –when the option is enabled then every
access granting will additionally generate Time and Attendance event if a user is assigned with Advanced
Authorisation for the function [155].
Tab Advanced Options
Parameter Thread Level –specifies access level at the Access Point. If Thread Level of Access Credential
belonging to particular user is lower than Thread Level of Access Point then access is denied regardless of
Authorisation assigned to user’s Access Credential.
Option Cancel Door Open Too Long Alarm after access is granted –when the option is enabled then
controller cancels Door Open Too Long Alarm when access is granted at the door.
Option Cancel Door Forced Open Alarm after access is granted –when the option is enabled then
controller cancels Door Forced Open Alarm when access is granted at the door.
Option Access must be followed by door opening –when the option is enabled then user entry into
Access Zone is counted only if access granting is followed by actual door opening which is confirmed by
door contact connected to controller input with the function [130]. The option concerns such Access Zone
functionalities as anti-passback (APB), occupancy count and neighboring zones.
Option Two Users Mode –when the option is enabled then access can be granted only if two Access
Credentials with adequate Authorisations are used at the Access Point.
Option Deny access on random personal check –when the option is enabled then in case of randomly
selected user not only output with the function [89] is activated but additionally access is denied at the
Access Point.
Parameter Access Direction –specifies the direction of user movement when access is granted at the
Access Point. The parameter is used mainly in turnstile control which is explained in AN019 application
note. Available values:
None –parameter disabled.
Read-in –when access is granted at the Access Point then outputs with functions [037] and [035]
are activated.
Read-out –when access is granted at the Access Point then outputs with functions [038] and [036]
are activated.
Read-in/out –when access is granted at the Access Point then outputs with functions [037], [038,
[035] and [036] are activated.
Parameter Card Holder Location –enables to indicate which Access Terminal of the Access Point is
equipped with card holder so Login Options which require card holder could be used. Terminals with card
holders (e.g. MCT82M-IO-CH) are mainly used in hotel application to control power supply in a room.
Parameter Buzzer Signalization Priority –specifies priority in range of 1-16 for BUZZER output control by
terminal’s internal logic. BUZZER output can be also assigned with output function(s) by system
administrator and it is possible to define priority for such function(s). Therefore the parameter enables to
decide if administrator defined logic or internal logic has priority in BUZZER control. The higher the number
the higher the priority.
Tab Login Options
The tab is available when an Access Point is created and it enables to define parameters for Normal Login
(single use of Authentication Factor), Special Login (long card reading), Double Login (double use of
Authentication Factor) and for card inserting and removing from holder. Configuration parameters for each
login option are the same.
Parameter Action Type –specifies action type for particular login option. Available types are function and
Local Command.
Parameter Action –specifies the function or Local Command which will be started by user for particular
login option.
Parameter Parameter –specifies a parameter for the function of action. As an example, for the function
[153]: Set Momentary T&A Mode the parameter is particular T&A Mode. The parameter is not configured in
this field when Local Command is applied.

MC16 Operating Manual 09.01.2020
16/52
Parameter Object –specifies target object for the function of action. The parameter is not configured in this
field when Local Command is applied.
Option Register Action Event –when the option is enabled then every action starting will additionally
generate associated event in the system.
Area Authentication and Authorisation Options
Option User authentication required –when the option is enabled then users can start object function or
Local Command without Authorisation(s) assigned. It is enough that such users are equipped with
Authentication Factors which are enrolled in the system.
Option Authorisation for Access Point required –when the option is enabled then only users with proper
Authorisation can start object function or Local Command. The Authorisation must include Access Point
type Positive rule for the Access Point where the function is started.
Option Authorisation for Object required –when the option is enabled then only users with proper
Authorisation can start object function or Local Command. The Authorisation must include Object type
Positive rule for the object of the function.
Option Authorisation for Function Parameter required –when the option is enabled then users with
proper Authorisation can start object function or Local Command. The Authorisation must include Parameter
type Positive rule for the parameter of the function.
Area Interactive Options
Interactive options enable to start actions which are not defined within Login Options of an Access Point.
Action can be started on any object depending on user Authorisations. Interactive actions can be started
only on terminals with keypad. Such terminals must have the option [*] key press allowed before PIN
enabled during their low level configuration (RogerVDM).
Option Enable Function Selection –when the option is enabled then user can enter keypad commands to
start functions on the level of Alarm Zones [102]-[104], [106]-[109], Access Doors [121]-[127], [136], Access
Points [151]-[152], [159], [171]-[176], T&A Modes [175] and Authorisation Modes [178]-[186].
Option Enable Object Selection –when the option is enabled then user must enter object Keypad Shortcut
to select the object.
Option Enable Interactive Function –when the option is enabled then user must enter function parameter.
Tab Access Doors
The tab is available when an Access Point is created and it enables to assign Access Door to the point.
Tab Access Terminals
The tab is available when an Access Point is created and it enables to assign Access Terminal(s) to the
point.
Tab Inputs
The tab is available when an Access Point is created and it enables to assign Input(s) to the point. Input
parameters and functions are listed within the description of Input objects.
Tab Outputs
The tab is available when an Access Point is created and it enables to assign Output(s) to the point. Output
parameters and functions are listed within the description of Output objects.
Tab Function Keys
The tab is available when an Access Point is created and it enables to assign Function Key(s) to the point.
Function key parameters and functions are listed within the description of Function Key objects.
Tab Local Commands
The tab is available when an Access Point is created and it enables to assign Local Command(s) to the
point. Local Command parameters and functions are listed within the description of Local Command
objects.
Access Doors
Access Door represents physical door or gate with such devices as door lock, exit button, door contact, etc.
Access Doors are logically linked with Access Points.

MC16 Operating Manual 09.01.2020
17/52
Area General
Text box Name –enables to name the door.
Parameter Group –enables to assign door to previously created Access Door Group.
Text box LCD Message –enables to specify door’s name which will be used on display.
Parameter Keypad Shortcut –enables to select key which will correspond to the door when interactive
options are applied.
Text box Description –enables to enter custom description for the door.
Area Door Mode Options
Parameter Default Door Mode –specifies default Door Mode. Available values:
Normal –access can be granted for user with adequate Authorisation(s).
Unlocked –access is granted without user identification. Door lock is permanently released.
Conditional Unlocked –the door is in Normal Mode and when access is granted based on user
Authorisation(s), then it switches to Unlocked Mode.
Locked –access cannot be granted regardless of user Authorisation(s). Door lock is permanently
locked.
Parameter Door Mode Schedule –enables assignment of schedule to specify Door Modes for the Access
Door in various periods. It requires earlier defining of Door Mode type Schedule.
Area Door Options
Parameter Re-lock –specifies if door lock release is shortened after access granting. Available values:
Disabled –parameter disabled.
Clear lock pulse after door opening –the output for door lock control is released after door
opening detection i.e. after signal from input with the function [130] (door contact) and not after time
defined by the parameter Lock Pulse or Lock Pulse Extended.
Clear lock pulse after door closing –the output for door lock control is released after door closing
detection i.e. after signal from input with the function [130] (door contact) and not after time defined
by the parameter Lock Pulse or Lock Pulse Extended.
Parameter Lock Pulse [s] –specifies default door lock release time when access is granted based on input
functions [128], [151] or [175].
Parameter Lock Pulse Extended [s] –specifies default door lock release time when access is granted
based on input functions [129], [152] or [176].
Parameter Lock Pulse Delay [s] –specifies delay for door lock release when access is granted.
Parameter Door Open Too Long Time [s] –specifies maximal time to shut the door. When elapsed then
Door Open Too Long Alarm is raised.
Option Cancel Door Open Too Long Alarm when door closed –when the option is enabled then door
closing cancels Door Open Too Long Alarm.
Option Door Open Too Long Alarm not only in Normal Door Mode –when the option is enabled then
Door Open Too Long Alarm can be raised also for other than Normal Door Modes.
Parameter Door Open Too Long Prealarm Time [s] –specifies when the prealarm (output with function
[030]) is activated to warn that Door Open Too Long Alarm will be raised soon. The parameter defines how
many seconds before the alarm, the warning (prealarm) is started.
Option Disable event [321]: Door Forced Alarm –when the option is enabled then event [321] is not
generated for the Access Door.
Tab Inputs
The tab is available when an Access Door is created and it enables to assign Input(s) to the door. Input
parameters and functions are listed within the description of Input objects.
Tab Outputs
The tab is available when an Access Door is created and it enables to assign Output(s) to the door. Output
parameters and functions are listed within the description of Output objects.
Tab Function Keys
The tab is available when an Access Door is created and it enables to assign Function Key(s) to the door.
Function key parameters and functions are listed within the description of Function key objects.

MC16 Operating Manual 09.01.2020
18/52
Tab Local Commands
The tab is available when an Access Door is created and it enables to assign Local Command(s) to the
door. Local Command parameters and functions are listed within the description of Local Command objects.
Inputs
Input represents object dedicated to receiving electric signals from external device/system. The status of
input is monitored and when changed then action can be started by controller. Type of action depends on
the function assigned to particular input (e.g. door opening detection, T&A Mode selection, arming, etc.)
One or more functions can be assigned to single input. When multifunction input is applied then its triggering
may start multiple actions in the system. More information on multifunction lines is given in AN010
application note. In case of inputs with the same toggle functions within the same object it is possible to
apply AND/OR logic. Additionally, in order to trigger an input in the system it may be necessary to
authenticate user at selected Access Point (reader).
Area General
Text box Name –enables to name the input.
Text box LCD Message –enables to specify input’s name which will be used on display.
Parameter Keypad Shortcut –enables to select key which will correspond to the input when interactive
options are applied.
Text box Description –enables to enter custom description for the input.
Area Object
Parameter Name –enables selection of physical input.
Info box Device –specifies device with selected input.
Info box Label –specifies type of object.
Info box Comment –displays comment which was assigned to the input during low level configuration.
Info box Type –specifies type of input (e.g. NO).
Info box IP Address –specifies IP address of host device (controller).
Info box RS Address –specifies RS485 address of device with the input.
Area Additional Options
Parameter Activity Schedule –enables assignment of schedule to specify when input can be triggered. It
requires earlier defining of General Purpose Maintained type Schedule.
Parameter Authentication Point –specifies Access Point where user must authenticate before input is
triggered. Such authentication requirement is configured in the area Authentication and Authorisation
Options when input is assigned to particular object (e.g. Access Door).
Option Multifunction –when the option is enabled then it is possible to specify the maximal number
functions for assignment to the input.
Parameter Function Limit –specifies the maximal number of functions for assignment to the input.
Area Events
Option Register event when input is switched ON –when the option is enabled then input triggering will
generate an event in the system.
Parameter Input ON Event –enables to indicate what event is generated in the system when the input is
triggered. It could be default event [661] or any other administrator defined event.
Option Register event when input is switched OFF –when the option is enabled then input releasing will
generate an event in the system.
Parameter Input OFF Event –enables to indicate what event is generated in the system when the input is
released. It could be default event [662] or any other administrator defined event.
Input object can be further configured, mainly in regard of its function on the level of other objects e.g.
Access Door. Other parameters for such configuration are given below, while parameters specific for
particular function are explained in the description of such function in the table 5.
Area General
Parameter Input –enables to select Input object.

MC16 Operating Manual 09.01.2020
19/52
Parameter Function –enables to select function for the Input. The list of all available functions is given in
the table 5 below.
Parameter Parameter –specifies parameter of selected function. It is available for some functions only.
Option Register Action Event –when the option is enabled then input triggering generates event related to
input function.
Parameter Logic Function –specifies logic function for the input. Available values:
OR –default value. Target object of the function is activated when at least single input with the
function is triggered.
I–value is available only for toggle type inputs. Target object is activated when all inputs with the
function are triggered.
Area Authentication and Authorisation Options
Option User authentication required –when the option is enabled then users can trigger the input without
Authorisation(s) assigned. It is enough that such users are equipped with Authentication Factors which are
enrolled in the system.
Option Authorisation for Access Point required –when the option is enabled then only users with proper
Authorisation can trigger the input. The Authorisation must include Access Point type Positive rule for the
Access Point where the function is started.
Option Authorisation for Object required –when the option is enabled then only users with proper
Authorisation can trigger the input. The Authorisation must include Object type Positive rule for the object of
the function.
Option Authorisation for Function Parameter required –when the option is enabled then users with
proper Authorisation can trigger the input. The Authorisation must include Parameter type Positive rule for
the parameter of the function.
Input functions
Input functions are available within selected objects. For example, input line can be used for
arming/disarming and then it should be configured on the level of Alarm Zone. Some of input functions can
be used within Login Options on the level of Access Point.
Input functions are divided into event type which are triggered by pulse and toggle (status) type which are
monitored in regard of their triggering and releasing.

MC16 Operating Manual 09.01.2020
20/52
Table 5 Input functions
No.
Name
Type
Object
Description
060
Restart Controller without
Dynamic Data Reload
Event
Main Board
When triggered then controller is restarted and all dynamic data (usage limits,
occupancy limits, APB register, etc.) is deleted.
101
Armed ON Mode Toggle
Toggle
Alarm Zone
As long as triggered then alarm zone is maintained armed.
102
Set Alternately Armed ON/Armed
OFF Mode
Event
Alarm Zone
When triggered then alarm zone is switched to opposite armed mode.
103
Set Armed ON Mode
Event
Alarm Zone
When triggered then Alarm Zone is armed.
104
Set Armed OFF Mode
Event
Alarm Zone
When triggered then Alarm Zone is disarmed.
105
Disable Armed ON Mode Toggle
Toggle
Alarm Zone
As long as triggered then Alarm Zone arming is blocked.
106
Postpone Auto-arming
Event
Alarm Zone
When triggered then Alarm Zone arming is delayed by the parameter Auto-
arming Delay when Zone not Ready for Arming.
107
Request Armed ON Mode
Event
Alarm Zone
When triggered then outputs with functions [045] and [047] are activated. The
function is also used to arm Integra or Galaxy alarm panel if it is integrated
with RACS 5 system.
108
Request Armed OFF Mode
Event
Alarm Zone
When triggered then outputs with functions [046] and [047] are activated. The
function is also used to disarm Integra or Galaxy alarm panel if it is integrated
with RACS 5 system.
109
Request Alternately Armed
ON/Armed OFF Mode
Event
Alarm Zone
When triggered then outputs with functions [047] and [045] or [046]
depending on current mode are activated. The function is also used to
arm/disarm Integra or Galaxy alarm panel if it is integrated with RACS 5
system.
111
Clear Occupancy Register
Event
Access Zone
When triggered then list of Access Credentials (and their users) logged in the
zone is deleted. It affects mainly occupancy count in the zone.
112
Clear Anti-passback Register
Event
Access Zone
When triggered then APB register is deleted.
113
Restart Controller with Dynamic
Data Reload
Event
Main Board
When triggered then controller is restarted and all dynamic data (usage limits,
occupancy limits, APB register, etc.) is preserved.
114
TML Supply Output Overload
Toggle
Toggle
Power Supply
As long as triggered then TML output overload is reported to controller.
115
AUX Supply Output Overload
Toggle
Toggle
Power Supply
As long as triggered then AUX output overload is reported to controller.
Other manuals for MC16
2
Table of contents
Other Roger Controllers manuals

Roger
Roger PR621-CH User manual

Roger
Roger PR402 User manual

Roger
Roger CPR32-NET User manual

Roger
Roger CPR32-SE User manual

Roger
Roger AG/CTRL/P Product manual

Roger
Roger PR311SE Instruction and safety manual

Roger
Roger CPR32-SE v3.0 User manual

Roger
Roger PR821-CH User manual

Roger
Roger H70/200AC Product manual

Roger
Roger AG CTRL Product manual
Popular Controllers manuals by other brands

Emerson
Emerson Tartarini PRX Series instruction manual

Mitsubishi Electric
Mitsubishi Electric CR750-D Series instruction manual

Wesper
Wesper western peripherals TC-151 Hardware manual

SMC Networks
SMC Networks HEC002-A5 Operation manual

Panasonic
Panasonic FP7 Series Command reference manual

WEG
WEG PDWD Installation instruction