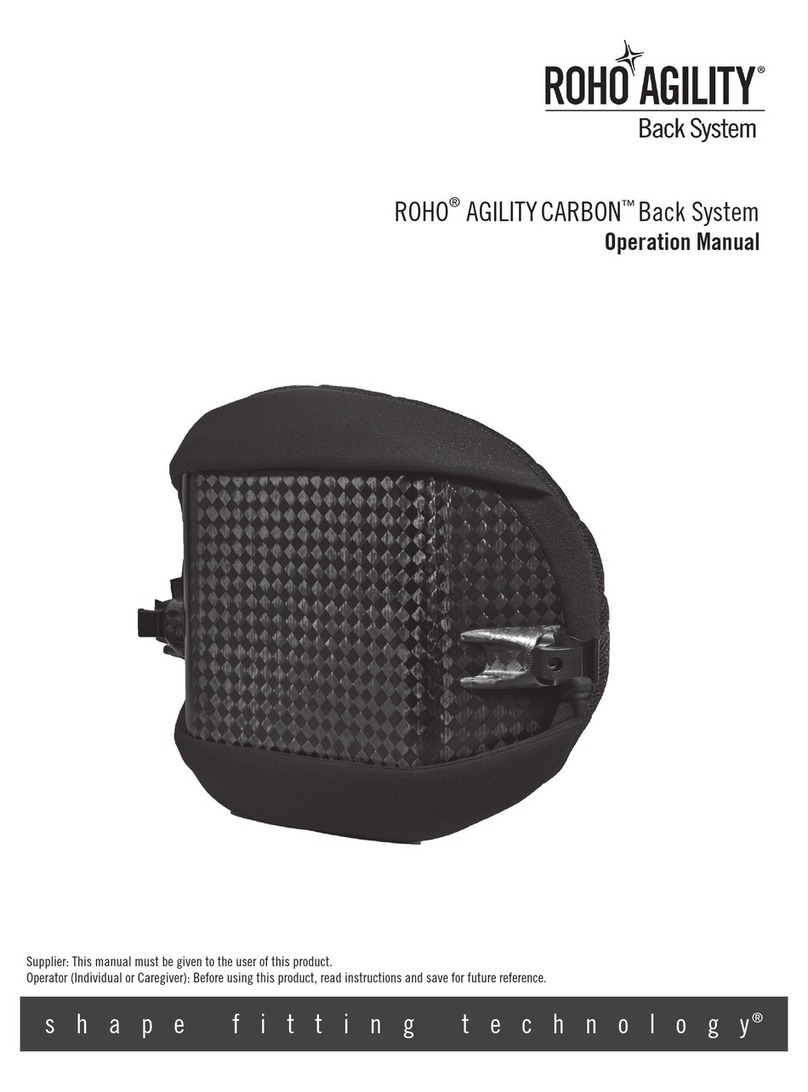
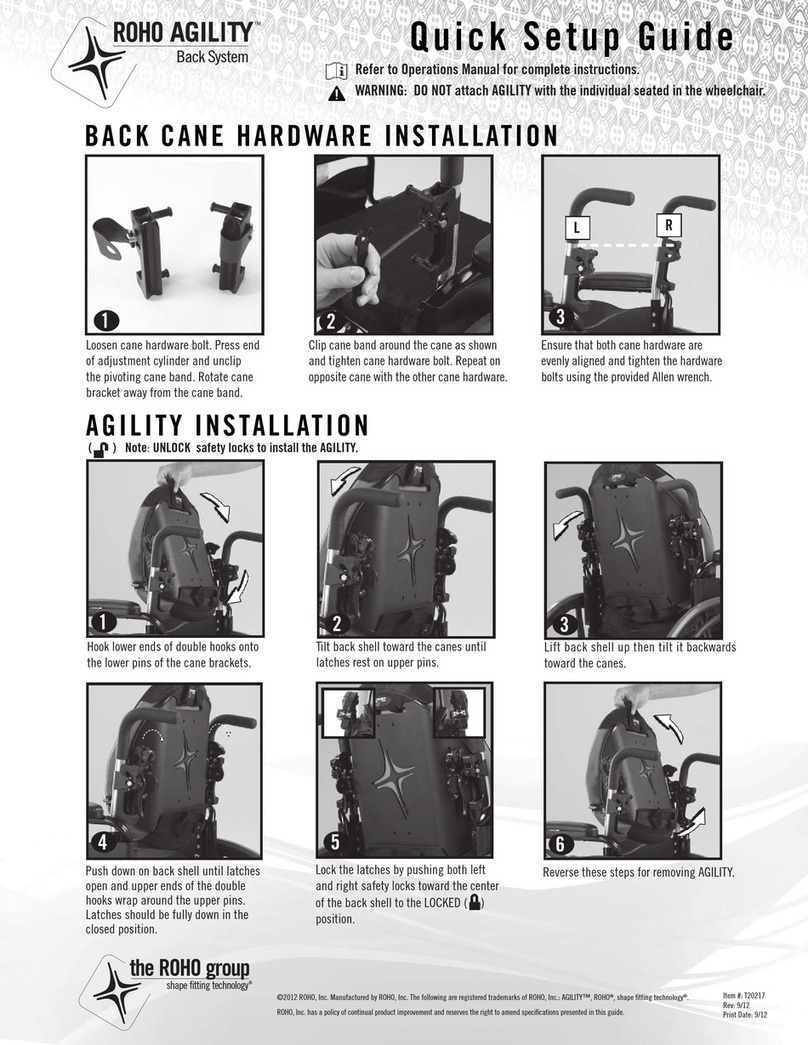
ROHO AGILITY User manual

shape fitting technology
®
Supplier: This manual must be given to the user of this product.
Operator (Individual or Caregiver): Before using this product, read instructions and save for future reference.
ROHO®AGILITY®Back System Fixed Hardware
Operation Manual
In addition to these instructions, r
efer to the ROHO AGILITY Back System Operation Manual.

ROHO AGILITY Back System Fixed Hardware Operation Manual
Table of Contents
Intended Use 2
Important Safety Information 2-3
Parts Detail 4
Product Specifications 4
Back Shell Hardware Installation 5
Wheelchair Compatibility 5-6
AGILITY Installation 6-8
Height Adjustment 8-9
Seat Depth and Angle Adjustment 10-11
Flip the Back Shell 11
AGILITY Removal 12
Troubleshooting 12
Maintenance, Disposal,
Cleaning and Disinfecting, and Limited Warranty
13
Español 14
Français 27
Deutsch 40
ROHO, Inc., 100 North Florida Avenue, Belleville, Illinois 62221-5429
© 2016 ROHO, Inc.
ROHO®, AGILITY®, and shape fitting technology®are registered trademarks of ROHO, Inc. Zytel®is a registered trademark of DuPont.
Products in this manual may be covered by one or more U.S. and foreign patents and trademarks. For further details please refer to ROHO.com.
ROHO, Inc. has a policy of continual product improvement and reserves the right to amend this document. A current version of this document is available at ROHO.com.
Visit ROHO.com to view the contents of this document in additional languages.
Italiano: Visitare ROHO.com per visualizzare i contenuti del presente documento nelle altre lingue.
Nederlands: Ga naar ROHO.com om de inhoud van dit document in andere talen te bekijken.
Dansk: Besøg ROHO.com for at se indholdet af dette dokument på andre sprog.
Svenska: Besök ROHO.com för att visa innehållet i detta dokument i ytterligare språk.
Norsk: Besøk ROHO.com for å se innholdet i dette dokumentet på flere språk.
Suomi: Käy osoitteessa ROHO.com nähdäksesi tämän asiakirjan sisällön muilla kielillä.
Português: Visite ROHO.com para exibir o conteúdo deste documento em outros idiomas.

2
ROHO AGILITY Back System Fixed Hardware Operation Manual
Intended Use
ROHO®AGILITY®Back System Fixed Hardware (AGILITY Fixed Hardware) is intended to attach compatible ROHO AGILITYBack Systems to
the wheelchair back canes. Compatible ROHO AGILITY Back Systems include:
-ROHO®AGILITY®Minimum Contour Back System (AGILITY Minimum Contour)
-ROHO®AGILITY®Mid Contour Back System (AGILITY Mid Contour)
-ROHO®AGILITY®Max Contour Back System (AGILITY Max Contour)
AGILITY Fixed Hardware is intended to be used only with ROHO AGILITY Back System that are 10, 13, and 16 in. (25.5, 33, and
40.5 cm) in height.
CONTRAINDICATION: AGILITY Fixed Hardware is NOT intended to be used on ROHO AGILITY Back Systems greater than 16 in.
(40.5 cm) in height.
ROHO, Inc. recommends that a clinician, such as a doctor or therapist experienced in seating and positioning, be consulted to determine if
AGILITY Fixed Hardware is appropriate for the individual’s particular seating needs.
ROHO medical products are intended to be part of an overall care regimen. ROHO, Inc. recommends that a clinician make product
recommendations based upon an evaluation of the individual’s medical and therapeutic needs and overall condition.
Important Safety Information
Warnings:
-DO NOT use the product without first reading and understanding all of the provided instructions. If you are unable to perform any
tasks in this manual, seek assistance by contacting your clinical caregiver, distributor, or ROHO, Inc.
-Follow all instructions and safety information provided with the product and provided by the manufacturer of your wheelchair or
other accessories.
-Skin/soft tissue breakdown can occur due to a number of factors, which vary by individual. Check skin frequently, at least once a
day, especially those areas covering bony prominences. Redness, bruising, or darker areas (when compared to normal skin) may
indicate the beginning of soft tissue breakdown and may need to be addressed. If there is any discoloration to skin/soft tissue,
STOP USE immediately. If the discoloration does not disappear within 30 minutes after disuse, immediately consult a healthcare
professional.
-The product should be installed by a qualified and competent medical equipment provider or licensed healthcare professional.
-The product must be sized correctly to the individual and the wheelchair.
-As with any addition to a wheelchair, the product may affect your wheelchair’s stability. Before using the product, consult with a
clinician to determine whether your wheelchair should be modified.
-DO NOT lean over the top of an AGILITY Back System. Doing so may cause a change in the center of gravity, and the wheelchair
could tip over.
-Use caution when installing, adjusting, or removing hardware to avoid pinching or trapping fingers in openings.
-Check daily to confirm the tightness of screws, nuts, clamps, and brackets. Retighten loose screws, following the instructions in
this manual. Check daily for wear and breakage. DO NOT use the product if any part cannot be tightened or is broken. Periodically,
the product should be thoroughly inspected by a qualified technician.
-DO NOT lift or push a wheelchair using any part of an AGILITY because it may become detached from the wheelchair.


3
ROHO AGILITY Back System Fixed Hardware Operation Manual
Important Safety Information, Continued
Cautions:
-Protect your AGILITY from blunt force shocks that may cause damage and/or breakage.
-Use of any hardware or components other than those supplied by ROHO may result in product damage or failure and may void the
warranty.
-The components of the AGILITY are not intended to be used separately from an AGILITY or in conjunction with other wheelchair back
systems.
-Altering an AGILITY may affect its performance and void the warranty.
-Metal components may become hot if exposed to high temperatures or cold if exposed to low temperatures.
-You may need to remove your AGILITY before folding your wheelchair.
Warnings - Motor Vehicle Transportation
-Whenever possible, transfer out of your wheelchair installed with an AGILITY and into a manufacturer-installed vehicle seat, and
use the vehicle’s crash-tested occupant restraint system.
-Failure to pay attention to these warnings could result in severe injury to the individual in the wheelchair or to others.
-The AGILITY must be correctly and securely installed on the wheelchair. Follow all provided instructions and warnings.
-Install an AGILITY on a wheelchair so the individual is seated in an upright position and the wheelchair is facing forward
during transportation in a motor vehicle. The AGILITY has only been crash tested on a wheelchair in the forward-facing position
per the test information provided in this operation manual.
-The AGILITY must only be used with wheelchairs that comply with the performance requirements of ISO 7176-19 and that are
installed, used and maintained according to the wheelchair manufacturer’s instructions.
-The wheelchair with an AGILITY must be used with an effective wheelchair securement system and a properly positioned,
crash-tested pelvic and shoulder-belt restraint, or Wheelchair Tiedown and Occupant Restraint System (WTORS), following the
manufacturer’s instructions.
-The top of an AGILITY should be positioned as close as possible to the top of the individual’s shoulder to provide good support
in the event of a crash. The distance between the top of the individual’s shoulder and the top of the wheelchair back should not
exceed 6½ in. (16.5 cm).
-If an AGILITY is involved in a motor vehicle accident, see Maintenance in this manual.
AGILITY with Fixed Hardware has been dynamically tested by a third-party testing facility for use in a motor vehicle and meets all
criteria for wheelchair seating systems proposed in Section 5.1.1 of Section 20 ANSI/RESNA/ WC/Volume 4 “Wheelchair Seating Systems
for Use in Motor Vehicles”.

4
ROHO AGILITY Back System Fixed Hardware Operation Manual
Triangle
Bracket
To order replacement parts, contact your product provider or ROHO, Inc. or visit therohostore.com.
Parts Detail
This manual* references the following package contents:
Back Cane Hardware; Back Shell Hardware; Cane Sleeves; Dual Wrench, Operation Manual, Registration Card
*For additional product information, refer to the ROHO
AGILITY Back System Operation Manual.
Note: A tape measure or a ruler is recommended but is not included in the package contents.
Product Registration
Card
Operation Manual
Fixed Hardware (R)
x 2
Cane Sleeve
Pivoting Band
Bolt (M6 x 1.0 x 35mm Socket Head Cap Screw)
Adjustment Cylinder
Product Specifications
Materials: Fixed Hardware, Zytel®, glass-filled nylon, stainless steel, aluminum and polypropylene
AGILITY Fixed Hardware Weight: 1.75 lb. (0.8 kg)
Dual Wrench
To separate and assemble for use as an Allen Wrench: 4 mm Hex Key
10 mm Box End
21 3
Sliding Height
Adjustment Bar
Width/Height
Adjustment
Nuts and Bolts
(M6 x 1.0 x 25mm
Carriage Bolt)
Depth/Angle
Adjustment Bolt
(M6 x 1.0 x 30mm
Socket Head Cap
Screw)
Width/Height
Adjustment Plate
R = Right Side (left side not shown)

5
ROHO AGILITY Back System Fixed Hardware Operation Manual
Wheelchair Compatibility
Warning: AGILITY hardware is compatible with many wheelchairs that recline, tilt, or are angularly adjustable up to and
including a back angle of 60 degrees. Beyond 60 degrees, AGILITY hardware may be damaged, the AGILITY may disconnect from your
wheelchair, and you may be vulnerable to falling and serious injury. Consult a with a clinician to determine if AGILITY hardware is
compatible with your wheelchair.
Wheelchair Cane Compatibility: Measure the diameter of your back canes.
Warning: AGILITY Fixed Hardware is NOT intended to be installed on back cane diameters < 1 in. (< 2.5 cm) without Cane
Sleeves. Doing so may result in an installation that is NOT secure. Consult with a clinician or the equipment provider to determine if
your back canes are compatible with AGILITY Fixed Hardware.
Circular back cane diameters (A):
1 in. to < 1¼ in. (2.5 cm to < 3.0 cm) Cane Sleeves are
not required.
¾ in. to < 1 in. (2.0 to < 2.5 cm)
Cane Sleeves are
required. See cane
Sleeve inStallation.
Back Shell Hardware Installation
Note: If your AGILITY was provided without the back shell hardware installed, follow these instructions to install the hardware.
1) Use the box end wrench to loosen and
remove the width/height adjustment
nuts. Repeat for both sides.
2) Place the left (L) and right
(R) Fixed hardware onto
the left (L) and right (R)
width/height adjustment
plates.
Right back shell hardware
is shown.
3) Replace the width/height
adjustment nuts.
4) Finger-tighten the width/height
adjustment nuts.
5) Tighten the width/height adjustment nuts with the box end wrench until snug + one-quarter turn.
Repeat for both sides.
Note: If a torque wrench is available, tighten to no more than 42 ± 2 inch-pounds (4.75 ± .25 Newton-
meters). Repeat for both sides.
R
A
A

6
ROHO AGILITY Back System Fixed Hardware Operation Manual
Wheelchair Compatibility
Cane Sleeve Installation (If Needed)
Warning: Cane Sleeves are required for wheelchair back cane diameters of ¾ in. to less than 1 in. (2.0 to < 2.5 cm).
See Wheelchair cane coMpatiblity in product SpecificationS.
Note: If you need to use Cane Sleeves, perform the following instructions after the AGILITY has been placed onto the wheelchair canes but
before tightening the bolts.
Spread open the Cane
Sleeve and place it on the
wheelchair cane. Slide the
Cane Sleeve down inside the
pivoting band. Repeat for
both sides.
For both sides, tighten the bolt with the
Allen wrench as directed in inStallation
option a or inStallation option b.
Note: It may be helpful to position the
opening of the Cane Sleeve toward the
back shell.
AGILITY Installation
STOP: If the back shell hardware is not yet installed on your AGILITY back shell, see back Shell hardWare inStallation.
Warnings:
-DO NOT install or remove an AGILITY while the individual is
seated in the wheelchair.
-DO NOT adjust the width of an AGILITY while the individual is
seated in the wheelchair.
-After you install or adjust an AGILITY, and before the individual
transfers into the wheelchair, make sure that all hardware
is securely tightened. Refer to the recommended torque
specifications.
Notes:
-The cover should be installed on the back shell before installing
an AGILITY. Refer to the ROHO
AGILITY Back System Operation
Manual provided with your AGILITY.
-During installation and removal, provide support to the center
of the back shell to help keep the left (L) and right (R) hardware
even and flush up against the canes.
-Lock the wheelchair wheels before beginning installation.
-An AGILITY installation video is available at ROHO.com.
Installation Options:
Follow the instructions for inStallation option a if your
wheelchair canes have push handles or other equipment
that may interfere with installation.
Otherwise, follow the instructions for inStallation option b.
AGILITY Installation Steps for Option A or Option B:
1. Loosen the Bolts
2. Place the AGILITY On the Wheelchair
3. Tighten the Bolts
4. Complete Attachment
5. Height Adjustment
6. Seat Depth and Angle Adjustment
Loosen the Bolts - Option A and Option B
1) For both sides: Loosen the bolt.
Note: The end of the bolt should
be flush with the adjustment
cylinder.
IMPORTANT! The bolt
should NOT disengage from
the adjustment cylinder.

7
ROHO AGILITY Back System Fixed Hardware Operation Manual
AGILITY Installation, Continued
Place the AGILITY On the Wheelchair - Option A or Option B
Installation Option A Installation Option B
2) Push against the bolt with your thumb and pry the pivoting
band away from the adjustment cylinder. Rotate the pivoting
band. Repeat for the other side.
2) The pivoting bands should remain
attached to the adjustment cylinders.
3) Place the pivoting bands
around the wheelchair
canes:
With your thumb against
the bolt, attach the pivoting
band so the narrow part of
the opening is on the groove
in the adjustment cylinder.
3) Slide the pivoting bands onto the
wheelchair canes.
Tighten the Bolts - Option A and Option B
IMPORTANT! Make sure the mounting hardware is flush against the
wheelchair canes.
4) For both sides: Finger-tighten the bolt.
Note: As you tighten each bolt, pinch or squeeze the pivoting band
to help the narrow part of the opening engage with the groove in the
adjustment cylinder.
5) If you are not able to attach the hardware or tighten the bolts,
you may need to adjust the width:
Loosen, but do not remove, the width/height adjustment nuts.
-Slide the triangle
brackets forward
for a wider width.
-Slide the
triangle brackets
backward for a
narrower width.
IMPORTANT! Use the reference grooves to make sure the left
and right triangle brackets are in the same position on both sides.
wider
narrower
Reference Grooves

8
ROHO AGILITY Back System Fixed Hardware Operation Manual
AGILITY Installation, Continued
Complete Attachment - Option A and Option B
6) Finger-tighten the width/height adjustment
nuts.
7) Complete attachment on both sides:
a. Use a tape measure to make
sure the pivoting bands are
at the same height on the
wheelchair canes.
b. Tighten the bolts with the Allen
wrench until snug + one-
quarter turn.
Note: If a torque wrench is
available, tighten to no more
than 40 inch-pounds (4.5
Newton-meters).
c. If you need to adjust the
height, see height adjuStMent.
Height Adjustment
Warnings:
-If performed correctly and with caution,
height adjustments may be made while
the individual is in the wheelchair. If you
find height adjustments too difficult or
unsafe to make while the individual is in
the wheelchair, have the individual transfer
safely out of the wheelchair.
-If you choose to adjust the height of an
AGILITY while the individual is seated in the
wheelchair, you must first take the following
safety precautions:
9Make sure the wheelchair wheels are
locked.
9Make sure that all hardware is securely
tightened. Refer to the recommended
torque specifications.
Note: Before you adjust the height of the AGILITY,
install the AGILITY on the wheelchair. See
agility inStallation.
Warning: If an AGILITY is not
positioned to make contact with the
Posterior Superior Iliac Spine (PSIS),
pelvic support and trunk control may
be reduced.
Make sure that the AGILITY is positioned
so that the bottom portion makes
contact with the PSIS.
PSISPSIS
Warning: Once installation and width adjustment is complete, make sure
all hardware is securely tightened before the individual is seated in the
wheelchair. Refer to the recommended torque specifications.

9
ROHO AGILITY Back System Fixed Hardware Operation Manual
Height Adjustment, Continued
1) On both sides: Use the box end wrench
to loosen the width/height adjustment
nuts:
DO NOT remove the width/height
adjustment nuts.
From a tight position, loosen the nuts
less than the equivalent of two (2)
full rotations. The nuts should be just
loose enough to allow the width/height
adjustment plate to slide up and down.
2) Slide the back shell up or down in the
vertical slots to the desired height:
3) While you hold the back shell in
position, use the box end wrench to
tighten the width/height nuts on the
width/height adjustments bolts until
snug + one-quarter turn. Note: If a
torque wrench is available, tighten the
bolts to 42 ± 2 inch-pounds (4.75 ±
0.25 Newton-meters).
IMPORTANT! Make sure that the
back shell hardware is the same height on
both sides: To make sure that the left (L)
back shell hardware and the right (R)
back shell hardware are at the same
height, count the squares that you can
see when you look through the left and
right vertical slots in the back shell.
(The squares are part of the sliding
height adjustment bar. See partS detail.)
Warning: Once adjustment is
complete, make sure all hardware is
securely tightened. Refer to the
recommended torque specifications.

10
ROHO AGILITY Back System Fixed Hardware Operation Manual
Seat Depth and Angle Adjustment
Warnings:
-If performed correctly and with caution, seat depth and angle adjustments may be made while
the individual is in the wheelchair. If you find seat depth and angle adjustments too difficult or
unsafe to make while the individual is in the wheelchair, have the individual transfer safely out of
the wheelchair.
-If you choose to adjust the seat depth and angle of the AGILITY while the individual is seated in the
wheelchair, you must first take the following safety precautions:
9Make sure the wheelchair wheels are locked.
9Make sure that all hardware is securely tightened. Refer to the recommended torque
specifications.
Note: Before you adjust the seat depth and the angle of an AGILITY, install the AGILITY on the
wheelchair. See agility inStallation.
To Adjust the Seat Depth
1) Use the Allen wrench to loosen
the depth/angle adjustment bolts
approximately three (3) full rotations.
2) Slide the back shell forward or
backward to the desired depth. Note: If
the triangle bracket will not slide, see
troubleShooting.
3) IMPORTANT! To make sure the
depth positions on both sides are equal,
compare the markers on the tops of the
triangle brackets.
4) If the AGILITY is not yet adjusted to
the desired angle, continue to the next
section, toadjuSt the angle.
5) If the AGILITY is already adjusted
to the desired angle: While you hold
the back shell in position, use the
Allen wrench to tighten the right and
left depth/angle adjustment bolts,
turning until snug + one-quarter
turn. Note: If a torque wrench is
available, tighten the bolts to 60
± 4 inch-pounds (7 ± 0.5 Newton-
meters).
Markers for Seat Depth
Markers for Angle

11
ROHO AGILITY Back System Fixed Hardware Operation Manual
Seat Depth and Angle Adjustment, Continued
To Adjust the Angle
1) If not yet loosened, use the Allen wrench
to loosen the depth/angle adjustment
bolts
approximately
two (2) full
rotations.
2) Pivot the back shell.
IMPORTANT! Compare the markers on
the front of the fixed hardware to make sure
both sides are rotated the same.
3) While you hold the back shell in position,
use the Allen wrench to tighten the right
and left depth/angle adjustment bolts,
turning until snug + one-quarter turn.
Note: If a torque wrench is available,
tighten the bolts to 60 ± 4 inch-pounds
(7 ± 0.5 Newton-meters)
IMPORTANT! After installation and adjustment is complete, tighten hardware securely before transferring into the wheelchair.
Refer to the appropriate sections in this manual for recommended torque specifications. If the individual is seated in the
wheelchair, and depth and angle re-adjustments are needed, review WarningS at the beginning of this section and re-adjust as
necessary. Re-tighten all hardware securely.
Flip the Back Shell
1) Remove the AGILITY from the wheelchair. See agility reMoval.
2) Remove the back shell hardware:
-Use the box end wrench to remove the width/height
adjustment nuts.
-Remove the triangle brackets from the back shell.
3) Rotate the back shell.
4) Install and adjust the AGILITY. See all adjustment and
installation instructions provided with the product.
Triangle
Bracket
2x

12
ROHO AGILITY Back System Fixed Hardware Operation Manual
AGILITY Removal
Warning: DO NOT remove the AGILITY while the individual is seated in the wheelchair.
Option A:If the wheelchair canes have push handles or other
equipment that may interfere with installation:
1) Use the Allen wrench to loosen the bolt on both sides.
2) Unclip the pivoting band from the adjustment cylinder.
3) Open the pivoting band.
4) Remove the AGILITY from the wheelchair canes.
Option B:If the wheelchair canes do not have push
handles or other equipment that may interfere with removal:
1) Use the Allen wrench to loosen but do not remove the
bolt on both sides.
2) Slide the pivoting bands off of the canes.
Note: Refer to agility inStallation for reference images.
Troubleshooting
For additional assistance, contact your clinical caregiver, distributor, or ROHO, Inc.
Not able to
correctly attach
components
during agility
inStallation.
-Make sure the mounting hardware is flush against the wheelchair canes.
-Make sure that the Fixed Hardware is the same height on both sides. Use a tape measure or ruler, if necessary.
-The normal installation location of the Fixed Hardware is on the back side of the canes. If a rigidizer bar
interferes with the Fixed Hardware when installed in the normal location, the Fixed Hardware may be installed
on the front side of the canes. In either orientation, the left (L) and right (R) Fixed Hardware should be correctly
located from the viewpoint of the installer.
Not able to
correctly attach
or secure
components
during agility
inStallation.
-Make sure the mounting hardware is flush against the wheelchair canes.
-Make sure that the width is set appropriately for the wheelchair. The distance between wheelchair canes may
vary. If the Fixed Hardware will not correctly attach and secure to the wheelchair canes, a width adjustment
may be needed. Adjust the width as described in agility inStallation. It may take a few attempts to find the
ideal width position for your wheelchair.
-If you are not able to secure the Fixed Hardware on the wheelchair canes, you may need to use Cane Sleeves.
(See Wheelchair cane coMpatibililty.)
Not able to
correctly attach
components
during agility
inStallation or
height adjuStMent.
-Make sure the Fixed Hardware -- (left (L) and right (R) -- are on the correct sides.
-Make sure the width/height adjustment nuts are in the same position in the triangle brackets. Use the
reference grooves as guides, which are below the horizontal slots on the triangle brackets. (See agility
inStallation.)
-Make sure that the Fixed Hardware is the same height on both sides. For each side, count the number of squares
openings that are visible in the sliding height adjustment bar (See height adjuStMent or partS detail.)
Not able to
correctly attach
components
during Seat
depth and angle
adjuStMent.
-Make sure that the left (L) and right (R) depths are equal. Compare the markers on the top of the triangle
brackets.
-Make sure that the left (L) and right (R) hardware are rotated to the same angle. Compare the markers on the
front of the hardware.

13
ROHO AGILITY Back System Fixed Hardware Operation Manual
Maintenance
Warning: DO NOT continue to use an AGILITY if any part is broken or cannot be tightened. Periodically, the AGILITY should be
thoroughly inspected by a qualified technician.
Check daily to confirm the tightness of AGILITY screws, nuts, clamps, and brackets. Retighten loose screws, following the instructions in this
manual.
Disposal
The components of the products in this manual are associated with no known environmental hazards when properly used and when
disposed of in accordance with all local/regional regulations. Incineration must be performed by a qualified, licensed waste management
facility.
Cleaning and Disinfecting
Cleaning and disinfecting are separate processes. Cleaning must precede disinfection. Before use by a different individual: clean,
disinfect, and check product for proper functioning.
Cautions:
-DO NOT use abrasives such as steel wool or scouring pads on components of an AGILITY.
-DO NOT use cleaning products containing petroleum or organic solvents [i.e. acetone, toluene, Methyl
Ethyl Ketone (MEK), naphtha, dry cleaning fluids, adhesive removers] on components of an AGILITY.
To Clean Hardware: Hand wash in warm (40°C) water with soap and a sponge. Rinse with clean water.
Wipe dry with a clean cloth and then allow to air dry completely.
To Disinfect Hardware: Wipe gently with a cloth dampened with a household disinfectant. Rinse with
clean water. Wipe dry with a clean cloth and then allow to air dry completely.
= Wipe with damp cloth
Limited Warranty
Limited Warranty Term, from the date the product was originally purchased: Back Shell Hardware and Cane Hardware: 36 months. See also
the ROHO Limited Warranty supplement provided with your product, or contact Customer Care.

Item # T20251
Revision: 28/10/19
Print Date: Qty
Mailing/Shipping Address:
1501 South 74th Street, Belleville, IL 62223-5900, USA
Administrative Offices:
100 North Florida Avenue, Belleville, IL 62221-5429, USA
U.S.: 1-800-851-3449 Fax 1-888-551-3449
Outside U.S.: 1-618-277-9150 Fax 1-618-277-6518
ROHO.com
Other manuals for AGILITY
2
Table of contents
Other ROHO Wheelchair manuals

ROHO
ROHO AirLITE User manual

ROHO
ROHO Hybrid Elite User manual

ROHO
ROHO JetStream Pro User manual

ROHO
ROHO AirLITE User manual

ROHO
ROHO AGILITY AG-LATSA-M-FL User manual

ROHO
ROHO AG3-1410A-1 User manual

ROHO
ROHO HARMONY User manual

ROHO
ROHO MID PROFILE User manual

ROHO
ROHO DRY FLOATATION User manual

ROHO
ROHO MOSAIC CUSHION User manual
Popular Wheelchair manuals by other brands

AMG Medical
AMG Medical MedPro DEFENSE Zorbi 770-305 Assembly instructions

Drive Medical
Drive Medical Super Lite manual

decon
decon E-Move MEM20 user manual

Chasswheel
Chasswheel FOUR X URBAN owner's manual

DeVilbiss Healthcare
DeVilbiss Healthcare drive D-LITE Instructions for use

Permobil
Permobil C500 owner's manual