- 8 -
HOW TO SET YOUR MONITOR TO YOUR REQUIREMENTS
NOTE: On-screen menu commands should only be selected when
monitor is in Steady-on (green light) mode.
Never change settings while operating vehicle.
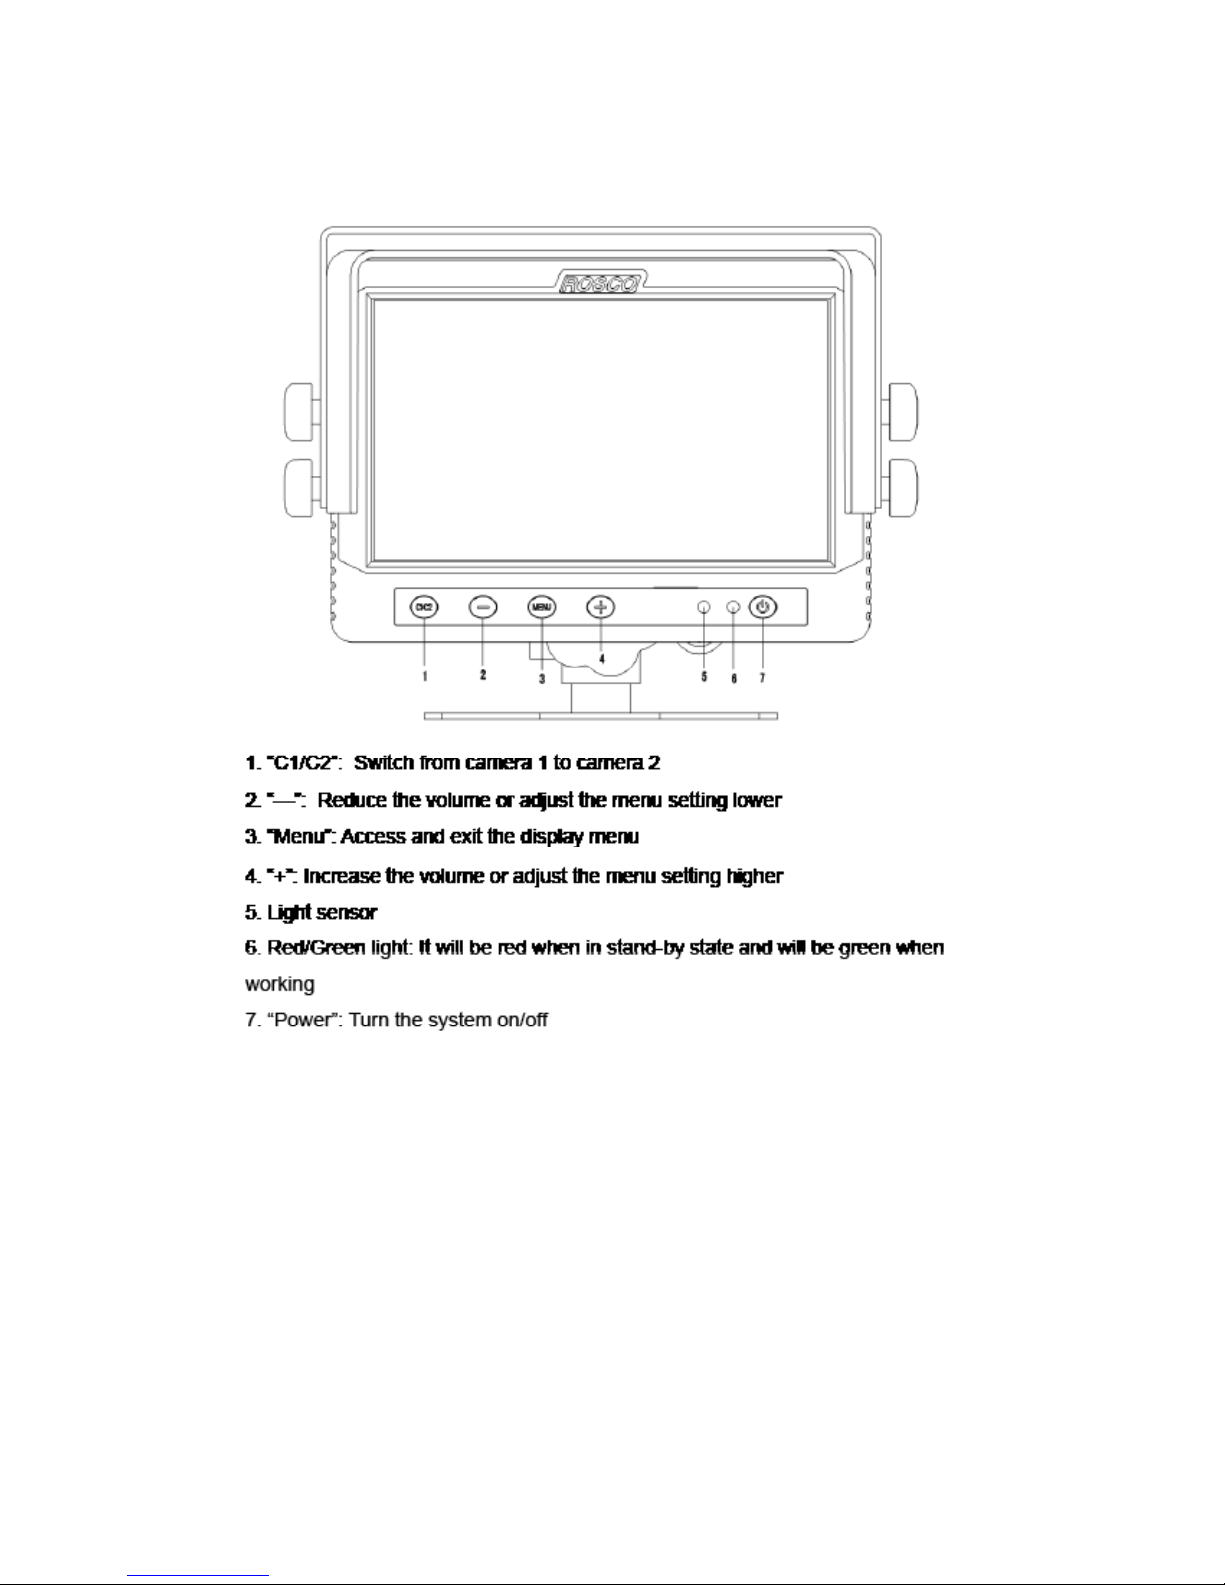
Press the MENU button once to set desired brightness.
Press +/- to increase/reduce the brightness.
Wait 3 seconds to exit setup mode.
Press the MENU button twice to set desired contrast.
Press +/- to increase/reduce the contrast.
Wait 3 seconds to exit setup mode.
Press the MENU button three times to set desired color.
Press +/- to increase/reduce the color.
Wait 3 seconds to exit setup mode.
Press the MENU button four times to set desired tint.
Press +/- to increase/reduce the tint.
Wait 3 seconds to exit setup mode.
Press the MENU button ve times to set desired language.
Press +/- to select English/ French/ Spanish.
Wait 3 seconds to exit setup mode.
Press the MENU button six times to reset.
Press +/- to restore factory defaults.
Wait 3 seconds to exit setup mode.
Press the MENU button seven times to set CAM1.
Press +/- to select Normal/Mirror mode.
Wait 3 seconds to exit setup mode.
Press the MENU button eight times to set CAM2.
Press +/- to select Normal/Mirror mode.
Wait 3 seconds to exit setup mode.
Press the MENU button nine times to set Vertical.
Press +/- to ip image.
Wait 3 seconds to exit setup mode.
Press the MENU button ten times to set Dimmer.
Press +/- to select Auto/ Day/ Night.
Wait 3 seconds to exit setup mode.
Press the MENU button eleven times to set Scale.
Press +/- to select On/Off.
Wait 3 seconds to exit setup mode.
Press the MENU button twelve times to set Scale Adjustment.
Press - to change selected line.
Press + to adjust position of line.
Wait 3 seconds to exit setup mode.