EN - 6
exhausted while taking a measurement.
• Do not take measurements if you are under stress or tension.
• During measurement, do not talk or move your arm or hand muscles.
• Take your blood pressure at normal body temperature. If you are feeling cold or hot, wait a
while before taking a measurement.
• If the monitor is stored at very low temperature (near freezing), have it placed at a warm
location for at least one hour before using it.
• Wait about 5 minutes before taking the next measurement.
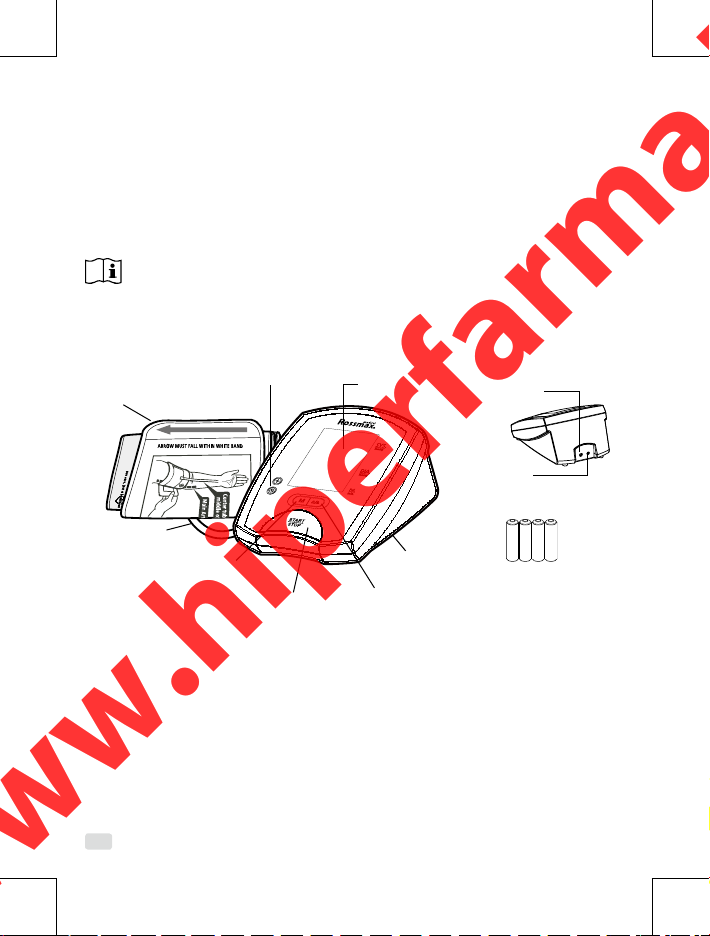
1. Press the User-Switching Key to select memory zone 1 or memory zone 2.
After a memory zone is selected, press the START/STOP Key to reset the monitor so it can
start measurement in the chosen memory zone.
2. Press the START/STOP Key. All digits will light up, checking the display functions. The
checking procedure will be completed in 2 seconds.
3. After all symbols appear, the display will show a blinking “0”. The monitor is “Ready to
Measure”and will automatically inate the cu slowly to start measurement.
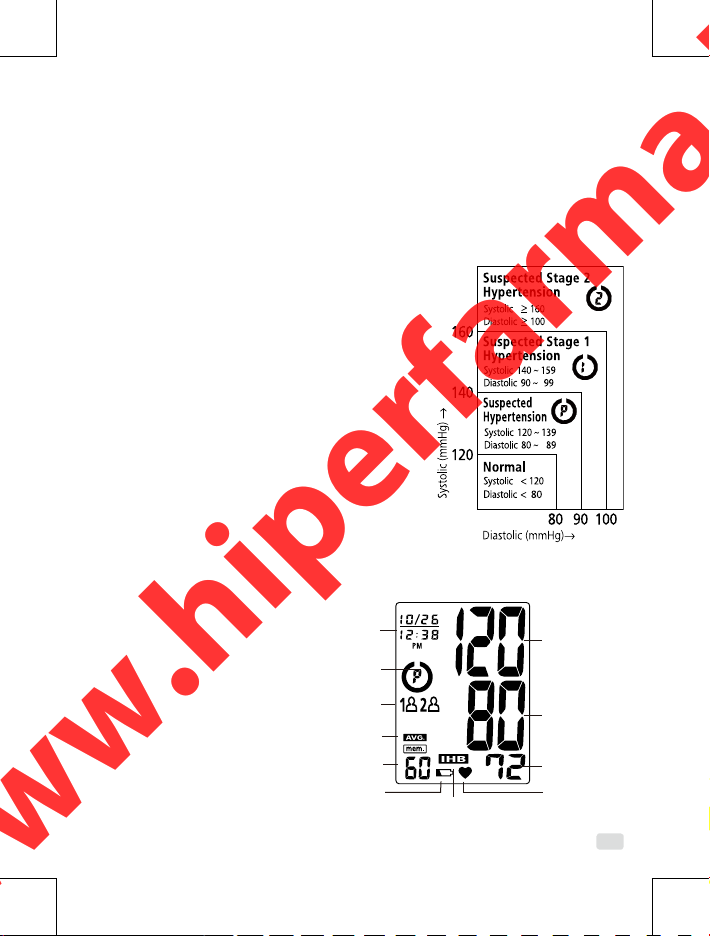
4. When the measurement is completed, the cu will exhaust the pressure inside. Systolic
pressure, diastolic pressure and pulse will be shown simultaneously on the LCD screen . The
measurement is then automatically stored into the pre-designated memory zone.
This monitor will re-inate automatically to approximately 220 mmHg if the system detects
that your body needs more pressure to measure your blood pressure.
Note: 1. This monitor automatically switches o approximately 1 minute after last key opera-
tion.
2. To interrupt the measurement, simply press the START/STOP or Memory key; the cu
will deate immediately.
3. During the measurement, do not talk or move your arm or hand muscles.
Recalling Values from Memory
1. The monitor has two memory zones (1 and 2). Each zone can store up to 60 measurements.
2. To read memory values from a selected memory zone, use the User-Switching Key to select
a memory zone (1 or 2) from which you want to recall values. Press the Memory key. The
rst reading displayed is the average of the last 3 measurements stored in memory.
3. Continue to press the Memory key to view the last previously stored measurement. Every
measurement comes with an assigned memory sequence number.
Note: The memory bank can store up to 60 readings per memory zone. When the number of
readings exceeds 60, the oldest data will be replaced with the new record.
Clearing Values from Memory
1. Press the User-Switching Key to select memory zone 1 or memory zone 2.
2. Continue to press and hold the Memory key for approximately 5 seconds, then the data in
www.hiperfarma.ltwww.hiperfarma.lt