manuals.online logo
Brands
  1. Home
  2. •
  3. Brands
  4. •
  5. Rousseau
  6. •
  7. Indoor Furnishing
  8. •
  9. Rousseau R Line User manual

Rousseau R Line User manual

All required hardware is included.
Please check the contents with your packing slip.
Read instructions carefully.
Two people are required for assembly.
Save this document for future reference.
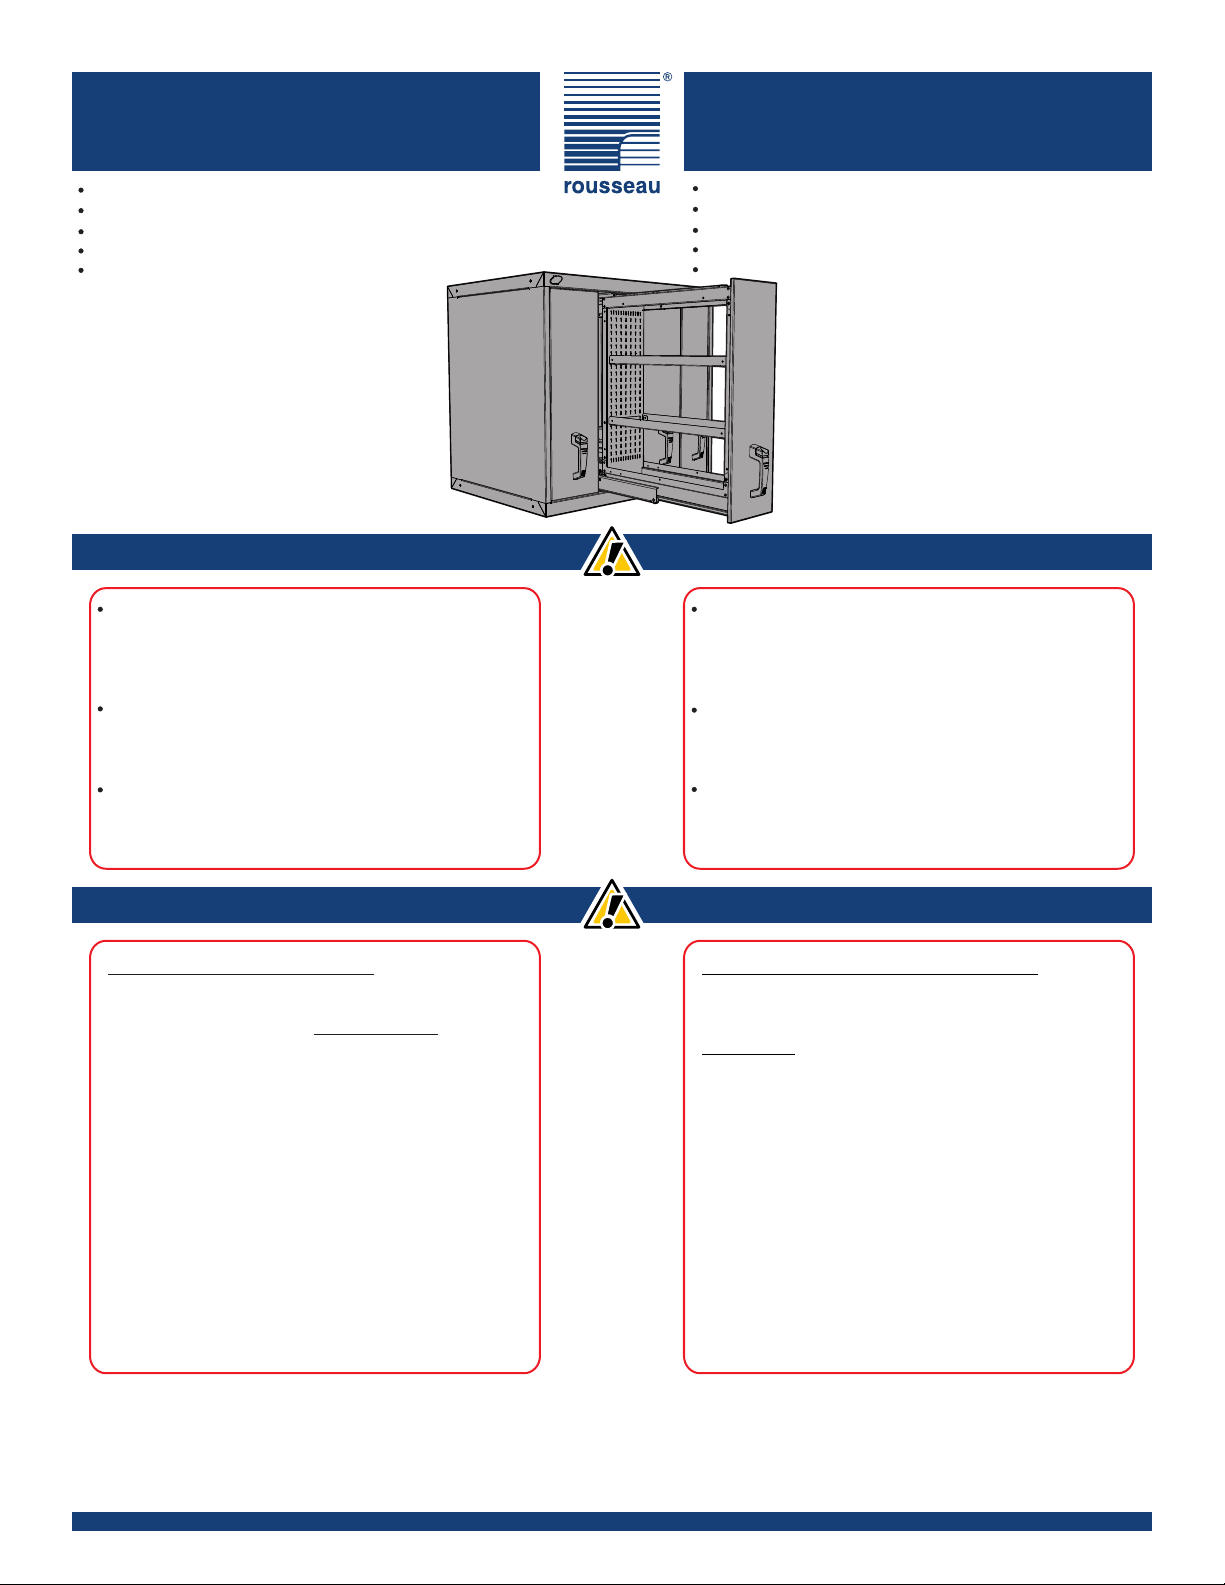
Vertical Drawer Cabinet
Cabinet pour tiroirs verticaux
Assembly Guide
R Line
Guide d’assemblage
Ligne R
R4E-MA20B
Page 1/8
7D00204E
rousseau.com
1-800-463-4271
Pour éviter le renversement accidentel:
Le cabinet avec tiroirs verticaux doit
OBLIGATOIREMENT être ancré au dessus d'un
cabinet modulaire tel que décrit dans ce guide.
EN PLUS...
1) le cabinet modulaire en dessous doit être
ancré au sol tel que décrit dans ce guide.
ou 2) s'assurer que les deux cabinets sont
équipés de mécanismes ''un-tiroir-à-la-fois''
et s'assurer d'avoir une répartition de poids
qui assure la stabilité des cabinets.
ou 3) ancrer le cabinet pour tiroir verticaux à un
mur ou à une structure juxtaposée ou
adossée capable de recevoir cette
application en utilisant la quincaillerie
d'ancrage appropriée (non fournie) tel que
décrit dans ce guide d'assemblage.
To prevent accidental toppling:
The vertical drawer cabinet MUST BE
ANCHORED to the top of a modular cabinet as
described in this guide. IN ADDITION...
1) The modular cabinet below must be anchored
to the ground as described in this guide.
or 2) Ensure that the two cabinets are fitted with
"One-Drawer-at-a-Time" mechanisms, and
ensure weight is distributed in such a way
that the cabinets are stable.
or 3) Anchor the vertical drawer cabinet to a wall
or adjacent structure (at the side or back)
that can support the assembly with
appropriate anchoring hardware (not
provided) as described in this assembly
guide.
Les montages avec cabinet pour tiroirs verticaux
peuvent comporter des risques de renversement
accidentel et ainsi causer des blessures et
dommages aux produits.
Le client a la responsabilité de s'assurer de la
stabilité du montage final avant d'en permettre son
utilisation.
Le client a la responsabilité de s'assurer que le
produit a été installé sécuritairement en suivant les
recommandations d'ancrage du manufacturier
mentionnées dans le présent document.
Security Guidelines Consignes de sécurité
Vertical drawer cabinet assemblies carry a risk of
accidental tipping, which can lead to injury and
product damage.
The customer is responsible for ensuring the stability
of the final assembly before allowing it to be used.
The customer is responsible for ensuring the product
has been installed securely by following the
manufacturer's anchoring recommendations
specified in this document.
Toute la quincaillerie requise est incluse.
Veuillez vérifier le contenu avec votre feuille de livraison.
Lisez attentivement les instructions.
Deux personnes sont requises pour l'assemblage.
Conservez ces instructions pour référence future.
Warning Avertissement
Cabinets modulaires du dessous compatibles:
RA30/34/35: cabinet modulaire
RD90: cabinet avec dévidoirs
RD86/87: contacter le service à la clientèle Rousseau
Compatible bottom cabinets:
RA30/34/35: modular cabinets
RD90: reel cabinet
RD86/87: contact Rousseau Customer Service
Page 2/8
rousseau.com
1-800-463-4271
Security guidelines... contd. Consignes de sécurité... suite
Lock or tilt the cabinet backward to prevent drawers
from opening while moving.
Verrouiller ou incliner le cabinet vers l'arrière pour éviter
que les tiroirs n'ouvrent pendant un déplacement.
The height of the top vertical drawer must not exceed
80" unless you have the proper equipment to reach
the contents in a safe manner.
La hauteur du tiroir vertical ne doit pas excéder 80" à
moins que vous ne possédiez l'équipement adéquat
pour accéder au contenu de façon sécuritaire.
Quincaillerie
Hardware
Outils suggérés
Suggested tools
Cut-resistant gloves
Gants anti-coupure
Washer
Rondelle
8x
3Z022002
Boulon 5/16-18
5/16-18 bolt
¾"
3L120202
5x
1/2"
7/16"
#3
7/16"
1/2"
9/16''
Ø 3/16"
Ø 7/32"
Ø 7/16"
3D5326T2
1 1/4''
Tapping screw
Vis taraudeuse
4x
Never open more than one drawer at the same time.
Ne jamais ouvrir plus d'un tiroir à la fois.
lb
200 lb MAX
Distribute loads evenly in drawers and cabinet.
Poids uniformément réparti dans les tiroirs et cabinet
lb lb lb lb
lb
lb
lb
lb
80"
2x
5/16-18 bolts
Boulons 5/16-18
3L120382
2 3/4"
5/16-18 nylon locknut
Écrou nylon 5/16-18
4X
3S2003Z2
1/4-20 nylon locknut
Écrou nylon 1/4-20
3S1803T2
3X
Rear anchor
Ancrage arrière
RL30A350
2X
Ø 3/8"
for concrete
pour béton
Side by side cabinets
Cabinets jumelés
ATTENTION
IMPORTANT: Only possible with a WS14 laminated
wood top and RC35/RC37 steel top with particle board.
ATTENTION: Possible seulement avec dessus en bois
lamellé WS14 et dessus en acier avec panneau en
particule RC35 ou RC37.
A A
C C
AB
A
CC
Single Cabinets
anchored to the floor
Cabinets simples
ancrés au sol
Single Cabinets with
''one-drawer-at-a-time''
mechanisms
Cabinets simples
avec mécanismes de
''un-tiroir-à-la-fois''
Single Cabinets
anchored to the wall
Cabinets simples
ancrés au mur
A A A A
D
A A B
A A
lb
lb
lb lb lb
lb
lb
Weight distributed to ensure
both cabinets are stable.
Répartition de poids qui assure
la stabilité des cabinets.
A A A A
E
A A
Back-to-back Cabinets
Cabinets dos-à-dos
A A A A
E
Page 3/8
rousseau.com
1-800-463-4271
Choix du montage et ancrage requis
Choice of layout and anchoring required
Instructions:
Identifier le montage.
Noter les types d'ancrage (A, B, C, D, E et F) requis
selon le montage.
Réaliser l'assemblage et les ancrages en vous
référant aux pages suivantes de ce guide
d'assemblage.
Instructions:
Choose your layout.
Note the type of anchoring needed (A, B, C, D, E & F)
for the layout.
Perform the assembly and anchoring according to the
instructions on the following pages of this assembly
guide.
Back-to-back Cabinets
Cabinets dos-à-dos
A A A A
F
F
C C C C
A A
F
F
C C
A A
F
C C C C
A A
Single Cabinets
Cabinets simples
CC
C C CC
AA
This layout
instead
Plutôt ce
montage
C C C C
A A B
CC
G/H G/H
Or this
layout
Ou ce
montage
C C
G H
CC
Page 4/8
rousseau.com
1-800-463-4271
Préparation
Preparation
Ancrage de type ''A'' : cabinets superposés
''A'' type anchoring : stacked cabinets
Retirer les tiroirs des cabinets du bas et du haut.
Cabinet du bas muni d'un mécanisme ''un-tiroir-à-la-
fois'' : À l'arrière du cabinet, au niveau du mécanisme,
déplacez le coulisseau correspondant au tiroir retiré
vers la gauche avant de tenter de retirer un autre
tiroir.
Cabinet du haut muni d'un mécanisme ''un-tiroir-à-la-
fois'' : À l'arrière du cabinet, au niveau du mécanisme,
déplacez le coulisseau du tiroir retiré vers le haut
avant de tenter de retirer un autre tiroir.
Remove top and bottom cabinet drawers.
Bottom cabinet with ''One-Drawer-at-a-Time''
mechanism: On the mechanism to the rear of the
cabinet, move the slider of the removed drawer to the
left before removing the next drawer.
Top cabinet with ''One-Drawer-at-a-Time'' mechanism:
On the mechanism to the rear of the cabinet, move the
slider of the removed drawer to the top before
removing the next drawer.
4X
Bottom cabinet / Top view
Cabinet du bas / Vue de dessus
A1 A2
4x 4x
¾"
Side view
Vue de côté
A3
Ancrage de type ''B'' :
cabinets superposés (dos)
''B'' type anchoring :
stacked cabinets (back)
Bottom cabinet
Side view
Cabinet du bas
Vue de côté
Top cabinet
Side view
Cabinet du haut
Vue de côté
2x 2x
Security brackets on
each corner.
Fixation de sécurité à
chaque coin arrière.
Side view
Vue de côté
B2
B1
Ancrage au sol avec cales d'épaisseurFloor anchoring with shim plates
For floor anchoring with shim plates,
refer to assembly guide R3K
(included with shimplates RA80).
Pour l'ancrage au sol avec des cales
d'épaisseurs se référer au guide R3K (inclus
avec les cales d'épaisseur RA80).
3 7/8''
2''
Here / Ici Here / Ici
3 7/8''
2''
''C'' type anchoring : floor anchoring Ancrage de type ''C'' : ancrage au sol
3 7/8''
3 3/8''
C1
Ø 3/8" X
3 1/4'' deep / prof.
for concrete
pour béton
Here / Ici Here / Ici
C2 .
.
.
.
..
.
.
.
.
.
.
Cabinet must be anchored as indicated.
Le cabinet doit être ancré aux endroits
prévus à l'arrière.
3 7/8''
3 3/8''
.
Cabinet with base Cabinet avec base
Cabinet without base Cabinet sans base
Ø 3/8" X
3 1/4'' deep / prof.
for concrete
pour béton
Back of Cabinet
Arrière du cabinet
Back of Cabinet
Arrière du cabinet
3 1/4''
Ø 3/8''
C3
.
.
.
.
.
..
.
.
.
.
.
.
.
.
.
.
.
.
.
.
.
.
.
.
9/16"
Installation torque :
20 lbf. ft (27N.m.)
Couple de serrage :
20 lbf. pi (27N.m.)
.
.
.
.
.
.
.
.
..
.
.
.
.
.
.
MIN. 1 5/8''
.
minimum
Ancrage de type ''D'' : ancrage au mur
''D'' type anchoring : wall anchoring
Front / avant
Rear / arrière
D1
C1
Page 5/8
rousseau.com
1-800-463-4271
D3 The client is responsible for installing the
product in a secure manner, to a wall
capable of supporting this application, and
for determining and using the appropriate
anchoring hardware. The assembly must
be anchored in two places. When selecting
each anchor, ensure it supports a minimum
true tensile load of 600lb. and that your
usage complies with the safety
recommendations of the anchoring
hardware manufacturer.
Le client a la responsabilité d'installer le
produit sécuritairement, à un mur capable
de recevoir cette application, et de
déterminer et d'utiliser la quincaillerie
d'ancrage appropriée. L'ancrage doit se
faire avec 2 ancrages. Chaque ancrage
doit être choisi pour résister à une charge
réelle minimum en tension de 600 lb et doit
être sélectionné de manière à inclure les
facteurs de sécurité recommandé par le
fabriquant de ces ancrages.
D2
D2
Ancrage de type ''F'' :
ancrage des cabinets juxtaposés
''F'' type anchoring :
side by side cabinets anchoring
2x
or/ou
4x
¾"
2x
or/ou
4x
4x
or/ou
8x
Front view
Vue de face
Front view
Vue de face
F1
F2
Page 6/8
rousseau.com
1-800-463-4271
Front / avant
Rear / arrière
Ancrage de type ''D'' : ancrage dos à dos
''E'' type anchoring : back to back anchoring
E1
E2
E2
E3
¾"
4x 8x 4x
Ancrage de type ''G & H''
''G & H'' type anchoring
Page 7/8
rousseau.com
1-800-463-4271
RC35/37 steel top with particle board
Dessus en acier avec panneau en
particule RC35/37
WS14 Laminated wood top
Dessus en bois lamellé WS14
Ø 7/32"
Ø 3/16"
G2
G1/H1 Determine the desired position of the vertical
drawer cabinet above the work surface.
IMPORTANT: Only possible with a WS14 laminated
wood top and RC35/RC37 steel top with particle
board.
ATTENTION: Possible seulement avec dessus en
bois lamellé WS14 et dessus en acier avec panneau
en particule RC35 ou RC37
Front of Cabinet / Avant du cabinet H2
Punch out the corresponding knockouts on the
bottom cabinet if the top and bottom cabinets are
aligned (in width and depth) or
Drill the bottom cabinet where the work surface
holes are.
Défoncer au préalable les débouchures
correspondantes sur le cabinet du bas si les
cabinets du haut et du bas sont allignés en largeur
et en profondeur ou
Percer celui-ci à l'emplacement du trou de la surface
de travail.
Ø 7/16
Back of Cabinet / Arrière du cabinet
G/H G/H G H
G1/H1 Identifier l'emplacement du cabinet pour
tiroirs verticaux à l'endroit désiré sur la
surface de travail.
11/4"
Side view
Vue de côté
Side view
Vue de côté
5''
2''
5''
2'' Back of Cabinet
Arrière du cabinet
3 7/8''
2''
3 7/8''
2''
Front of Cabinet
Avant du cabinet
TOP VIEW / VUE DE DESUS
Desired cabinet position
Position du cabinet désirée
G2
H2
G2
H2
Page 8/8
rousseau.com
1-800-463-4271
1 1/4''
2x
Ancrage de type ''G & H''... suite
''G & H'' type anchoring contd.
HG H
Side view
Vue de côté
Side view
Vue de côté
2x
2x
G3 Front of Cabinet / Avant du cabinet H3 Back of Cabinet / Arrière du cabinet
Riveted nuts at the bottom of the cabinet.
Écrous rivés dans le fond du cabinet.
Tip: Start to tighten screws with fingers to
align them with the riveted nuts, then
tighten with a tool.
Astuce: Commencer à visser les vis avec
les doigts pour bien les aligner avec les
écrous rivés et serrer avec un outil.
Front / Avant
Rear / Arrière
Front / Avant
Rear / Arrière
GH
G
Front / Avant
Rear / Arrière

Other manuals for R Line

2

Other Rousseau Indoor Furnishing manuals

Rousseau Modular Cabinet R Line User manual

Rousseau

Rousseau Modular Cabinet R Line User manual

Rousseau R34-MA20B User manual

Rousseau

Rousseau R34-MA20B User manual

Rousseau 2721 User manual

Rousseau

Rousseau 2721 User manual

Rousseau W36-MA20B User manual

Rousseau

Rousseau W36-MA20B User manual

Rousseau L Line User manual

Rousseau

Rousseau L Line User manual

Rousseau OT User manual

Rousseau

Rousseau OT User manual

Rousseau WM Series User manual

Rousseau

Rousseau WM Series User manual

Rousseau 1500 User manual

Rousseau

Rousseau 1500 User manual

Rousseau WS Line User manual

Rousseau

Rousseau WS Line User manual

Rousseau W36-MA20S User manual

Rousseau

Rousseau W36-MA20S User manual

Rousseau WS Series User manual

Rousseau

Rousseau WS Series User manual

Popular Indoor Furnishing manuals by other brands

Bush Business Furniture A173969D Assembly instructions

Bush Business Furniture

Bush Business Furniture A173969D Assembly instructions

Till-Hilft 88706.531 manual

Till-Hilft

Till-Hilft 88706.531 manual

Argos 875/5223 Assembly instructions

Argos

Argos 875/5223 Assembly instructions

HOMCOM 839-026 Assembly & instruction manual

HOMCOM

HOMCOM 839-026 Assembly & instruction manual

boori Urbanе Metro Box BU-MTBX Assembly instructions

boori

boori Urbanе Metro Box BU-MTBX Assembly instructions

Lightolier LYTESPOT instructions

Lightolier

Lightolier LYTESPOT instructions

Coaster 223651Q B1 Assembly instructions

Coaster

Coaster 223651Q B1 Assembly instructions

DHP 3136096 Assembly instructions

DHP

DHP 3136096 Assembly instructions

Hanover MANTEL CAM5021-1TEK Assembly instructions

Hanover

Hanover MANTEL CAM5021-1TEK Assembly instructions

Room to Grow JUB140 Assembly instructions

Room to Grow

Room to Grow JUB140 Assembly instructions

Acme Furniture 71767 Assembly instructions

Acme Furniture

Acme Furniture 71767 Assembly instructions

Costway JV10841US manual

Costway

Costway JV10841US manual

Furniture of America CM7970D Assembly instructions

Furniture of America

Furniture of America CM7970D Assembly instructions

Cooper Lighting Shaper 472 Specification sheet

Cooper Lighting

Cooper Lighting Shaper 472 Specification sheet

Ameriwood HOME 9866412COM manual

Ameriwood HOME

Ameriwood HOME 9866412COM manual

Buhl PLCAB44E instruction sheet

Buhl

Buhl PLCAB44E instruction sheet

Lynk 421121 installation instructions

Lynk

Lynk 421121 installation instructions

OfficeSource RCN3131C Assembly instructions

OfficeSource

OfficeSource RCN3131C Assembly instructions

manuals.online logo
manuals.online logoBrands
  • About & Mission
  • Contact us
  • Privacy Policy
  • Terms and Conditions

Copyright 2025 Manuals.Online. All Rights Reserved.