RPB T200 User manual

EMPLOYERS: read this manual, the flow control device
instruction manual, and carry out the employer responsibilities
(page 7).
PRODUCT USERS: read this manual, the flow control device
instruction manual, and follow the product user safety instructions
(page 9).
Manuals are regularly updated. Make sure this manual is
available to all users for reference.
CURRENT VERSION OF MANUAL AND OTHER LANGUAGES:
rpbsafety.com/resources
The Respiratory Protection Brand®
INSTRUCTION MANUAL
A RPB Certified Biotechnician Company
Buy at www.DuralineSystems.com
Call (877) 561-0500

2
T200™
EXPLANATION OF SIGNAL WORDS AND SYMBOLS 2
INTRODUCTION 3
IMPORTANT SAFETY INFORMATION
PROTECTION PROVIDED AND LIMITATIONS 4
RESPIRATORY COMPONENT DIAGRAM - NIOSH CAUTIONS & LIMITATIONS 6
AIR SOURCE, FITTINGS, AND PRESSURE 7
EMPLOYER RESPONSIBILITIES 7
PRODUCT USER SAFETY INSTRUCTIONS 9
RESPIRATOR SETUP AND CARE 12
DONNING AND DOFFING 19
STORAGE 21
PARTS AND ACCESSORIES 22
WARRANTY AND LIABILITY STATEMENT 25
CONTENTS
RPB®Safety LLC is an ISO9001 certified company.
EXPLANATION OF SIGNAL WORDS AND SYMBOLS
The following signal word and safety symbols are used in this manual and product labeling:
WARNING indicates a hazardous situation that, if not avoided, could
result in death or serious injury.
DANGER Indicates a hazardous situation that, if not avoided, will result
in death or serious injury.
Read the Instruction Manual.
Additional copies of RPB®manuals can be found at
www.rpbsafety.com/resources.
WARNING
DANGER

3
RPB®SAFETY - GLOBAL HEADQUARTERS
2807 Samoset Rd, Royal Oak, MI 48073, USA.
T: 1-866-494-4599 F: 1-866-494-4509 E: sales.us@rpbsafety.com rpbsafety.com
RPB®SAFETY - APAC
1 Ivan Jamieson Place, Christchurch Airport, Christchurch 8053 New Zealand.
T: +64-3-357-1761 F: +64-3-357-1763 E: sales.nz@rpbsafety.com rpbsafety.com
RPB®SAFETY - EMEA
T: +44-800-689-5031 E: sales@rpbsafety.co.uk rpbsafety.com
Copyright ©2020 RPB Safety, LLC. All rights reserved. All materials contained on this
website are protected by United States copyright law and may not be reproduced, distributed,
transmitted, displayed, published or broadcast without the prior written permission of RPB
Safety, LLC. You may not alter or remove any trademark, copyright or other notice from
copies of the content.
All trademarks, service marks, and logos used in this publication, both registered and
unregistered, are the trademarks, service marks, or logos of their respective owners. All
rights in the RPB Intellectual Property contained in this publication, including copyright,
trademarks, service marks, trade secret, and patent rights are reserved. RPB Intellectual
Property means any patent, patented articles, patent applications, designs, industrial designs,
copyrights, software, source code, database rights, moral rights, inventions, techniques,
technical data, trade secrets, know-how, brands, trademarks, trade names, slogans, logos,
and any other common law and proprietary rights, whether registered or unregistered
anywhere in the world, that are owned by, developed in whole or in part by, or licensed by
RPB Safety, LLC.
For technical assistance contact our Customer Service Department at 1-866-494-4599 or
email: sales@rpbsafety.com
Form #: 7.20.505
Rev: 0
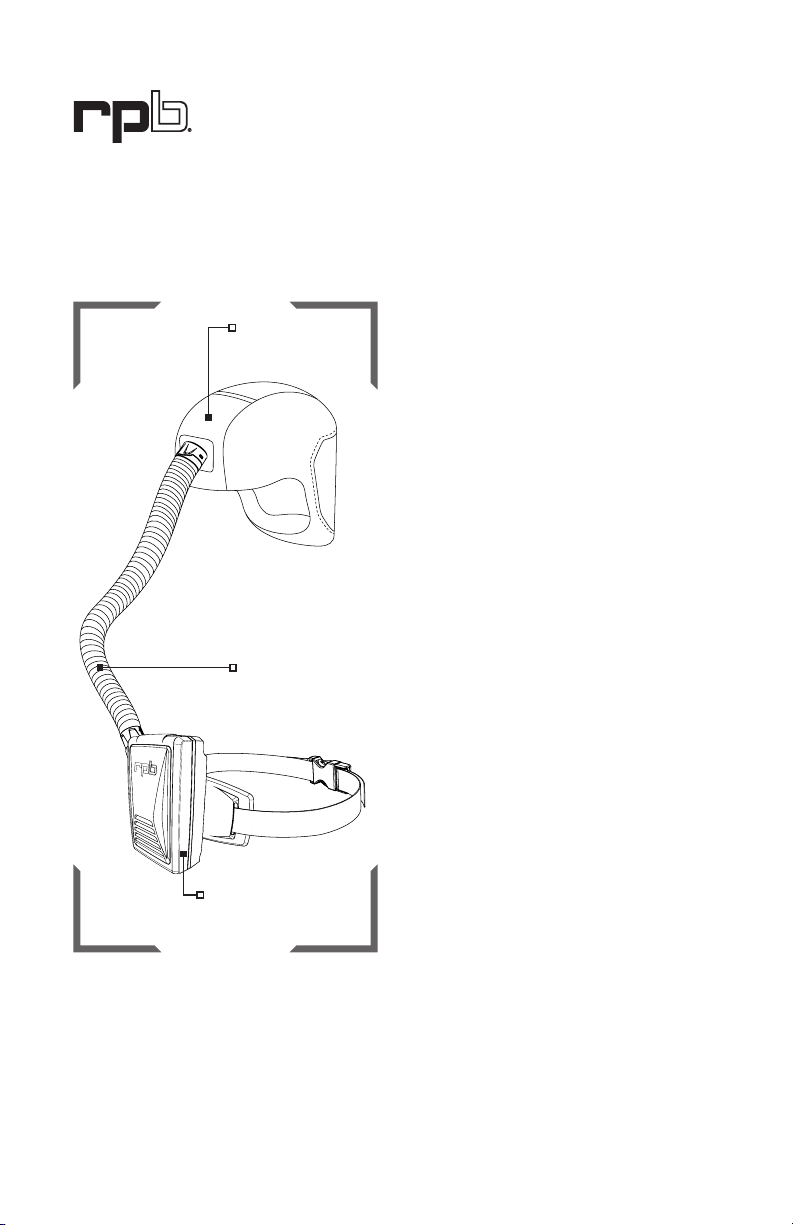
The T200™is a multiuse respirator designed for a range of different applications where
there is a need to be protected from airborne contaminants. With an optional bump cap for
head protection, and three hood options available, the T200 can used in both industrial and
healthcare settings. For increased hearing protection, optional Quiet-Slim™Ear Defender
earmuff system can be installed.
This product must be inspected and maintained in accordance with this instruction manual at
all times.
See PROTECTION PROVIDED AND LIMITATIONS (page 4) for details.
INTRODUCTION

4
T200™
RESPIRATION
The RPB T200 is approved by NIOSH in the categories as follows:
Powered Air
The RPB T200 Respirator, when properly fitted and used with all required components,
including the Breathing Tube Assembly and the RPB®PX5®Powered Air Purifying Respirator,
is a NIOSH approved powered air purifying respirator. The T200 significantly reduces, but
does not completely eliminate, the breathing of contaminates by the respirator wearer.
Specific protection depends on the filter selected for use in the RPB PX5 PAPR (see PX5
Instruction Manual).
HAZARD LIMITATIONS
The RPB T200 Respirator is NOT FOR USE if:
In atmospheres immediately dangerous to life or health (IDLH).
Wearer cannot escape without the aid of the respirator.
Atmosphere contains less than 19.5% oxygen.
In abrasive blasting applications.
For protection against hazardous gases (e.g., carbon monoxide).
Contaminants are in excess of regulations or recommendations.
Contaminants or contaminant concentrations are unknown.
Work area is poorly ventilated.
The temperature is outside the range of 14°F to 140°F (-10°C to +60°C).
A flammable or explosive atmosphere is present when used with systems including
electrical parts that are not intrinsically safe, such as the PX5®PAPR.
PROTECTION PROVIDED AND LIMITATIONS
Improper selection, fit, use, or maintenance of this product can result
in transfer of illness, injury, life threatening delayed lung, skin or eye
disease, or death. This product is intended for occupational use in accordance with applicable
standards or regulations for your location, industry, and activity (see Employer Responsibilities,
page 7). Familiarity with standards and regulations related to the use of this protective equipment
is recommended, even if they do not directly apply to you. If self-employed or if used in a non-
occupational setting, refer to Employer Responsibilities and Product User Safety Instructions. Go
to rpbsafety.com/important-safety-information for helpful links to OSHA and other content.
EMPLOYERS: Read this manual and the air supply device Instruction Manual and carry out the
Employer Responsibilities (page 7).
PRODUCT USERS: Read this manual and the air supply device Instruction Manual and follow the
Product User Safety Instructions (page 9).
CHECK WEBSITE FOR UPDATES. Product manuals are regularly updated.
Visit rpbsafety.com/resources for the most recent version of this manual before using the product.
IMPORTANT SAFETY INFORMATION
WARNING

5
FACE AND EYES
The T200 with Standard Lens does not meet ANSI Z87.1 face shield requirements.
The T200 with Safety Lens meets ANSI Z87.1 face shield requirements.
The T200 is not designed or tested to provide protection against molten metals or
corrosive liquids.
Note: Safety glasses may be required to be worn depending on the job hazard analysis.
The T200 does not provide protection against the transfer of impact to both safety and
prescription lens glasses worn underneath the hood. It does not provide complete eye and
face protection against severe impact and penetration. It is not a suitable substitute for
good safety practices and engineering controls.
HEAD
The T200, when equipped with the bump cap provides minimal head protection. It does not
meet the ANSI/ISEA Z89.1 requirements.
HEARING
The Quiet-Slim™Ear Defender system provides a Noise Reduction Rating (NRR) of 21. Refer
to the Quiet-Slim instruction manual to ensure proper installation and fit .
Other hearing protection, such as earplugs or ear defenders, must be properly fitted and
worn where noise levels exceed the OSHA permissible exposure levels.

6
T200™
Figure 1.1
1. RESPIRATOR
HOOD
ASSEMBLY
2. BREATHING
TUBE
ASSEMBLY
3. AIR SUPPLY PX5
RESPIRATOR COMPONENT DIAGRAM - PAPR
NIOSH - CAUTIONS AND
LIMITATIONS
POWERED AIR
A. Not for use in atmospheres containing
less than 19.5 percent oxygen.
B. Not for use in atmospheres immediately
dangerous to life or health.
C. Do not exceed maximum use
concentrations established by regulatory
standards.
F. Do not use powered air-purifying
respirators if airflow is less than six cfm
(170 lpm) for hoods and/or helmets.
H. Follow established cartridge and canister
change schedules or observe ESLI to
ensure that cartridge and canisters are
replaced before breakthrough occurs.
I. Contains electrical parts that may cause
an ignition in flammable or explosive
atmospheres.
J. Failure to properly use and maintain this
product could result in injury or death.
L. Follow the manufacturer’s User’s
Instructions for changing cartridges,
canister and/or filters.
M. All approved respirators shall be
selected, fitted, used and maintained
in accordance with MSHA, OSHA, and
other applicable regulations.
N. Never substitute, modify, add or omit
parts. Use only exact replacement parts
in the configuration as specified by the
manufacturer.
O. Refer to user’s instructions, and/or
maintenance manuals for information
on use and maintenance of these
respirators.
P. NIOSH does not evaluate respirators for
use as surgical masks.
The RPB T200 Powered Air Purifying Respirator consists of 3 main components. All 3
components must be present and properly assembled to constitute a complete NIOSH
approved respirator.

7
PLACE NIOSH APPROVAL LABEL HERE.
AIR SOURCE, FITTINGS, AND PRESSURE
AIR SOURCE
Powered Air
Check that the contaminated area is within the limits of use for a Powered Air Purifying
Respirator and determine the type of contamination. Once the contamination level has
been confirmed you can then determine the filter cartridge to be used for the application,
to make sure that you are sufficiently protected. Make sure that the area is well ventilated
and that regular air samples are taken to confirm the atmosphere stays within the levels
recommended by OSHA and other governing bodies. Follow the PX5 PAPR Instruction
Manual for more details.
EMPLOYER RESPONSIBILITIES
Your specific responsibilities may vary by location and industry, but in general RPB expects that
employers will:
Follow all applicable standards and regulations for your location, industry, and activity.
Depending on your location and industry, a number of standards and regulations may apply
to your selection and use of respirators and other personal protective equipment. These may
include such things as federal (e.g., OSHA, MSHA, Canadian Occupational Health and Safety),
local (e.g., state, provincial), or military standards and regulations and consensus standards
such as ANSI and CSA. There are also requirements specific to particular contaminants, e.g.
silica (see rpbsafety.com/importantsafetyinformation/ for more information), asbestos, organic
pathogens, etc. Know which requirements apply to your location and industry.
Have appropriate safety programs in place.
Have and follow:
A workplace safety program.
A written respiratory protection program in accordance with applicable standards and
regulations (e.g., OSHA 29 CFR 1910.134; ANSI/ASSE Z88.2; CSA Z94.4, etc.).
In accordance with the above,
Perform a hazard analysis and select appropriate equipment for each activity.
A hazard analysis should be performed by a qualified person. Controls should be in
place as appropriate and a qualified person should determine what kind of respiratory,
face, eye, head, and hearing protection are appropriate for the intended environments.
(For example, select a respirator appropriate to the specific airborne hazards, with
consideration of workplace and user factors and with an Assigned Protection Factor (APF)
that meets or exceeds the required level for employee protection.)
Check your workplace safety program, respiratory protection program, and standards
and regulations for your industry for related protection requirements. See this manual
(Protection Provided and Limitations, page 4) and the PX5 PAPR Instruction Manual for
product specifications.

8
T200™
Be sure employees are medically qualified to use a respirator.
Have a qualified physician or other licensed health care professional (PLHCP) perform
medical evaluations using a medical questionnaire or an initial medical examination as
per OSHA 29 CFR 1910.134.
Train employees in the T200’s use, maintenance, and limitations.
Appoint a qualified individual who is knowledgable about the RPB T200 per ANSI/ASSE
Z88.2 guidelines to provide training:
Section 8.1 Qualifications of the Respirator Trainer. Anyone providing respirator training
shall:
a) be knowledgable in the application and use of the respirator(s);
b) have practical knowledge in the selection and use of respirator(s) and work practices
at the site;
c) have an understanding of the site’s respirator program; and
d) be knowledgable of applicable regulations.
Train each T200 user in the product’s use, application, inspection, maintenance, storage,
fitting, and limitations in accordance with the content of this Instruction Manual and the
approved air supply device Instruction Manual and standard or regulatory requirements.
Ensure that each intended user reads both these manuals. Contact RPB for training
assistance.
Ensure that equipment is properly set up, used, and maintained.
Make sure that equipment is properly set up, inspected, fitted, used, and maintained,
including selection of the appropriate air filter cartridge for the application.
Measure and monitor airborne contaminants in the work area.
Measure and monitor airborne contaminant levels in the work area in accordance with
applicable requirements. Make sure work area is well ventilated.
If you have any questions, contact RPB.
Call Customer Service Department at:
Tel: 1-866-494-4599
Email: sales@rpbsafety.com
Web: rpbsafety.com
EMPLOYER RESPONSIBILITIES

9
PRODUCT USER SAFETY INSTRUCTIONS
BEFORE INITIAL USE - BE TRAINED AND MEDICALLY QUALIFIED
Do not use this respirator until you have read this manual and the PX5 PAPR Instruction Manual
(additional copies available at www.rpbsafety.com) and been trained in the respirator’s use,
maintenance, and limitations by a knowledgeable individual (appointed by your employer) who is
knowledgable about the RPB T200 Respirator.
Do not wear this respirator until you have passed a medical evaluation using a medical
questionnaire or an initial medical examination by a qualified physician or other licensed health
care professional (PLHCP).
Allergens: No known common allergens are used in this product.
Some materials could cause an allergic reaction in susceptible individuals. If you have a known
allergy or develop irritation, inform your employer. Follow all cleaning and care instructions
provided in the instruction manuals for this and any other RPB products you are using.
MAKE SURE THE SYSTEM IS READY FOR USE
Make sure you have a complete system. Verify that you have all required components for the
T200 to serve as a complete NIOSH approved respirator:
Respirator Hood Assembly (T200)
Breathing Tube Assembly
Flow Control Device (PX5 PAPR)
See Respirator Component Diagram (page 6). The RPB T200 is only approved to be used with
the RPB PX5 PAPR. Use only authentic RPB brand parts and components that are part of the
NIOSH approved respirator assembly. Using incomplete or inappropriate equipment, including the
use of counterfeit or non-RPB parts, can result in inadequate protection and will void the NIOSH
approval of the entire respirator. Do not modify or alter any part of this product.
Inspect all components daily for signs of damage or wear and tear that may reduce the level of
protection originally provided. Remove any damaged component or product, including any hood
or helmet that has been subject to impact, from service until repaired or replaced. Scratched or
damaged lenses or other components should be replaced with genuine RPB brand replacement
parts. When the hood is replaced, make sure to remove any additional protective film from both
sides of the lens. If the film is left in place, it could affect the optical clarity of the lens and cause
eye strain. Inspect the inside of the respirator for respirable dust or other foreign objects. Keep the
inside of the respirator clean at all times.
Make sure that the helmet is correctly assembled in the configuration that suits your application.
An incomplete or improperly installed hood could provide inadequate impact and respiratory
protection. See Respirator Setup and Care (page 12) See Donning (page 19) for fit information.
VERIFY THAT YOU HAVE THE APPROPRIATE EQUIPMENT FOR YOUR ACTIVITY
Verify that the T200 provides appropriate protection for your activity. As applicable, check your
workplace safety program, respiratory protection program, standards, and regulations for your
activity or industry. (See PROTECTION PROVIDED AND LIMITATIONS, page 4.)

10
T200™
BEFORE DONNING THE T200®:
Verify airborne contaminants are within recommended limits for respirator use:
Determine the type and level of contamination. Verify that airborne contaminant
concentrations do not exceed those allowed by applicable OSHA, EPA, or NIOSH
regulations and recommendations for powered air purifying respirators or supplied air
respirators.
Filtering the breathing air:
PAPR: Once the contamination level has been confirmed, determine the correct filter
cartridge to be used for the application, to make sure that you are sufficiently protected.
Follow the PX5 PAPR Instruction Manual.
Ventilation and monitoring:
Make sure that the area is well ventilated and that regular air samples are taken to
confirm the atmosphere stays within the levels recommended by OSHA and other
governing bodies.
If you have any questions, ask your employer.
DO NOT ENTER THE WORK AREA if any of the following conditions exist:
Atmosphere is immediately dangerous to life or health.
You cannot escape without the aid of the respirator.
Atmosphere contains less than 19.5% oxygen.
A flammable or explosive atmosphere is present when used with systems including
electrical parts that are not intrinsically safe, PX5.
Contaminants are in excess of regulations or recommendations.
Contaminants or contaminant concentrations are unknown.
Work area is poorly ventilated.
The temperature is outside the range of 14°F to 140°F (-10°C to +60°C).
LEAVE THE WORK AREA IMMEDIATELY IF:
Any product component becomes damaged.
Vision becomes impaired.
Airflow stops or slows down, or alarm sounds. Do not use Powered Air Purifying Respirators if
airflow is less than 6 cfm (170 lpm).
Breathing becomes difficult.
You become dizzy, nauseous, too hot, too cold, or ill.
Your eyes, nose, or skin become irritated.
The work area is a confined space (unless proper measures are taken for confined spaces).
You taste, smell, or see contaminants inside the helmet.
You have any other reason to suspect that the respirator is not providing adequate protection .
PRODUCT USER SAFETY INSTRUCTIONS CONTINUED

11
PRODUCT CARE
Never place the hood on hot surfaces. Do not apply paints, solvents, adhesives or self-adhesive
labels except as instructed by RPB. This product may be adversely affected by certain chemicals.
See the “Respirator Setup and Care” section (page 12) for more specific cleaning instructions.
INSTRUCTIONS FOR SPECIFIC USES OR ENVIRONMENTS
Confined Spaces
If this respirator is used in confined spaces, ensure the area is well ventilated and that all
contaminant concentrations are below those recommended for this respirator. Follow all
procedures for confined space entry, operation, and exit as defined in applicable regulations and
standards.

12
T200™
RESPIRATOR SETUP AND CARE
HEAD HARNESS WITH TOP STRAPS ASSEMBLY AND ADJUSTMENT
The head harness can be adjusted with
the ratchet adjuster on the back of the
headband. Turn the knob to tighten and
loosen the headband.
FIGURE 2.4
1
1
2
1
2
Attach the front band to the head harness
brackets. 1. Slide the ends into the channel
on the brackets. 2. Hook the keyhole over
the peg in the inside of the bracket. Adjust
to fit.
FIGURE 2.1
Attach the top straps to the head harness
brackets with the rounded side towards the
head. Hook the hole in the straps under the
tab on the head harness bracket. Then push
the slot on the straps over the top clip on
the head harness bracket.
FIGURE 2.1
Align the ratchet assembly so that the RPB
logo on the inside pad is up right. Attach the
ratchet assembly to the holes in the head
harness brackets by (1) sliding the tab on
the end of the ratchet band over the hole in
the bracket from the inside. 2. Then snap
the clip of the ratchet into the hole on the
bracket.
1
1
2
1
2
FIGURE 2.3

13
To make the head harness straps smaller,
push the two straps together to tighten.
To make the top straps bigger, 1. unclip the
end tabs from over the strap. 2. Then pull
the straps apart to the desired notch. Then
clip the tabs back over the strap to hold it
securely.
FIGURE 2.5 FIGURE 2.6
1
2
To remove, pull strap away from the
bracket, unhook from the bottom and lift
upwards.
FIGURE 3.1
Attach the bump cap to same mounting
locations that the straps were removed
from. Hook the hole in the bump cap under
the tab on the head harness bracket. Then
rotate the bump cap mounting hole over the
top clip on the head harness bracket.
FIGURE 3.2
BUMP CAP ASSEMBLY

14
T200™
Align the head harness bracket with the
lens mount, lift back tab and push towards
the front until at desired position, making
sure the tab is secured in the desired
position slot. Repeat for the other side.
Adjust the lens mounts using the finger tab
to position them forward or back on the
mounts. This will bring the lens of the hood
closer or farther away from the face.
1
2
FIGURE 4.1 FIGURE 4.2
ATTACHING THE LENS MOUNTS
1. Line up the alignment arrows. 2. Slide
the wings of the duct assembly into the
“W” shaped slot on the side clips until the
middle clip securely snaps over the cross
section of the wing.
1
12
2
FIGURE 5.1
ATTACHING THE AIR DUCT
RESPIRATOR SETUP AND CARE CONTINUED
Duct assembly attached to lens mount.
FIGURE 5.2
NOTE: BUMP CAP ASSEMBLY SHOWN IN FIGURES 4.1-6.5. ALL HEAD HARNESS AND AIR
DUCT SETUP INSTRUCTIONS APPLY TO BOTH BUMP CAP (15-850) AND TOP STRAPS
(15-841) VERSIONS.

15
Insert the head suspension or bump cap
assembly into the hood.
PLACING THE HEAD SUSPENSION/BUMP CAP AIR DUCT INTO THE HOOD
FIGURE 6.1 FIGURE 6.2
Insert the threaded inlet of the air duct into
the black rubber seal on the back of the
hood. Starting from the bottom side, stretch
the rubber seal over the retaining rib behind
the threaded section.
1
1
2
2
Repeat the steps for the other side.
1
1
2
2
FIGURE 6.3
Line up the tabs of the lens with the clips on
the sides of the lens mount.
- Hook point 1 under point 1 as pictured.
- Snap point 2 over point 2 as pictured.
FIGURE 6.4

16
T200™
Adjust the airflow director up or down so
that the air flows either towards the lens or
towards the face.
FIGURE 6.5
Make sure the flat seal is on the breathing
tube coupler. Insert the bayonet end of the
breathing tube into the outlet of the PX5®
PAPR and complete a half turn clockwise
until it is secure.
FOR USE WITH RPB®PX5®- SEE THE PAPR
USER MANUAL
When the T200 Respirator is being used
in conjunction with the RPB®PX5®PAPR,
please refer to the RPB®PX5®Instruction
Manual for set up and use of the assembly.
Note: The RPB®PX5®is a Powered Air
Purifying Respirator, therefore care must be
taken when selecting the correct filter for
the application the respirator will be used
in.
FIGURE 8.1
POWERED AIR
Make sure the o-ring is on the threaded
inlet. Attach the breathing tube to the inlet
by turning clockwise. Do not over tighten.
Hold the hood to prevent it from twisting as
the breathing tube is tightened.
O-RING
FIGURE 7.1
ATTACH THE BREATHING TUBE
RESPIRATOR SETUP AND CARE CONTINUED

17
CLEAR-VISION CASSETTE LENSES
Peel off the backing of the cassette lenses.
Apply the cassette to the outside of the lens
sewn into the hood.
Use the pre-folded tabs to remove each
lens as needed.
FIGURE 10.1 FIGURE 10.2
Put on the 18-524 RPB®Quiet-Slim
earmuffs with the neckband around the
back of the neck, making sure the pads
seal completely around the ears. Secure
the over-head band with the hook and loop
strap. Don the hood after putting on the
earmuffs.
Refer to the Quiet-Slim earmuff Instruction
Manual for more details.
FIGURE 9.2
STETHOSCOPE OR EARMUFF USE
The hood has been designed for the users
ears to be exposed so a stethoscope may
be used without compromising the users
breathing air quality.
FIGURE 9.1

18
T200™
The bump cap pad is attached to the inside
of the bump cap with hook and loop dots.
Peel the pad out of the helmet. The pad can
be washed with mild detergent or replaced.
Remove the head harness or bump cap duct
assembly from the hood by uncliping the
lens on both sides and pulling the threaded
inlet out of the rubber seal on the back.
CLEANING THE T200 AND THE BUMP CAP PAD
FIGURE 12.1
FIGURE 12.2
Clean the head harness or bump cap and the duct assembly with hot water and mild
deteregent. Allow to dry before placing back inside of a hood.
To remove the brow pad, undo the hook
and loop connections. Clean it with mild
detergent or replace it with a new one.
Place the new or cleaned brow pad onto the
inside of the front strap of the head harness.
Fold the top and bottom over and secure the
hook and loop tabs.
BROW PAD REPLACEMENT AND CLEANING
FIGURE 11.1 FIGURE 11.2
RESPIRATOR SETUP AND CARE CONTINUED

19
DONNING YOUR HOOD
Once you have completed the set up, you are ready to fit your RPB T200 Respirator. Firstly
check inside the hood and head harness assembly to ensure that it is free of dust, dirt or
contaminants. Ensure the air source is turned on and is flowing. Then open the bottom of the
hood, put the respirator onto your head, pull the hood down, adjust the head harness ratchet
to fit. Make sure it is sealed with the elastic cord. The seal is designed to sit above the ratchet
to allow easy adjustment, but the remainder of the head harness and duct should be fully
inside of the hood.
If using a neck seal hood, ensure the neck seal is sealing all of the way around the neck with
adjustable elastic cord. Tuck the inner bib in under your coveralls or other outer garment. Pull
the outer bib down over your shoulders and make sure it is laying flat on your chest and back
so that it does not get in the way of your work.
DONNING AND DOFFING
Open the bottom of the hood with the
air flowing from the air source, put the
respirator onto your head. Make sure the
hood is centered on your head.
Pull the hood down and tighten the head
harness ratchet to fit. Tighten the pull cord.
Make sure that the elastic cord is sealing
around under the chin, up the cheeks, over
the ears and around the back of the head.
FIGURE 13.1 FIGURE 13.2
T200 FACE SEAL HOODS
Always check the interior of the respirator for contaminants before
donning. Always don and doff the helmet while outside the work area, keeping the interior
of the hood clean and free of contaminants. Not doing these steps could expose you to
hazardous materials, and contaminants that could impair the function of the respirator.
WARNING

20
T200™
Tuck the inner bib into the collar of your
shirt, coveralls, or protective gear to prevent
contaminants from entering the hood. Pull
the outer bib down.
Fasten the flow control device belt around
your waist and over your hips.
FIGURE 14.3 FIGURE 14.4
With the air source turned on and flowing,
open the bottom of the hood, put the
respirator onto your head. Make sure the
hood is centered on your head.
Pull the hood down, adjust the head
harness ratchet to fit, and make sure the
neck seal is sealing around your neck,
making sure the elastic is sinched securely.
FIGURE 14.1 FIGURE 14.2
T-LINK NECK SEAL HOODS
DONNING AND DOFFING CONTINUED
Table of contents
Other RPB Respiratory Product manuals