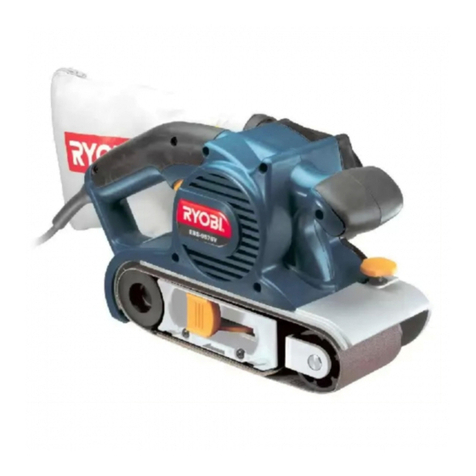
Ryobi EBS8076F Operation manual

EBS8076F
BELT SANDER
OWNER’S OPERATING MANUAL
THANK YOU FOR BUYING A RYOBI BELT SANDER
Your new belt sander has been engineered and manufactured to Ryobi’s high standard for
dependability, ease of operation and operator safety. Properly cared for, it will give you years
of rugged, trouble free performance.
CAUTION: Carefully read through this entire owner’s manual before using
your belt sander.
Pay close attention to the Rules for Safe Operation, Warnings and Cautions.
If you use your belt sander properly and only for what it is intended, you will enjoy years of
safe, reliable service.
Thank You again for buying Ryobi tools.
SAVE THIS MANUAL FOR FUTURE REFERENCE
Double
Insulated

Fig. 1 Fig. 2
Fig. 3 Fig. 4
3
1
2
3
4
5
567
7
8
8
11
10 913
12

Fig. 6
14
Fig. 5
Fig.7
15

1
INSTRUCTIONS FOR SAFE HANDLING
WARNING! Read all instructions. Failure to follow all
instructions listed below may result in electric shock,
fire and/or serious injury. The term “Power Tool” in all of
the warnings listed below refers to your mains operated
(corded) power tool or battery operated (cordless) power
tool.
SAFETY ALERT SYMBOL. Indicates caution or
warning. May be used in conjunction with other
symbols or pictures.
WARNING: Failure to obey a safety warning can
result in serious injury to yourself or to others.
Always follow the safety precautions to reduce
the risk of fire, electric shock and personal injury.
WARNING: Do not attempt to operate this tool
until you have read thoroughly and understood
completely safety rules, etc. contained in this
manual. Failure to comply can result in accidents
involving fire, electric shock or serious personal
injury. Save owners manual and review frequently
for continuing safe operation and instructing
others who may use this tool.
The operation of any tool can result
in foreign objects being thrown into
your eyes, which can result in severe
eye damage. Before beginning
power tool operation, always wear
safety goggles or safety glasses with
side shields and a full face shield when needed.
We recommend Wide Vision Safety Mask for use
over eyeglasses or standard safety glasses with side
shields.
WORK AREA
nKeep work area clean and well lit. Cluttered and
dark areas invite accidents.
nDo not operate power tools in explosive
atmospheres, such as in the presence of
flammable liquids, gases or dust. Power tools
create sparks which may ignite the dust or fumes.
nKeep children and bystanders away while
operating a power tool. Distractions can cause you
to lose control.
ELECTRICAL SAFETY
nPower tool plugs must match the outlet. Never
modify the plug in any way. Do not use any
adapter plugs with earthed (grounded) power
tools. Unmodified plugs and matching outlets will
reduce risk of electric shock.
nAvoid body contact with earthed or grounded
surfaces such as pipes, radiators, ranges and
refrigerators. There is an increased risk of electric
shock if your body is earthed or grounded.
nDo not expose power tools to rain or wet
conditions. Water entering a power tool will increase
the risk of electric shock.
nDo not abuse the cord. Never use the cord for
carrying, pulling or unplugging the power tool. Keep
cord away from heat, oil, sharp edges or moving
parts. Damaged or entangled cords increase the risk
of electric shock.
nWhen operating a power tool outdoors, use an
extension cord suitable for outdoor use. Use of
a cord suitable for outdoor use reduces the risk of
electric shock.
PERSONAL SAFETY
nStay alert, watch what you are doing and use
common sense when operating a power tool. Do
not use a power tool while you are tired or under the
influence of drugs, alcohol or medication. A moment
of inattention while operating power tools may result
in serious personal injury.
nUse safety equipment. Always wear eye protection.
Safety equipment such as dust mask, non-skid
safety shoes, hard hat or hearing protection used for
appropriate conditions will reduce personal injuries.
nAvoid accidental starting. Ensure the switch is in
the off position before plugging in. Carrying power
tools with your finger on the switch or plugging in
power tools that have the switch on invites accidents.
nRemove any adjusting key or wrench before
turning the power tool on. A wrench or a key left
attached to a rotating part of the power tool may
result in personal injury.
nDo not overreach. Keep proper footing and
balance at all times. This enables better control of
the power tool in unexpected situations.
nDress properly. Do not wear loose clothing or
jewellery. Keep your hair, clothing and gloves away
from moving parts. Loose clothes, jewellery or long
hair can be caught in moving parts.
nIf devices are provided for the connection of dust
extraction and collection facilities, ensure these
are connected and properly used. Use of these
devices can reduce dust related hazards.

2
INSTRUCTIONS FOR SAFE HANDLING
POWER TOOL USE AND CARE
nDo not force the power tool. Use the correct power
tool for your application. The correct power tool will
do the job better and safer at the rate for which it was
designed.
nDo not use the power tool if the switch does not
turn it on and off. Any power tool that can not be
controlled with the switch is dangerous and must be
repaired.
nDisconnect the plug from the power source before
making any adjustments, changing accessories
or storing power tools. Such preventive safety
measures reduce the risk of starting the power tool
accidentally.
nStore idle power tools out of the reach of children
and do not allow persons unfamiliar with the
power tool or these instructions to operate the
power tool. Power tools are dangerous in the hands
of untrained users.
nMaintain power tools. Check for misalignment
or binding of moving parts, breakage of parts and
any other condition that may affect the power tools
operation. If damaged, have the power tool repaired
before use. Many accidents are caused by poorly
maintained power tools.
nKeep cutting tools sharp and clean. Properly
maintained cutting tools with sharp cutting edges are
less likely to bind and are easier to control.
nUse the power tool, accessories and tool bits etc.,
in accordance with these instructions and in the
manner intended for the particular type of power
tool, taking into account the working conditions
and the work to be performed. Use of the power
tool for operations different from intended could result
in a hazardous situation.
SERVICE
nHave your power tool serviced by a qualified
repair person using only identical replacement
parts. This will ensure that the safety of the power
tool is maintained.
nCheck damaged parts. Before further use of the
tool, a guard or other part that is damaged should
be carefully checked to determine that it will operate
properly and perform its intended function. Check for
alignment of moving parts, free running of moving
parts, breakage of parts, mounting and any other
part that is damaged should be properly repaired
or replaced by an authorized service centre unless
otherwise indicated in this instruction manual.
Have defective switches replaced by an authorized
service centre. Do not use the tool if the switch does
not turn it on and off.
SPECIFIC SAFETY INSTRUCTIONS FOR
SANDERS
nAlways wear safety goggles and a dust mask
when sanding, especially sanding over-head.
nThe machine is not suitable for wet sanding.
nDo not use sanding paper larger than needed.
Extra paper extending beyond the sanding pad can
also cause serious lacerations.
nThe dust bag shall be equipped with the tool.
It shall be emptied frequently. To connect dust bag,
insert the adapter of dust bag to the dust-collection
opening on the rear end of the sander.
WARNING
Do not throw sanding dust on an open fire
because materials in fine particle form may be
explosive.
WARNING
A suitable breathing respirator must be worn
while sanding lead paint, some woods and metal
to avoid breathing the harmful/toxic dust or air.
SPECIFICATIONS
Voltage : 240V ~ 50Hz
Input power : 800W
No load speed : 150-300 m/min
Belt size : 76 x 533 mm
Net weight : 3.6 kg
Be sure to check the nameplate on the product,
because the voltage is subject to change depending
on the area in which in the product is to be used.

3
DESCRIPTION
1. Adjustable front handle
2. Sanding belt
3. Tension release lever
4. Rear handle
5. Dust bag
6. Dust port
7. Lock-on button
8. Switch
9. Adjustment screw
10.Front roller
11. Rear roller
12.Variable speed control
13. Livetool IndicatorTM
14. Front handle release button
15. Slot holder
BELT SANDER SAFETY PRECAUTIONS
nHold the tool firmly with both hands.
nKeep the cord away from the rotating abrasive belt.
nKeep your hands away from rotating parts.
nDo not place the tool on a surface while the belt is
still moving since belt rotation will cause it to move
and may result in the tool being damaged or personal
injury.
nThe tool must be used only for dry sanding.
nDo not continue to use worn or torn abrasive belts.
nClamp the work piece if it does not remain stationary
due to its own weight.
nTurn the tool on before applying it to the work piece.
Turn the tool off after it has been lifted away from the
work piece.
STANDARD ACCESSORIES
G-Clamp, Dust bag, Abrasive belt x 3, Sanding frame.
APPLICATIONS
(Use only for the purpose listed below)
1. Surface finishing for wood.
2. For removal of rusl and surface finishing for metal.
NOISE BUILD-UP
Noise (sound pressure level ) in the workplace can exceed
87 dB (A). In this case, sound insulation and hearing
protection measure must be taken by the operator.
SWITCH (FIG. 1)
This tool is started and stopped by squeezing and
releasing the trigger (8).
For continous operation, press the lock button (7) while
trigger is being squeezed. Squeeze trigger again to
release the lock.
The belt speed can be freely adjusted from 150 to 300
m/min by turning the variable speed control (12).
(1= lowest speed / 6 = highest speed )
DUST BAG (FIG. 2)
When sanding wood, the dust bag (5) should be used.
Although the dust bag has a substanial capacity, it should
be emptied frequently.
Opening the zipper of the dust bag allows complete
cleaning.
CAUTION!
When sanding metal, the dust bag should not
be used, because of the risk of fire from flying
sparks.
CHANGING THE ABRASIVE BELT (FIG.3 TO 4)
WARNING!
BE SURE TO DISCONNECT THE TOOL FROM
THE POWER SUPPLY WHEN MOUNTING AND
REMOVING THE SANDING BELT.
nPlace the tool on its side and lift the lever (3) to retract
the front roller and release the belt tension. (Fig. 3).
nPull the sanding belt off.
nMount a new sanding belt.
NOTE!
Be sure that the arrow inside of the belt is pointing
in the same direction as that of the tool.
nPush the lever down to the original position. (Fig. 4)
CAUTION!
Ensure that your fingers are not trapped.

4
ADJUSTABLE FRONT HANDLE (FIG. 5)
FRONT HANDLE RELEASE BUTTON
Press the front handle release button (14) to allow
the front handle to be adjusted to the desired working
position.
FRONT HANDLE ADJUSTMENTS
While depressing the front handle release button move
the handle upwards or downwards to the desired angle
of either -15, 0, 15 and 30 degrees. Release the front
handle release button to allow the handle to lock in to the
selected.
OPERATING (FIG. 6)
Never cover air vents since they must always be open for
proper motor cooling.
Make sure that the work piece is free of nails and other
foreign objects that could tear the abrasive belt.
Hold the tool firmly with both hands. Turn the switch on
and permit the rotation of the abrasive belt to reach full
speed. Then gently place the tool on the work piece
surface. Move the tool back and forth. Never exert
excessive pressure on the tool. The weight of the tool
applies adequate pressure. Excessive pressure will retard
the abrasive action, leave an uneven finish and cause
extra wear to both the tool and the abrasive belt. Always
lift the tool off the work piece before turning the switch off.
LIVETOOL INDICATORTM
This tool features a Livetool IndicatorTM (13) which
illuminates as soon as the tool is connected to the power
supply. This warns the user that the tools is connected to
live power and will operate when the switch is pressed.
AUTO BELT TRACKING SYSTEM
The machine is designed with auto-belt tracking system.
Turn the tool upside down and hold it firmly with one
hand, then start the tool and observe the tracking of the
sanding belt.
The edge of the sanding belt will automatically be even
with the outer edges of wear plate.
The system has been preset at the factory but may
required adjustment when belt are changed or an older
belt stretches. If the edge of the belt deviates more than
3.175mm (1/8 inch) from the edge of the wear plate,
adjust the belt by turning the auto-track adjusting screw
until the belt is even with the edge of wear plate.
CLAMP
The clamp is designed to stabilize the tool when using it in
the bench configuration.
MOUNT & ADJUSTING THE SANDING FRAME
Put the sanding frame on the belt sander and attach the
four slot into slot holder (15).
By turning the adjustment bolt clockwise, the sanding
frame will rise and can be taken out. If turning
counterclockwise, it will down and the depth will be
added.
MAINTENANCE
After use, check the tool to make sure that it is in top
condition.
It is recommended that you take this tool to a Ryobi
Authorized Service Centre for a through cleaning and
lubrication at least once a year.
Do not make any adjustment while the motor is in motion.
Always disconnect the power cord from the receptacle
before changing removable or expendable parts (blade,
bit, sanding paper etc.), Lubricating or working on the
unit.
If the supply cord is damaged, it shall be replaced by
the manufacturer or its service centre or similar qualified
person in order to avoid a hazard.
WARNING!
To ensure safety and reliability, all repair should
be performed by an AUTHORIZED SERVICE
CENTRE or other QUALIFIED SERVICE
ORGANIZATION.
SAVE THESE INSTRUCTION FOR FURTURE
REFERENCE.
ENVIRONMENTAL PROTECTION
Do not dispose of in general household waste.
Instead, dispose in an environmentally friendly
way. Contact your local recycling centre or
council for advise. Ryobi takes the care of the
environment very seriously.

4%#(42/.)#).$5342)%3!5342!,)!049,)-)4%$
'5!2!.4%%
!".
#ONTACT DURING NORMAL BUSINESS HOURS
!5#+,!.$ #LEMOW $RIVE -T 7ELLINGTON .:
#ONTACT DURING NORMAL BUSINESS HOURS
!,,!5342!,)!.%.15)2)%34%,
7%34!5342!,)!.%.15)2)%34%,
!
0URCHASED&ROM
DDRESS /F $EALER
0RESENT 4HIS &ORM 7ITH 9OUR 0URCHASE $OCKET 7HEN 'UARANTEE 3ERVICE )S 2EQUIRED
4EL &AX WWWRYOBICOMAU
4EL &REE #ALL &AX WWWRYOBICONZ
&OR YOUR RECORD AND TO ASSIST IN ESTABLISHING DATE OF PURCHASE NECESSARY FOR INGUARANTEE SERVICE
PLEASE KEEP YOUR PURCHASE DOCKET AND THIS FORM COMPLETED WITH THE FOLLOWING PARTICULARS
4HIS 'UARANTEE &ORM 3HOULD "E 2ETAINED "Y 4HE #USTOMER !T !LL 4IMES
$ATE -ODEL .O 3ERIAL .O
39$.%9"UILDING"2OSEHILL)NDUSTRIAL%STATE3HIRLEY3TREET2OSEHILL.37
4%#(42/.)#).$5342)%3!5342!,)!049,)-)4%$
4%#(42/.)#).$5342)%3.:,)-)4%$
3UBJECT TO THE GUARANTEE CONDITION BELOW THIS 2YOBI
TOOLHEREINAFTERCALLEDhTHEPRODUCTvISGUARANTEEDBY
4%#(42/.)# ).$5342)%3 !5342!,)! 049
,)-)4%$HEREINAFTERCALLEDhTHE#OMPANYvTOBEFREE
FROMDEFECTSINMATERIALORWORKMANSHIPFORAPERIODOF
MONTHSFROMTHEDATEOFORIGINALPURCHASECOVERING
BOTHPARTSANDLABOUR5NDERTHETERMSOFTHISGUARAN
TEETHEREPAIRORREPLACEMENTOFANYPARTSHALLBETHE
OPINION OF THE #OMPANY OR ITS AUTHORISED SERVICE
CENTRE3HOULDSERVICEBECOMENECESSARYDURINGTHE
WARRANTY PERIOD THE OWNER SHOULD CONTACT THE
CUSTOMERSERVICE(%,0,).%ORCONTACT
THERETAILERFROMWHOMTHEPRODUCTWASPURCHASED
)NORDERTOOBTAINGUARANTEESERVICETHEOWNERMUST
PRESENTTHESALESDOCKETAND'UARANTEE#ERTIFICATETO
CONFIRMDATEOFPURCHASE4HISPRODUCTISSOLDBYTHE
DEALER OR SERVICE CENTRE AS PRINCIPAL AND THE DEALER
HAS NO AUTHORITY FROM THE #OMPANY TO GIVE ANY
ADDITIONALGUARANTEEONTHE#OMPANYSBEHALFEXCEPT
ASHEREINCONTAINEDORHEREINREFERREDTO
'UARANTEE#ONDITIONS
4HISGUARANTEEONLYAPPLIESPROVIDEDTHATTHE0RODUCT
HASBEENUSEDINACCORDANCEWITHTHEMANUFACTURERS
RECOMMENDATIONSUNDERNORMAL USE AND REASONABLE
CARE IN THE OPINION OF THE #OMPANY AND SUCH
GUARANTEE DOES NOT COVER DAMAGE MALFUNCTION OR
FAILURERESULTINGFROMMISUSENEGLECTABUSEORUSED
FORAPURPOSEFORWHICHITWASNOTDESIGNEDORISNOT
SUITED AND NO REPAIRS ALTERATIONS OR MODIFICATIONS
HAVE BEEN ATTEMPTED BY OTHER THAN AN AUTHORISED
SERVICECENTRE4HISGUARANTEEWILLNOTAPPLYIFTHETOOL
ISDAMAGEDBYACCIDENTORIFREPAIRSARISEFROMNORMAL
WEARANDTEAR
4HE#OMPANYACCEPTSNOADDITIONALLIABILITYPURSUANT
TOTHISGUARANTEEFORTHECOSTSOFTRAVELLINGORTRANSPOR
TATIONOFTHE0RODUCTORPARTSTOANDFROMTHESERVICE
DEALERORCENTRESUCHCOSTSARENOTINCLUDED
INTHISGUARANTEE
#ERTAINLEGISLATIONINCLUDINGTHE4RADE0RACTICES
!CT AS AMENDED AND OTHER STATE AND
TERRITORIALLAWSGIVERIGHTSTOTHEBUYERANDIMPOSE
LIABILITYONTHESELLERINCERTAINCIRCUMSTANCES.OTHING
HEREINSHALLHAVETHEEFFECTOFEXCLUDINGRESTRICTINGOR
MODIFYING ANY CONDITION GUARANTEE RIGHT OR LIABILITY
IMPOSED TO THE EXTENT ONLY THAT SUCH EXCLUSION
RESTRICTION OR MODIFICATION WOULD RENDER ANY TERM
HEREINVOID
Table of contents
Other Ryobi Sander manuals

Ryobi
Ryobi RPS18 User manual

Ryobi
Ryobi S652DK User guide

Ryobi
Ryobi RB101 User guide

Ryobi
Ryobi R18ROS User manual

Ryobi
Ryobi CORNER CAT CFS1503G User manual

Ryobi
Ryobi R12PS User manual

Ryobi
Ryobi ERO-2412V User manual

Ryobi
Ryobi RS280VS User manual

Ryobi
Ryobi RS290 User guide

Ryobi
Ryobi BE318-2 User manual

Ryobi
Ryobi P440 User manual

Ryobi
Ryobi ESS200RS User manual

Ryobi
Ryobi BE318-2 Quick start guide

Ryobi
Ryobi RPS1201 User manual

Ryobi
Ryobi R18BS User manual

Ryobi
Ryobi PBF100 User manual

Ryobi
Ryobi EAG85125GS Operation manual

Ryobi
Ryobi BE319TH User manual

Ryobi
Ryobi EBS-9576V User manual

Ryobi
Ryobi RRS-300 Operation manual