manuals.online logo
Brands
  1. Home
  2. •
  3. Brands
  4. •
  5. Safeguard Supply
  6. •
  7. Accessories
  8. •
  9. Safeguard Supply LRA-DCRXA User manual

Safeguard Supply LRA-DCRXA User manual

LRA-DCRXA/DCRXA-L Wireless Door Chime
Owner’s Manual
is viccoiswi Par5o ........ rsraionoisvic issco 
oowing coniions . is vica nocas arinrrnc. . isvics
accan inrrncincing inrrnca a cas nsiroraion.
Introution
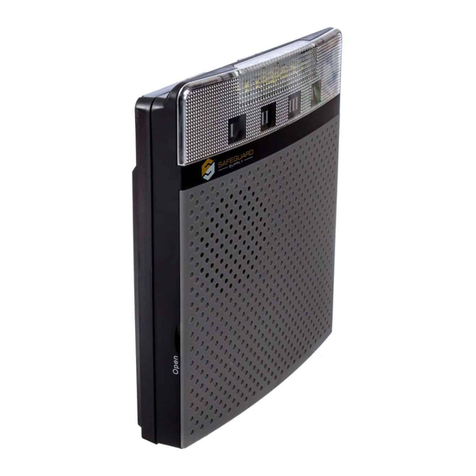
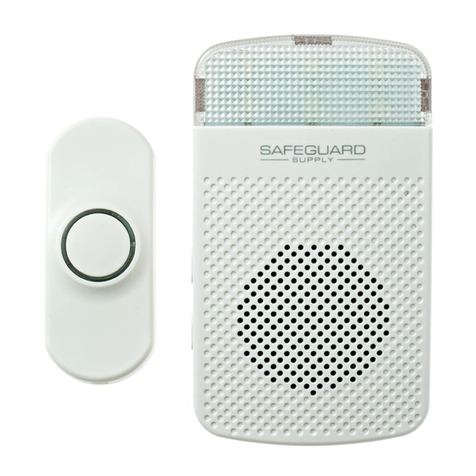
The ADCRXA/DCRXA-L is a wireless door chime from Safeguard Supply. The
wireless door chime is powered by C-sized alkaline batteries (not included) or by
an optional plugin transformer.
Iortant otes
This receiver will work with up to four (4) compatible LRA transmitter/sensors,
with each transmitters being paired to a zone on the receiver.
The receiver has three (3) modes of operation; chime only, strobe only, chime
strobe.
The unit is powered by 3 x c-sized alkaline batteries. An optional plug is
available.
The unit may be wall mounted or sit upright on a flat surface.
The unit has 32 melodies to choose from with a sound rating of up to 90 dBA.
rograing the Receiver
There are a variety of compatible transmitters/sensors with t his receiver.
Each transmitter/sensor will be programmed to one (1) of the four (4)
zones on the receiver. We recommend assigning a unique melody to
each zone so you distinguish the triggering transmitter/sensor by the
sound the receiver plays.
The process of programming the receiver is the same, regardless of the
transmitter up to the point where you "trigger" the transmitter, as this
process is slightly different, depending on the transmitter. For example,
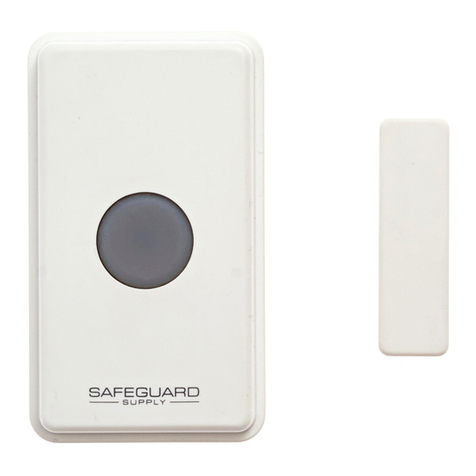
to trigger a push button you would simply press the button. To trigger a
magnetic door contact you would separate the magnetic. Other than
this, the process is the same. If you are only programming one
transmitter/sensor, you do not have to program the other zones.
rograing the Receiver (ont
In this example we are programming with the LRA-PBTXA-L. For
full instructions on the LRA-PBTXA-L push button, please consult
that manual.
Note: Once a zone is occupied (programmed) to a transmitter, the zone
cannot accept a different transmitter until the memory for that zone is
deleted or erased.
•nsure the battery(s) is installed in the wireless push button
transmitter you are programming to this unit.
•Ensure the batteries are installed in the receiver, or it is
plugged in using the optional add-on plug,
•pen the front coer of the receier.
•ress  hold the one selector button . for approximately
three seconds until you see "one " flashing on the receier.
•hen it starts to flash, release the one selector button. The
flashing one signifies that this one is in
programmingpairing mode.
•If you are programming zone 1 on this receiver moe to the
next step. If you are programming to a different one, press
the one selector button  again to scroll to the desired one.
•ext you will select the desired melody for that one by
scrolling through the melodies using the melody selector
button ♫ located next to one selector button.
•nce you hear the desired melody, stop pressing the
melody selector button ♫.
•Press the button on the wireless push button (ensure
batteries are installed).
•A green light will appear around push button trigger to show
transmission. When the transmitter has successfully paired to
the receier, the strobe on the receiver will flash once, and
the next ones  will start blinking (showing that zone is
now in program mode).
•If you would like to program another transmitter/sensor,
follow this step. If not, skip to the next step. Pressing the ♫
button, scroll to the desired melody for this one. nce you
hear the melody, trigger the additional transmitter to pair the
transmitter to this one.
This shows you are no longer in pairing programming mode.
Installing Batteries or Using a Plug
On
Off
Pad On
Pad 12V
Ready
12V Plug (optional)
Battery compartment Battery cover
Speaker
Zone LED
Flasher
Zone selector
button
Melody
selector button
Volume control
Function Switch
Battery
compartment
Battery cover
aeguar uly
 oon tation t.  
ennesaw, A 
www.safeguardsupply.com
Test the rograing
After completing the programming steps above, test the
programmingpairing prior to mounting the transmitter. Trigger
the transmitter/sensor. The receiver should play the melody,
flash, or do both, depending on mode of operation.
Lo attery Iniator
A randomly blinking one light on the AA-L receier
indicates that the battery is low for this transmitter. lease
replace the battery as soon as possible.
When batteries are low in the receiver, the strobe light will
flash once every 5-seconds.
TEIAL RT
If you encounter any difficulty in the operation of this product after
reading the manual, please contact us. You can reach us by phone at
 from  A Ā to   Monday-Friday (astern Standard
Time. e will be happy to answer your questions and help you in any way
we can.
WARRANTY: The product you have purchased is guaranteed against defects
in workmanship and materials for a period of one year from the date of
purchase. Warranties implied by law are subject to the same time period
limitation. For a detailed warranty policy, please visit our website by visiting:
www.safeguardsupply.com
ARI ancer and eproductie arm. o to www.P65Warnings.ca.gov for more information.
rograing the Receiver (ont
•When the transmitter has successfully paired to the receier, the
strobe on the receiver will flash once, and the next ones  will
start blinking (showing that zone is now in program mode).
•If you would like to program another transmitter/sensor, follow this
step continue the above steps. If not, skip to the next step.
•Using the zone selector button, scroll past zone 4. This will cause
the receiver to exit programming mode.
Changing the Melody for a Zone
•Press & hold the zone selector button until the zone indicator light
begins to blink (approximately 3-seconds). Release the button.
•Press the zone selector button to select the specific zone for melody
change. Once you arrive on that zone, stop pressing the button.
•Next, press the melody button to scroll through the available
melodies.
•Trigger the transmitter programmed to this zone. You will then hear
a short tone sound indicating the melody has been changed.
Deleting a Transmitter/Sensor from Zone Memory
•Press & hold the zone selector button until the zone indicator light
begins to blink (approximately 3-seconds). Release the button.
•Press the zone selector button to select the specific zone for
melody change. Once you arrive on that zone, stop pressing the
button.
•Simultaneously, press & hold both the zone selector & melody
buttons for approximately 5-seconds.
•The receiver will play a short tone sound indicating the memory
has been deleted.
Using Relays On Back of Receiver
Cancel
Output
delay
Wire Clip
Relay
Output
control
5
2
On
Off
Using Relays On Back of Receiver (cont.)
The receiver features a normally open & normally closed relay on
back of the receiver (see image). This relay may be used to
integrate the receiver with other devices that accept a relay.
Please note: the relay only works for zone 4 on the receiver. For
example, if you want to use the "normally closed" relay, ensure a
transmitter/sensor that triggers the relay is programmed to zone 4.
•Slide the switch to the "On" position. This will activate the relay when
zone 4 is triggered. Sliding the switch to the "Off" position will not
activate the relay when zone 4 is triggered.
•Slide the switch to the 2' position & the relay will activate for 2 seconds,
5' is 5 seconds.
•The relays on back of the receiver will open or close only. It does not
supply external power. The integrated device must supply power for it
to activate.
Or
LRA-DCRX MOUNTING OPTIONS
Wall mount
Sits on desk Top
25mm
o
/ 7mm

This manual suits for next models

1

Other Safeguard Supply Accessories manuals

Safeguard Supply WDK-2500-STROBE User manual

Safeguard Supply

Safeguard Supply WDK-2500-STROBE User manual

Safeguard Supply WDK-ERA-STROBE User manual

Safeguard Supply

Safeguard Supply WDK-ERA-STROBE User manual

Safeguard Supply ERA-DCKIT User manual

Safeguard Supply

Safeguard Supply ERA-DCKIT User manual

Safeguard Supply ERA-PBDCR-STROBE User manual

Safeguard Supply

Safeguard Supply ERA-PBDCR-STROBE User manual

Safeguard Supply LRA-D1000 User manual

Safeguard Supply

Safeguard Supply LRA-D1000 User manual

Safeguard Supply ERA-PIR-SPK User manual

Safeguard Supply

Safeguard Supply ERA-PIR-SPK User manual

Safeguard Supply LRA-D1000 User manual

Safeguard Supply

Safeguard Supply LRA-D1000 User manual

Safeguard Supply ERA-UTX User manual

Safeguard Supply

Safeguard Supply ERA-UTX User manual

Safeguard Supply ERA-PRXPG User manual

Safeguard Supply

Safeguard Supply ERA-PRXPG User manual

Safeguard Supply WDK-ERA-KIT User manual

Safeguard Supply

Safeguard Supply WDK-ERA-KIT User manual

Safeguard Supply ERA-DSTX User manual

Safeguard Supply

Safeguard Supply ERA-DSTX User manual

Popular Accessories manuals by other brands

Gembird PB20-02 user manual

Gembird

Gembird PB20-02 user manual

Datalogic Smart-VS Product reference guide

Datalogic

Datalogic Smart-VS Product reference guide

Zap ACC200 quick start guide

Zap

Zap ACC200 quick start guide

AEG BK 6 Instructions for use

AEG

AEG BK 6 Instructions for use

SkyLink WD-434T Setup

SkyLink

SkyLink WD-434T Setup

Climadiff DUOVINO18 use instructions

Climadiff

Climadiff DUOVINO18 use instructions

Bosch MSE-LZ installation manual

Bosch

Bosch MSE-LZ installation manual

ATI Technologies SR-61 manual

ATI Technologies

ATI Technologies SR-61 manual

Arista ALC-CMP-DT-BT installation instructions

Arista

Arista ALC-CMP-DT-BT installation instructions

Emos P5712 instructions

Emos

Emos P5712 instructions

Oliver Bonas 1328608 Use & care information

Oliver Bonas

Oliver Bonas 1328608 Use & care information

ADTEK WSA Operation manual

ADTEK

ADTEK WSA Operation manual

schmersal RSS36 AS operating instructions

schmersal

schmersal RSS36 AS operating instructions

QOLSYS IQ Mini Dw Extended S Line Quick install guide

QOLSYS

QOLSYS IQ Mini Dw Extended S Line Quick install guide

OnRobot HEX-E v1 user manual

OnRobot

OnRobot HEX-E v1 user manual

Landscape Forms Connect 2.0 installation guide

Landscape Forms

Landscape Forms Connect 2.0 installation guide

Blaupunkt IRP-S1L manual

Blaupunkt

Blaupunkt IRP-S1L manual

LEGRAND 882 08 manual

LEGRAND

LEGRAND 882 08 manual

manuals.online logo
manuals.online logoBrands
  • About & Mission
  • Contact us
  • Privacy Policy
  • Terms and Conditions

Copyright 2025 Manuals.Online. All Rights Reserved.