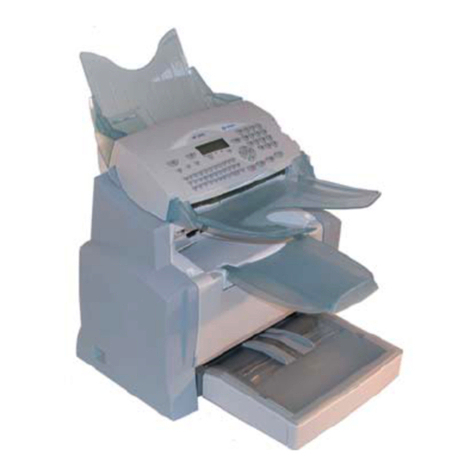
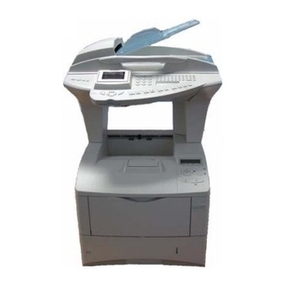
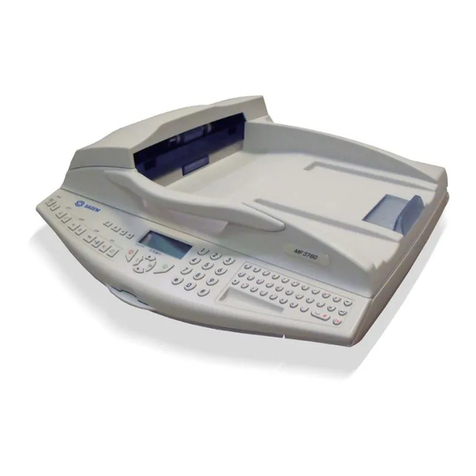
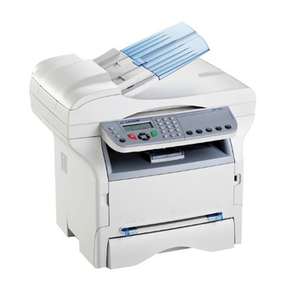
Sagem MF 3610 SMS User manual

TELECOM
F@x™ Laser
F@x™ Internet
SMS F@x™
6$*(0
0)606606
User’s manual
Société anonyme à directoire et conseil de surveillance au capital de 36.044.360 e- 562 082 909 R.C.S. PARIS
27, rue Leblanc - 75512 PARIS CEDEX 15 - FRANCE
http://www.sagem.com
*251274544*
Non contractual document
User’s Manual - Rev. A
Couvertures_36xx.fm Page 1 Vendredi, 16. mai 2003 12:18 12

&21680$%/(65()(5(1&(6
Toner cartridge TNR 736: 251 222 454
Drum cartridge DRM 736: 251 222 462
Printed sheet
output tray
Printer top cover
Document feeder
Adjustable paper guide
Printer top cover
release button
Manual feed tray
Control
panel
Scanning cover
Scanned document tray
Chipcard reader
Support (option)
Flat scanner
window
Flat scanner flap
3620 Model only
250-sheet paper tray
0DFKLQHRYHUYLHZ
Couvertures_36xx.fm Page 2 Vendredi, 16. mai 2003 12:18 12

Date en cours : 7 mai 2003
\\Sct31nt3\BE31-DOC\DOC 31 - En cours\Travaux en cours\MFL-MFC-MFK\MFC 251274544A_LU MF3610-3620 SMS_Sagem_GB\Légende
COUV36xx.fm
@
Menu
123
456
789
0#
*
SMS
SMS
OK
OK
C
F2 F3 F4 &/ , : =
'" |%
~§
\?!$+
() <>{}
;
@
F1
Q
W
E
R
T
Y
U
IO
P
A
S
D
F
G
H
J
K
L
.
Z
X C V
B
N M C
t
r
l
C
t
r
l
S
t
d
F
i
n
e
S
F
i
n
e
P
h
o
t
o
050 100
R
e
s
o
l
u
t
i
o
n
M
emo
r
y
C
o
n
t
r
a
s
t
L
i
n
e
!
T
o
n
e
r
F
ax
M
e
ss
age
s
O
n
C
o
l
o
r
s
ca
nn
e
r
I
n
t
e
r
n
e
t
&
S
e
r
v
i
ce
s
T
r
a
n
s
m
i
ss
i
o
n
F
ax
&
F
@
x
S
ca
nn
e
r
R
e
s
o
l
. - C
o
n
t
r
.
@
1.
2.
3.
4.
5.
6.
7.
8.
9. 19.
12.
10.
11. 13.
14.
15.
16.
17.
18.
20.
21.22.23.
24.
28.
26. 25.
27.
1. "Fax Messages" indicator:
On: the fax machine is set to fax-TAD mode
Blinking: message received in fax-TAD mode
2. "Line" icon:
On: communication in progress
Blinking: communication being established
3. Scanning resolution for fax transmission (Std,
Fine, SFine, Photo)
4. Memory capacity (0 to 100%)
5. Printer "paper jam" icon
6. spare "Toner" icon:
On: No toner left
Blinking: toner near end
7. Contrast indicator
8. "Colour scanner" mode indicator (depending
on model)
9. "On" indicator:
Green: machine turned on
Red: problems
10. key: transmission scanning resolution
11. key: access to directory and quick-dial
numbers
12. key: attachment to a mail entered at the
keyboard.
13. key: contrast setting
14. key: print functions list
15. key: broadcast fax
16. key: Manual line taking
17. key: Redial
18.SMS key: Sending an SMS
19.Numerical keypad
20. key: stop current operation
21. key: fax transmission or black & white
local copy
22.@key: Internet fax transmission
23. key: Internet transmission in colour
24.OKkey: confirm displayed selection
25.Navigation keys
26.MENU key: access to functions
27.Ckey: return to previous menu and correct
data entry
28.Alphabetic keypad
i
&RQWUROSDQHO
LIASSE 251274544A.book Page 1 Mercredi, 7. mai 2003 4:01 16

Date en cours : 7 mai 2003
\\Sct31nt3\BE31-DOC\DOC 31 - En cours\Travaux en cours\MFL-MFC-MFK\MFC 251274544A_LU MF3610-3620
SMS_Sagem_GB\Bienvenue.fm
:(/&20(
You have acquired a telecommunication terminal device of the newest generation and we would like
to congratulate you on your choice. Both a laser fax machine and a terminal with access to the Internet,
your machine is the answer to all your most demanding professional needs.
In the following user’s manual both models in this product series are described:
It combines power, user-friendliness and simplicity thanks to its navigator, its multitask access and
direct access directory.
The laser printer lets you print all received documents.
Thanks to the two scanners (the sheet-feed scanner and the flat-bed scanner1) you are not only able to
send colour documents, you can also use the device as a conventional black-and-white photocopier.
The flat-bed scanner lets you send portions of bound documents with a better resolution.
Open to the Internet, you can send faxes to E-mails and also receive them thanks to the F@x-to-E-mail
feature.
You can send to traditional fax machines via the Internet at a reduced cost thanks to the F@x-to-Fax
service. This service even gives you the possibility of receiving E-mail attachments thanks to its
attachment conversion function.
With the SMS key and the alphabetic keypad it is very easy to write and send short, so-called SMS
(Short Message Service) messages.
This unit has been designed in accordande with European standards I-CTR37 and CTR21, it is
designed for connection to the Public Switched Telephone Network (PSTN). In case of any problems,
first contact your Supplier.
The mark CE attests that the products comply with the essential requirements of Directive R&TTE
1999/5/EC, for user safety, in accordance with Directives 73/23/EC for electromagnetic interference,
in accordance with Directive 89/336/EC.
And that it makes efficient use of the radio spectrum allocated to terrestrial communications.
The manufacturer declares that the products are manufactured in accordance with ANNEX II of
Directive R&TTE 1999/5/EC.
0RGHO (TXLSPHQW
606 • 1 sheet-feed scanner (CIS type).
• 1 flat-bed scanner (CCD type).
606 • 1 sheet-feed scanner (CIS type).
1. Only on 3620 model.
LIASSE 251274544A.book Page 2 Mercredi, 7. mai 2003 4:01 16
Operation Settings Quick usageDirectoryMaintenanceSafety ContentsInstallation
Date en cours : 7 mai 2003
-I-
&217(176
,167$//$7,21 1-1
3ULQWHU 1-1
8QSDFNLQJWKHSULQWHU 1-1
'HVFULSWLRQ 1-4
3XWWLQJWKHSULQWHULQWRRSHUDWLRQ 1-5
QVWDOODWLRQUHTXLUHPHQWV 1-5
QVWDOODWLRQ 1-6
QVWDOOLQJRSWLRQV 1-8
6HFRQGSDSHUFDVVHWWHXQLW 1-8
QVWDOOLQJWKHVHFRQGSDSHUFDVVHWWHXQLW 1-9
6FDQQHU 1-10
8QSDFNLQJWKHVFDQQHU 1-10
6FDQQHULQVWDOODWLRQ 1-10
6HWWLQJWKHGHWDFKDEOHLWHPV 1-10
8QORFNLQJWKHVFDQQHURQO\IRUWKHPRGHO606 1-11
&RQQHFWLRQV 1-12
3ULQWHUFRQQHFWLRQ 1-12
7HOHSKRQHDQG/$1FRQQHFWLRQ 1-13
3RZHUOLQHFRQQHFWLRQDQGVZLWFKRQ 1-13
8SGDWLQJWKHFRQVXPDEOHV 1-13
48,&.86$*( 2-1
1DYLJDWLRQPHWKRGV 2-1
3UHVHQWDWLRQ 2-1
7KHQDYLJDWRU 2-1
7KHGLVSOD\VFUHHQ 2-3
$FFHVVWRIXQFWLRQV 2-3
6WHSE\VWHSIXQFWLRQDFFHVV 2-3
'LUHFWDFFHVVE\QXPEHU 2-4
)XQFWLRQVOLVW 2-4
6(77,1*6 3-1
0DLQVHWWLQJV 3-1
%HIRUHWUDQVPLVVLRQ 3-1
'DWH7LPH 3-1
<RXUID[QXPEHU 3-1
1DPH 3-2
7\SHRIQHWZRUN 3-2
*HRJUDSKLFDOVHWWLQJV 3-2
/RFDOSUHIL[ 3-3
7UDQVPLVVLRQUHSRUWDQGGHSRVLWQRWLFH 3-3
(FRQRP\SHULRG 3-4
'RFXPHQWIHHGW\SHV 3-4
%HIRUHUHFHSWLRQ 3-5
)D[DQVZHULQJPDFKLQH 3-5
5HFHSWLRQZLWKRXWSDSHU 3-5
1XPEHURIFRSLHV 3-6
LIASSE 251274544A.book Page I Mercredi, 7. mai 2003 4:01 16

Date en cours : 7 mai 2003
-II-
5HOD\EURDGFDVW 3-6
)D[RU3&5HFHSWLRQ2SWLRQ 3-7
7HFKQLFDOSDUDPHWHUV 3-7
/RFDO$UHD1HWZRUN 3-9
/RFDOQHWZRUNVHWWLQJV 3-10
$XWRPDWLFFRQILJXUDWLRQ 3-10
0DQXDOFRQILJXUDWLRQ 3-10
(((DGGUHVVRU0$&(WKHUQHWDGGUHVV 3-10
1HWELRVQDPHV 3-11
0DLOVHUYLFHDQGWKHLQWHUQHW 3-11
QLWLDOLVDWLRQSDUDPHWHUV 3-11
$FFHVVWRFRQQHFWLRQDQGPDLOER[SDUDPHWHUV 3-12
$FFHVVWRVHUYHUVSDUDPHWHUV 3-12
6HWWLQJV 3-12
6WDQGDUGVHWWLQJV 3-13
0DLOVRUWLQJ 3-14
)#[WR)D[ 3-15
QWHUQHW&RQQHFWLRQ 3-16
PPHGLDWHFRQQHFWLRQWRWKH QWHUQHW 3-16
3URJUDPPHGFRQQHFWLRQ 3-17
'HDFWLYDWHWKH QWHUQHWIXQFWLRQ 3-17
7KH606VHUYLFH 3-17
'LVSOD\RI606VHQGHU·V ' 3-17
QLWLDOLVDWLRQSDUDPHWHUV 3-18
6HQGLQJDQ606WRDPRELOHSKRQH 3-18
',5(&725< 4-1
&UHDWLQJVXEVFULEHUUHFRUGV 4-1
$GGLQJDUHFRUG 4-2
&UHDWLQJVXEVFULEHUVOLVWV 4-2
$GGLQJDOLVW 4-3
$GGLQJRUGHOHWLQJDQXPEHUIURPWKHOLVW 4-4
&RQVXOWLQJDUHFRUGRUOLVW 4-4
0RGLI\LQJDUHFRUGRUDOLVW 4-4
'HOHWLQJDUHFRUGRUDOLVW 4-5
3ULQWLQJWKHGLUHFWRU\ 4-5
PSRUWLQJDGLUHFWRU\ 4-5
7KHILOHVWUXFWXUH 4-6
3URFHGXUH 4-7
([SRUWLQJDGLUHFWRU\ 4-8
23(5$7,21 5-1
6HQGLQJ 5-1
3RVLWLRQLQJWKHGRFXPHQW 5-1
6KHHWIHHGVFDQQHU 5-2
)ODWEHGVFDQQHU 5-2
LIASSE 251274544A.book Page II Mercredi, 7. mai 2003 4:01 16

Operation Settings Quick usageDirectoryMaintenanceSafety ContentsInstallation
Date en cours : 7 mai 2003
-III-
&KRRVLQJWKHUHVROXWLRQWKHFRQWUDVW 5-2
5HVROXWLRQ 5-2
&RQWUDVW 5-3
'LDOOLQJ 5-3
)URPWKHGLUHFWRU\ 5-3
)URPWKHUHGLDONH\ 5-4
7RPXOWLSOHFDOOQXPEHUV 5-4
7UDQVPLVVLRQYLDWKH3XEOLF6ZLWFKHG7HOHSKRQH1HWZRUN36715-4
PPHGLDWHWUDQVPLVVLRQ 5-4
'HOD\HGWUDQVPLVVLRQ 5-5
6HQGLQJLQWKH(FRPRGH 5-5
7RSURJUDPDWUDQVPLVVLRQLQWKH(FRPRGH 5-5
7UDQVPLVVLRQZLWKGLDOOLQJIROORZXS 5-6
7UDQVPLVVLRQYLDWKH QWHUQHW 5-6
6HQGLQJDSDSHUID[WRDQ(0DLODGGUHVV 5-6
6HQGLQJDFRORXUGRFXPHQWWRDQ(0DLODGGUHVV
2QO\RQFRORXUVFDQQHUPRGHO 5-7
6HQGLQJDNH\HGLQPHVVDJHWRDQ(0DLODGGUHVV 5-7
7UDQVPLWWLQJDGRFXPHQWWRDIDFVLPLOHWHUPLQDO)#[ WR )D[VHUYLFH 5-8
7UDQVPLVVLRQZDLWLQJTXHXHV 5-9
&RQVXOWRUPRGLI\WKHZDLWLQJTXHXH 5-9
PPHGLDWHO\SHUIRUPWUDQVPLVVLRQIURPWKHZDLWLQJTXHXH 5-10
3ULQWLQJDGRFXPHQWLQZDLWLQJRULQGHSRVLW 5-10
3ULQWWKHZDLWLQJTXHXH 5-10
'HOHWLQJDWUDQVPLVVLRQRQKROG 5-10
&DQFHOOLQJWUDQVPLVVLRQLQSURJUHVV 5-10
5HFHSWLRQ 5-11
5HFHSWLRQYLDWKH3XEOLF6ZLWFKHG7HOHSKRQH1HWZRUN3671 5-11
5HFHSWLRQYLDWKH QWHUQHW 5-11
&RS\LQJ 5-11
/RFDOFRS\ 5-11
6WDQGDUGFRS\ 5-11
6RSKLVWLFDWHGFRS\ 5-12
6SHFLILFVHWWLQJVIRUWKHFRS\ 5-12
6FDQQHUVHWWLQJV 5-13
3ULQWHUVHWWLQJV 5-14
2WKHUIXQFWLRQV 5-15
/RJV 5-15
3ULQWLQJWKHIXQFWLRQVOLVW 5-15
3ULQWLQJWKHPDFKLQHVHWWLQJV 5-16
0HPRUL]LQJDVHTXHQFHRINH\V 5-16
&RXQWHUV 5-17
'HSRVLWDQGSROOLQJ 5-17
3ODFHDGRFXPHQWLQGHSRVLW 5-18
3ROOLQJDGHSRVLWHGGRFXPHQW 5-18
/RFNV 5-19
(QWHULQJWKHLQWHUORFNFRGH 5-19
/RFNLQJWKHNH\SDG 5-19
/RFNLQJGLDOOLQJ 5-20
LIASSE 251274544A.book Page III Mercredi, 7. mai 2003 4:01 16

Date en cours : 7 mai 2003
-IV-
/RFNLQJWKH QWHUQHWVHWWLQJV 5-20
/RFNLQJWKH606VHUYLFH 5-20
0DLOER[0%;)$; 5-21
0%;0DQDJHPHQW 5-21
QLWLDOLVLQJD0%; 5-21
0RGLI\LQJWKHIHDWXUHVRID0%; 5-22
3ULQWWKHFRQWHQWVRID0%; 5-22
'HOHWHD0%; 5-22
3ULQWWKH0%;OLVW 5-22
0%;GHSRVLWLQ\RXUID[ 5-23
0%;GHSRVLWLQDUHPRWHID[ 5-23
0%;SROOLQJIURPDUHPRWHID[ 5-23
0$,17(1$1&( 6-1
0DLQWHQDQFH 6-1
*HQHUDO 6-1
5HSODFLQJWKHFRQVXPDEOHV 6-1
5HSODFLQJFDUWULGJHV 6-2
&OHDQLQJ 6-13
&OHDQLQJWKHVFDQQHU·VUHDGLQJGHYLFHV 6-13
&OHDQLQJWKHSULQWHU 6-13
6HUYLFH 6-14
6FDQQHUFDOLEUDWLRQ 6-15
QFLGHQWV 6-15
&RPPXQLFDWLRQHUURUV 6-15
7UDQVPLVVLRQIURPWKHIHHGHU 6-15
7UDQVPLVVLRQIURPWKHPHPRU\ 6-15
&RPPXQLFDWLRQHUURUFRGHV 6-16
3ULQWHULQFLGHQWV 6-18
(UURUPHVVDJHV 6-18
3ULQWHUSDSHUMDP 6-19
6FDQQHULQFLGHQWV 6-21
6KHHWIHHGVFDQQHUSDSHUMDP 6-21
0LVFHOODQHRXVLQFLGHQWV 6-22
&KDUDFWHULVWLFV 6-23
8QLWFKDUDFWHULVWLFV 6-23
&RQVXPDEOH&KDUDFWHULVWLFV 6-24
6$)(7< 7-1
LIASSE 251274544A.book Page IV Mercredi, 7. mai 2003 4:01 16

1-1
Date en cours : 7 mai 2003
\\Sct31nt3\BE31-DOC\DOC 31 - En cours\Travaux en cours\MFL-MFC-MFK\MFC 251274544A_LU MF3610-3620
SMS_Sagem_GB\Installation.fm
167$//$7,21
35,17(5
813$&.,1*7+(35,17(5
LIASSE 251274544A.book Page 1 Mercredi, 7. mai 2003 4:01 16

1-2
Installation
Date en cours : 7 mai 2003
\\Sct31nt3\BE31-DOC\DOC 31 - En cours\Travaux en cours\MFL-MFC-MFK\MFC 251274544A_LU MF3610-3620
SMS_Sagem_GB\Installation.fm
+Remove the plastic bag and peel off the shipping tape from the back of the printer.
+Take the paper cassette out of the plastic packaging and remove the adhesive strip which
serves as a protection for the cover during transportation.
LIASSE 251274544A.book Page 2 Mercredi, 7. mai 2003 4:01 16

Installation
1-3
Operation Settings Quick usageDirectoryMaintenanceSafety ContentsInstallation
Date en cours : 7 mai 2003
\\Sct31nt3\BE31-DOC\DOC 31 - En cours\Travaux en cours\MFL-MFC-MFK\MFC 251274544A_LU MF3610-3620
SMS_Sagem_GB\Installation.fm
+Remove the two transportation guards in the paper feed inlet as well as the adhesive tape.
+Carefully push the paper cassette as far as it will go into the printer shaft by inserting it into
the guide rails on the left and the right (see the following illustration). Once the cassette
has been inserted it can no longer be removed.
+Attach the cover of the paper cassette.
LIASSE 251274544A.book Page 3 Mercredi, 7. mai 2003 4:01 16

1-4
Installation
Date en cours : 7 mai 2003
\\Sct31nt3\BE31-DOC\DOC 31 - En cours\Travaux en cours\MFL-MFC-MFK\MFC 251274544A_LU MF3610-3620
SMS_Sagem_GB\Installation.fm
'(6&5,37,21
Face-down tray
Manual feed tray
Paper guide
Tray 2 cover
Tray 2
Top cover
Power switch
Second paper cassette
unit (option)
Face-up/Face-down
selection switch
Power cord socket
Printer’s port connector
Drum cartridge
Toner cartridge
250-sheet paper tray
cassette)
(500-sheet second
(pre-installed)
(pre-installed)
release button
LIASSE 251274544A.book Page 4 Mercredi, 7. mai 2003 4:01 16

Installation
1-5
Operation Settings Quick usageDirectoryMaintenanceSafety ContentsInstallation
Date en cours : 7 mai 2003
\\Sct31nt3\BE31-DOC\DOC 31 - En cours\Travaux en cours\MFL-MFC-MFK\MFC 251274544A_LU MF3610-3620
SMS_Sagem_GB\Installation.fm
3877,1*7+(35,17(5,17223(5$7,21
QVWDOODWLRQUHTXLUHPHQWV
A proper location helps to ensure that your printer provides you with the long service life for
which it is designed. Double-check to make sure that the location you select has the following
characteristics.
• Choose a location that is well-ventilated.
• Make sure there is no chance of ammonia or other organic gasses being generated in the
area.
• The power outlet you plan to connect to for power should be nearby and unobstructed.
• Make sure that the printer is not exposed to direct sunlight.
• Avoid areas in the direct airflow of air conditioners, heaters, or ventilators, and areas subjec-
ted to temperature and humidity extremes.
• Choose a sturdy, level surface where the printer will not be exposed to strong vibration.
• Keep the printer away from any objects that might block its heat vents.
• Do not locate the printer near curtains or other combustible objects.
• Choose an area where there is no possibility of the printer being splashed with water or
other liquids.
• Make sure that the surrounding area is clean, dry, and free of dust.
2SHUDWLRQDO3UHFDXWLRQV
Note the following important precautions whenever using the printer.
Operating Environment
The following describes the operating environment required when using the printer:
• Temperature:
10°C to 35°C (50°F to 95°F) with fluctuation of 10°C (18°F) per hour.
• Humidity:
15% to 85% with fluctuation of 20% per hour.
Printer
The following describes precautions for using the printer.
• Never turn the printer off or open any of its covers during a print operation.
• Never place flammable gasses, liquids or objects that generate magnetic forces near the
printer.
• When unplugging the power cord, always grasp the plug and never pull on the cord. A
damaged cord creates the danger of fire or electrical shock.
• Never touch the power cord when your hands are wet. Doing so creates the danger of elec-
trical shock.
• Always unplug the power cord before moving the printer. Failure to do so can damage the
power cord, creating the danger of fire or electrical shock.
• Always unplug the power cord if you do not plan to use the printer for a long time.
LIASSE 251274544A.book Page 5 Mercredi, 7. mai 2003 4:01 16

1-6
Installation
Date en cours : 7 mai 2003
\\Sct31nt3\BE31-DOC\DOC 31 - En cours\Travaux en cours\MFL-MFC-MFK\MFC 251274544A_LU MF3610-3620
SMS_Sagem_GB\Installation.fm
• Never try to remove any secured panel or cover. The interior of the printer contains high-vol-
tage circuitry which creates the danger of electrical shock when exposed.
• Never try to modify the printer. Doing so creates the danger of fire or electrical shock.
• Never place any heavy objects on the power cord, pull on it or bend it. Doing so creates the
danger of fire or electrical shock.
• Always make sure the printer is not placed on the electrical cord or the communications
cables of any other electrical equipment. Also make sure that cords and cables do not get into
the printer’s mechanism. Any of these conditions create the danger of malfunction and fire.
• Always take care so that paper clips, staples, or other small pieces of metal do not get into the
printer through its vents or other openings. Such objects create the danger of fire or electrical
shock.
• Do not allow water or other liquids to spill on or near the printer. Fire or electrical shock can
occur should water or liquid come into contact with the printer.
• Should liquid or any piece of metal accidently get inside the printer, immediately turn it off,
unplug the power cord, and contact your dealer. Failure to take this immediate action creates
the danger of fire or electrical shock.
• Whenever the printer emits unusually high amounts of heat, smoke, an unusual odor, or
noise, immediately turn it off, unplug it, and contact your dealer. Failure to take this imme-
diate action creates the danger of fire or electrical shock.
Caution - Be sure to locate the printer in a well-ventilated location. A minimal amount of ozone
is generated during normal operation of this printer. Because of this, an unpleasant odor may result
when the printer is used for extensive printing in a poorly ventilated area. In order to ensure
trouble-free operation you should select a well-ventilated location for the device.
QVWDOODWLRQ
+Open the tray for the printed paper.
LIASSE 251274544A.book Page 6 Mercredi, 7. mai 2003 4:01 16

Installation
1-7
Operation Settings Quick usageDirectoryMaintenanceSafety ContentsInstallation
Date en cours : 7 mai 2003
\\Sct31nt3\BE31-DOC\DOC 31 - En cours\Travaux en cours\MFL-MFC-MFK\MFC 251274544A_LU MF3610-3620
SMS_Sagem_GB\Installation.fm
/RDGLQJSDSHU
+Remove the cover of the paper cassette and push the two paper guides apart.
+Insert the paper (max. 250 sheets with 80 g/m2) into the cassette with the side to be printed
facing upwards. Press the paper guides together so that they are close to the edge of the
paper and then replace the cover of the paper cassette.
QVHUWLQJSDSHULQWRWKHPDQXDOSDSHUIHHGWUD\
+Insert a sheet of paper into the middle of the paper feed. Push the paper guides on the left
and the right together until they are close to the edge of the paper. This ensures that the
paper is correctly fed into the printer.
LIASSE 251274544A.book Page 7 Mercredi, 7. mai 2003 4:01 16

1-8
Installation
Date en cours : 7 mai 2003
\\Sct31nt3\BE31-DOC\DOC 31 - En cours\Travaux en cours\MFL-MFC-MFK\MFC 251274544A_LU MF3610-3620
SMS_Sagem_GB\Installation.fm
Caution - The manual paper feed only permits you to insert one page at a time. Please insert only
one sheet between the paper guides.
Remark : If the paper output is to take place via the front document tray, set the selector switch to the top position (a). If the
paper output is to take place at the back of the printer, e.g. if you want to print documents of larger size, set the
switch to the bottom position (b).
+Make sure that the switch is always set to position (a).
,167$//,1*237,216
This section describes the optional items that are available for the printer.
6HFRQGSDSHUFDVVHWWHXQLW
The second paper cassette unit comes equipped with a cassette that can hold up to 500 sheets of A4
size paper called tray 2.
b
a
LIASSE 251274544A.book Page 8 Mercredi, 7. mai 2003 4:01 16

Installation
1-9
Operation Settings Quick usageDirectoryMaintenanceSafety ContentsInstallation
Date en cours : 7 mai 2003
\\Sct31nt3\BE31-DOC\DOC 31 - En cours\Travaux en cours\MFL-MFC-MFK\MFC 251274544A_LU MF3610-3620
SMS_Sagem_GB\Installation.fm
QVWDOOLQJWKHVHFRQGSDSHUFDVVHWWHXQLW
Removethe secondpapercassette unitand
tray 2 from their packaging.
Remove the plastic packaging and all
transportation guards.
Place the printer on top of the base unit.
Make sure to align the coupling pins of the
base unit with the holes located
underneath the printer.
Remove the cover from tray 2. Press down on the paper lifting plate
located inside of tray 2 until it locks.
Place a stack of up to 500 sheets of paper
into tray 2. Replace the cassette cover and insert
tray 2 into the second paper cassette unit.
LIASSE 251274544A.book Page 9 Mercredi, 7. mai 2003 4:01 16

1-10
Installation
Date en cours : 7 mai 2003
\\Sct31nt3\BE31-DOC\DOC 31 - En cours\Travaux en cours\MFL-MFC-MFK\MFC 251274544A_LU MF3610-3620
SMS_Sagem_GB\Installation.fm
Remark : Be sure to use both hands whenever tray 2 is removed from or inserted into the second paper cassette unit.
6&$11(5
813$&.,1*7+(6&$11(5
Check the presence of the following items:
6&$11(5,167$//$7,21
6HWWLQJWKHGHWDFKDEOHLWHPV
QVWDOODWLRQRIWKHRXWOHWWUD\IRURXWJRLQJGRFXPHQW
• Scanner
• Outlet tray for out going document
• Mainpower cord
• Printer connection cord
• Printer main power connection cord
• Telephone line cord
• Plug'n'Print card for the setting up of
the
fax (microchip card)
+Set the outlet tray on the left-hand side of
the fax machine by engaging the two
pins in their respective holes.
LIASSE 251274544A.book Page 10 Mercredi, 7. mai 2003 4:01 16

Installation
1-11
Operation Settings Quick usageDirectoryMaintenanceSafety ContentsInstallation
Date en cours : 7 mai 2003
\\Sct31nt3\BE31-DOC\DOC 31 - En cours\Travaux en cours\MFL-MFC-MFK\MFC 251274544A_LU MF3610-3620
SMS_Sagem_GB\Installation.fm
8QORFNLQJWKHVFDQQHURQO\IRUWKHPRGHO606
Before you turn on the device the flat-bed scanner must be unlocked.
The locking/unlocking mechanism is to be found under the scanner unit on the left:
+Raise the scanner unit a little.
+Pull out the unlocking flap, see illustration A.
Remark : If it is necessary to transport the scanner unit it is recommended to lock the flat-bed scanner in the "Park"
position.
• Switch the scanner unit off and then switch it on again using the main power switch at the
back of the device.
• Then push back the unlocking flap, see illustration B.
• Switch the device off and pack it up.
AB
LIASSE 251274544A.book Page 11 Mercredi, 7. mai 2003 4:01 16

1-12
Installation
Date en cours : 7 mai 2003
\\Sct31nt3\BE31-DOC\DOC 31 - En cours\Travaux en cours\MFL-MFC-MFK\MFC 251274544A_LU MF3610-3620
SMS_Sagem_GB\Installation.fm
&211(&7,216
3
35,17(5&211(&7,21
+Plug end of the connection cord (3) into the jack of the fax machine (F) and the other end
into the printer’s jack (C).
+Plug end of the main power cord (2) into its jack on the fax machine (A) and the other end
into the printer’s jack (D).
A
B
D
E
F
1
2
3
4
C
G
H
LIASSE 251274544A.book Page 12 Mercredi, 7. mai 2003 4:01 16
Table of contents
Other Sagem All In One Printer manuals

Sagem
Sagem MF 3750 User manual

Sagem
Sagem MF9500 User manual

Sagem
Sagem AGORIS M943 User manual

Sagem
Sagem MF 6990dn User manual

Sagem
Sagem MF5990dn User manual

Sagem
Sagem MF 3430 User manual

Sagem
Sagem 6890N User manual

Sagem
Sagem Laser Pro 351 User manual

Sagem
Sagem MF 5481 User manual

Sagem
Sagem MF 4690N User manual

Sagem
Sagem MF 5482 User manual

Sagem
Sagem MF9500 User manual

Sagem
Sagem MF 5462 User manual

Sagem
Sagem MF 3625 User manual

Sagem
Sagem MF 5401 User manual

Sagem
Sagem MF9300 User manual

Sagem
Sagem MF 5890DN User manual

Sagem
Sagem LASER PRO 358 User manual

Sagem
Sagem LASER PRO 346 User manual

Sagem
Sagem MF 3620 SMS User manual