manuals.online logo
Brands
  1. Home
  2. •
  3. Brands
  4. •
  5. Sakura
  6. •
  7. Laboratory Equipment
  8. •
  9. Sakura Tissue-Tek Film User manual

Sakura Tissue-Tek Film User manual

Coverslipping
Tissue-Tek® Film®
Quick Reference Guide
Tissue-Tek® Film®
Sakura Finetek Europe B.V. | Flemingweg 10a, 2408 AV Alphen a/d Rijn | NL
Phone: +31 (0) 88 592 00 00 | Fax: +31 (0) 88 592 00 01 | sakura@sakura.eu | www.sakura.eu
Loading station
Xylene
bottle
Waste
bottle
Film
loading
area
Film door
Cover
Power switch
Control panel
Loading
door
Start Up
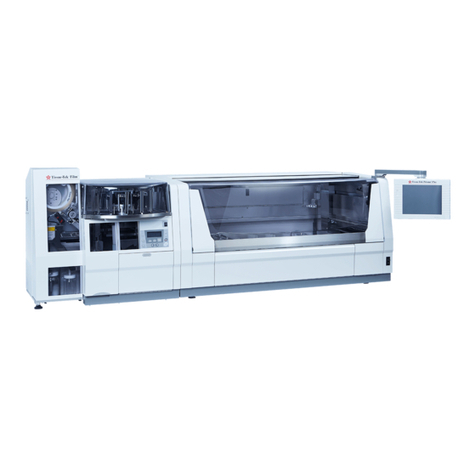
The Tissue-Tek®Film™ automated coverslipper is
designed to coverslip biological specimens that are
mounted on standard 25 x 75 mm (1 x 3 inch)
microscope slides. The use of a special, resin-
coated, film and xylene eliminates the need for
coverglass and mounting media.
Preparation before coverslipping
Hardware
Placement of loading station
1. Insert the loading station and fill it with xylene.
Placement of xylene and waste bottle
1. Fill the xylene bottle and insert this in the
instrument.
2. Insert the waste bottle.
Placement of the coverslipping film
1. Load the coverslipping film.
2. Instructions for loading the coverslipping film
can be found on the diagram located on the
back wall of the instrument.
3. The film is wound through positioning spools
and rollers until it has reached the
coverslipping area.
4. Press “film” to lead the film automatically
trough roller seven.
Tissue-Tek® Film®
Coverslipping
Quick Reference Guide
Tissue-Tek® Film®
page 2 | 5 QRG | Film | 2010 | V-2
Placing the
coverslipping film
1. Placing the cutter blade
2. Film scrap receiver
1
2
NOTE: The Setup Menu is only available when the
instrument is in the Standby or Suspension mode.
Placement of the cutter blade
CAUTION:
Make sure that the instrument is switched
off and the power cord is unplugged.
1. Pull the spring steel tab on the blade assembly
to the right to clear the capture button on the
black safety handle.
2. The handle, along with the blade, can be
removed from the assembly by pulling it straight
out.
3. While removing, hold the blade against the
safety handle, as it is not locked into place on
the handle.
4. Dispose the blade in an appropriate container.
5. Insert a new blade.
6. Place the blade assembly back into the
instrument.
Note: replace after every 10 rolls of film
(approx. 10,000 slides) or when the film splice is
ragged or torn.
Software
Modifying the Setup Menu
There are 7 options available from the setup menu:
1. Prime volume refers to the amount of
xylene dispensed on each slide during cover
slipping. The priming level can be selected in a
range of 1-5, 3 being the default setting.
2. Film Length refers to the length of the film
placed on the slide to cover the specimen. There
are four selectable lengths: 45mm, 50mm,
55mm and 60mm.
3. Extended Prime is required each time the
xylene bottle is refilled. This prime ensures that
there are no bubbles in the priming line. The
extended prime will prime the line for 30
seconds. If bubbles are detected in the line, the
instrument will prime for an additional 30
seconds. If bubbles are still detected, the unit
produces an audible warning alarm and an error
message appears.
4. Count Reset refers to the counter value
displayed in the lower left corner in the standby
or operation menu.
5. Key Sound can either be turned ON or OFF.
6. Alarm there are four available alarm levels to
choose from, with level 4 set as default setting.
7. Software Version allows the user to access the
current software version in the instrument.
<FILM LENGTH>
45mm 50mm 55mm 60mm
[<][>] to select
[ENTER] to save
<EXTENDED PRIME>
[ENTER] to prime
system
[EXIT] to exit
<COUNT RESET>
COUNT:012345
[ENTER] to reset
<KEY SOUND>
OFF / ON
[<][>] to select
[ENTER] to save
<ALARM>
1 / 2 / 3 / 4
[<][>] to select
[ENTER] to save
<SOFTWARE VERSION>
N74-900-00
[EXIT] to exit
1
3
4
5
2
7
6
Screens in the “menu set-up”
<PRIME VOLUME>
LEVEL(1-5):3
[PRIME] to prime
[ENTER] to save
Coverslipping
Tissue-Tek® Film®
Quick Reference Guide
Tissue-Tek® Film®
QRG | Film | 2010 | V-2 page 3 | 5
Coverslipping operation
Coverslipping slides
Pre-operational checks
1. Turn on POWER.
2. Start screen of the film appears.
3. Check solvent check the volume in the xylene
bottle (only use high grade xylene) and empty
the waste bottle if necessary.
4. Prime xylene prior to coverslipping pressing the
[prime] button on the control panel.
5. Check film load film according to protocol,
when film is already loaded press the [FILM]
key and feed the film so the film tip comes 1-2
mm past the cutter blade edge.
Note: Film will be continuously fed as long as the [FILM]
key is pressed.
6. Cut the film.
7. Remove the film end with forceps or fingers.
8. Check loading area.
9. Close the film door.
10. Press [enter] to initialize.
11. Confirm no baskets are left in the carousel.
Control panel:
1. MENU Moves to menu screen.
2. EXIT Returns to the previous screen without
saving the setting item.
3. <Moves the selection item upward or leftward.
(Holding the button will cause continuous
action.)
4. >Moves the selection item downward or
rightward. (Holding the button will cause
continuous action.)
5. ENTER Saves the setting item and returns to the
previous screen.
6. FILM Feeds the film.
7. PRIME Conducts priming with the prime
corresponding to the dispensing level (1-5)
To prevent air bubbles in the tubing.
8. START Starts coverslipping action, or start of
origin return action, or priming action etc.
9. STOP Stops coverslipping action, or stop of
priming action etc.
10. SCREEN Displays various information
11. COVER Lights up when the cover on the top of
equipment is ready to be opened.
12. LOAD Lights up when the door of the loading
station is ready to be opened.
13. LED The LED stays lit while the power is
supplied to the system.
14. POWER Turns the power supply on and off.
13
6
7
10
8
14
11
12
9
2
1
3
4
5
Control panel
Insert slides
Do not till
Loading of the slides
Loading of the baskets
Set by making sure the
“UP SIDE” marks are
facing to the right.
Start screen
Check solvent
Check film
Check loading area
[ENTER] to initialize
Tissue-Tek® Film®
Coverslipping
Quick Reference Guide
Tissue-Tek® Film®
page 4 | 5 QRG | Film | 2010 | V-2
Remove slides from the carousel
1 place tissue in acetone 2 peel off the film
Removal of film
Start of operation
1. Check if the slides have been loaded in the
baskets properly.
2. Open the loading station access door.
3. Remove the lid of the loading station.
4. Pull out the loading station and set baskets (up
to three baskets can be set).
5. Close loading station door.
6. Coverslipping starts automatically.
End of Operation
1. Let the slides dry in the carousel.
2. Remove the slides from the carousel.
Power off
1. Turn off power and place the lid on the loading
station
Removal of coverslipping film
(see operating manual section 4.1 for
more detailed information)
Most common method for removal
1. Place the slides in acetone until film can be
peeled off (approx. 5 min. to 10 min.).
2. Place the slides in clean acetone for 5 min.
3. Place the slides in ethanol 100%.
4. Place the slides in xylene.
5. Slides are now ready for further treatment.
Maintenance
(see operating manual section 6 for more
detailed information)
Daily
Exterior cleaning
1. Clean the exterior with a mild detergent such as
glass cleaner and a soft cloth.
Note: Make sure that the instrument is switched Off.
2. Internal components should be inspected and
cleaned as needed.
Waste bottle
1. Remove waste container, empty it and put it
back.
Check xylene bottle
1. Refill the xylene bottle when reagent level is low.
2. Use high grade xylene (never use recycled
xylene).
3. Purge the line to remove any air bubbles by
using the extended priming procedure.
Coverslipping
Tissue-Tek® Film®
Quick Reference Guide
Tissue-Tek® Film®
QRG | Film | 2010 | V-2 page 5 | 5
Weekly
Cleaning the slide baskets
1. Soak the baskets for 24 hours in solvent for
mounting medium.
Cleaning the loading station
1. Change the solvent for mounting medium in the
loading station.
Cleaning the white and black rollers
1. Remove the film and film particles.
2. Clean the rollers with xylene.
3. Clean the rollers with ethanol 100%.
4. Make sure the rollers are completely dry before
continuing coverslipping.
Storage of unused film
1. Avoid storing film in humid areas.
2. Storage conditions for film prior to use:
•Relative Humidity: 30 to 70%
•Temperature: 10ºC to 30ºC (50ºF to 86ºF)
3. Packaged rolls of film should not be stored near
laboratory chemicals.The solvent fumes will
penetrate through the cardboard box and
plastic bag, resulting in degradation of the film
coatings.
NOTE: Sakura can only recommend the use of Tissue-
Tek coverslipping Film, Product Code # 4770.
Every 2 weeks
Changing carbon filters
1. Change carbon filters every 2 weeks
Monthly
Film scrap receiver
1. The film scrap receiver should be emptied and
cleaned.
2. Unscrew the thumb-screw on the
receiver tray.
3. Remove the tray.
4. Remove film particles from the
tray.
5. Clean the tray with xylene.
Yearly
Preventive maintenance by a Sakura representative
or a qualified service engineer.
Maintenance task
Frequency
Exterior cleaning
Daily
Waste bottle
Daily
Check xylene bottle
Daily
Cleaning the slide baskets
Weekly
Cleaning the loading station
Weekly
Cleaning of the rollers
Weekly
Changing carbon filters
Every 2 weeks
Film scrap receiver
Monthly
Preventative maintenance
Yearly
Storage of cover slipped slides (see
operating manual section 3.2 for more
detailed information)
1. Slides should be stored in a vertical position
front-to back.
2. Slides can be stored within 24 hours after being
coverslipped.
3. Any amount of water or alcohol remaining on
the slides may interfere with immediate or long-
term adherence of the coverslipper film.
4. Avoid storing Film coverslipped slides in wet or
humid areas.
5. Store slides in an environment in which
temperature and humidity are stable and
adhere to the following limits:
Relative humidity: <50%
Temperature: 22ºC ± 3ºC (72ºF ± 5ºF)
6. Not following the storage guidelines may result
in film delaminating from the slide.
7. Avoid long exposure to fluorescent light or
sunlight. This may cause stain fading.
Control panel

Other Sakura Laboratory Equipment manuals
Sakura Tissue-Tek Xpress x120 User manual

Sakura

Sakura Tissue-Tek Xpress x120 User manual

Sakura Tissue-Tek Glas g2 User manual

Sakura

Sakura Tissue-Tek Glas g2 User manual

Sakura Tissue-Tek AutoTEC a120 User manual

Sakura

Sakura Tissue-Tek AutoTEC a120 User manual

Sakura Cyto-Tek 2500 User manual

Sakura

Sakura Cyto-Tek 2500 User manual
Sakura Tissue-Tek Prisma Plus Prisma-P-AD User manual

Sakura

Sakura Tissue-Tek Prisma Plus Prisma-P-AD User manual

Sakura Tissue-Tek DRS 2000 User manual

Sakura

Sakura Tissue-Tek DRS 2000 User manual

Sakura Tissue-Tek AutoTEC a120 User manual

Sakura

Sakura Tissue-Tek AutoTEC a120 User manual

Sakura Tissue-Tek Prisma Plus User manual

Sakura

Sakura Tissue-Tek Prisma Plus User manual

Sakura Tissue-Tek Glas g2 User manual

Sakura

Sakura Tissue-Tek Glas g2 User manual

Sakura 6134 User manual

Sakura

Sakura 6134 User manual

Sakura Tissue-Tek Prisma Plus User manual

Sakura

Sakura Tissue-Tek Prisma Plus User manual

Sakura Tissue-Tek TEC 6 Instruction Manual

Sakura

Sakura Tissue-Tek TEC 6 Instruction Manual

Sakura Tissue-Tek Glas User manual

Sakura

Sakura Tissue-Tek Glas User manual

Sakura Histo-Tek VP1 User manual

Sakura

Sakura Histo-Tek VP1 User manual

Sakura Tissue-Tek TEC 6 EM Option User manual
Sakura

Sakura Tissue-Tek TEC 6 EM Option User manual

Sakura Cyto-Tek 2500 User manual

Sakura

Sakura Cyto-Tek 2500 User manual

Popular Laboratory Equipment manuals by other brands

REITEL ERGORET CLASSIC operating instructions

REITEL

REITEL ERGORET CLASSIC operating instructions

Heathrow Scientific eCOUNT instruction manual

Heathrow Scientific

Heathrow Scientific eCOUNT instruction manual

Sigma 2-16PK operating manual

Sigma

Sigma 2-16PK operating manual

Dectris EIGER2 X 500K user manual

Dectris

Dectris EIGER2 X 500K user manual

axolotl BIOSYSTEMS axo user manual

axolotl BIOSYSTEMS

axolotl BIOSYSTEMS axo user manual

CAMAG UV LAMP 4 instruction manual

CAMAG

CAMAG UV LAMP 4 instruction manual

Bibby Sterilin Stuart SF1 Instructions for use

Bibby Sterilin

Bibby Sterilin Stuart SF1 Instructions for use

diagenode Bioruptor Pico user manual

diagenode

diagenode Bioruptor Pico user manual

Hettich ROTIXA 500 RS operating manual

Hettich

Hettich ROTIXA 500 RS operating manual

DEMA 203BS-2EP installation instructions

DEMA

DEMA 203BS-2EP installation instructions

NuAire NuWind NU-C200V Operation & maintenance manual

NuAire

NuAire NuWind NU-C200V Operation & maintenance manual

Pentair BIOSHIELD 522635 Installation and user guide

Pentair

Pentair BIOSHIELD 522635 Installation and user guide

Miltenyi Biotec autoMACS Pro Separator Short instructions

Miltenyi Biotec

Miltenyi Biotec autoMACS Pro Separator Short instructions

BioLAB BLVR-202 Operation manual

BioLAB

BioLAB BLVR-202 Operation manual

Labnet Excel E10-1 Operation manual

Labnet

Labnet Excel E10-1 Operation manual

Hach DR 6000 Basic user manual

Hach

Hach DR 6000 Basic user manual

Agilent Technologies gc/ms series Maintenance manual

Agilent Technologies

Agilent Technologies gc/ms series Maintenance manual

Thermo Scientific PDM3700 manual

Thermo Scientific

Thermo Scientific PDM3700 manual

manuals.online logo
manuals.online logoBrands
  • About & Mission
  • Contact us
  • Privacy Policy
  • Terms and Conditions

Copyright 2025 Manuals.Online. All Rights Reserved.