Salus EP101 User manual

Instruction Manual
Model No EP101
Programmable
Heating Controller
2
Salus EP101 Manual 001:89 21/11/10 11:49 Page 1

Salus EP101 Manual 001:89 21/11/10 11:49 Page 2

PRODUCT COMPLIANCE
This product complies with the essential requirements of the
following EC Directives:
•Electro-Magnetic Compatibility directive 2004/108/EC
•Low Voltage Directive 2006/95/EEC
•EC Marking directive 93/68/EEC
SAFETY INFORMATION
These instructions are applicable to the Salus Controls model stated
on the front cover of this manual only, and must not be used with
any other make or model.
These instructions are intended to apply in the United Kingdom
only, and should be followed along with any other statutory
obligations.
This accessory must be fitted by a Competent person, and
installation must comply with the guidance provided in the current
editions of BS7671 (IEE Wiring Regulations) and Part ‘P’ of the
Building Regulations. Failure to comply with the requirements of
these publications could lead to prosecution.
Always isolate the AC Mains supply before opening or
removing the unit from the wall or wall box.
When fitting batteries don’t mix old and new batteries
together. Do not use rechargable batteries.
Please leave these instructions with the end user where they should
be kept in a safe place for future reference.
EP101 INSTRUCTION MANUAL 3
Salus EP101 Manual 001:89 21/11/10 11:49 Page 3

INTRODUCTION
A A programmable heating controller is used to switch the heating system
in your home on and off as needed. It works by controlling the heating
boiler according to a series of programmed settings that take effect at
different times of the day.
The EP101 from Salus Controls is
a stylish and accurate 5/2 or 7 day
programmable heating controller
with a large, easy to read Liquid
Crystal Display (LCD). This
controller has been specifically
designed to be used for single
channel Volt Free or 230V AC
heating applications.
A simple jumper switch changes
the EP101 between 5/2 or 7 day
programming.
Features
•Timed control of central heating
•Large LCD with blue backlight
•Stylish Casing
•Volt Free Contacts
•Built-in start up programme
•12 or 24 hour clock display
•Advance 1 hour facility
•Holiday Function
•5/2 or 7 day programming
•Three On / Off periods
•Memory backup
EP101 INSTRUCTION MANUAL
4
Salus EP101 Manual 001:89 21/11/10 11:49 Page 4

INSTALLATION
Please read the important safety information at the start of this manual
before you begin to install the device.
The ideal position to locate the EP101 programmable heating controller is
about 1.5m above floor level. It should be mounted in a location where the
controller is easily accessible, reasonably lit and free from extremes of
temperature.
The electrical connections to the EP101 are made to the supplied industry
standard backplate. This simplifies installation, as no connections are made
to the controller itself. Connection details are shown below - no Earth
connection is required for the correct and safe operation of the EP101, but
a parking terminal is provided to connect an Earth wire if one is present.
230V AC Switching
Terminal Description Backplate
N Mains Neutral
L Mains Live
1 Hot Water Off
2 No Connection
3 Switched Live (output)
4 230V link from Mains Live
(do not remove)
Earth Parking
(no electrical connection)
EP101 INSTRUCTION MANUAL 5
Salus EP101 Manual 001:89 21/11/10 11:49 Page 5

After installing the backplate in a suitable location, wiring connections can be
made as shown above. The following criteria apply to the installation:
•
The incoming AC mains supply should be 230V AC and fused at 6 amps.
•
Optimum cable size for installation is 1.5 mm2; wiring colours should be
in accordance with the current requirements of the IEE Wiring Regulations.
•
Cable entry should be from the rear of the backplate.
•
All wiring connections should be securely made, and be firmly
gripped beneath the terminal square brass washer.
Do not restore the mains supply to the system until all associated items are fully
installed.
NOTE: All electrical installation work should be carried out
by a suitably qualified Electrician or other competent person.
If you are not sure how to install this programmable thermostat consult either
with a qualified electrician, heating engineer or your boiler / heating system
supplier for advice on how to continue.
Do not remove or refit the EP101 onto the backplate without the mains
supply to the system being isolated.
Volt Free Switching
Terminal Description Backplate
N Mains Neutral
L Mains Live
1 Normally Closed (NC)
2 No Connection
3 Normally Open (NO)
4 Volt Free Common
Earth Parking
(no electrical connection)
EP101 INSTRUCTION MANUAL
6
Salus EP101 Manual 001:89 21/11/10 11:49 Page 6

JUMPER SETTINGS
Changes to the jumper settings should only be made by the Engineer
carrying out the installation or other qualified person.
The installer should select the jumper positions required if changes need to
be made to the factory default settings. These jumpers are found on the
rear of the controller.
Jumper Function Default
Program Type Movable jumper for 5-2 or 7 5-2
individual days programming. programming
Internal Movable jumper for Internal backup
Backup Battery enabling or disabling the battery disabled
internal backup battery.
The installer should enable the internal backup battery before fitting the
controller to ensure user settings are retained – the battery will be kept
charged from the controller mains supply.
EP101 INSTRUCTION MANUAL 7
Salus EP101 Manual 001:89 21/11/10 11:49 Page 7

AFTER INSTALLATION
After completing installation and powering up the EP101 for the first time
the controller will behave in the following way:
All the indicators on the display and the backlight will be turned on for two
seconds. After two seconds, the EP101 will then operate in Normal mode
(controller output OFF).
All the controller settings will be returned to default values. If the Reset
Button is pressed, the EP101 will behave in the same way as described
above, except that any previously saved user settings will be deleted and
overwritten with the default settings.
EP101 INSTRUCTION MANUAL
8
Salus EP101 Manual 001:89 21/11/10 11:49 Page 8

USER INTERFACE AND CONTROLS
The status and operation of the
EP101 can be clearly seen on the
large backlit Liquid Crystal Display
(LCD) - this display allows the user
to see at a glance the current status
of the heating system.
There are few user controls for the EP101, making the controller very easy to
operate. These controls are shown below, along with a description of each of
their functions.
User Control Function Summary
Key / Operation Symbol Functions
+1Hr Temporary override
UP key Increases the selected setting
DOWN key Decreases the selected setting
BACKLIGHT / Manually turns on the LCD backlight
HOLIDAY key for 5 seconds, or activates /
deactivates Holiday Override
MODE key Selects operating mode
SELECT key Selects a clock or programme setting
SET key Sets a clock or programme setting
RESET button Resets the controller to default
(original factory) settings
EP101 INSTRUCTION MANUAL 9
Salus EP101 Manual 001:89 21/11/10 11:49 Page 9

OPERATION
The EP101 is configured and
adjusted by the use of an intuitive
user interface with a minimal
number of user controls.
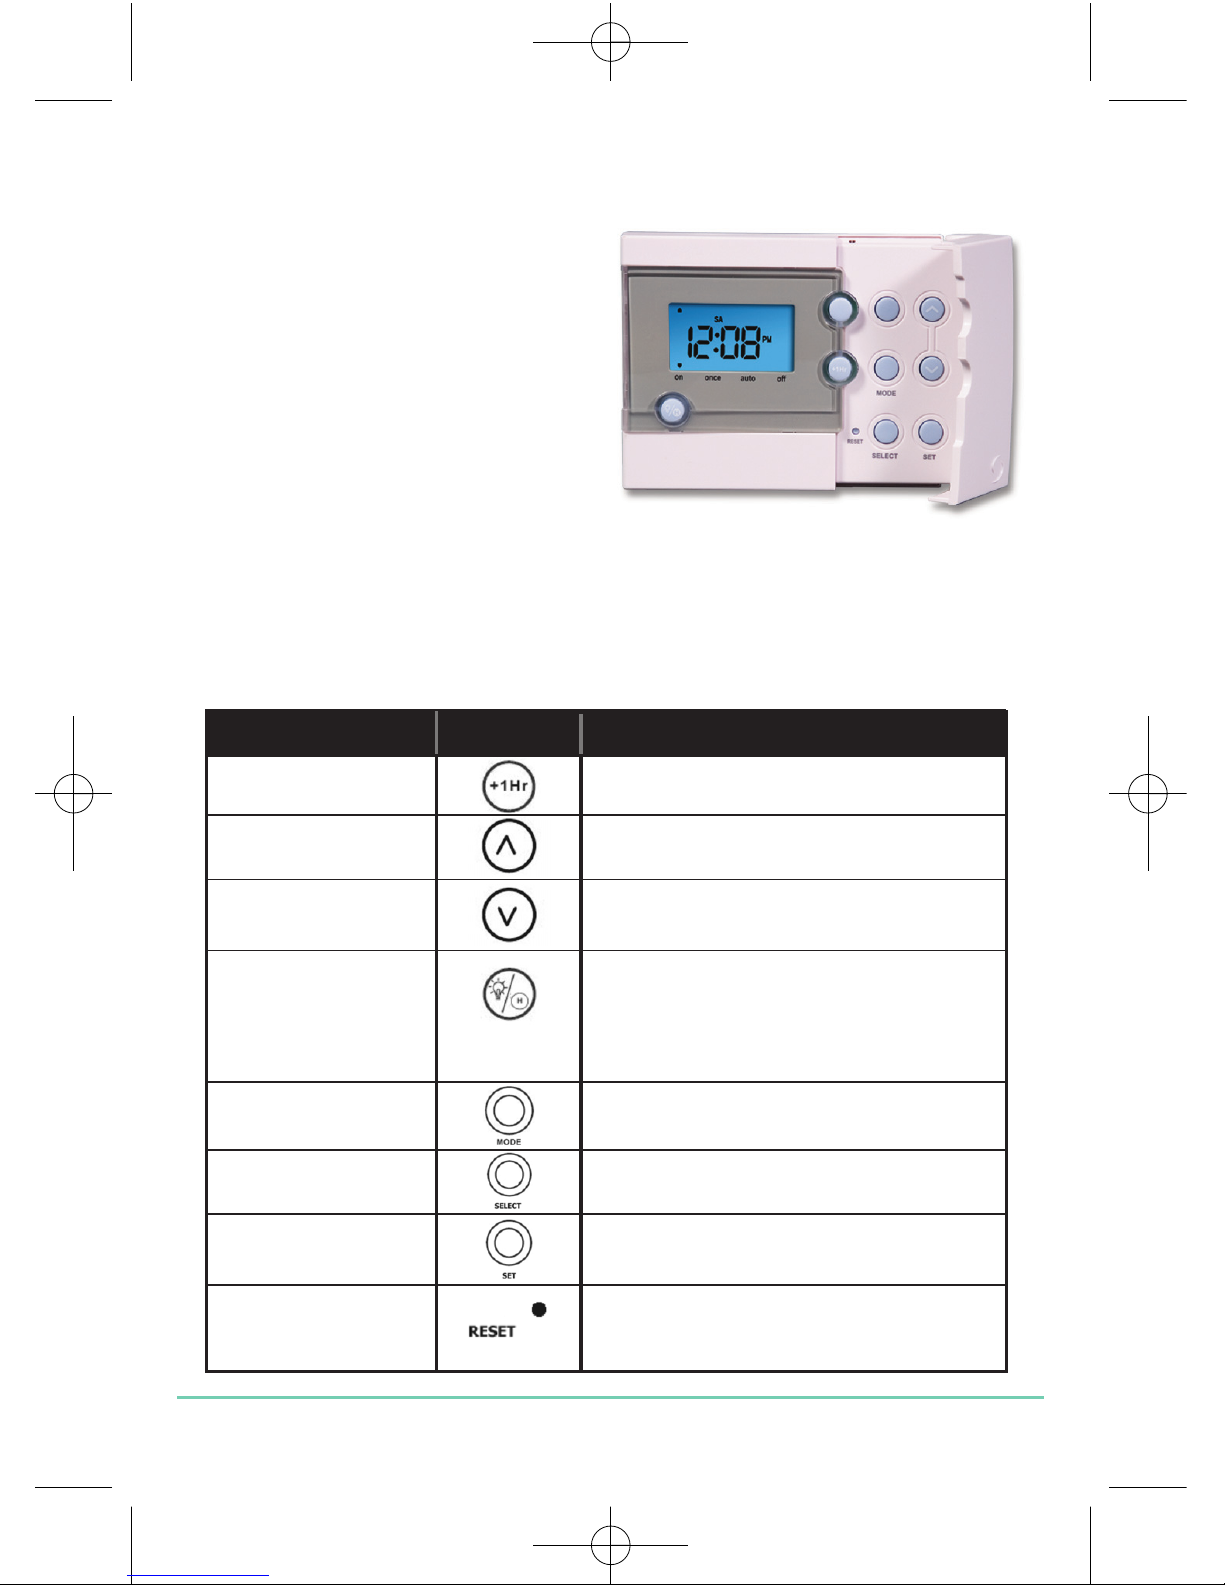
The backlit LCD gives a highly
visible, easily readable indication of
the controller status.
Setting the Time
Press and hold SET and SELECT when the EP101 is in Normal mode for three
seconds to enter the Clock setting mode. Releasing both keys will display
“12 hr” or “24 hr” and SET, as shown below:
Release the SET and SELECT keys and
press UP or DOWN to toggle between 12
and 24 hour time format.
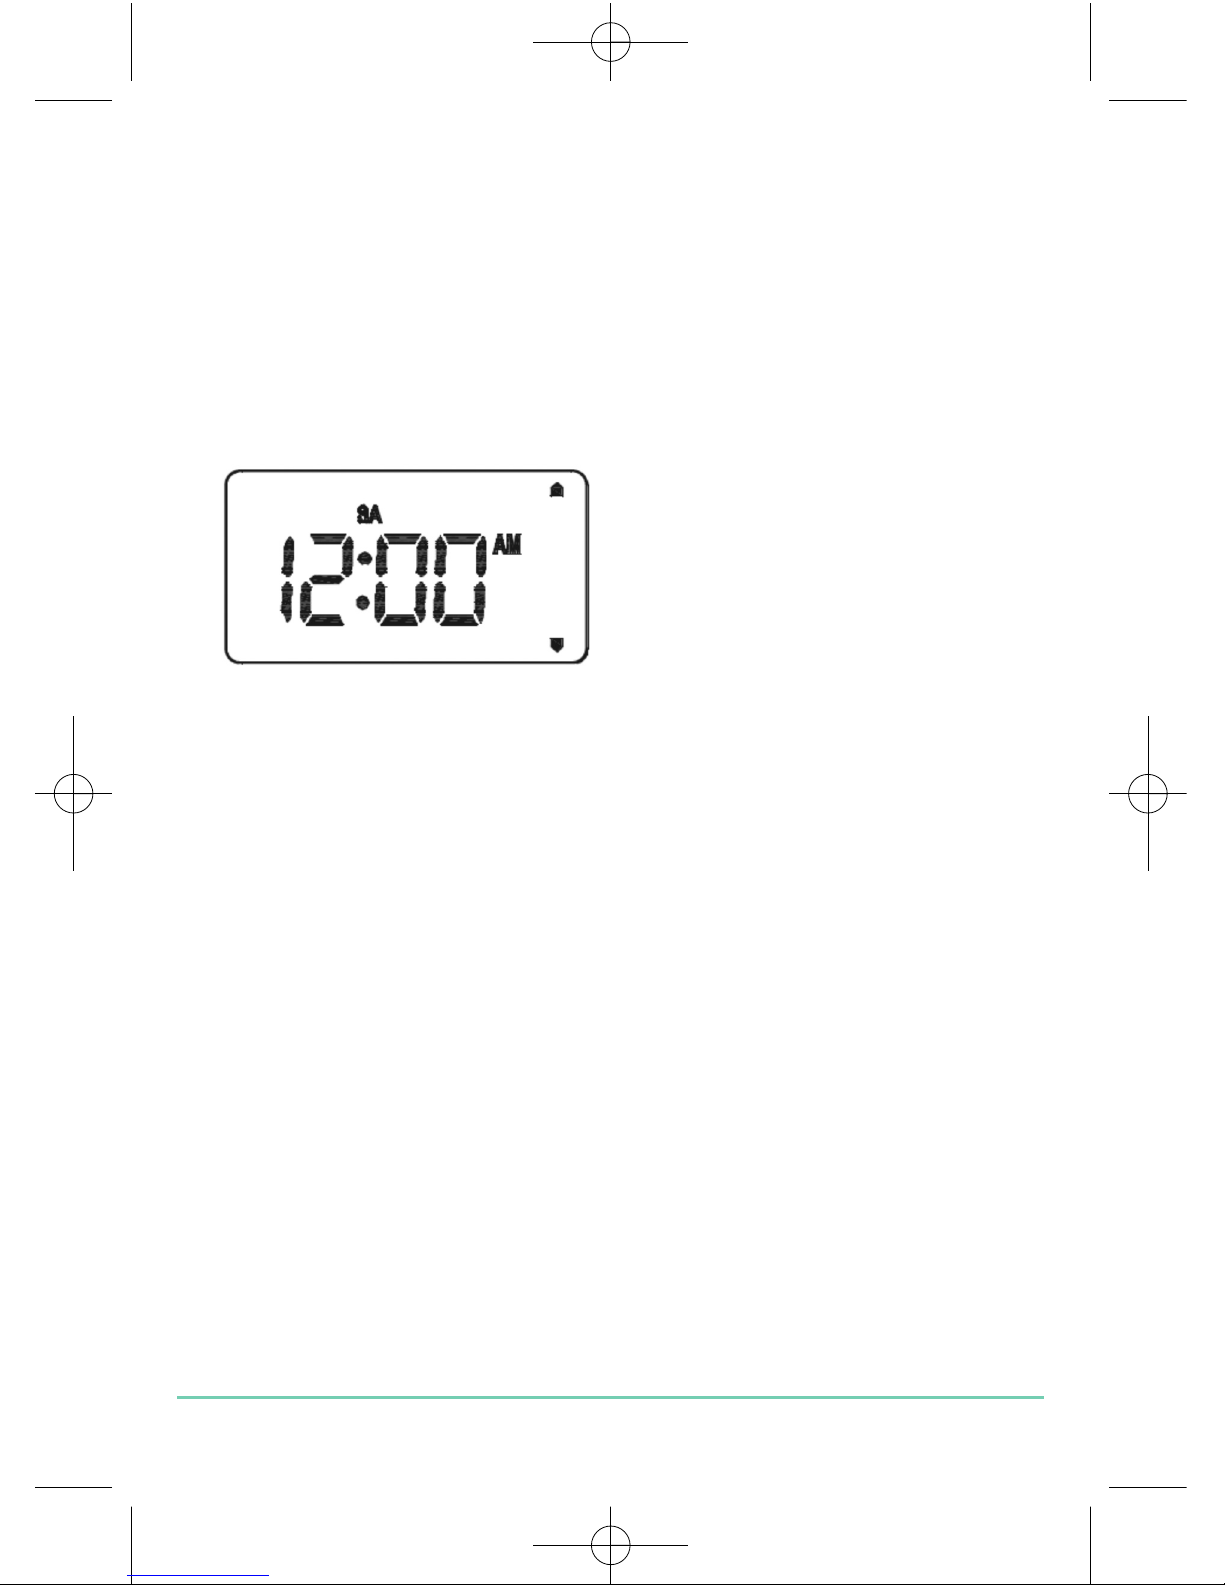
Pressing and releasing SELECT will then display the time and a SET
indicator, with all other indicators cleared from the display. The hour part
of the time will be flashing to indicate that it is the currently selected item
and is ready to be adjusted.
Press the UP or DOWN keys to increase or
decrease the hour setting – the selected
item will stop flashing while a key is
pressed, and will resume flashing when
you release the key.
Press the SELECT key to select the ‘minutes’ section of the time. Set the
minutes in the same way as the hour by using the UP and DOWN keys.
EP101 INSTRUCTION MANUAL
10
Salus EP101 Manual 001:89 21/11/10 11:49 Page 10

Pressing and releasing SELECT again will
then display the year as displayed
Press the UP or DOWN keys to increase or
decrease the year – valid settings are
between 05 and 99 (indicating a year range
of 2005 to 2099).
Press the SELECT key to select the month
section of the date – this is adjusted in the
same way by using the UP and DOWN keys
– valid settings are between 01 and 12
Press the UP or DOWN keys to then increase
or decrease the day setting.
Pressing and releasing SELECT again will
then take you to the final part of the time
and date setting process: enabling daylight
saving.
Press the UP or DOWN keys to enable or disable the daylight saving setting
Pressing the SET key will confirm and save the settings, before returning
the EP101 to Normal mode. Not pressing any keys for more than 15 seconds
will also update the clock settings and return the controller to Normal
mode.
EP101 INSTRUCTION MANUAL 11
Salus EP101 Manual 001:89 21/11/10 11:49 Page 11

PROGRAMMING THE EP101
The EP101 offers great versatility with its programming options, allowing
the user to programme the unit to operate on a 5/2 or 7 day control cycle.
The controller has a default set of programmes that have been designed to
meet the needs of most users. If these default programmes are not suitable
for your particular situation, reprogramming the EP101 with your own
settings is a very straightforward operation.
Selection of the default programming mode (5/2 or 7 day) is made by
changing the jumper setting on the rear of the controller, as previously
described within the Installation section of this manual.
5/2 Day Mode
5/2 day mode is the default programming mode for the EP101. With this
mode selected three different sets of on/off times can be set for Weekdays
or Weekends.
To review or change a programme, press the SET key when the EP101 is in
Normal mode. This will change the unit status to Programme Setting
mode.
The display will show programme number 1 and SET PROG, with all other
indicators cleared. The weekdays will be flashing to indicate they are the
selected item and are ready to be adjusted:
Press the UP or DOWN key to select the
programme set for either Weekday or
Weekend to be reviewed or adjusted.
Pressing the SET key at any time when in
programming mode will return the
EP101 into Normal mode.
EP101 INSTRUCTION MANUAL
12
Salus EP101 Manual 001:89 21/11/10 11:49 Page 12

Press the SELECT key to confirm the Weekday or Weekend selection. Once
this is set, the ‘Hour’ will flash to indicate that it is the selected item and is
the next item to be adjusted:
Press the UP or DOWN key to adjust
the hour setting to the desired value,
and confirm your selection by
pressing the SELECT key.
Pressing the SELECT key allows you to step through each of the items to be
reviewed or adjusted within the programmes in the following sequence:
Programme Status Function Sequence
1 ON Hour Minutes
1 OFF Hour Minutes
2 ON Hour Minutes
2 OFF Hour Minutes
3 ON Hour Minutes
3 ON Hour Minutes
…before then allowing you to cycle back to Programme 1. Pressing the SET
key at any time will confirm the setting and return to the programme set
selection.
EP101 INSTRUCTION MANUAL 13
Salus EP101 Manual 001:89 21/11/10 11:49 Page 13

7 Day Mode
The EP101 also offers a 7 day programming mode, which allows you to
programme three different sets of on/off times for each day of the week to
give a total of 21 separate programme settings.
To review or change a programme, press the SET key when the EP101 is in
Normal mode. This will change the unit status to Programme Setting
mode.
The controller will display programme number 1 and SET PROG, with all
other indicators cleared. The weekday will be flashing to indicate the
selected item is ready to be adjusted.
Press the UP or DOWN key to change
the display to indicate the single day
you want to programme:
Pressing the SET key at any time when
in programming mode will return the
EP101 into Normal mode. Press the
SELECT key to confirm the Day
selection. Once this is set, the ‘Hour’
will flash to indicate that it is the
selected item and is the next item to
be adjusted:
Press the UP or DOWN key to adjust the hour setting to the desired value,
and confirm your selection by pressing the SELECT key.
EP101 INSTRUCTION MANUAL
14
Salus EP101 Manual 001:89 21/11/10 11:49 Page 14

Pressing the SELECT key allows you to step through each of the items to be
reviewed or adjusted within the programmes in the following sequence:
Programme Status Function Sequence
1 ON Hour Minutes
1 OFF Hour Minutes
2 ON Hour Minutes
2 OFF Hour Minutes
3 ON Hour Minutes
3 ON Hour Minutes
…before then allowing you to cycle back to programme 1. Pressing the SET
key at any time will confirm the setting and return to the programme set
selection. Each programme for all the other days of the week is set in exactly
the same way – just repeat the steps shown above, after entering
programming mode and selecting the day you want to programme.
Regardless of which programming mode the EP101 is set for (5/2 or 7 day),
not pressing any keys for 15 seconds will automatically save any
programming changes and exit to Normal mode. Programmes can be
reviewed or changed even if temporary override mode is enabled.
Please be aware that each of the programme time settings must be in
sequence: for example, the OFF time cannot be earlier than the ON time,
programme 3 cannot be set with a time earlier than Programme 2. If this
situation occurs, then the EP101 may operate in an unpredictable way.
EP101 INSTRUCTION MANUAL 15
Salus EP101 Manual 001:89 21/11/10 11:49 Page 15

OPERATING MODE SELECTION
The EP101 operating mode is selected by pressing the MODE key.
There are four operating modes for the controller:
ON, ONCE, AUTO and OFF
The mode can be changed when the controller is in NORMAL mode by
pressing the MODE key. Each key press will cycle the operation mode as
follows:
ON ONCE AUTO OFF ON
The mode indicator changes to indicate the selected operating mode:
The operating mode functions are:
Mode Possible selections Function
ON ON Continuously on
ONCE ON, ONCE On for one period per day
(from Programme 1 ON
to Programme 3 OFF)
AUTO ON, ONCE, AUTO Automatic programme control
OFF ON, ONCE, AUTO, OFF Continuously off
EP101 INSTRUCTION MANUAL
16
Salus EP101 Manual 001:89 21/11/10 11:49 Page 16

Holiday Override Mode
The holiday override mode allows the user to override all the
current programme settings and turn off the heating for up to 31
days. When the EP101 is in Normal mode, pressing the
BACKLIGHT/HOLIDAY key for 3 seconds or longer allows you to turn
on the holiday override mode. The controller display will have the
day numeral flashing to indicate that it is ready to be adjusted, as
shown in the image below:
Use the UP and DOWN keys to
increase or decrease the number of
days to turn the system off. The
maximum number of allowable
override days is 31 – increasing past
this number will roll back the
display to 0 and disable the holiday
override mode.
Pressing the SET key, or not pressing any keys for more than three
seconds will activate the holiday override mode and the heating will
immediately be turned off. The EP101 display will change to show
the number of days the system will be turned off for – the number
of days displayed will decrease at midnight each day.
Cancelling Holiday Override Mode
Pressing the BACKLIGHT/HOLIDAY key for more than three seconds
will turn off the holiday override mode and return the EP101 to
Normal mode.
EP101 INSTRUCTION MANUAL 17
Salus EP101 Manual 001:89 21/11/10 11:49 Page 17

Temporary Override Mode
The temporary override mode allows the user to override the current
programme settings and turn the heating on for a preset period. This mode
is activated by pressing the +1Hr key.
After pressing the +1Hr key, the controller display will change have the day
numeral flashing to indicate that it is ready to be adjusted, as shown in the
image below:
Each press of the +1Hr key will increase the
duration of the override by one hour, to a
maximum duration of nine hours.
Increasing the setting beyond this level will
roll the setting back to 0 and disable the
temporary override.
Pressing the SET key, or not pressing any keys for more than three seconds
will activate the temporary override mode and the heating will immediately
be turned on. After 10 seconds, the EP101 display will change to a
countdown display showing the amount of time the system will be turned
on for. The MODE indicator will flash in the ON position for the duration of
the temporary override.
The EP101 will go back to Normal mode at
the end of the manual override period.
Cancelling Temporary Override Mode
To turn off the temporary override, press the +1Hr key until the display
indicates 0. Pressing the SET key, or not pressing any keys for more than
three seconds will then disable the temporary override mode.
EP101 INSTRUCTION MANUAL
18
Salus EP101 Manual 001:89 21/11/10 11:49 Page 18

OTHER FUNCTIONS AND CONTROLS
Backlight
The backlight of the EP101 is switched on automatically whenever any of
the keys are pressed. The backlight will remain illuminated for
approximately 5 seconds after the last key press, except if you are
changing settings within the Clock, Programme or Temporary Override
modes – in this case the backlight will remain illuminated throughout the
setting change process.
The backlight will not illuminate if there is no mains supply to the
controller.
Daylight Saving
When enabled, the clock will automatically change from Greenwich Mean
Time (GMT) to British Summer Time (BST) on the last Sunday in March at
2:00am. The clock will automatically change back to GMT on the last
Sunday in October at 2:00am.
Reset Button
The Reset Button is provided as a way to restore the heating controller to
its default factory settings. Pressing this button will delete any
previously entered settings.
EP101 INSTRUCTION MANUAL 19
Salus EP101 Manual 001:89 21/11/10 11:49 Page 19

MAINTENANCE
The EP101 programmable heating controller requires no special
maintenance. Periodically, the outer casing can be wiped clean using a dry
cloth (please DO NOT use solvents, polishes, detergents or abrasive
cleaners, as these can damage the thermostat).
There are no user serviceable parts within the unit; any servicing or repairs
should only be carried out by Salus Controls or their appointed agents.
Should the EP101 programmable heating controller fail to function
correctly, check:
•Mains supply to the EP101 is switched on.
•Heating system is switched on.
•If the EP101 is still not functioning correctly, press the Reset Button.
WARRANTY
Salus Controls warrants that this product will be free from any
defect in materials or workmanship, and shall perform in
accordance with its specification, for a period of two years from the
date of purchase. Salus Controls sole liability for breach of this
warranty will be (at its option) to repair or replace the defective
product.
EP101 INSTRUCTION MANUAL
20
Salus EP101 Manual 001:89 21/11/10 11:49 Page 20
Other manuals for EP101
1
Table of contents
Other Salus Thermostat manuals

Salus
Salus ST101ZB User manual

Salus
Salus VS35W User manual

Salus
Salus BTR230 User manual

Salus
Salus RT310SPE User manual

Salus
Salus RT310SR User manual

Salus
Salus 091FLRF User manual

Salus
Salus ERT 52 User manual

Salus
Salus RT200 User manual

Salus
Salus RT310SPE User manual

Salus
Salus Rogers Smart Thermostat 7 Series User manual