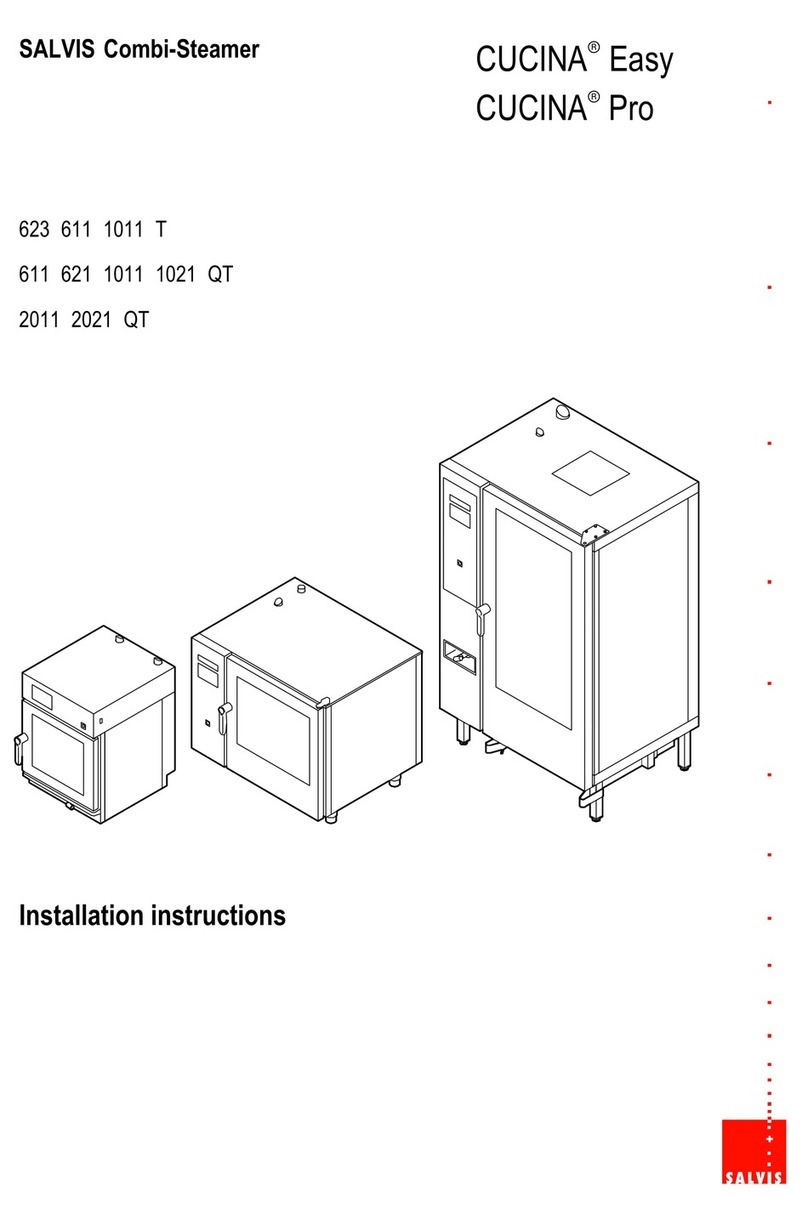
Salvis CucinaEVO 623T User manual

SALVIS Combi-Steamer CUCINAEVO Easy
CUCINAEVO Pro
Operation instructions
623 611 1011 T
611 621 1011 1021 QT
2011 2021 QT

Table of contents page
2/ 92
1. User information 4. . . . . . . . . . . . . . . . . . . . . . . . . . . . . . . . . . . . . . . . . . . . . . . . . . . . . . . . . . . . .
1.1 Information about the instructions for the appliance 4. . . . . . . . . . . . . . . . . . . . . . . . . .
1.2 Symbols in front of the text 4. . . . . . . . . . . . . . . . . . . . . . . . . . . . . . . . . . . . . . . . . . . . . . .
1.3 Warning signs, danger symbols and information symbols 4. . . . . . . . . . . . . . . . . . . . .
1.4 Use as intended 5. . . . . . . . . . . . . . . . . . . . . . . . . . . . . . . . . . . . . . . . . . . . . . . . . . . . . . . . .
1.5 Misuses 5. . . . . . . . . . . . . . . . . . . . . . . . . . . . . . . . . . . . . . . . . . . . . . . . . . . . . . . . . . . . . . . .
2. Safety instructions 5. . . . . . . . . . . . . . . . . . . . . . . . . . . . . . . . . . . . . . . . . . . . . . . . . . . . . . . . . . .
3. Description of the appliance 7. . . . . . . . . . . . . . . . . . . . . . . . . . . . . . . . . . . . . . . . . . . . . . . . . .
3.1 Description of the function components, Types 623, 621, 611, 1011, 1021 7. . . . . .
3.2 Description of the functional components, Type 2011, 2021 8. . . . . . . . . . . . . . . . . . .
3.3 Opening the cooking chamber door 9. . . . . . . . . . . . . . . . . . . . . . . . . . . . . . . . . . . . . . . .
3.4 Using the pull-out shower with automatic retraction 9. . . . . . . . . . . . . . . . . . . . . . . . . .
3.5 Function of the condensate cover (optional) 9. . . . . . . . . . . . . . . . . . . . . . . . . . . . . . . . .
4. Familiarise yourself with the operating and display panel. 10. . . . . . . . . . . . . . . . . . . . . .
4.1 Overview of control versions 10. . . . . . . . . . . . . . . . . . . . . . . . . . . . . . . . . . . . . . . . . . . . . .
4.2 Notes on using the touch-screen 11. . . . . . . . . . . . . . . . . . . . . . . . . . . . . . . . . . . . . . . . . .
4.3 Mode settings “Steam, Hot Air Steam, Hot Air” 12. . . . . . . . . . . . . . . . . . . . . . . . . . . . . .
5. Commissioning 13. . . . . . . . . . . . . . . . . . . . . . . . . . . . . . . . . . . . . . . . . . . . . . . . . . . . . . . . . . . . . .
5.1 Getting ready for use 13. . . . . . . . . . . . . . . . . . . . . . . . . . . . . . . . . . . . . . . . . . . . . . . . . . . .
5.1.1 Inserting the air filter 13. . . . . . . . . . . . . . . . . . . . . . . . . . . . . . . . . . . . . . . . . . . . . . . . . . . . .
5.1.2 Screwing on the water manifold (optional automatic cleaning system) 13. . . . . . . . . . .
5.1.3 Inserting the air baffle 13. . . . . . . . . . . . . . . . . . . . . . . . . . . . . . . . . . . . . . . . . . . . . . . . . . . .
5.1.4 Inserting the grease filter (optional) 14. . . . . . . . . . . . . . . . . . . . . . . . . . . . . . . . . . . . . . . . .
5.1.5 Inserting the removable racks 15. . . . . . . . . . . . . . . . . . . . . . . . . . . . . . . . . . . . . . . . . . . . .
5.2 Inserting/removing removable racks/rack trolleys (option) 16. . . . . . . . . . . . . . . . . . . . .
5.3 Switching on the device 17. . . . . . . . . . . . . . . . . . . . . . . . . . . . . . . . . . . . . . . . . . . . . . . . . .
5.4 Prevent smoke development with greasy foods 17. . . . . . . . . . . . . . . . . . . . . . . . . . . . . .
5.5 Loading 18. . . . . . . . . . . . . . . . . . . . . . . . . . . . . . . . . . . . . . . . . . . . . . . . . . . . . . . . . . . . . . . .
5.5.1 Using the core temperature sensor 18. . . . . . . . . . . . . . . . . . . . . . . . . . . . . . . . . . . . . . . . .
5.5.2 Using the Sous-Vide sensor (option) 18. . . . . . . . . . . . . . . . . . . . . . . . . . . . . . . . . . . . . . .
5.6 Starting / ending the cooking process 19. . . . . . . . . . . . . . . . . . . . . . . . . . . . . . . . . . . . . .
5.6.1 Starting the cooking process 19. . . . . . . . . . . . . . . . . . . . . . . . . . . . . . . . . . . . . . . . . . . . . .
5.6.2 End of the cooking process 20. . . . . . . . . . . . . . . . . . . . . . . . . . . . . . . . . . . . . . . . . . . . . . .
5.6.3 Removing the containers 20. . . . . . . . . . . . . . . . . . . . . . . . . . . . . . . . . . . . . . . . . . . . . . . . .
5.7 Cooling of the cooking chamber with cooking chamber door open 20. . . . . . . . . . . . . .
6. Using operating modes, cooking programs 22. . . . . . . . . . . . . . . . . . . . . . . . . . . . . . . . . . . .
6.1 Setting the cooking process - manual settings 22. . . . . . . . . . . . . . . . . . . . . . . . . . . . . . .
6.2 Cooking steps to add / combinations 26. . . . . . . . . . . . . . . . . . . . . . . . . . . . . . . . . . . . . . .
6.3 Using vitalising 29. . . . . . . . . . . . . . . . . . . . . . . . . . . . . . . . . . . . . . . . . . . . . . . . . . . . . . . . . .
6.4 Cooking process application 30. . . . . . . . . . . . . . . . . . . . . . . . . . . . . . . . . . . . . . . . . . . . . .
6.5 Special programs application 31. . . . . . . . . . . . . . . . . . . . . . . . . . . . . . . . . . . . . . . . . . . . . .
6.6 Working using slide-in times 32. . . . . . . . . . . . . . . . . . . . . . . . . . . . . . . . . . . . . . . . . . . . . .
6.7 Using combi-cooking 34. . . . . . . . . . . . . . . . . . . . . . . . . . . . . . . . . . . . . . . . . . . . . . . . . . . . .
6.8 Applying the SmartCooking program 36. . . . . . . . . . . . . . . . . . . . . . . . . . . . . . . . . . . . . . .
6.9 Using cooking programs from the cookbook 38. . . . . . . . . . . . . . . . . . . . . . . . . . . . . . . . .
6.10 Working with categories (menu groups) 40. . . . . . . . . . . . . . . . . . . . . . . . . . . . . . . . . . . .
6.11 Working with favourites (preferred products) 41. . . . . . . . . . . . . . . . . . . . . . . . . . . . . . . .

Table of contents page
3/ 92
7. Creating, changing, deleting products in the cookbook 42. . . . . . . . . . . . . . . . . . . . . . . .
7.1 Creating, saving and assigning products 42. . . . . . . . . . . . . . . . . . . . . . . . . . . . . . . . . . . .
7.2 Changing the settings of products in the cookbook 46. . . . . . . . . . . . . . . . . . . . . . . . . . .
7.3 Deleting a product from the cookbook 47. . . . . . . . . . . . . . . . . . . . . . . . . . . . . . . . . . . . . .
7.4 Creating and deleting a category 48. . . . . . . . . . . . . . . . . . . . . . . . . . . . . . . . . . . . . . . . . .
7.4.1 Creating a category 48. . . . . . . . . . . . . . . . . . . . . . . . . . . . . . . . . . . . . . . . . . . . . . . . . . . . . .
7.4.2 Delete category with products 49. . . . . . . . . . . . . . . . . . . . . . . . . . . . . . . . . . . . . . . . . . . . .
8. Using baking 52. . . . . . . . . . . . . . . . . . . . . . . . . . . . . . . . . . . . . . . . . . . . . . . . . . . . . . . . . . . . . . . .
9. Displaying HACCP protocols 54. . . . . . . . . . . . . . . . . . . . . . . . . . . . . . . . . . . . . . . . . . . . . . . . .
9.1 Reading HACCP protocols on a USB stick 55. . . . . . . . . . . . . . . . . . . . . . . . . . . . . . . . . .
10. Setup of the control and user interface 56. . . . . . . . . . . . . . . . . . . . . . . . . . . . . . . . . . . . . . . .
11. Exporting and importing data 66. . . . . . . . . . . . . . . . . . . . . . . . . . . . . . . . . . . . . . . . . . . . . . . . .
11.1 Data export: information about the data structure on the USB stick 67. . . . . . . . . . . . .
11.2 Data import: information about the "Replace/Add" option 68. . . . . . . . . . . . . . . . . . . . . .
11.3 Exporting data - example: saving data 69. . . . . . . . . . . . . . . . . . . . . . . . . . . . . . . . . . . . . .
11.4 Importing data - example: replacing a cookbook/cookbooks 70. . . . . . . . . . . . . . . . . . .
12. Completion of operation 71. . . . . . . . . . . . . . . . . . . . . . . . . . . . . . . . . . . . . . . . . . . . . . . . . . . . .
13. Cleaning and Care 71. . . . . . . . . . . . . . . . . . . . . . . . . . . . . . . . . . . . . . . . . . . . . . . . . . . . . . . . . . .
13.1 Notes on stainless steel (risk of corrosion!) 71. . . . . . . . . . . . . . . . . . . . . . . . . . . . . . . . .
13.1.1 Secondary cleaning after completion of automatic cleaning
(liquid/powder cleaner) 71. . . . . . . . . . . . . . . . . . . . . . . . . . . . . . . . . . . . . . . . . . . . . . . . . . .
13.2 Notes on cleaning 72. . . . . . . . . . . . . . . . . . . . . . . . . . . . . . . . . . . . . . . . . . . . . . . . . . . . . . .
13.3 Preparing the appliance for cleaning of the cooking chamber 72. . . . . . . . . . . . . . . . . .
13.3.1 Cleaning the water manifold 73. . . . . . . . . . . . . . . . . . . . . . . . . . . . . . . . . . . . . . . . . . . . . . .
13.3.2 Cleaning the outlet screen in the cooking chamber drain 73. . . . . . . . . . . . . . . . . . . . . .
13.3.3 Using the sealing plate Type 2011/2021 73. . . . . . . . . . . . . . . . . . . . . . . . . . . . . . . . . . . .
13.4 Cleaning the cooking chamber - without automatic cleaning system 74. . . . . . . . . . . .
13.5 Cleaning the cooking chamber - automatically, with powdered cleaner (optional) 76.
13.5.1 Dosing quantities for powdered cleaner: 76. . . . . . . . . . . . . . . . . . . . . . . . . . . . . . . . . . . .
13.5.2 Starting the automatic cleaning process (powdered cleaner) 77. . . . . . . . . . . . . . . . . . .
13.6 Cleaning the cooking chamber - automatically, with liquid cleaner (optional) 79. . . . .
13.6.1 Connecting or replacing the cleaning agent and rinse-aid canisters 79. . . . . . . . . . . . .
13.6.2 Filling the suction hoses with cleaning agent and rinse-aid. 80. . . . . . . . . . . . . . . . . . . .
13.6.3 Starting the automatic cleaning process (liquid cleaner) 81. . . . . . . . . . . . . . . . . . . . . . .
13.7 After completion of automatic cleaning 83. . . . . . . . . . . . . . . . . . . . . . . . . . . . . . . . . . . . .
13.7.1 Cleaning the glazing, cooking chamber door and seal 84. . . . . . . . . . . . . . . . . . . . . . . . .
13.7.2 Cleaning the grease filter (optional) 84. . . . . . . . . . . . . . . . . . . . . . . . . . . . . . . . . . . . . . . . .
13.7.3 Cleaning the cooking chamber behind the air baffle. 85. . . . . . . . . . . . . . . . . . . . . . . . . .
13.7.4 Clean air filter 86. . . . . . . . . . . . . . . . . . . . . . . . . . . . . . . . . . . . . . . . . . . . . . . . . . . . . . . . . . .
13.7.5 Clean stainless steel surfaces 86. . . . . . . . . . . . . . . . . . . . . . . . . . . . . . . . . . . . . . . . . . . . .
13.7.6 Cleaning the control/display panel and the key "On/Off" 87. . . . . . . . . . . . . . . . . . . . . . .
13.8 Decalcifying the cooking chamber 87. . . . . . . . . . . . . . . . . . . . . . . . . . . . . . . . . . . . . . . . .
13.9 Cancelling automatic cleaning 87. . . . . . . . . . . . . . . . . . . . . . . . . . . . . . . . . . . . . . . . . . . . .
13.10 Cleaning of the condensate cover (optional) 87. . . . . . . . . . . . . . . . . . . . . . . . . . . . . . . . .
14. Errors and remedies 88. . . . . . . . . . . . . . . . . . . . . . . . . . . . . . . . . . . . . . . . . . . . . . . . . . . . . . . . .
15. Service 90. . . . . . . . . . . . . . . . . . . . . . . . . . . . . . . . . . . . . . . . . . . . . . . . . . . . . . . . . . . . . . . . . . . . . .
16. Disposal of end-of-life appliances 90. . . . . . . . . . . . . . . . . . . . . . . . . . . . . . . . . . . . . . . . . . . . .
17. EU Declaration of Conformity 91. . . . . . . . . . . . . . . . . . . . . . . . . . . . . . . . . . . . . . . . . . . . . . . . .
18. Software declaration 91. . . . . . . . . . . . . . . . . . . . . . . . . . . . . . . . . . . . . . . . . . . . . . . . . . . . . . . . .

Operating Instructions
4/ 92
1. User information
1.1 Information about the instructions for the appliance
These operating instructions contain important information on the safety, operation, settings and cleaning
of the appliance.
Refer to the installation instructions for information on the setup and installation of the unit.
Read the operating and installation instructions carefully before starting to use the appliance.
The owner of the appliance must ensure that the instructions are accessible to the staff employed to ope
rate the appliance.
Always keep the documents accompanying the appliance close to hand and pass these on with the app
liance to any new owner.
1.2 Symbols in front of the text
.You are requested to carry out an action.
−Enumeration and listing
DNotes, operational sequences
Text without symbols: Descriptions or explanations after a heading.
Text in italics - refers to another chapter
1.3 Warning signs, danger symbols and information symbols
DANGER! Electrical voltage! Risk of electric shock that may result in serious injury or
death!
WARNING! Caustic substances! Risk of chemical burns with possible serious injury! Wear
protective clothing, protective gloves and safety goggles!
WARNING! Risk of injury! Warning of possible injuries through escaping hot steam with cau
stic cleaning agents! Do not open the cooking chamber door during the automatic cleaning
process!
CAUTION! Risk of injury, risk of damage! Warning of possible injury, a health risk or
damage to property! Wear protective clothing, protective gloves and safety goggles! Exer
cise appropriate caution!
CAUTION! Warning of hot objects and possible injury by burns! Serious burns are possible
in the event of a fire! Wear protective clothing, protective gloves and safety goggles! Exer
cise appropriate caution!
WARNING! Scalding hazard! Containers with liquids or products to be boiled, becoming
liquid during the cooking process, may only be pushed into the slot that can be easily viewed
by the operating personnel.
Information! Notes containing particularly useful information and tips.
Translation of the original operating instructions

Operating Instructions
5/ 92
1.4 Use as intended
DThe appliance is for commercial use and may only be operated
−by trained personnel,
−if the appliance is supervised,
−for the purpose designated in the operating instructions.
DThe appliance may only be used for the preparation of foodstuffs. E. g. for the steaming, stewing,
frying, grilling, baking, defrosting, warming and keeping warm of meet, fish, potatoes, vegetables, con
fection of pastries, filled stuffed pasta and baked goods.
DThe user alone is responsible for damage caused by use contrary to the intended use.
1.5 Misuses
DThe appliance may not be used for the heating, drying and storage of objects and not for the melting of
materials!
DNo flammable and ignitable objects may be placed into the cooking chamber.
DThe appliance may not be operated outdoors and not without water hook-up.
DThe appliance may not be used
−by children,
−persons with restricted physical, sensory or mental abilities and
−untrained personnel.
2. Safety instructions
Use
DNote the safety information in the operating and installation instructions.
DDo not use the appliance as a storage or work surface.
DOpenings for supply and exhaust air of the cooking chamber and the control panel must not be co
vered.
DCheck before use whether the cooking chamber still contains residues from cleaning agents and rinse-
aid.
DAn automatic rinse process must be started if the automatic cleaning of the cooking chamber was inter
rupted (e.g. power failure). This prevents contamination of the food items with cleaning agent residues
or damage to chambers.
DPackaged products may only be cooked in heat-resistant containers approved for foodstuff areas.
DNo foodstuffs may be heated in sealed cans or tinned food packaging.
DThe product to be cooked may not touch the cooking chamber, grease filter or air baffle.
DObserve, e.g. for function of the start time selection: If uncooled or unheated food is in the cooking
chamber, e.g. bacteria can very quickly multiply!
DObserve the information about "Cleaning" in these instructions, see from Page 71 in Chapter 13.
DPlease observe the stipulations and rules of the professional associations!
DIf you cannot rectify malfunctions using page 88, Chapter 14. "Troubleshooting and Remedies", switch
off the appliance, disconnect from power, shut off the water tap and notify authorised Customer Ser
vice.
DFor appliances on wheels, the manoeuvrability of the appliance must be restricted to the extent that
any damage to the supply and disposal lines is prevented. Secure the appliance again with the safety
chain after transportation (see installation instructions).

Operating Instructions
6/ 92
Risk of injury
DDuring operation there is a risk of burns from
−hot surfaces,
−hot cooked products,
−hot removable racks,
−hot rack trolleys and
−hot escaping steam when opening the cooking chamber door.
DScalding hazard! Containers with liquids or products to be boiled, becoming liquid during the cooking
process, may only be pushed into the slot that can be easily viewed by the operating personnel. Slop
ping may cause scalding when removing liquid cooked products! A supplied safety sticker must be affi
xed at an appropriate location. Refer to the description in the installation instructions regarding affixing
the safety sticker.
DThe appliance may no longer be operated when the glazing in the door, on the cooking chamber ligh
ting or on the control panel is damaged! The food must be disposed of in the event of glass breakage
during the cooking process!
DScalding hazard! Risk of damage Do not use the pull-out shower to spray into the hot cooking cham
ber.
DThe pull-out shower may only be used to rinse out the cooled cooking chamber.
DRisk of injury! Remove the air baffle only after the ventilator wheel has come to a stop and the app
liance is switched off. Do not slow down the ventilator by hand.
DIf the shower head or the hose is defective, you must notify the authorised customer service.
DContact the authorised customer service if the automatic cleaning system is defective.
DObtain instructions as user of the appliances as to where to find the building's circuit breaker for the
appliances to be operated. This allows you shutting down the appliance without hazard in the event of
fire or damage.
DRack trolleys/transport carts, as well as appliances on wheels, may tip over when transported across
slanted surfaces or thresholds!
Danger of chemical burns
DCleaning agents are caustic! Wear suitable protective clothing, protective gloves and safety goggles
when handling cleaning agents!
DThe cooking chamber door must not be opened while automatic cleaning is in progress. Caustic vapour
and cleaning solution may escape!
Risk of damage
DRisk of splinters! Do not hit the glass panes of the appliance with objects such as the GN sheets or
grilles. Do not drive against the glazing with rack trolleys, serving carts, etc.
DDo not spray or clean the appliance with water hoses, high pressure cleaners, high pressure steam
cleaners or steam cleaners!
DDo not spray foam cleaner on front panels and appliance panels. The foam cleaner gets into the
smallest of cracks and destroys the electrical and electronic systems.
DIf the appliance has not been used for some time, have an authorised customer service agent check it
for correct operation.
Determination and assessment of hazards in accordance with the German Health and
Safety at Work Act
DAccording to the German Health and Safety at Work Act, the employer must assess what hazards are
present for those occupied in the work and what health and safety measures are necessary. Observe
the information supplied by the employers' liability insurance association for commercial kitchens.
DThe employer must specify and provide the personal protective equipment.

Operating Instructions
7/ 92
3. Description of the appliance
Operating principle
−The heat in the cooking chamber is supplied via electrically heated heating elements.
−According to the different operating modes and settings by the user, a defined volume of water is
evaporated via the heating elements.
−The ventilator distributes the hot and moist air in the cooking chamber.
−Settings are made via the touch-screen.
−The control system ensures the automatic sequence of the cooking processes.
3.1 Description of the function components, Types 623, 621, 611, 1011, 1021
(1)
(1) Cooking chamber supply air
(2) Exhaust air, vapour
(3) Display and control panel
(Touch-screen)
(4) Water supply pipe
(5) Air baffle
(6) 4-point core temperature sensor
(7) Door catch
(8) Outlet screen
(9) Drip pan housing
(10) Adjustable feet
(11) Pull-out spray (optional)
(12) Door condensate collecting
groove
(13) Door handle
(14) Cooking chamber door with
locking levels
(15) Cooking chamber lighting
(16) Hook the removable rack
(17) USB connection (option)
(18) Main appliance On/Off switch
(19) Water manifold for automatic
cleaning system (optional)
(20) Air filter - supply air control
(21) Connection Sous-Vide sensor
(option)
(6)
(3)
(4)
(5)
(2)
(7)
(8)
(9)
(10) (11) (10)
(12)
(13)
(14)
(15)
(16)
(18)
(1)
(13)
(2)
(3)
(7)
(11)
(10)
(12)(8)
(17)
(16)
(6)
(5)
(18)
(14)
(15)
(19)
(19)
(9)
(20)
(17) - to 2013
(20)
from 2013 (17) (21)
(21)
Types 623, 611, 1011 T
Types 611, 621, 1011, 1021 QT

Operating Instructions
8/ 92
3.2 Description of the functional components, Type 2011, 2021
(1) Exhaust air, vapour
(2) Cooking chamber supply air
(3) Display and control panel
(Touch-screen)
(4) Main appliance On/Off switch
(5) Door catch
(6) USB connection (option)
(7) Pull-out spray
(8) Adjustable feet
(9) Air filter - supply air control
(10) Guide rail for the rack trolley
(11) Grease filter, cooking chamber
(option)
(12) Holder for 4-Point core
temperature sensor
(13) Air baffle
(14) Outlet screen
(15) Water manifold for automatic
cleaning system (optional)
(16) Lighting, cooking chamber (4 x)
(17) Sealing plate for cooking chamber
with unlocking lever
(18) Drip pan housing
(19) Cooking chamber door with
locking levels
(20) Locking the inner door
(21) Door handle
(22) Door condensate collecting groove
(2)
(3)
(8) (10)
(8)
(14)
(4)
(5)
(6)
(7)
(1)
(9)
(22)
(19)
(21)
(11)
(10)
(15)
(12)
(13)
(11)
(18)
(16)
(17)
(20)
(20)
Caution, risk of bruising on the feet! Before
unlocking or swivelling the sealing plate downwards,
remove the sealing plate from the swivel area.
The sealing plate is required in order to completely
close the cooking chamber,
−if the appliance is operated without rack trolley
(e.g. for preheating),
−for automatic cleaning without rack trolley pushed
in.
Using the sealing plate, refer to Page 73 Chap
ter 13.3.3
Sealing plate
Unlocking
lever
(17)

Operating Instructions
9/ 92
3.3 Opening the cooking chamber door
WARNING! Scalding hazard! Open carefully! Allow steam and hot air to escape to prevent a hazard to
any person!
DOpening the cooking chamber door during a coo
king process shuts off the ventilator and heater.
The cooking process continues automatically
after closing the door.
DRisk of splinters! Do not hit the glass panes of the
appliance with objects such as the GN sheets or
grilles. Do not drive against the glazing with rack
trolleys, serving carts, etc.
3.4 Using the pull-out shower with automatic retraction
DUse the pull-out shower only in the cooking chamber.
DDo not use the pull-out shower in the heated cooking chamber because of
−risk of injury from hot steam or
−risk of damage of the cooking chamber and the glazing!
DThe pull-out shower may not be used to cool down the cooking chamber!
Operation
DThe pull-out shower engages at several positions.
DThe pull-out shower can be retracted between the
locking points.
DThe locking points can be heard and felt.
DThe water supply is activated when the cooking
chamber door is open.
.Guide the pull-out shower back into the appliance
by hand during rewinding. Do not allow so snap
back!
DThe pull-out shower must be completely retracted
in the appliance after use. Risk of damage of the
pull-out shower through the cooking chamber
door!
3.5 Function of the condensate cover (optional)
DThe condensate cover is controlled automatically.
DThe fan is activated
−when humidity and temperature have increased in the exhaust air.
−in four output stages, depending on the volume of humidity and the temperature reached in the ex
haust air.
−at the highest output stage at the end of the cooking process and when the door of the cooking
chamber is opened.
−at low speed if the door of the cooking chamber remains open for a prolonged period of time (time-
controlled).
Door handle
The cooking chamber door
can be unlocked by turning
the door handle in both
directions.
Operating the door handle
Pull-out shower
Pushbutton for shower
Handle

Operating Instructions
10 / 92
4. Familiarise yourself with the operating and display panel.
4.1 Overview of control versions
After the control system is switched on and has powered up different user interfaces appear according to
the appliance features.
Control system operating features "Pro"
The control system permits many different
operating versions:
−Cookbook program list
−Cookbook with pictogram
−Own favourites list (preferred products)
−Nine preset cooking methods
−Categories as list or pictogram (products
divided into groups)
−20 cooking steps can be combined
−Special programs
−User-selectable allocations and
−manual setting
Using the operating modes, see from Page 22
Chapter 6.
Example display
The user can adapt the "Input and display area"
according to the operational circumstances.
Changing the views in the "Input and display
area", see page 56 section 10. fig. 12 and 13
Control system operating features "Easy"
With four modes of operation:
−Steaming
−Combi-steaming
−Hot air
−Vitalising
−Cooking method
Using the operating modes, see from Page 22
Chapter 6.1 to Chapter 6.4
Example display
The user can adapt the "Input and display
area" according to the operational
circumstances.
Changing the views in the "Input and display
area", see page 56 section 10. fig. 12 and 13
Display HACCP data, refer to Page 54
Chapter 9.
Special equipment
If auxiliary functions are purchased and
installed, for the description of these, see from
Page 31 Chapter 6.5
Baking, refer to Page 52 Chapter 8.
Input and display area for
operation
Program
functions
Input and display area for
operation
Program
functions
Display and read HACCP data, refer to Page 54
Chapter 9.
Special equipment
E.g. baking, refer to Page 52 Chapter 8.

Operating Instructions
11 / 92
4.2 Notes on using the touch-screen
Operating and display panel:
Touch-screen
DThe control system of the appliance is operated
via the touch-screen.
DThe touch-screen may be operated only with the
fingers. Brief tapping is sufficient.
DDo not operate the operating panel with ballpoint
pens or other objects.
DThe layout and number of symbols in the "Input
and display area" can be customised to the user
requirements. Refer to Page 56 section 10. fi
gure 12 and 13.
DIf there is not input for a certain period, the bright
ness of the screen is reduced. Tapping on it in
creased the brightness.
Easy operation
DThe control system is easy to operate. Tapping
on the symbols guides you to the next setting
option. Switch through the menus for practice.
You can always return to the previous menu with
the back key .
DBy briefly tapping and holding the back key
the display changes to the "home" symbol.
The start screen appears after releasing the key.
DThe help function provides you with additional
information in the respective menus. An info text
is shown when you tap the help key . Close
the info text with the exit key .
Differences light grey - dark grey
Depending on the various functions key symbols are
shown light or dark grey and framed.
Auxiliary function enabled or disabled
This auxiliary function can be enabled or disabled by
tapping the key.
−Light grey = auxiliary function disabled
−Dark grey = auxiliary function enabled
Display of possible functions
−Light grey = selection not possible
−Dark grey = selection possible
Fig.: Control system Pro
Display of possible functions
Dark grey and
framed = enabled
light grey =
disabled
Auxiliary function disabled or enabled
light grey =
selection not
possible
Auxiliary functions

Operating Instructions
12 / 92
4.3 Mode settings “Steam, Hot Air Steam, Hot Air”
“Modes” window
“Settings” window
Steaming
Temperature range 30 - 130°C
Moisturization 100% (not adjustable)
Core temperature range 0 - 99°C
The adjustable fan speed is limited:
3 - 4 - 5
Hot air steaming
Temperature range 30 - 250°C
Moisturization 0 - 100%
Core temperature range 0 - 99°C
Hot air
Temperature range 30 - 250°C
No moisture can be added:
This setting influences maintaining the cooked product’s
own moisture.
The supply air flap opens or closes depending on the
setting.
Air flap position in increments of 20:
0, 20, 40, 60, 80, 100%
−0% = Supply air flap open - cooking chamber is de
humidified
−100% = Supply air flap closed - own moisture of the
food being cooked remains in the cooking chamber
Core temperature range 0 - 99°C
Regeneration
Temperature range 30 - 250°C
Moisturization 0 - 100%
Core temperature range 0 - 99°C
Special programs
For applications, refer to page 31 chapter 6.5

Operating Instructions
13 / 92
5. Commissioning
.Before using the appliance for the first time, clean with a cleaning product that dissolves grease.
For cleaning, see page 71, Chapter 13.
Only for appliances with automatic cleaning system, not for Types 2011:
.Before initial commissioning or after extended operating breaks, fill approx. 5 litres of water into the
cooking chamber drain (overheating protection/odour trap).
5.1 Getting ready for use
.Check whether the cooking chamber is clean and free of cleaning agent residues.
5.1.1 Inserting the air filter
.Set the air filter in the guide rails and push against the stop.
Air filter
Type 611, 621QT,
1011, 1021QT,
2011, 2021QT
Type 623 T,
611 T,
1011 T
Air filter on the
rear of the
appliance
5.1.2 Screwing on the water manifold (optional automatic cleaning system)
DOnly for appliances with automatic cleaning sys
tem!
.Insert water manifold up in the cooking chamber
and fasten with by hand with knurled nut.
5.1.3 Inserting the air baffle
DThe device may not be operated without air baffle!
DThe device must be switched off during installation.
DThe air baffle may not be dismantled or mounted while the ventilator is still running!
Inserting the air baffle type 623T, 611T,
1011T
.Air baffle
−insert at the bottom into the two guide pins,
−lean against the holder at the top,
−use a screwdriver to close both locks by tur
ning them to the left.
DOpen/close locking mechanism:
−Open by turning to the right,
−Close by turning to the left.
In upper centre
of cooking
chamber
Knurled nut
Threaded bolt
Air baffle (at rear of cooking chamber)
Guide pin
Locking
Open
Closed

Operating Instructions
14 / 92
Inserting the air baffle type 611, 621QT,
1011, 1021QT
.Insert air baffle into the guide pins:
1. Insert at top
2. Lift air baffle
3. Insert at bottom
Inserting the air baffle, Type 2011, 2021QT
.Insert air baffle into the guide pins:
1. Insert at top
2. Lift air baffle
3. Insert at bottom
4. Secure with four screws and U washers.
5.1.4 Inserting the grease filter (optional)
DUse the grease filter preferentially with greasy
foods
Information about "Preventing smoke development",
refer to Page 17 Chapter 5.4
Air baffle (at left in cooking chamber)
Guide pin
Seat for guide pin, top
Air baffle (at left in cooking chamber)
Guide pin
Seat for guide pin, top
Screw
U washer
Grease filter

Operating Instructions
15 / 92
5.1.5 Inserting the removable racks
Inserting the air baffle type 623T, 611T, and
1011T
.Push removable racks into suspension pins
−at the rear,
−hook in place in the front.
DThe removable racks are identical at the left and
right.
Insert the removable racks type 611, 621QT
and 1011, 1021QT
DBy converting the retaining tab, the removable
racks can be used for lengthwise or crosswise
positioning or for bakery standard.
DDo not mix up the left and right removable racks.
The holder for the core temperature sensor is
mounted in the left removable rack.
DCareful, do not bend the upper guide pins! Do not
tilt the removable racks whilst inserting them!
.Hook the removable rack
−on the upper guide pins,
−push upward,
−insert into the lower guide pins and
−lower it.
Suspension pin in cooking chamber (only on
top)
Core temperature sensor holder
Front
Rear
Guide pin in cooking chamber, top
Guide pin in
cooking chamber,
bottom
Core
temperature
sensor holder
Retaining tab
(Lengthwise position)

Operating Instructions
16 / 92
5.2 Inserting/removing removable racks/rack trolleys (option)
WARNING! Risk of injury! Rack trolleys/
transport carts as well as appliances on wheels may
tip over when transported across slanted surfaces or
thresholds!
Caution hot! Wear protective gloves to move re
move removable racks/rack trolleys!
.Close Gastronorm containers with their lids be
fore transportation, to prevent hot liquids from
spilling over.
.Close the locking mechanism after inserting the
containers into the rack trolley or removable rack.
.Do not bang against the appliance or door seal
when inserting a rack trolley or removable rack
into the cooking chamber.
.Activate the parking brake while the transport
cart/rack trolley is not being moved to prevent it
from inadvertently rolling away.
Using a removable rack
.Remove racks from cooking chamber.
.Place the slide-in frame in the cooking chamber.
Ensure exact fixing with the guide pin!
.Secure the removable rack on the transport cart
against movement by using the engagement
lever.
.Adjust the appliance with the screw-in feet if the
height of the transport cart and slide-in frame are
not aligned.
.Move the transport cart up to the appliance until
the locking mechanism on the cooking chamber
engages and the transport cart is thus secured
against rolling away.
.Lift the engagement lever and slide the remov
able rack into the cooking chamber.
.Secure the removable rack to the slide-in frame
with the engagement lever.
.Use the pull loop to remove the plate rack.
Using a rack trolley
.Immediately detach the handle after inserting the
rack trolley (risk of glass breakage or damage to
the cooking chamber door)!
.Actuate the parking brakes on the rack trolley
after sliding it into the cooking chamber and clos
ing the cooking chamber door to prevent it from
moving unchecked after opening the cooking
chamber door.
.Always use the detachable handle to pull the rack
trolley out (risk of burns from hot surfaces)!
Press the release rod to unlock the
locking mechanism.
Slide-in rack
Plate rack
Removable rack
Engagement lever
Engagement lever
must be engaged
during transporta
tion
Locking mecha
nism
Transport
cart
Guide pin in
cooking
chamber
Holes for engage
ment lever
Container locking mechanism
Pull loop
Parking brake
Container locking me
chanism
To open: lift and swing
to the left.
Rack trolley, e.g. for
type 2011, 2021
Handle for rack trolley

Operating Instructions
17 / 92
5.3 Switching on the device
.Open the water tap.
.Switch on the mains switch for the appliance.
The appliance is equipped with different main switches, depending on the type of appliance and year of
manufacture:
Touch-key with LED indicator light
Switch with LED ring indicator light
DThe red LED in the ON/OFF button lights up.
.Switch the appliance on - tap the "on/off" key.
DThe red LED in the ON/OFF button switches
off.
.Switch the appliance on - press the "on/off"
key.
DThe ring indicator light illuminates.
DThe cooking chamber lighting illuminates after approx. 3 seconds.
DAn appliance logo will be displayed on the touch-screen for approx. 1 minute.
Please note! The appliance is computer-controlled!
Therefore do not turn the device on and off in quick succession, as this could result in errors. The compu
ter controller needs a bit of time to load all data or to shut the system down properly. Therefore wait about
30 seconds after turning the device off before turning it back on again.
Select products / make settings, see from Page 22 Chapter 6.
5.4 Prevent smoke development with greasy foods
Attention! Incorrect settings can result in
heavy smoke development, so that smoke detectors
could be triggered!
How to reduce or prevent heavy smoke develop
ment:
.Use a grease filter.
.Reduce air speeds.
.Reduce cooking temperature.
.After cooking with greasy foods, clean the coo
king chamber (from Page 71 Chapter 13.).
Grease filter

Operating Instructions
18 / 92
5.5 Loading
DUse only heat-resistant containers and GastroNorm containers (EN631).
DGrease dripping down during the cooking process must not enter the cooking chamber drain; a GN
container must therefore be inserted in the lowest shelf for these types of food. Otherwise there will be
a risk of clogging the water drainage system.
DNote the shelf heights for liquid foods and foods becoming liquid.
DFor liquid or liquefying foods,
−only fill the GN container to a maximum of 2/3,
−only slide in the GN container at the level that can be easily viewed by the operating persons.
5.5.1 Using the core temperature sensor
DCAUTION! Risk of burning! The core temperature sensor and the handle may be very hot! Use
protective gloves!
DThe core temperature sensor must not protrude beyond the cooking chamber (damage to the glazing
or core temperature sensor when closing the cooking chamber door).
.Poke the core temperature sensor in the centre at
the thickest point into the food to be cooked.
DIf the food to be cooked is frozen, push the core
temperature sensor only into prepared holes. Do
not force into the frozen food to be cooked.
DInsert the core temperature sensor into the holder
when not used.
DBefore removing the food from the cooking cham
ber pull the core temperature sensor first from the
cooked food and insert it in the holder (risk of
damage)!
5.5.2 Using the Sous-Vide sensor (option)
DCAUTION! Risk of burning, risk of injury! The Sous-Vide sensor and the handle can become hot!
The Sous-Vide sensor has a sharp point! Use protective gloves!
DThe The Sous-Vide sensor must not protrude beyond the cooking chamber (damage to the glazing
when closing the cooking chamber door).
Connecting to the appliance
.Remove the cover from the connecting socket.
DCaution! Do not bend the connecting pins!
DObserve the anti-rotation protection of the angle
plug and socket!
.Insert the angle plug.
.Connect the angle plug to the screw fastening.
Insert into the food to be cooked
DCaution! Do not bend the Sous-Vide sensor!
.Bond a Sous-Vide sealing pad at the thickest po
sition in the food to be cooked.
.Insert the Sous-Vide sensor into the food to be
cooked, through the sealing pad. Position the
point of the Sous-Vide sensor in the centre of the
food to be cooked.
.After using the Sous-Vide sensor on the app
liance, remove and safely store.
.Remove the cover from the connecting socket.
Using special programs, refer to Page 31 Chapter
6.5
Holder
Handle
4-point core temperature sensor
(the lowest temperature on the
sensor is displayed)
Connecting socket
Handle
1-Point sensor
Two connecting
pins
Screw fastening
Anti-rotation
protection
Sous-Vide sealing pad 10 off
Article No. 881875

Operating Instructions
19 / 92
5.6 Starting / ending the cooking process
5.6.1 Starting the cooking process
Select products / make settings, see from Page 22 Chapter 6.
1
"Manual steam injection" button
Start cooking process
DThe symbol in the key glows green.
.Tap the key "Start/Stop".
DThe symbol in the "Start/Stop" key changes from
green to red.
DThe cooking process is running.
DThe time runs down. The remaining time is dis
played.
DThe progress bar indicates the time progression
graphically.
DYou can make changes during the cooking process.
DSteaming operating mode: If the temperature in the
cooking chamber is too high, the cooking chamber is
cooled down. The temperature on the display flashes
during the cooling down process.
Displaying the actual temperature in the cooking
chamber.
.Tap the "Temperature" key.
DThe actual temperature is shown for approx. 5 se
conds.
"Start/Stop" key info presentation
Green: The cooking process can be started.
Red: The cooking process is running. The cooking pro
cess can be interrupted by tapping the "Start/Stop" key.
Blue: Shows the completion of a heating or cooling pro
cess. The controller waits for a confirmation to start the
cooking time countdown.
The cooking time countdown starts only after
−loading the cooking compartment, by opening and
closing the door of the cooking compartment
or
−after tapping the key "Start/Stop".

Operating Instructions
20 / 92
5.6.2 End of the cooking process
WARNING! Scalding hazard! Carefully open the cooking chamber door! Allow steam and hot air to
escape to prevent a hazard to any person!
1
End of cooking process
DAfter expiry of the cooking process, an acoustic si
gnal sounds.
Setting the sound and light signal, see from Page 56
Chapter 10. (Figure 6)
After opening the cooking chamber door, or tapping the
key "Start/Stop":
DThe symbol in the "Start/Stop" key changes from red
to green.
DThe cooking parameters previously set are displayed
again.
5.6.3 Removing the containers
DCAUTION During operation there is a risk of burns from
−hot surfaces,
−hot cooked products,
−hot removable racks,
−hot rack trolleys and
−hot escaping steam when opening the cooking chamber door.
DWARNING! Scalding hazard! Caution! Hot surfaces and containers! Caution! Hot liquids slopping
over. Wear suitable protective clothing, protective gloves!
.Cover containers with liquid foods before removing them to prevent any risk of scalding from liquids
slopping over.
.The cooking chamber must be cleaned if no other cooking process follows the removal of the food
items. Otherwise risk of clogging in the drain from solidifying grease (Cleaning see page 71 Chap
ter 13.).
5.7 Cooling of the cooking chamber with cooking chamber door open
This function allows opening and closing the cooking chamber door during the cooling process.
WARNING!Scalding hazard! Carefully open the cooking chamber door! Allow steam and hot air to es
cape to prevent a hazard to any person!
WARNING!Risk of injury! The device may not be operated without air baffle!
1Example
The cooking chamber temperature is 200°C and shall be cooled
to 80°C.
This manual suits for next models
8
Table of contents
Other Salvis Kitchen Appliance manuals

Salvis
Salvis CUCINA EASY User manual

Salvis
Salvis VitalityEVO-Pro User manual

Salvis
Salvis Evolino Pro User manual

Salvis
Salvis Vitality Pro SDS 1/1-13 User guide

Salvis
Salvis Cucina Evo Easy Series User manual

Salvis
Salvis FS 1/1 P User manual

Salvis
Salvis ProfiLine Griddle plate 600 User manual

Salvis
Salvis Evolino II User manual