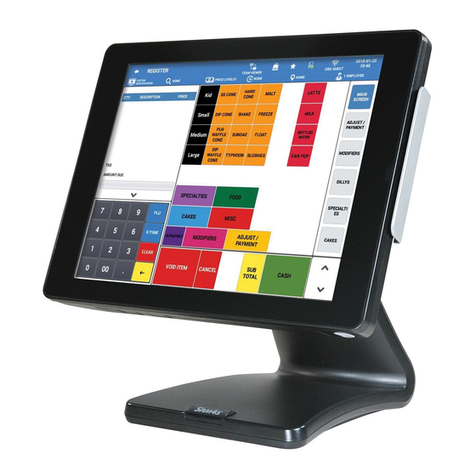
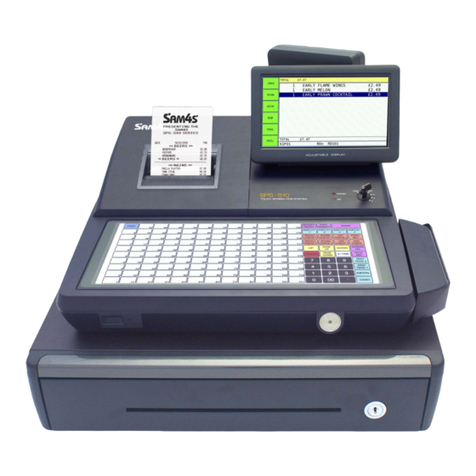
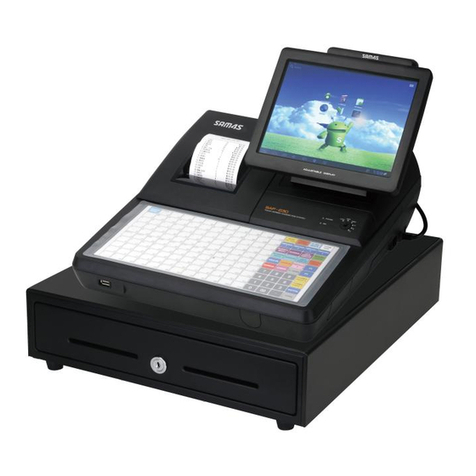
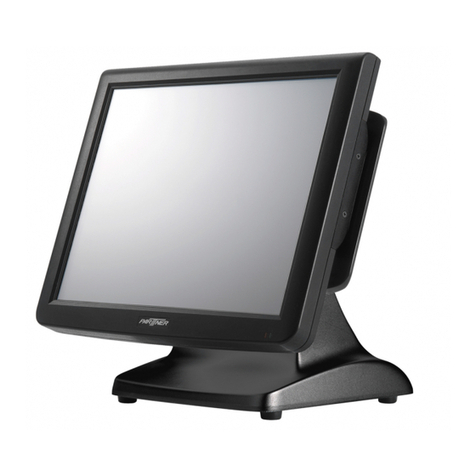
Sam4s SAM4POS User manual

KPRouting
Supplement for Sam4POS
Sam4POS KP Routing Supplement v2.1
All specifications are subject to change without notice. 2017, CRS, Inc.

Sam4POS KP Routing Supplement v2.1 - 2 - Table of Contents
Table of Contents
Introduction ....................................................................................................................................................... 4
Overview ....................................................................................................................................................... 4
Required Programming ................................................................................................................................. 4
Optional Programming .................................................................................................................................. 4
Device Programming: ........................................................................................................................................ 5
Device Setting ................................................................................................................................................ 5
Device Setting Options .............................................................................................................................. 7
Device Mapping (v1.0.79 and Earlier) ........................................................................................................... 8
KP Group (v1.0.79 and Earlier) .................................................................................................................... 10
Device Mapping (v1.0.80 and Later) ........................................................................................................... 12
Adding Kitchen Printers ........................................................................................................................... 13
Edit Kitchen Printers ................................................................................................................................ 15
KP Group (v1.0.80 and Later) ...................................................................................................................... 16
PLU Programming: ........................................................................................................................................... 18
PLU ............................................................................................................................................................... 18
PLU STATUS GROUP .................................................................................................................................... 20
Options Programming ..................................................................................................................................... 21
OPTIONS → KP/KV Option .......................................................................................................................... 21
Print on KP ............................................................................................................................................... 21
Send on KP/KV ......................................................................................................................................... 21
Sort /Split ................................................................................................................................................. 22
ETC ........................................................................................................................................................... 22
Optional Programming .................................................................................................................................... 23
Receipt / KP Message Programming ........................................................................................................... 23
Add a New Receipt/KP Message ............................................................................................................. 23
Station Programming .............................................................................................................................. 23

Sam4POS KP Routing Supplement v2.1 - 3 - Table of Contents
KP Route .......................................................................................................................................................... 24
KP Route Programming ........................................................................................................................... 24
KP Route Operation ..................................................................................................................................... 25
Operation #1 ........................................................................................................................................... 25
Operation #2 ............................................................................................... Error! Bookmark not defined.
Manual Revision History .................................................................................................................................. 26

Sam4POS KP Routing Supplement v2.1 - 4 - Introduction
Introduction
Overview
The printer setup and routing on the Sam4POS terminals is very flexible. We are able to connect Serial or
ethernet printers to the terminal. Each station in the system can have printers assigned and mapped. Kitchen
printers in a system can be shared by multiple stations.
If multiple Kitchen Printers are used, each printer can use a specific Header/Footer to help in identifying the
printers in the system.
The KP Mapping & KP Group programming changed significantly beginning at Sam4POS v1.0.80. This
application guide describes both the new and previous programing methods.
A new feature in added in v1.0.80 and later allows for selecting to print all items on one ticket to the KP,
each item on a separate ticket to the KP or a combination of all items/separate items. We can also control the
number of tickets to print at the KP.
Required Programming
The programming areas required to utilize kitchen printing with Sam4POS are:
• Device Setting – Setup your kitchen printer(s) on an available port in the.
• Device Mapping – Assign printers to the stations in the system.
• KP Group – Create kitchen printing groups to be utilized: i.e. Grill – Beverage – Expediter.
• PLU Status Group – Assign PLU Status Groups to the appropriate Kitchen Printer Group.
• PLU –Link the PLU items you want to send to the kitchen to the appropriate PLU Status Group
Link.
• KP/KV Options – Program the Kitchen Printing Options as needed.
Optional Programming
• KP Message – A unique Header/Footer message can be assigned to kitchen printers for easy
identification if desired.
• KP Route – It may be desirable to setup different routing for orders for different time periods:
i.e. Normal – Busy – Event.

Sam4POS KP Routing Supplement v2.1 - 5 - Table of Contents
DeviceProgramming:
Device programming is where all the individual printers to be used on the Sam4POS system are configured
and mapped (routed) to the all the stations in the system. The KP Group programming is also setup in this
area.
Device Setting
The Device setting program area is where all your printers are configured for the port that they will occupy.
Each terminal will have its own device setting programming. To simplify device mapping when multiple
terminals are in an IRC network, it is best to program your devices to the same port on each Sam4POS
terminal. For example: all Grill Printers on COM2, all Beverage printers on COM1, etcetera.
The SAP-530 Sam4POS terminals have a standard internal receipt printer, additional serial or ethernet
printers can be connected as needed.
1. From the PROGRAM MODE main menu selection screen select DEVICE to view the Device menu
selection dialog, then select DEVICE SETTING. The DEVICE SETTING program screen displays:
2. Choose PRINTER from the device selection list. Current printers installed on the terminal are listed.
3. Press the icon to add a new device to add a new printer. The add new printer dialog displays:

Sam4POS KP Routing Supplement v2.1 - 6 - Table of Contents
4. Press the drop-down to see all the printer selections:
5. Select the printer type, then press OK to add the printer to the terminal.
6. Press the icon to TEST, SORT, or enter the EDIT MODE for the selected device.
• TEST – Sends a Test Print to the selected device.
• EDIT MODE – Select devices to delete as necessary; Press the X to exit edit mode.
• SORT – Sort printers alphabetically.
7. With the new printer added to the list, you can edit the parameters for the printer as necessary.

Sam4POS KP Routing Supplement v2.1 - 7 - Table of Contents
Device Setting Options
General
DEVICE MODEL
SAM4S 2 Inch, 3 Inch,
EPSON TM-U220, TMT88II, EPSON TMT88III
SNBC BTP-L520
COMMUNICATION TYPE
Serial, Ethernet
Serial Ethernet
COM PORT IP ADDRESS
COM1 thru COM4
(dependin
g
on Sam4POS terminal model) Type in the IP of the printer
(mus
t
be in the same ran
g
e as s
y
stem)
BAUD RATE PORT NUMBER
1200, 2400, 9600, 19200, 38400, 57600, 115200 Type in the PORT number used by the printer
(check the printer settin
g
s
f
or correct number)
DATA BITS
7 or 8
PARITY
N
ONE, EVEN, ODD
STOP BITS
1 or 2
FLOW CONTROL
N
ONE, XON
_
XOFF (S/W), RTS
_
CTS (H/W)
Print
PAPER CUTTING AFTER PRINTING
Check if you want to the printer to cut after printing.
This flag can also be used to send a signal to a beeper connected the printer.
FEEDING LINES AFTER PRINTING
Up to a 2-digit entry is allowed (0-99).
OPEN DRAWER AFTER PRINTING
Check this option if using the ‘Print Messenger’

Sam4POS KP Routing Supplement v2.1 - 8 - Table of Contents
Device Mapping (v1.0.79 and Earlier)
The Device Mapping program area is used to assign printers that will be used on each of the various stations in the
Sam4POS system.
1. From the Program Mode/Device/DEVICE SETTING screen, press the drop-down arrow on the
section title to view the sub menu selections. Select DEVICE MAPPING from the available selections.
The DEVICE MAPPING program screen is displayed:
2. Select PRINTER from the list of available device selections, then select the STATION you want to
assign a printer to.
3. Press the NEW button to assign a device. The NEW item dialog displays:
a. Input a DESCRIPTION for the device (up to 30 characters). With terminals in an IRC, it may be
helpful to create descriptors that indicate the terminal; i.e. KP BAR Reg3.
b. SELECT DEVICE: from the list of available devices as set in the Device Setting screens.
c. SELECT FROM TERMINAL: chose the terminal where the device is connected.
d. SELECT DEVICE USING TYPE: Select the type for the specified device. Example, for
printers choose from the selections: Receipt, KP, Journal, Slip, and Label.
e. SELECT BACKUP DEVICE: set if you wish to define a backup device in the case the main
device is offline.
f. SELECT BACKUP TERMINAL: select the terminal where the backup device is connected.
4. Press OK when complete to add the device mapping or press OK AND CONTINUE to map more
printers. Press CANCEL if you want to exit without mapping additional printers to the station.

Sam4POS KP Routing Supplement v2.1 - 9 - Table of Contents
5. Your mapped devices will display:
6. You can use the buttons at the bottom of the mapping screen to edit existing mapped devices.
• GOTO – Brings up the Device Setting programming.
• NEW – To add additional devices.
• EDIT – Allows changes to the printer and time period selections.
• DELETE – Will delete the selected device assignment.

Sam4POS KP Routing Supplement v2.1 - 10 - Table of Contents
KP Group (v1.0.79 and Earlier)
Use this programming area to determine the KP Groups that will be used for assignment in the PLU Status
Group programming. You can assign KP Groups to different printers at different time periods if desired.
Note: You must create a KP printer in the Device Mapping before you can create a KP Group.
Note: KP Time Periods must be created prior to assignment here.
1. From the Program Mode/Device/DEVICE MAPPING screen, press the drop-down arrow on the
section title to view the sub menu selections. Select KP GROUP from the available selections. The KP
GROUP program screen is displayed:
2. From the KP GROUP programming screen press the icon to add a new KP Group(s) or select a group
from the KP Group list.
3. Input a description (up to 30 characters) for the KP Group and press OK to close the dialog or press OK
AND CONTINUE to add additional KP Groups. Press CANCEL if you wish to exit the add KP Group
without adding the group.
4. After the KP Groups are created, press the NEW button to assign the KP group to a printer and selected
the time period for the group. You can add more than one printer/time period for the group. Operation
Buttons are provided to maintain the KP Group settings:
5. GOTO – will bring you to the Device Setting programming. This allows you to Add/Edit devices without
having to exit out of the KP Group programming.
6. NEW – to assign printers (from Device Mapping) to the KP Group and select the time period for the KP
group. The default Time period is ALWAYS, additional time periods for use here are created in: Program-
Mode\Time Schedule\KP Time Period. You can add more than one printer/time period for the group. i.e.
In an IRC system, you may have KP printers assigned for each station.

Sam4POS KP Routing Supplement v2.1 - 11 - Table of Contents
7. EDIT – allows you to change the assigned printer and time period selections.
8. DELETE – Will delete the printer assignment for the selected printer.
9. Press the icon to access the EDIT MODE to select and delete KP Groups or select SORT to sort the
KP Groups alphabetically.

Sam4POS KP Routing Supplement v2.1 - 12 - Table of Contents
Device Mapping (v1.0.80 and Later)
The Device Mapping program area was changed beginning at v1.0.80. Kitchen Printer is a separate selection
from Printer mapping. The Kitchen Printer area is used to assign printers that will be used on each of the
stations in the Sam4POS system.
We can configure kitchen printers the same for all station or each individual station. The ability to configure
kitchen printers by station was added beginning at v1.0.96.
1. From the Program Mode/Device menu, select DEVICE MAPPING from the available selections.
• Alternately, you can press the drop-down arrow on the DEVICE SETTING screen to view
the sub menu selections; then select DEVICE MAPPING from the selection list.
2. Select KITCHEN PRINTER from the list of available device selections on the DEVICE MAPPING
screen:
3. ALL TERMINAL is selected by default.
• If all terminals in a system will use the same kitchen printers, use this selection to add the
printers.
• If each terminal in a system will use different kitchen printers, we can select the station from the
list to add the printers for each station.
4. Add or Edit kitchen printers as desired.
• To ADD NEW kitchen printers, refer to the Adding Kitchen Printers section on page 13.
• To EDIT kitchen printers, refer to the Edit Kitchen Printers section on page 15.

Sam4POS KP Routing Supplement v2.1 - 13 - Table of Contents
Adding Kitchen Printers
Kitchen Printers are listed in the right most column on the Device Mapping Screen
1. Press the NEW button to assign a device. The NEW item dialog displays:
INPUT DESCRIPTION
Type in a description for the device (up to 30 characters). i.e. KP Grill, Bar, Cold, etc.
SELECT DEVICE
Choose the printer from the list of available printers as set in the Device Setting.
SELECT FROM TERMINAL
Chose the terminal from the list where the device is connected.
TICKET COUNT
Set the number of KP tickets to be printed.
KP TYPE
Select the type for the specified device.
• Normal – Prints all items on one ticket.
• Single – Prints each item on a separate ticket; (regardless of the KP Option settings).
• Normal & Single – Prints all items on one ticket & prints each item separately.
• Single & Normal – Prints each item on a separate ticket & prints all items on one ticket.
SELECT BACKUP DEVICE
Set if you wish to define a backup device in the case the main device is offline.
SELECT BACKUP TERMINAL
Select the terminal where the backup device is connected.
2. Press OK when complete to add the device mapping or press OK AND CONTINUE to map more
printers. Press CANCEL if you want to exit without mapping additional kitchen printers.
3. Your mapped devices will display:

Sam4POS KP Routing Supplement v2.1 - 14 - Table of Contents
4. You can use the buttons at the bottom of the mapping screen to edit existing mapped devices.
• GOTO – Brings up the Device Setting programming.
• NEW – To add additional Kitchen Printers.
• EDIT – Allows changes to the settings for the selected Kitchen Printer. You can select an
individual printer or multiple printers to edit all at one time.
• DELETE – Will delete the selected Kitchen Printer.

Sam4POS KP Routing Supplement v2.1 - 15 - Table of Contents
Edit Kitchen Printers
If necessary, you can edit the kitchen printer information.
1. Select a Kitchen Printer from the list you wish to edit; Press the EDIT button to open EDIT item dialog:
DESCRIPTION
You can delete and type in a new description for the device (up to 30 characters) if desired.
SELECT DEVICE
Choose the printer from the list of available printers as set in the Device Setting.
SELECT FROM TERMINAL
Chose the terminal from the list where the device is connected.
TICKET COUNT
Set the number of KP tickets to be printed.
KP TYPE
Select the type for the specified device.
• Normal – Prints all items on one ticket.
• Single – Prints each item on a separate ticket; (regardless of the KP Option settings).
• Normal & Single – Prints all items on one ticket & prints each item separately.
• Single & Normal – Prints each item on a separate ticket & prints all items on one ticket.
SELECT BACKUP DEVICE
Set if you wish to define a backup device in the case the main device is offline.
SELECT BACKUP TERMINAL
Select the terminal where the backup device is connected.
2. Press OK when complete to add the device mapping or press CANCEL if you want to exit without
mapping additional kitchen printers.

Sam4POS KP Routing Supplement v2.1 - 16 - Table of Contents
KP Group (v1.0.80 and Later)
The KP Group programming was changed beginning at v1.0.80 and later. Use this programming area to
determine the KP Groups that will be used for assignment in the PLU Status Group programming. You can
assign KP Groups to different printers at different time periods if desired.
Note: You must create a KP printer in the Device Mapping before you can create a KP Group.
Note: KP Time Periods must be created prior to assignment here.
1. From the Program Mode/Device menu, select KP GROUP from the available selections.
• Alternately, you can press the drop-down arrow on the /DEVICE MAPPING screen to view
the sub menu selections; then select KP GROUP from the selections.
2. The KP GROUP program screen is displayed:
3. From the KP GROUP programming screen press the icon in the LEFT COLUMN to add a new KP
Group(s) or select a KP Group list.
4. Input a description (up to 30 characters) for the KP Group and press OK to close the dialog or press OK
AND CONTINUE to add additional KP Groups. Press CANCEL if you wish to exit the add KP Group
without adding the group.
5. After the KP Groups are created, press the icon in the CENTER COLUMN to assign the printer to be
used for the KP group and selected the time period for the group.
6. When the printer and time period are selected, the KP OPTION selections are displayed.

Sam4POS KP Routing Supplement v2.1 - 17 - Table of Contents
KP Option
DESCRIPTION
You edit the description for the KP Group here if desired.
TICKET COUNT
This is the number of tickets you wish to print. This number initially comes from the Device Mapping
setting.
KP TYPE
This setting comes from the Device Mapping setting. Pressing the GOTO button will bring you to the
Device Mapping screen.
KP TIME PERIOD
This setting comes from the Device Mapping setting.
Press the icon to access the EDIT MODE to select and delete KP Groups or select SORT to sort the KP Groups
alphabetically.

Sam4POS KP Routing Supplement v2.1 - 18 - Table of Contents
PLUProgramming:
PLU’s you want to send to a kitchen printer must be assigned to a PLU Status Group that is set to send to the
appropriate KP Group.
PLU
1. From the PROGRAM MODE menu, touch PLU to view the PLU program selection window then select
PLU from the available selections.
2. Select the PLU you want to program:
3. In the GENERAL section for the selected PLU, select the appropriate PLU STATUS GROUP LINK for
the PLU by pressing the green to access the selection dialog:

Sam4POS KP Routing Supplement v2.1 - 19 - Table of Contents
4. Select the appropriate PLU Status Group from the list to assign it to the item.
5. Pressing the GOTO button in front the PLU/PLU Status Group Link option will bring up the
programming for the PLU status group. You can edit the programming for the status group if desired;
press the back arrow to return to the PLU programming screen.

Sam4POS KP Routing Supplement v2.1 - 20 - Table of Contents
PLU STATUS GROUP
1. From the PROGRAM MODE menu, touch PLU to view the PLU program selection window then select
PLU STATUS GROUP from the available selections.
Alternately, you can access the Status Group from the PLU program screen.
• Select the PLU you wish to edit,
• go to the PLU STATUS GROUP LINK selection option and
• press the GOTO button in front the PLU/PLU Status option to go to the programming for
the status group.
2. From the PLU STATUS GROUP programming screen, go to the KP & KV section.
3. Select/Check the option KITCHEN PRINTER.
4. Select the desired KITCHEN PRINTER GROUP; Press the green to access the Kitchen Printer
Group selection dialog:
5. Choose the appropriate KITCHEN PRINTER GROUP from the list.
6. You can press the GOTO button to go to the KP GROUP programming screen if you want to view or edit
the KP Group settings.
7. On the KP Group or the PLU Status Group; You can press the icon to access:
• EDIT MODE – to select and delete KP Groups or PLU Status Groups
• SORT – to sort the KP Groups or PLU Status Groups alphabetically.
Other manuals for SAM4POS
2
Table of contents
Other Sam4s Touch Terminal manuals

Sam4s
Sam4s SPS-500 User manual

Sam4s
Sam4s SAM4POS User manual

Sam4s
Sam4s Titan-560 User manual

Sam4s
Sam4s SPS-500 User manual

Sam4s
Sam4s SPS-1000 Owner's manual

Sam4s
Sam4s SAP-6600II User manual

Sam4s
Sam4s Touch Screen Terminal User manual

Sam4s
Sam4s SAP-6600 User manual

Sam4s
Sam4s SPT-3000 Guide

Sam4s
Sam4s SPS-500 User manual
Popular Touch Terminal manuals by other brands

CEP Terminals
CEP Terminals CT63 NG user manual

Lean Kiosk Systems
Lean Kiosk Systems LKS8500 Series manual

National Instruments
National Instruments NI CB-37F-HVD installation guide

Pax Technology
Pax Technology D180 quick start guide

ratiotec
ratiotec Connect Box user manual

Fluke
Fluke MOLBOX1 PLUS S - V 6.00 Operation and maintenance manual