manuals.online logo
Brands
  1. Home
  2. •
  3. Brands
  4. •
  5. Samsung
  6. •
  7. Keypad
  8. •
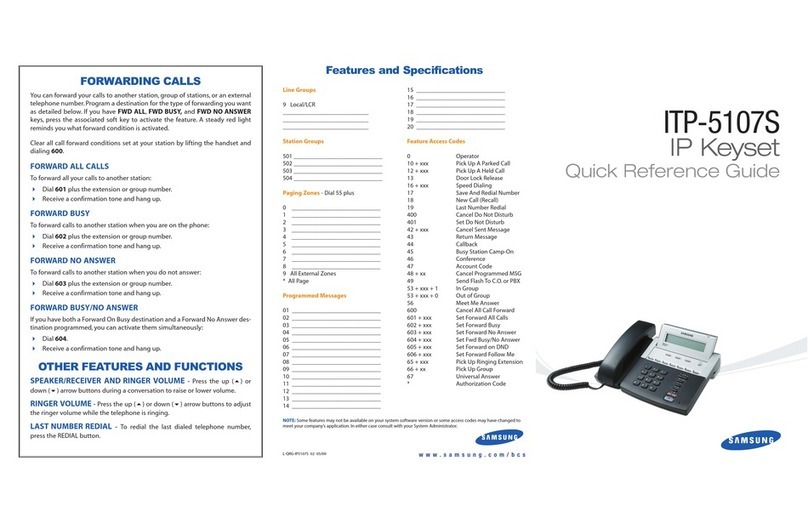
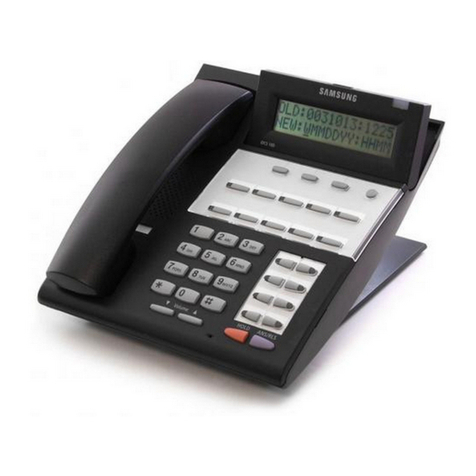
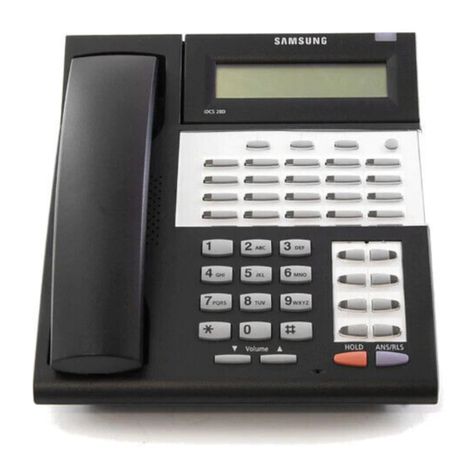
  9. Samsung OfficeServ ITP-5121D User manual

Samsung OfficeServ ITP-5121D User manual

Features and Specifications
Line Groups
9 Local/LCR
____________________________
____________________________
____________________________
Station Groups
501 _____________________________
502 _____________________________
503 _____________________________
504 _____________________________
Paging Zones - Dial 55 plus
0 _____________________________
1 _____________________________
2 _____________________________
3 _____________________________
4 _____________________________
5 _____________________________
6 _____________________________
7 _____________________________
8 _____________________________
9 All External Zones
* All Page
Programmed Messages
01 _____________________________
02 _____________________________
03 _____________________________
04 _____________________________
05 _____________________________
06 _____________________________
07 _____________________________
08 _____________________________
09 _____________________________
10 _____________________________
11 _____________________________
12 _____________________________
13 _____________________________
14 _____________________________
15 _____________________________
16 _____________________________
17 _____________________________
18 _____________________________
19 _____________________________
20 _____________________________
Feature Access Codes
0Operator
10 + xxx Pick Up A Parked Call
12 + xxx Pick Up A Held Call
13 Door Lock Release
16 + xxx Speed Dialing
17 Save And Redial Number
18 New Call (Recall)
19 Last Number Redial
400 Cancel Do Not Disturb
401 Do Not Disturb
42 + xxx Cancel Sent Message
43 Return Message
44 Callback
45 Busy Station Camp-On
46 Conference
47 Account Code
48 + xx Cancel Programmed MSG
49 Send Flash To C.O. or PBX
53 + xxx + 1 In Group
53 + xxx + 0 Out of Group
56 Meet Me Answer
600 Cancel All Call Forward
601 + xxx Set Forward All Calls
602 + xxx Set Forward Busy
603 + xxx Set Forward No Answer
604 + xxx Set Fwd Busy/No Answer
605 + xxx Set Forward on DND
606 + xxx Set Forward Follow Me
65 + xxx Pick Up Ringing Extension
66 + xx Pick Up Group
67 Universal Answer
* Authorization Code
NOTE: Some features may not be available on your system software version or some access codes may have changed to
meet your company’s application. In either case consult with your System Administrator.
OTHER FEATURES AND FUNCTIONS
SPEAKER/RECEIVER VOLUME - Press the up () or down () arrow but-
tons during a conversation to raise or lower volume.
RINGER VOLUME - Press the up () or down () arrow buttons to adjust
the ringer volume while the telephone is ringing.
LAST NUMBER REDIAL - To redial the last dialed telephone number, press
the REDIAL button.
NAVIGATION BUTTON -
The NAVIGATION button is divided into separate
feature buttons:
MENU BUTTON: This button displays
the following options:
1. OUTGOING LOG: Provides a list of the 30 most recent outgoing calls.
• Press the MENU button, scroll or dial number 1.
• Press ENTER.
• Scroll to the desired PHONE NUMBER.
• Press the SEND button to dial the number.
2. INCOMING LOG: Provides a list of the 30 most recent incoming calls.
• Press the MENU button, scroll or dial number 2.
• Press ENTER.
• Scroll to the desired PHONE NUMBER.
• Press the SEND button to dial the number.
3. SPEED DIAL: Searches through Station and System Speed Dial
Numbers.
• Press the MENU button, scroll or dial number 3.
• Press ENTER, scroll to option or dial option:
1. Personal Speed, or 2. System Speed.
• Press ENTER, scroll to the desired PHONE NUMBER.
• Press the SEND button to dial the number.
4. DIRECTORY DIAL: Searches for station speed, system speed, and sta-
tion numbers based on their associated programmed name.
• Press MENU button, scroll or dial option number 4.
• Press ENTER, scroll to option or dial option: 1. Personal Speed, 2.
System Speed, or 3. Station Number.
• Enter the name associated with the speed number or station
number and press the SEND button to dial the number.
5. FORWARD SET: Assigns station call forward conditions for the phone.
You must first set the forward type and destination (Options 2-5) then
activate the forwarding in option 1.
• Scroll or dial option number 5.
• Press ENTER, scroll to or dial the desired option and assign the for-
ward to station number: 2. ALL FWD NO., 3. BUSY FWD NO., 4.
NOANS FWD NO., 5. DND FWD NO., 0. FWD CANCEL.
• Press ENTER, scroll to or dial 1. FORWARD TYPE.
• Scroll to or dial the desired forward type and press ENTER to acti-
vate the desired call forward type.
6. ALARM REMINDER: Sets an Alarm Reminder for up to three alarms.
• Scroll or dial option number 6.
• Scroll or dial the desired alarm number (Alarm 1-3).
• Press ENTER.
• Enter Alarm Type: 0. NOT SET: Disables alarm, 1. TODAY: Rings
alarm one time only, on the day set, or 2. DAILY: Rings alarm daily
at time set.
• Press ENTER,display confirms setting and returns to that alarm set
menu.
• Scroll up to set ALARM TIME and press ENTER.
• Enter ALARM TIME (24-hour Format) and press ENTER.
• Display confirms setting.
SEND BUTTON: Lists recently received or called numbers. It also connects
incoming calls.
END BUTTON: Disconnects a call after a conversation. It also returns the
display to the main menu.
CANCEL BUTTON: Returns display to the main menu.
L-QRG-ITP21D 01 04/06 www.samsung.com/bcs
ITP-5121D
IP Keyset
Quick Reference Guide
PLACING A CALL ON HOLD
Calls can be placed on System Hold or Exclusive Hold. Calls placed on
Exclusive Hold can only be picked up from the extension that placed them on
hold. A call placed on System Hold can be picked up from any extension.
SYSTEM HOLD - To place a call on hold:
Press the HOLD button. The call will flash green at your telephone.
To take the caller off hold, press that button and the green flashing light will
go steady green again.
Resume conversation.
EXCLUSIVE HOLD - To place a call on hold at your telephone so that other
users cannot answer it:
Press the HOLD twice.The call will flash green at your telephone.
To retrieve the call, press the flashing green line button or press the HOLD
button a third time.
NOTE: Internal calls are always placed on exclusive hold.
TRANSFERRING CALLS
You can transfer a call by notifying the party to which the call is being trans-
ferred or without notification.
While on a call, press the TRANSFER button and dial an extension number.
Your call is automatically put on transfer hold.
Wait for the called party to answer and announce the call (optional).
Replace the handset.
TRANSFERRING WITH CAMP-ON
When you transfer a call to another station and receive a busy signal, you can
camp the call on to this station. Hang up when you hear the busy signal. The
called party is alerted that a call is waiting.
NOTE: If you receive No More Calls tone, that station has no button available to
receive another call. Press TRANSFER to return to the caller.
CALL WAITING
If an outside call is camped-on to your phone or another station is camped-on
to you:
Your keyset rings and the call that is waiting (camped-on) flashes green.
Press the flashing button to answer; the other call is put on hold automati-
cally if your station has the Automatic Hold feature set. If not, you must
press HOLD and then the flashing button or finish the first call and hang up;
the waiting call will ring.
Lift the handset to answer.
NOTE: Intercom calls will not go on Automatic Hold.
CONFERENCE CALLS
To make a conference call while engaged in a conversation:
Press the CONFERENCE button and receive conference tone.
Make another call, either intercom or outside, press the CONFERENCE
button and receive conference tone.
Make another call or press the CONFERENCE button to join all parties. You
can conference up to five parties (you and four others).
Repeat the last step until all parties are added.
Hang up to leave the conference call.
NOTE: When attempting to add another party to the conference and you are
not able to reach the desired person, hang up. Simply press the CON-
FERENCE button again to return to the previous conversation.
FORWARDING CALLS
You can forward your calls to another station, group of stations, or an external
telephone number. Program a destination for the type of forwarding you want
as detailed below. If you have FWD ALL,FWD BUSY, and FWD NO ANSWER
keys, press the associated soft key to activate the feature. A steady red light
reminds you what forward condition is activated.
Clear all call forward conditions set at your station by lifting the handset and
dialing 600.
FORWARD ALL CALLS
To forward all your calls to another station:
Dial 601 plus the extension or group number.
Receive a confirmation tone and hang up.
FORWARD BUSY
To forward calls to another station when you are on the phone:
Dial 602 plus the extension or group number.
Receive a confirmation tone and hang up.
FORWARD NO ANSWER
To forward calls to another station when you do not answer:
Dial 603 plus the extension or group number.
Receive a confirmation tone and hang up.
FORWARD BUSY/NO ANSWER
If you have both a Forward On Busy destination and a Forward No Answer
destination programmed, you can activate them simultaneously:
Dial 604.
Receive a confirmation tone and hang up.
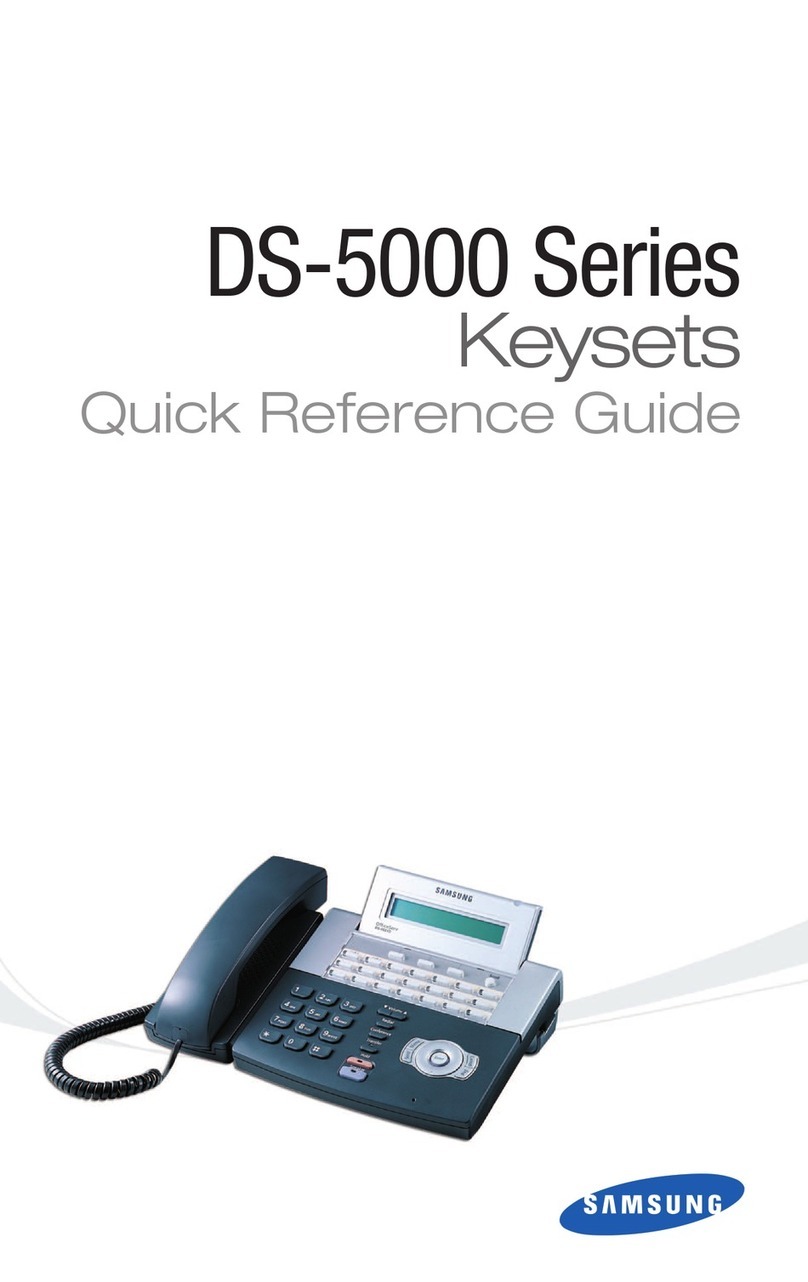
This QUICK REFERENCE GUIDE provides the basic operation of your Samsung
ITP-5121D telephone.
PLACING CALLS
OUTSIDE CALLS - To place a call to an outside party:
Lift the handset.
Press an idle outside line button, line group button, or dial a line access
code to receive dial tone.
Dial the telephone number.
Replace the handset or press the END button when the call is completed.
NOTE: To call preprogrammed speed dial external numbers, lift the handset
and press the appropriate key.
INTERNAL CALLS - To place a call to another extension at your location:
Lift the handset.
Dial the extension number or group number.
Wait for the party to answer. If you hear a brief tone burst instead of ring-
back tone, the station called is set for Voice Announce or Auto Answer.
Begin speaking after the tone.
Replace the handset or press the END button when the call is completed.
SPEAKERPHONE CALLS - Your Samsung ITP-5121D has full speakerphone
capability. This feature is used for both internal or external calls. To activate this
feature:
Press the SPEAKER button.
Place an internal or external call.
Press SPEAKER button to disconnect the call.
NOTE: The handset can be used at any time during the conversation.To resume
handsfree operation, press the SPEAKER button, and replace the handset.
ANSWERING CALLS
OUTSIDE/INTERNAL/VOICE ANNOUNCE CALLS - To answer these
three types of calls:
Lift the handset or press the SEND button to answer on SPEAKERPHONE,
and you are automatically connected to the ringing call.
Replace the handset or press the END button when the call is completed.
NOTE: If a call is flashing at your telephone but not ringing, you must press the
flashing button to answer. The volume can be adjusted at any time by
pressing the up and down arrow keys on your navigation button.
Features and Specifications
Line Groups
9 Local/LCR
____________________________
____________________________
____________________________
Station Groups
501 _____________________________
502 _____________________________
503 _____________________________
504 _____________________________
Paging Zones - Dial 55 plus
0 _____________________________
1 _____________________________
2 _____________________________
3 _____________________________
4 _____________________________
5 _____________________________
6 _____________________________
7 _____________________________
8 _____________________________
9 All External Zones
* All Page
Programmed Messages
01 _____________________________
02 _____________________________
03 _____________________________
04 _____________________________
05 _____________________________
06 _____________________________
07 _____________________________
08 _____________________________
09 _____________________________
10 _____________________________
11 _____________________________
12 _____________________________
13 _____________________________
14 _____________________________
15 _____________________________
16 _____________________________
17 _____________________________
18 _____________________________
19 _____________________________
20 _____________________________
Feature Access Codes
0Operator
10 + xxx Pick Up A Parked Call
12 + xxx Pick Up A Held Call
13 Door Lock Release
16 + xxx Speed Dialing
17 Save And Redial Number
18 New Call (Recall)
19 Last Number Redial
400 Cancel Do Not Disturb
401 Do Not Disturb
42 + xxx Cancel Sent Message
43 Return Message
44 Callback
45 Busy Station Camp-On
46 Conference
47 Account Code
48 + xx Cancel Programmed MSG
49 Send Flash To C.O. or PBX
53 + xxx + 1 In Group
53 + xxx + 0 Out of Group
56 Meet Me Answer
600 Cancel All Call Forward
601 + xxx Set Forward All Calls
602 + xxx Set Forward Busy
603 + xxx Set Forward No Answer
604 + xxx Set Fwd Busy/No Answer
605 + xxx Set Forward on DND
606 + xxx Set Forward Follow Me
65 + xxx Pick Up Ringing Extension
66 + xx Pick Up Group
67 Universal Answer
* Authorization Code
NOTE: Some features may not be available on your system software version or some access codes may have changed to
meet your company’s application. In either case consult with your System Administrator.
OTHER FEATURES AND FUNCTIONS
SPEAKER/RECEIVER VOLUME - Press the up () or down () arrow but-
tons during a conversation to raise or lower volume.
RINGER VOLUME - Press the up () or down () arrow buttons to adjust
the ringer volume while the telephone is ringing.
LAST NUMBER REDIAL - To redial the last dialed telephone number, press
the REDIAL button.
NAVIGATION BUTTON -
The NAVIGATION button is divided into separate
feature buttons:
MENU BUTTON: This button displays
the following options:
1. OUTGOING LOG: Provides a list of the 30 most recent outgoing calls.
• Press the MENU button, scroll or dial number 1.
• Press ENTER.
• Scroll to the desired PHONE NUMBER.
• Press the SEND button to dial the number.
2. INCOMING LOG: Provides a list of the 30 most recent incoming calls.
• Press the MENU button, scroll or dial number 2.
• Press ENTER.
• Scroll to the desired PHONE NUMBER.
• Press the SEND button to dial the number.
3. SPEED DIAL: Searches through Station and System Speed Dial
Numbers.
• Press the MENU button, scroll or dial number 3.
• Press ENTER, scroll to option or dial option:
1. Personal Speed, or 2. System Speed.
• Press ENTER, scroll to the desired PHONE NUMBER.
• Press the SEND button to dial the number.
4. DIRECTORY DIAL: Searches for station speed, system speed, and sta-
tion numbers based on their associated programmed name.
• Press MENU button, scroll or dial option number 4.
• Press ENTER, scroll to option or dial option: 1. Personal Speed, 2.
System Speed, or 3. Station Number.
• Enter the name associated with the speed number or station
number and press the SEND button to dial the number.
5. FORWARD SET: Assigns station call forward conditions for the phone.
You must first set the forward type and destination (Options 2-5) then
activate the forwarding in option 1.
• Scroll or dial option number 5.
• Press ENTER, scroll to or dial the desired option and assign the for-
ward to station number: 2. ALL FWD NO., 3. BUSY FWD NO., 4.
NOANS FWD NO., 5. DND FWD NO., 0. FWD CANCEL.
• Press ENTER, scroll to or dial 1. FORWARD TYPE.
• Scroll to or dial the desired forward type and press ENTER to acti-
vate the desired call forward type.
6. ALARM REMINDER: Sets an Alarm Reminder for up to three alarms.
• Scroll or dial option number 6.
• Scroll or dial the desired alarm number (Alarm 1-3).
• Press ENTER.
• Enter Alarm Type: 0. NOT SET: Disables alarm, 1. TODAY: Rings
alarm one time only, on the day set, or 2. DAILY: Rings alarm daily
at time set.
• Press ENTER,display confirms setting and returns to that alarm set
menu.
• Scroll up to set ALARM TIME and press ENTER.
• Enter ALARM TIME (24-hour Format) and press ENTER.
• Display confirms setting.
SEND BUTTON: Lists recently received or called numbers. It also connects
incoming calls.
END BUTTON: Disconnects a call after a conversation. It also returns the
display to the main menu.
CANCEL BUTTON: Returns display to the main menu.
L-QRG-ITP21D 01 04/06 www.samsung.com/bcs
ITP-5121D
IP Keyset
Quick Reference Guide

Other manuals for OfficeServ ITP-5121D

4

Other Samsung Keypad manuals

Samsung DS-5064 User manual

Samsung

Samsung DS-5064 User manual

Samsung OfficeServ ITP-5107S User manual

Samsung

Samsung OfficeServ ITP-5107S User manual

Samsung OfficeServ SMT-I5220 User manual

Samsung

Samsung OfficeServ SMT-I5220 User manual

Samsung iDCS Keyset User manual

Samsung

Samsung iDCS Keyset User manual

Samsung LCD 12B User manual

Samsung

Samsung LCD 12B User manual

Samsung DS 5007S KEYSET User manual

Samsung

Samsung DS 5007S KEYSET User manual

Samsung Basic 12B User manual

Samsung

Samsung Basic 12B User manual

Samsung DS-2100B User manual

Samsung

Samsung DS-2100B User manual

Samsung DS 5000 Series User manual

Samsung

Samsung DS 5000 Series User manual

Samsung OfficeServ 7200 User manual

Samsung

Samsung OfficeServ 7200 User manual

Samsung OfficeServ ITP-5012L User manual

Samsung

Samsung OfficeServ ITP-5012L User manual

Samsung 7B User manual

Samsung

Samsung 7B User manual

Samsung OfficeServ ITP-5121D User manual

Samsung

Samsung OfficeServ ITP-5121D User manual

Samsung iDCS500 User manual

Samsung

Samsung iDCS500 User manual

Samsung iDCS 500-DCS User manual

Samsung

Samsung iDCS 500-DCS User manual

Samsung DS 5000 Series User manual

Samsung

Samsung DS 5000 Series User manual

Samsung DS-2100B User manual

Samsung

Samsung DS-2100B User manual

Popular Keypad manuals by other brands

AAA Alarms 6150RFAAA installation instructions

AAA Alarms

AAA Alarms 6150RFAAA installation instructions

ICT EliteSuite user manual

ICT

ICT EliteSuite user manual

Allmatic AM1 PAD instruction manual

Allmatic

Allmatic AM1 PAD instruction manual

Channel Vision A0127 instructions

Channel Vision

Channel Vision A0127 instructions

Maker Factory MAKEVMA300 user manual

Maker Factory

Maker Factory MAKEVMA300 user manual

CDVI Digicode Series installation manual

CDVI

CDVI Digicode Series installation manual

Velbus VMBKP manual

Velbus

Velbus VMBKP manual

Ghost Controls AXWK manual

Ghost Controls

Ghost Controls AXWK manual

CDVI KCIENSBP installation manual

CDVI

CDVI KCIENSBP installation manual

Bosch SOLUTION 6000 Quick user guide

Bosch

Bosch SOLUTION 6000 Quick user guide

Elkron KP600 Installation, programming and functions manual

Elkron

Elkron KP600 Installation, programming and functions manual

Genie Wireless Keypad operating instructions

Genie

Genie Wireless Keypad operating instructions

CDVI KCIEN manual

CDVI

CDVI KCIEN manual

CISA 06525-75 manual

CISA

CISA 06525-75 manual

Honeywell 6150 - Ademco Fixed - Display Keypad Installation and setup guide

Honeywell

Honeywell 6150 - Ademco Fixed - Display Keypad Installation and setup guide

POSIFLEX KP-200 user manual

POSIFLEX

POSIFLEX KP-200 user manual

Elkron KP500D quick start guide

Elkron

Elkron KP500D quick start guide

ENFORCER SK-983A user manual

ENFORCER

ENFORCER SK-983A user manual

manuals.online logo
manuals.online logoBrands
  • About & Mission
  • Contact us
  • Privacy Policy
  • Terms and Conditions

Copyright 2025 Manuals.Online. All Rights Reserved.