manuals.online logo
Brands
  1. Home
  2. •
  3. Brands
  4. •
  5. Sanus
  6. •
  7. TV Mount
  8. •
  9. Sanus VisionMount VMF308 User manual

Sanus VisionMount VMF308 User manual

Sanus Systems
2221 Hwy 36 West
Saint Paul, MN 55113 USA
Customer Service
Americas: 800-359-5520 • 651-484-7988 • [email protected]om
Europe, Middle East, and Africa: + 31 40 2324700 • europe[email protected]om
Asia Pacific: 86 755 8996 9226 • sanus.ap@milestone.com
sanus.com
©2010 Milestone AV Technologies,a Duchossois Group Company.
All rights reserved. Sanus is a division of Milestone.
All other brand names or marks are used for identification purposes and are trademarks of their respective owners.
VMF308
(6901-002066 <02>)
Wood Stud
Concrete
5.5mm
(7/32 in.)
10mm
(3/8 in.)
13mm
(1/2 in.)
6901-002066<02>
2
?
Wood stud walls Concrete/Concrete Block
Walls Choose an Option Do Not Alternate View
Structure de murs en bois Murs en béton coulé ou en
blocs de béton Sélectionnez une option Interdit Autre vue
Holzbalkenwände Beton-/Betonsteinwände Wählen Sie eine Option Tun Sie Folgendes nicht Alternative Ansicht
Paredes con montantes de
madera
Paredes de hormigón o de
bloques de hormigón Elija una opción Prohibido Vista ampliada
Paredes de pino de madeira Paredes de concreto/Paredes
de bloco de concreto Escolha uma opção Não Exibição alternada
Muren met houten
balkenconstructie
Muren van beton/
betonblokken Kies een optie Niet Alternatieve weergave
Pareti con montanti in legno Pareti in calcestruzzo/blocchi
di calcestruzzo Scegliere un'opzione Divieto Visualizzazione alternativa
Τοίχοι ε ξύλινου
ορθοστάτε
Τοίχοι από σκυρόδεα/
τσιεντόλιθου Επιλέξτε ια επιλογή Μην Εναλλακτική προβολή
Vegger med trestendere Betongvegger/vegger av
betongblokker Velg et alternativ Forbudt Alternativ visning
Vægge med trædyveler Beton / betonblokvægge Vælg en mulighed Advarsel Skift visning
Väggar med träreglar Betong/Betongvägg Välj ett alternativ Gör inte Annan vinkel
  

  /
     
Drewniane ściany
szkieletowe
Ściany z betonu lub
pustaków betonowych Wybrać opcję Nie należy: Widok z innej strony
Zdi sdřevěnými výztuhami Zdi z betonu/panelů Vyberte jednu možnost Nedělat Alternativní zobrazení
Ahşap Prolli Duvarlar Beton/Beton Blok Duvarlar Seçeneklerden Birini
Belirleyin Yapılmaması Gerekenler Diğer Görünüm
木製スタッド壁 コンクリート/コンクリー
トブロック壁 オプションの選択 禁止事項 別の角度からの図
木墙柱墙壁 混凝土/混凝土砌块墙 选择一个选项 请勿 交换视图
English
Français
Deutsch
Español
Português
Nederlands
Italiano
Ελληνικά
Norsk
Dansk
Svenska

polski
Česky
Türkçe
日本語
中文
6900-002066<02> 3
Tools required
WARNING: This product contains
small items that could be a choking
hazard. CAUTION / WARNING Repeat Step Heavy! Assistance Required.
Outils nécessaires
Ce produit contient de petites pièces
qui peuvent représenter un risque
d’étouement.
ATTENTION/
AVERTISSEMENT! Répétez l’étape
TRÈS LOURD ! Cette étape
requiert deux personnes.
Benötigte Werkzeuge Dieses Produkt enthält kleine Teile, die
zum Erstickungstod führen können. VORSICHT / WARNUNG Wiederholen Sie den
Schritt
VORSICHT, SCHWER! Bei
diesem Schritt werden Sie
Hilfe benötigen.
Herramientas necesarias
Este producto contiene piezas
pequeñas que, si fuesen tragadas,
podrían producir asxia.
PRECAUCIÓN
/ADVERTENCIA! Repita este paso ¡PESADO! Necesitará ayuda
para realizar esta operación.
Ferramentas necessárias
Este produto contém itens pequenos
que podem oferecer risco de
sufocamento.
ATENÇÃO / AVISO! Repita a etapa PESADO! Necessitará de
ajuda nesta etapa.
Benodigd gereedschap Dit product bevat kleine onderdelen
die stikkingsgevaar kunnen opleveren.
VOORZICHTIG/
WAARSCHUWING Herhaal stap
ZWAAR! Voor het uitvoeren
van deze stap is assistentie
vereist.
Strumenti richiesti
Questo prodotto comprende elementi
di piccole dimensioni che potrebbero
causare il soocamento.
PRECAUZIONE/
AVVERTENZA Ripetere l’operazione
PESANTE! Per questa
operazione, si avrà bisogno
di aiuto.
Απαιτούενα εργαλεία
Το προϊόν αυτό περιλαβάνει
ικρά αντικείενα που πορεί να
αποτελέσουν κίνδυνο πνιγού.
ΠΡΟΣΟΧΗ/
ΠΡΟΕΙΟΠΟΙΗΣΗ Επαναλάβετε το βήα ΒΑΡΥ! Θα χρειαστείτε
βοήθεια σ’αυτό το βήα.
Nødvendig verktøy Dette produktet inneholder små
elementer som kan utgjøre kvelefare. FORSIKTIG/ADVARSEL Gjenta trinn TUNGT! Du vil trenge hjelp til
denne operasjonen.
Redskaber, der skal
bruges
Dette produkt indeholder små dele,
som kan forårsage kvælning, hvis de
bliver slugt.
FORSIGTIG/ADVARSEL Gentag trin TUNGT! Du skal bruge hjælp,
når du udfører dette trin.
Verktyg som behövs Den här produkten innehåller små
delar som kan utgöra kvävningsrisk. FÖRSIKTIGHET/VARNING Upprepa steg
TUNGT! Du kommer att
behöva hjälp under det här
steget.


    ,
   
   
 .
/
  
 ! 
 
  
.
Wymagane narzędzia Produkt zawiera małe elementy, które
mogą grozić zakrztuszeniem. UWAGA / OSTRZEŻENIE Powtórzyć krok
CIĘŻKIE! W tej czynności
potrzebna będzie pomoc
drugiej osoby.
Požadované nástroje
Tento výrobek obsahuje malé
součástky, které hrozí rizikem
zadušení.
POZOR / VAROVÁNÍ Opakovat krok
TĚŽKÉ! K tomuto kroku
budete potřebovat
pomocníka.
Gereken Aletler Bu ürün, boğulma tehlikesine neden
olabilecek küçük parçalar içermektedir. DİKKAT / UYARI Adımı Tekrarlayın AĞIR MALZEME! Bu aşamada
yardıma ihtiyacınız vardır.
必要なツール 本製品には小さい部品が付属して
おり、窒息の危険性があります。 注意 / 警告 手順の繰り返し 重量あり!この操作は2人
で行ってください。
需要的工具 此产品包含可能带来窒息危险的小
组件。 小心 / 警告 重复步骤 支架臂很重! 该步骤需要
协助。
English
Français
Deutsch
Español
Português
Nederlands
Italiano
Ελληνικά
Norsk
Dansk
Svenska

polski
Česky
Türkçe
日本語
中文
6901-002066<02>
4
Troubleshooting and
Maintenance
This End Up
Dépannage et maintenance Ce côté vers le haut
Fehlerbehebung und Wartung Dieses Ende nach oben
Resolución de problemas y
mantenimiento Este extremo hacia arriba
Solução de problemas e
manutenção Esta extremidade para cima
Probleemoplossing en
onderhoud Deze zijde boven
Risoluzione dei problemi e
manutenzione Alto
Αντιετώπιση προβληάτων και
Συντήρηση
Με αυτό το άκρο προ τα
επάνω
Feilsøking og vedlikehold Denne siden opp
Fejlnding og Vedligeholdelse Denne ende skal være opad
Felsökning och underhåll Denna sida upp
  
   
Rozwiązywanie problemów i
konserwacja Tym końcem do góry
Řešení problémů a údržba Tímto koncem vzhůru
Sorun Giderme ve Bakım Bu UçYukarı
トラブルシューティングとメ
ンテナンス この面を上にします
故障排除与维护 此端向上
English
Français
Deutsch
Español
Português
Nederlands
Italiano
Ελληνικά
Norsk
Dansk
Svenska

polski
Česky
Türkçe
日本語
中文
6900-002066<02> 5
English
IMPORTANT SAFETY INSTRUCTIONS – SAVE THESE INSTRUCTIONS – PLEASE
READ ENTIRE MANUAL BEFORE USING THIS PRODUCT
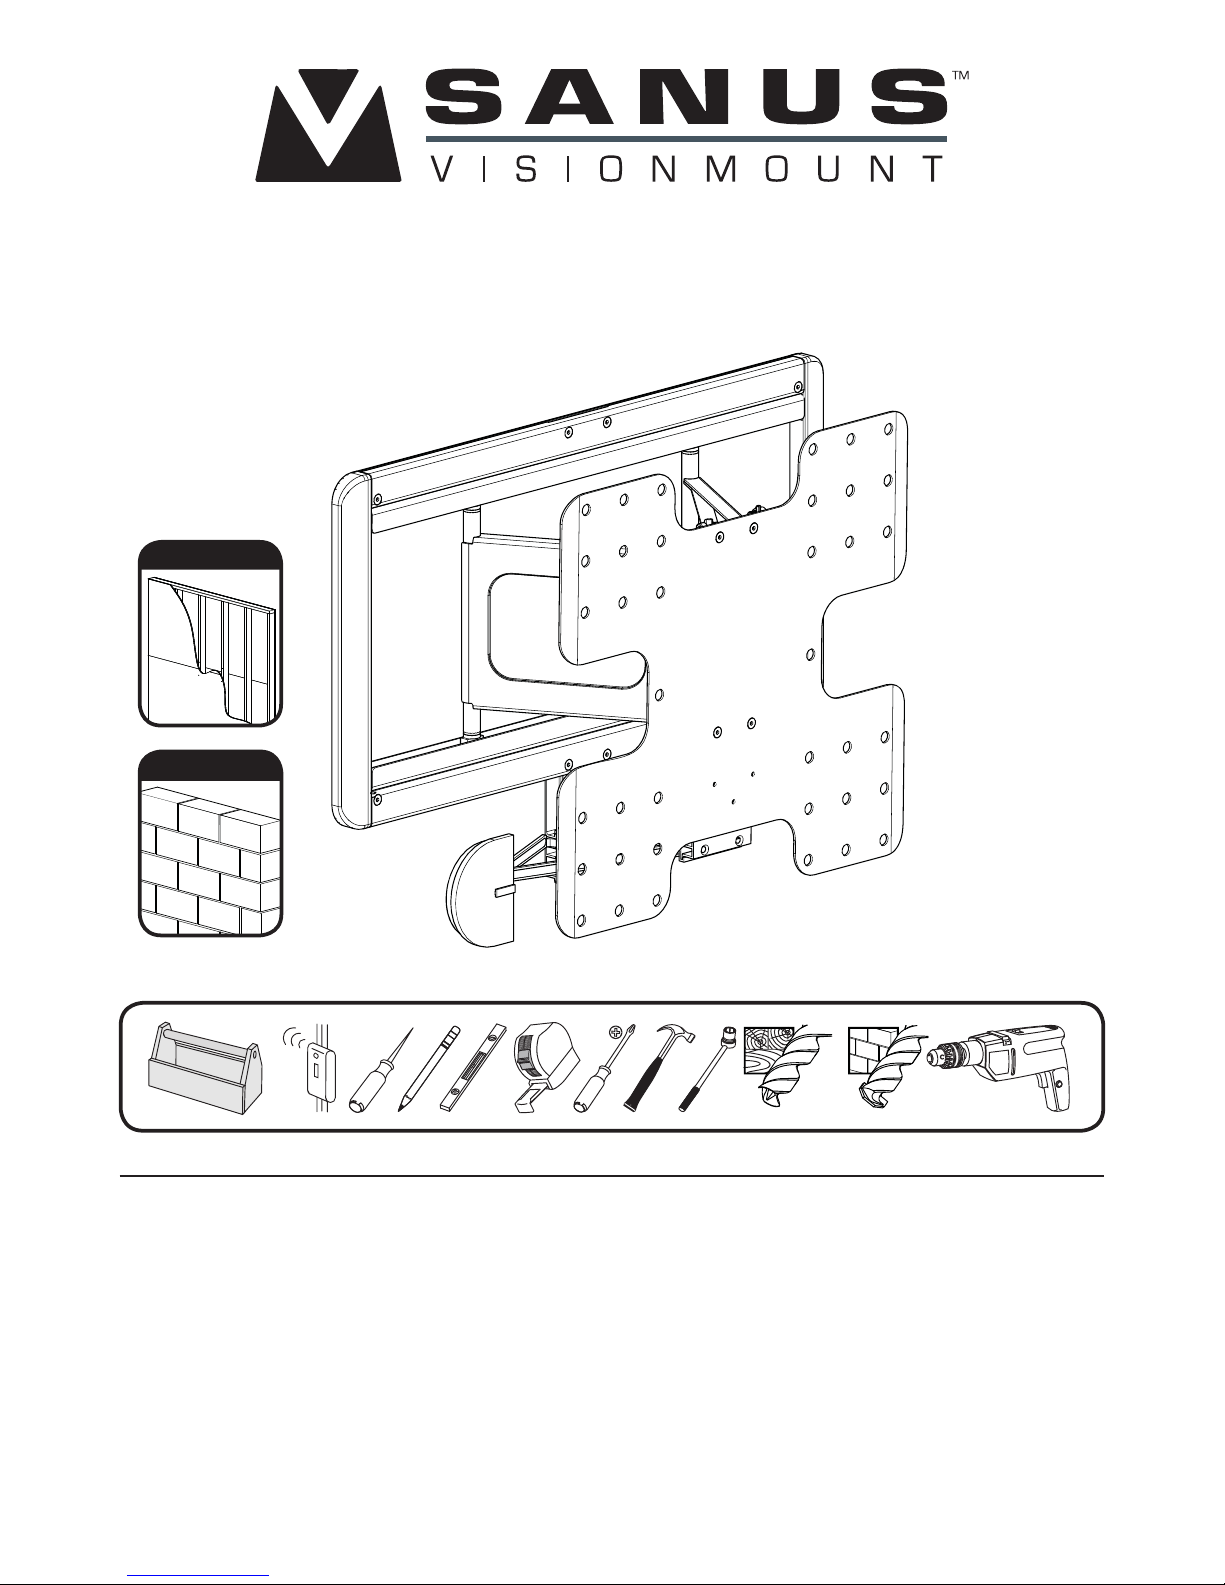
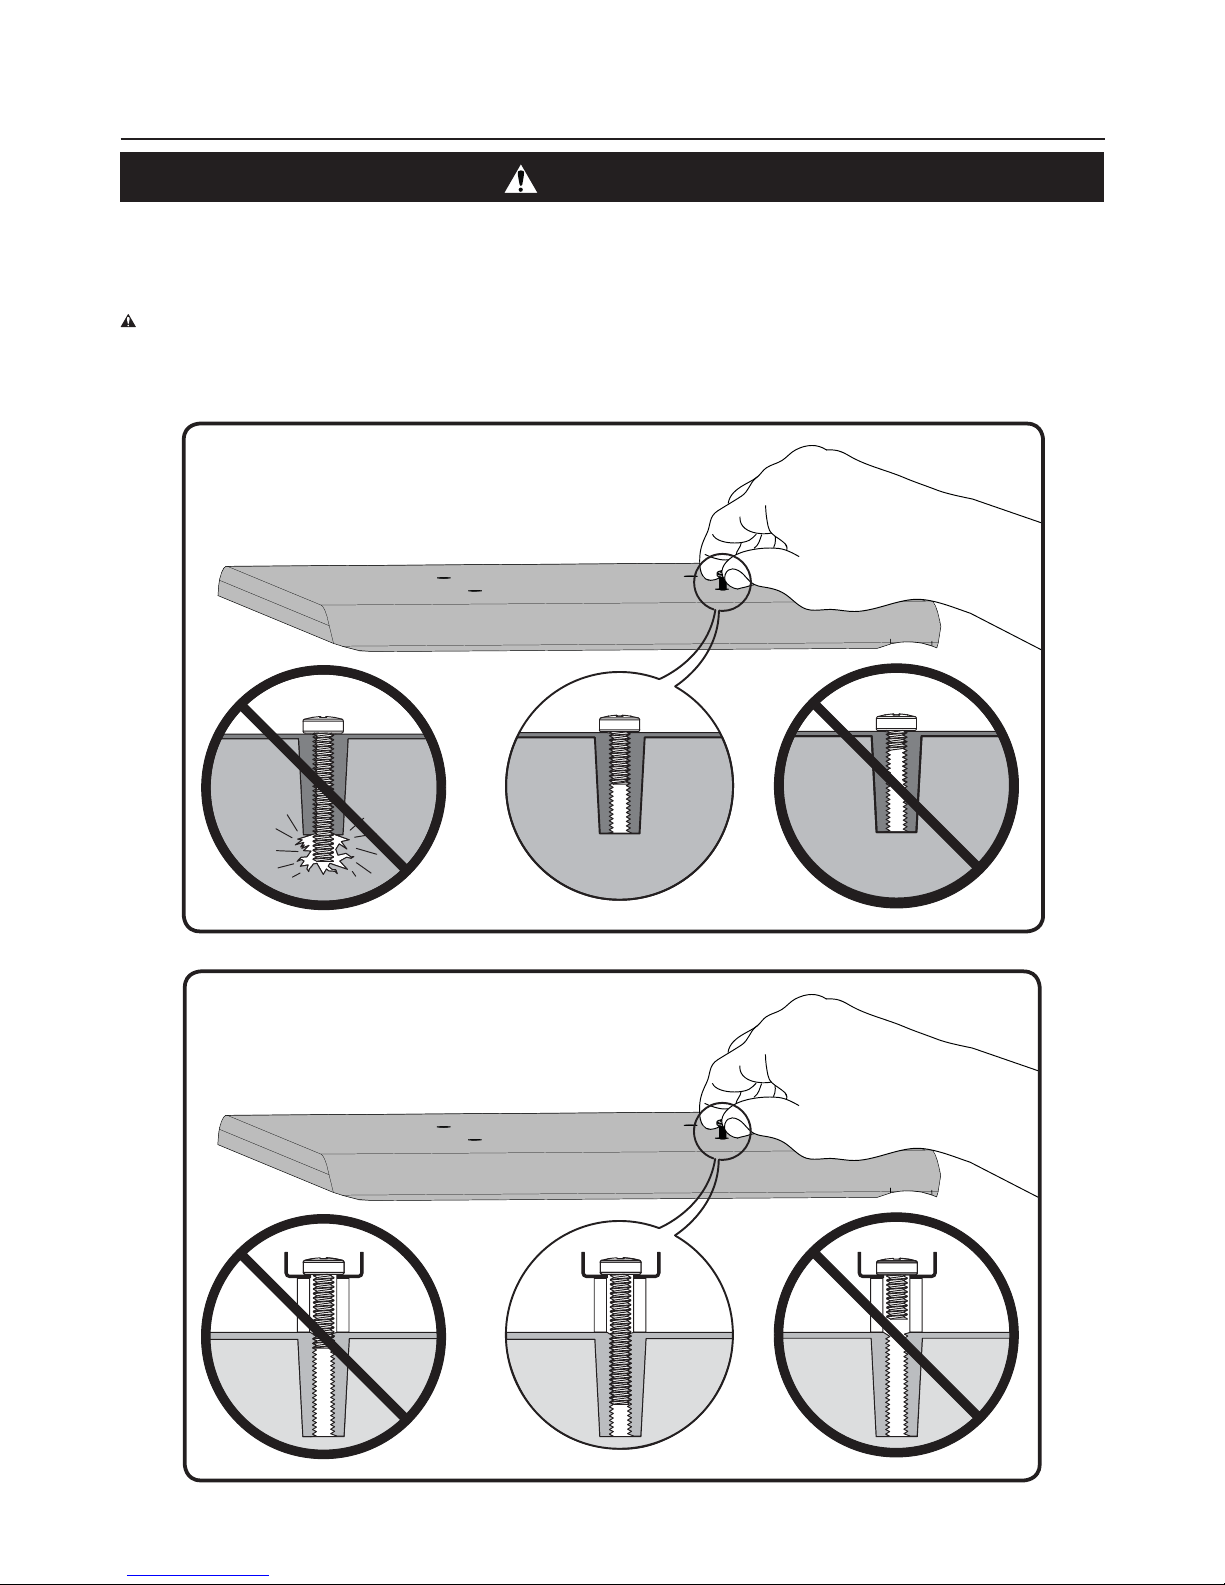
For best results, reference both the text and illustrations when using this
manual. Cut along the dashed lines to match your language with the
illustrations.
English Text Pages 6
Dansk
VIGTIGE SIKKERHEDSOPLYSNINGER – GEM DISSE OPLYSNINGER – LÆS
HELE DENNE VEJLEDNING IGENNEM FØR BRUG
For at opnå det bedste resultat, skal både tekst og illustrationer i denne
manual bruges. Klip langs den stiplede linje, så afsnittet med dit sprog
passer til illustrationerne.
Dansk tekst side 40
Français
INFORMATIONS IMPORTANTES CONCERNANT LA SÉCURITÉ – CONSERVEZ
CES INSTRUCTIONS – VEUILLEZ LIRE ATTENTIVEMENT LE MANUEL AVANT
D’UTILISER CE PRODUIT
Pour obtenir de meilleurs résultats, reportez-vous à la fois au texte et aux
illustrations lorsque vous consultez ce manuel. Couper le long de la ligne
pointillée pour faire correspondre les illustrations à votre langue de préférence.
Texte français page 24 Svenska
VIKTIGA SÄKERHETSANVISNINGAR  SPARA DESSA ANVISNINGAR – LÄS
HELA HANDBOKEN INNAN DU ANVÄNDER DENNA PRODUKT
För bästa resultat, hänvisa till både text och bilder när du använder denna
bruksanvisning. Klipp längs de streckade linjerna för att matcha ditt språk
med bilderna.
Svensk text sida 42
Deutsch
WICHTIGE SICHERHEITSHINWEISE – BEWAHREN SIE DIESE HINWEISE
SORGFÄLTIG AUF – LESEN SIE VOR DEM GEBRAUCH DES PRODUKTS DAS
GESAMTE HANDBUCH
Die Montage ist am einfachsten, wenn Sie den Text und die Abbildungen
zusammen verwenden. Schneiden Sie daher den Text in Ihrer Sprache aus
(gestrichelte Linien), um ihn den Abbildungen gegenüberstellen zu können.
Deutscher Text Seiten 26 
      
  –    
  
       , 
  ,    .  
 ,      .
 : . 44
Español
INSTRUCCIONES IMPORTANTES DE SEGURIDAD  CONSERVE ESTAS
INSTRUCCIONES – LEA TODO EL MANUAL ANTES DE UTILIZAR ESTE
PRODUCTO
Para obtener mejores resultados, consulte el texto y las ilustraciones cuando
utilice este manual. Corte por las líneas punteadas para hacer coincidir su
idioma con las ilustraciones.
Español Páginas de texto 28
polski
WAŻNE INSTRUKCJE DOTYCZĄCE BEZPIECZEŃSTWA  NIE WYRZUCAĆ –
PRZED UŻYTKIEM NALEŻY ZAPOZNAĆ SIĘ Z TREŚCIĄ CAŁEJ INSTRUKCJI
W celu uzyskania najlepszych rezultatów, korzystając z tej instrukcji,
należy zwrócić uwagę zarówno na tekst, jak i na ilustracje. Przeciąć wzdłuż
przerywanych linii w celu dopasowania języka do ilustracji.
Tekst w języku polskim na stronach 46
Português
INSTRUÇÕES DE SEGURANÇA IMPORTANTES  GUARDE ESTAS
INSTRUÇÕES – LEIA O MANUAL INTEIRO ANTES DE USAR ESTE PRODUTO
Para obter melhores resultados, consulte o texto e as ilustrações ao usar
este manual. Recorte nas linhas tracejadas para combinar seu idioma com
as ilustrações.
Texto em português Páginas 30
Česky
WAŻNE INSTRUKCJE DOTYCZĄCE BEZPIECZEŃSTWA  NIE WYRZUCAĆ.
PŘED POUŽITÍM TOHOTO VÝROBKU SI PROSÍM PŘEČTĚTE CELOU
PŘÍRUČKU – PŘED POUŽITÍM TOHOTO VÝROBKU SI PROSÍM PŘEČTĚTE
CELOU PŘÍRUČKU
Nejlepších výsledků dosáhnete, budete-li při používání této příručky
srovnávat text s ilustracemi. Odstřihněte podél čárkované čáry, aby bylo
možno české instrukce přiřadit k ilustracím.
Český text se nachází na straně 48
Nederlands
BELANGRIJKE VEILIGHEIDSINSTRUCTIES  BEWAAR DEZE GOED – GAAT
GEBRUIKEN
Voor de beste resultaten moet u zowel de tekst als de illustraties raadplegen
wanneer u deze handleiding gebruikt. Gebruik de stippellijnen om uw taal
bij de illustraties te plaatsen.
Nederlandse tekst op pagina 32 Türkçe
ÖNEMLİ GÜVENLİK TALİMATLARI  BU TALİMATLARI SAKLAYIN – LÜTFEN
BU ÜRÜNÜ KULLANMADAN ÖNCE KILAVUZUN TAMAMINI OKUYUN
En iyi sonucu almak için bu kılavuzdan yararlanırken hem metne hem
de resimlere bakın. Türkçe metinle resimleri eşleştirmek için kesik
çizgilerden kesin.
Türkçe Metin Sayfaları 50
Italiano
ISTRUZIONI DI SICUREZZA IMPORTANTI – CONSERVARE CON CURA
QUESTE ISTRUZIONI – LEGGERE TUTTE LE ISTRUZIONI PRIMA DI USARE
QUESTO PRODOTTO
Per risultati ottimali, fare riferimento sia al testo che alle illustrazioni di
questo manuale. Tagliare lungo le linee tratteggiate per abbinare il testo
nella propria lingua alle illustrazioni.
Testo in italiano alle pagine 34
日本語
重要−上記の安全指示書を保管しておいてください本製品を使用する前
に、説明書の内容をよくお読みください。
組み立てをうまく行うためには、本説明書を使用する際に、説明文とイラ
ストの両方を参照してください。点線に沿って切り取ると、ご使用の言語
とイラストが一致します。
日本語は52 ページ
Ελληνικά
ΣΗΜΑΝΤΙΚΕΣ ΟΗΓΙΕΣ ΑΣΦΑΛΕΙΑΣ  ΦΥΛΑΞΤΕ ΑΥΤΕΣ ΤΙΣ ΟΗΓΙΕΣ –
ΙΑΒΑΣΤΕ ΟΛΟΚΛΗΡΟ ΤΟ ΕΓΧΕΙΡΙΙΟ ΠΡΙΝ ΧΡΗΣΙΜΟΠΟΙΗΣΕΤΕ ΑΥΤΟ ΤΟ
ΠΡΟΪΟΝ
Για βέλτιστα αποτελέσατα, ανατρέξτε στο κείενο και τι εικόνε κατά
τη χρήση αυτού του εγχειριδίου. Κόψτε κατά ήκο των διακεκοένων
γραών για να αντιστοιχίσετε τη γλώσσα σα ε τι εικόνε.
Ελληνικό κείενο, σελίδε 36
中文
重要安全说明 – 保存这些说明 – 请先完整阅读手册
使用本说明书时,请同时参考文本与插图,以达到最佳理解效果。沿着
虚线裁剪将您的语言与插图匹配起来。
中文文本页 54
Norsk
VIKTIGE SIKKERHETSINSTRUKSJONER  TA VARE PÅ DISSE
INSTRUKSJONENE  LES HELE HÅNDBOKEN FØR DU BRUKER DETTE
PRODUKTET
Se tekst og illustrasjoner i håndboken for beste resultater. Klipp langs de
stiplede linjene for å samsvare det aktuelle språket med illustrasjonene.
Norsk tekst side 38
6901-002066<02>
6
IMPORTANT SAFETY INSTRUCTIONS – SAVE THESE INSTRUCTIONS – PLEASE READ ENTIRE MANUAL BEFORE USING THIS PRODUCT
Specications
Weight capacity: 27.22 kg (60 lbs) includes TV and any accessories
Swivel: ±35°
Tilt: –10°
CAUTION: Avoid potential personal injuries and property damage!
Do not use this product for any purpose not explicitly specied by manufacturer.
The wall must be capable of supporting ve times the weight of the monitor and mount combined.
This product is not designed for use in metal stud walls!
If you do not understand these instructions, or have doubts about the safety of the installation, assembly or use of this product, contact manufacturer
Customer Service or call a qualied contractor.
Manufacturer is not responsible for damage or injury caused by incorrect assembly or use.
English
CAUTION:
15.75
400.0
11.81
300.0
7.87
200.0
15.75
400.0
11.81
300.0
7.87
200.0
12.30
312.4
13.50
342.9
17.00
431.8
25.20
640.1
5.01
127.4
in.
[mm]
6900-002066<02> 7
35°
1.11
[28.3] 8.27
[210.1]
10°10°
in.
[mm]
6901-002066<02>
8
Supplied Parts and Hardware.
Before starting assembly, verify all parts are included and undamaged. If any parts are missing or damaged, do not return the damaged item to your dealer; contact Customer
Service. Never use damaged parts!
NOTE:
Not all hardware included will be used.
1
41cm
(16in.)
3
<16mm
(5/8in.)
13mm
(1/2 in.)
5.5mm
(7/32 in
.)
10mm
(3/8 in.
3
2
13mm
(1/2 in.)
VMF308 Wall Plate Template
(6700-002536 <02>)
Wood Stud Solid Concrete or Concrete Block
Customer Ser vice
Americas: 800-359-5520• 651-484-7988 • [email protected]
Europe, Middle East, and Africa: + 31 40 2324700 • [email protected]
Asia Pacic: 86 755 8996 9226 • [email protected]
4
4
2
1
41cm
(16in.)
3
<16m
m
(5/8in.)
13mm
(1/2in.)
5.5mm
(7/32in
.)
10mm
(3/8in.
1
3
2
13mm
(1/2in.)
VMF308WallPlateTemplate
(6700-002536<01>)
WoodStud SolidConcreteorConcrete Block
CustomerService
Americas:800-359-5520•651-484-7988•info@sanus.com
Europe,MiddleEast,andAfrica:+31402324700•europe.sanus@milestone.com
4
4
2
2
1
41
cm
(16in
.)
3
<
1
6m
m
(5/8i
n.
)
1
3mm
(1
/2in.)
5.5mm
(7/32in
.)
1
0mm
(3/
8
in
.
1
3
2
13mm
(1
/2in.)
VMF308WallPlateTemplate
(6700-002536<01>)
WoodStudSolidConcreteorConcreteBlock
CustomerService
Americas:800-359-5520•651-484-7988•info@sanus.com
Europe,MiddleEast,andAfrica:+31402324700•europe.sanus@milestone.com
4
4
1
CAUTION:
[01] x 1
[02] x 1
[03] x 1
[04] x 1
[05] x 2
6900-002066<02> 9
M4 x 12mm
[06] x 4
M5 x 12mm
[09] x 4
M6 x 14mm
[12] x 4
M8x 16mm
[15] x 4
[26] x 3
14mm
[18] x 4
M4/M5
[20] x 4
M6/M8
[21] x 4 [22] x 4
[29] x 1
24mm
[19] x 4
M4 x 30mm
[07] x 4
M5 x 30mm
[10] x 4
M6 x 25mm
[13] x 4
M8x 25mm
[16] x 4
[27] x 8
M4 x 40mm
[08] x 4
M5 x 40mm
[11] x 4
M6 x 40mm
[14] x 4
M8x 45mm
[17] x 4
[28] x 2
⁄ in. x 2.75 in.
[32] x 4
[31] x 4[30] x 4
⁄ in. Hex Key
[23] x 1
M3 Hex Key
[24] x 1
⁄ in. Hex Key
[25] x 1
6901-002066<02>
10
1
Install TV Brackets
Before you begin, hand thread screws into the threaded inserts on the back of your TV to determine the correct screw diameter (M4, M5, M6, or M8). Verify
that there are adequate threads to secure the brackets to the monitor. If you encounter resistance, stop immediately and contact customer service.
CAUTION: Avoid potential personal injuries and property damage! Use the shortest screw and spacer combination to accomodate your needs. Using
hardware that is too long may damage your monitor’s internal components.
1-2, 1-3
1-1
CAUTION:
6900-002066<02> 11
1-1
M6
M5M4
M8
ForTVs with a at back. Ensure that the bracket is level on the back of
the TV. Standard congurations are shown. If you need extra space to
accommodate cables, recesses, or protrusions, see an installation option (1-2
or 1-3) that uses spacers. For special applications, or if you are uncertain
about your hardware selection, contact Customer Service.
[06]
[12]
[09]
[15]
[20]
[21]
[20]
[21]
[03]
[03]
[03]
[03]
[03]
6901-002066<02>
12
1-2
?
M6
M5M4
M8
AForTVs with an irregular/obstructed back. Ensure that the
bracket is level on the back of the TV. Standard congurations
are shown. For special applications, or if you are uncertain about
your hardware selection, contact Customer Service.
[07]
[13]
[10]
[16]
[20]
[22]
[22]
[22]
[22]
[18]
[18]
[18]
[18]
[21]
[20]
[21]
[03]
[03]
[03]
[03]
[03]
[22]
[18]
6900-002066<02> 13
1-3
?
M6
M5M4
M8
A
ForTVs with an irregular/obstructed back. Ensure that the
bracket is level on the back of the TV. Standard congurations
are shown. For special applications, or if you are uncertain about
your hardware selection, contact Customer Service.
[22]
[22]
[22]
[22]
[19]
[19]
[19]
[19]
[08]
[14]
[11]
[17]
[20]
[21]
[20]
[21]
[03]
[03]
[03]
[03]
[03]
[22]
[19]
6901-002066<02>
14
2
To prepare the wall plate for mounting:
Slide the arms of the wall plate [02] together and insert the slide lock [29]
into place. This will lock the arms into full extension making the wall plate
mounting and TV attachment easier.
Install the locking screws [28] into the sides of the face plate using the ⁄ in
hex key [25]. Screw in only until the end of the screw is ush with the inside
of the plate. This will allow the TV to be mounted without interference.
[29]
[29]
[02]
[28]
[28]
[25]
6900-002066<02> 15
6901-002066<02>
16
3
CAUTION:
Wall Mounting
3-1: Wood Stud Mounting
CAUTION:
Improper use could reduce the holding power of the lag bolt. To avoid potential injuries or property damage:
Pilot holes MUST be drilled to a depth of 75 mm (3 in.), using a 5.5 mm (7/32 in.) diameter drill bit.
DO NOT over-tighten the lag bolts [32].
Any material covering the wall must not exceed 16 mm (5/8in.).
Minimum wood stud size: common 2 x 4 in. (nominal 1.5 x 3.5 in.)
3-2: Solid Concrete and Concrete Block Mounting
CAUTION:
Improper use could reduce the holding power of the lag bolt. To avoid potential injuries or property damage:
Pilot holes MUST be drilled to a depth of 75 mm (3 in.), using a 10 mm (3/8in.) diameter drill bit.
Be sure the anchors [30] seat ush with the concrete surface.
Mount wall plate directly onto the concrete surface.
Never drill into the mortar between blocks.
DO NOT over-tighten the lag bolts [32].
Minimum solid concrete thickness: 8in.
Minimum concrete block size: 8x 8x 16 in.
6900-002066<02> 17
Wood Stud Wall Mounting – See Cautions in Step 3.
1. Locate studs. Verify the center of the stud with an awl or thin nail or
use an edge to edge stud nder.
2. Using the wall plate template [01], level the template [01] and mark
the hole locations.
3. Drill pilot holes as illustrated.
4. Place the wall plate against the wall. Tighten the lag bolts [32] only
until the washers [31] are pulled rmly against the wall plate [02].
2
1
41cm
(16in.)
3
<16mm
(5/8in.)
13mm
(1/2 in.)
5.5mm
(7/32 in
.)
10mm
(3/8 in.
1
3
2
13mm
(1/2 in.)
VMF308 Wall Plate Template
(6700-002536<01>)
Wood Stud Solid Concrete or Concrete Block
Customer Servi ce
Americas: 800-359-5520 • 651-484-7988 • [email protected]
Europe,Middle East, and Africa: + 31 40 2324700 • [email protected]
AsiaPacic: 86 755 8996 9226 • [email protected]
4
4
2
4
3-1
1
3
13mm
(1/2 in.)
5.5mm
(7/32 in.)
41 cm
(16 in.)
< 16 mm
(5/8 in.)
[01]
[02]
[31]
[32]
75 mm
3 in.
6901-002066<02>
18
10mm
(3/8 in.)
3-2
13mm
(1/2 in.)
4
2
1
41cm
(16in.)
3
<16mm
(5/8in.)
13mm
(1/2 in.)
5.5mm
(7/32 in
.)
10mm
(3/8in.
1
3
2
13mm
(1/2 in.)
VMF308 Wall Plate Template
(6700-002536<01>)
Wood Stud SolidConcrete or Concrete Block
CustomerService
Americas: 800-359-5520 • 651-484-7988 • [email protected]
Europe,Middle East, and Africa: + 31 40 2324700 • [email protected]
AsiaPacic: 86 755 8996 9226 • [email protected]
4
4
1
3
Solid Concrete and Concrete Block Mounting – See Cautions in Step 3.
1. Using the wall plate template[01], level the template [01] and mark
the hole locations.
2. Drill pilot holes as illustrated.
3. Insert lag bolt anchors [30].
4. Place the wall plate against the wall. Tighten the lag bolts [32] only
until the washers [31] are pulled rmly against the wall plate [02].
2
[02]
[31]
[32]
75 mm
3 in.
[01]
[30]
6900-002066<02> 19
4
Install wall plate covers and the wire management assembly (optional)
onto the wall plate.
1. Mount the upper cover [05] using the ⁄ in. hex key [23] to install four
screws [27].
2. Mount the lower cover [05] using the ⁄ in. hex key [23] to install
four screws [27] while (optional) tting the rear mount of the wire
managment assembly [04] between the cover [05] and the lower
horizontal of the wall plate [02].
Note: Do not install the rear mount of the wire management assembly
[04] unless you intend to install the front mount of the wire management
assembly [04] in Step 6.
4
4
?
[02]
[04]
[04]
[05]
[05]
[27]
[23]
[27]
[05]
[27]
[23]
?
6901-002066<02>
20
5
1
2
Attach TV to Wall Plate
HEAVY! You will need assistance with this step.
1. Hang the TV with mounting bracket [03] onto the face plate of the
wall plate [02]. The lower mounting knobs of the mounting bracket
[03] will t into the keyhole slots of the face plate of the wall plate [02]
while the upper knobs will drop into the top slots of the face plate of
the wall plate [02].
2. Secure the TV to the face plate of the wall plate [02] by tightening the
locking screws [28] with the ⁄ in. hex key [25] until they capture the
upper knobs of the bracket [03].
[03]
[03]
[03]
[25]
[28]
[28]
[02]
[02]
[02]

Other Sanus TV Mount manuals

Sanus BMT1 User manual

Sanus

Sanus BMT1 User manual

Sanus SLF226-B8 User manual

Sanus

Sanus SLF226-B8 User manual

Sanus SOA-AVS1 User manual

Sanus

Sanus SOA-AVS1 User manual

Sanus VLF525 User manual

Sanus

Sanus VLF525 User manual

Sanus VDLT16 User manual

Sanus

Sanus VDLT16 User manual

Sanus VXF730-B2 User manual

Sanus

Sanus VXF730-B2 User manual

Sanus VisionMount MF215 User manual

Sanus

Sanus VisionMount MF215 User manual

Sanus LLT1 User manual

Sanus

Sanus LLT1 User manual

Sanus SLF7 User manual

Sanus

Sanus SLF7 User manual

Sanus Vuepoint F58c2 User manual

Sanus

Sanus Vuepoint F58c2 User manual

Sanus DLL1 User manual

Sanus

Sanus DLL1 User manual

Sanus SA809 User manual

Sanus

Sanus SA809 User manual

Sanus SASP1 User manual

Sanus

Sanus SASP1 User manual

Sanus Simplicity SMF3 User manual

Sanus

Sanus Simplicity SMF3 User manual

Sanus VLT5 User manual

Sanus

Sanus VLT5 User manual

Sanus VMFL1 User manual

Sanus

Sanus VMFL1 User manual

Sanus HLF112 User manual

Sanus

Sanus HLF112 User manual

Sanus VisionMount LT25 User manual

Sanus

Sanus VisionMount LT25 User manual

Sanus VLF311-B2 User manual

Sanus

Sanus VLF311-B2 User manual

Sanus VML44A User manual

Sanus

Sanus VML44A User manual

Sanus LL11 User manual

Sanus

Sanus LL11 User manual

Sanus VLT7-B3 User manual

Sanus

Sanus VLT7-B3 User manual

Sanus Classic MLT15 User manual

Sanus

Sanus Classic MLT15 User manual

Sanus Premium VLT5B1 User manual

Sanus

Sanus Premium VLT5B1 User manual

Popular TV Mount manuals by other brands

AVF JML2400 manual

AVF

AVF JML2400 manual

HUANUO HNCM8 Installation instruction

HUANUO

HUANUO HNCM8 Installation instruction

ErgoAV ERTSS2-01B instruction manual

ErgoAV

ErgoAV ERTSS2-01B instruction manual

Sony SU-WL845 Installation information

Sony

Sony SU-WL845 Installation information

ONKRON G140 user guide

ONKRON

ONKRON G140 user guide

FOGIM TKLA-7837 installation manual

FOGIM

FOGIM TKLA-7837 installation manual

PEERLESS LWS210/BK Installation and assembly

PEERLESS

PEERLESS LWS210/BK Installation and assembly

Secura QLT35 instruction manual

Secura

Secura QLT35 instruction manual

Kanto PT250 user manual

Kanto

Kanto PT250 user manual

ACME MTLF51 manual

ACME

ACME MTLF51 manual

Nordic DELTACO ARM-0251 user manual

Nordic

Nordic DELTACO ARM-0251 user manual

Vivo STAND-TV00M4 instruction manual

Vivo

Vivo STAND-TV00M4 instruction manual

Goobay TV EasyMount L user manual

Goobay

Goobay TV EasyMount L user manual

Panasonic WV-Q186 operating instructions

Panasonic

Panasonic WV-Q186 operating instructions

Brasforma SBRP 140 instruction manual

Brasforma

Brasforma SBRP 140 instruction manual

Kanto PS200 user manual

Kanto

Kanto PS200 user manual

Echogear EGCM1 instruction manual

Echogear

Echogear EGCM1 instruction manual

Ergotron Neo-Flex manual

Ergotron

Ergotron Neo-Flex manual

manuals.online logo
manuals.online logoBrands
  • About & Mission
  • Contact us
  • Privacy Policy
  • Terms and Conditions

Copyright 2025 Manuals.Online. All Rights Reserved.