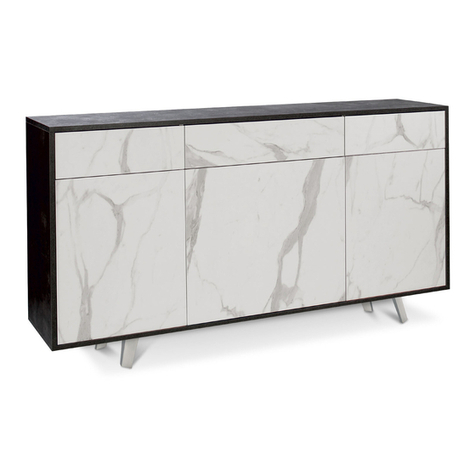
SARMOG 7034k User manual

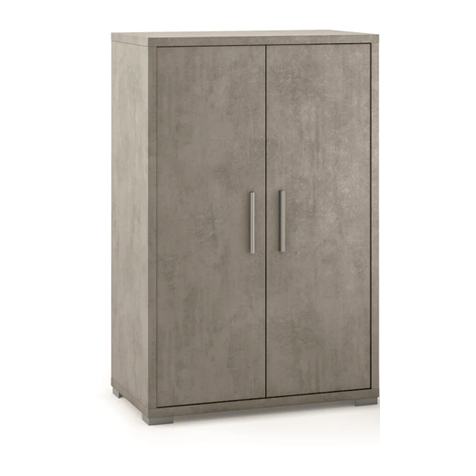
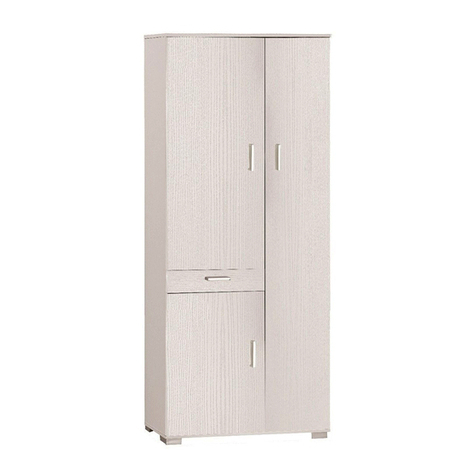
Mobile 4 ante
4-door unit
- Struttura materiale in truciolare nobilitato
- Piedini verniciati cromo satinato
- Push-pull
- Contiene: 4 ripiani regolabili in altezza
- Mobile in kit
- Material structure in engineered wood
- Chrome-plated feet
- Push-pull
- Inside: 4 adjustable shelves
- Kit furniture
Misure / Measures
Dettagli / Details
Componenti / Elements
Pos.
Pezzi / Pcs
Descrizione / Description
1
1
Coperchio (1064 x 408 x 18mm)
Cover (1064 x 408 x 18mm)
2
1
Fianco dx (1531 x 408 x 18mm)
Rh Side (1531 x 408 x 18mm)
3
1
Fianco sx (1531 x 408 x 18mm)
Lh Side (1531 x 408 x 18mm)
4
1
Tramezza orizzontale (1027 x 383 x 16mm)
Hor Partition Side (1027 x 383 x 16mm)
5
2
Tramezza verticale (757,5 x 383 x 16mm)
Ver Partition Side (757,5 x 383 x 16mm)
6
1
Base (1064 x 408 x 18mm)
7
4
Anta (762 x 510,5 x 16mm)
Door (762 x 510,5 x 16mm)
8
4
Schiena (769 x 517 x 3mm)
Backrest (769 x 517 x 3mm)
9
4
Ripiani (503 x 364 x 10mm)
Shelves (503 x 364 x 10mm)
36,4cm
50,3cm
Sp. 10mm
Ripiani
Shelves
50cm
50cm
50cm
37cm
50cm
75cm
75cm
75cm
75cm
40,8cm
106,4cm
12cm
156,7cm 168,7cm
Sp. 3mm
Schiena
Backrest
42
7
7
8
5
7
1
8
3
8
5
6
7
8
9
Sp. 18mm
Art. 7034k

A
C
B
D
Istruzioni di montaggio / Assembly Instructions
Accessori / Equipment
Pos.
Pezzi / Pcs
Descrizione / Description
10
8
Cerniere
Hinges
11
8
Vite 3x12
Screw 3x12
12
4
Piastra per push-pull
Push-pull plate
13
4
Push-pull
Screw-on Push-latch
14
5
Piedi
Feet
15
15
Vite TS 3,5x16
Screw TS 3,5x16
16
8
Eccentrico sp.18
Cam th.18
17
4
Eccentrico sp.16
Cam th.16
18
12
Tappino D.17 per Eccentrico
Cam Cover Cap D.17
19
12
Perno x Eccentrico
Cam Bolt
20
16
Reggipiani
Support shelves
Inserire gli eccentrici sp.18 (16) nei fori (in alto ed in basso) posti sui fianchi
dx e sx (2 e 3). Inserire gli eccentrici sp.16 (17) nei fori (in alto ed in basso)
posti sulla tramezza (4).
Insert the cams th.18 (16) into the holes (top and low) on the Rh and Lh sides (2
e 3). Insert the cams th.16 (17) into the holes (top and low) on the partition shelf
(4).
Fissare le piastre (12) sulle tramezze su entrambi i lati (5) con le viti 3x12 (11).
Attenzione che la freccia sia orientata verso il bordo bianco.
Fix the push-pull plates (12) on the partition shelves (5) on both sides with the
screws 3x12 (11). Make sure that the arrow points toward the white edge.
Avvitare i perni per eccentrico (19) nei fori su base (5), coperchio (1) e sui
fianchi dx e sx (2 e 3). Avvitarli sino a fine corsa.
Screw the cam bolts (19) into the holes on the top (1), base (5) and on the Lh
and Rh sides (2 and 3). Screw them up at the end of the stroke.
Appoggiare il fianco sx (3) su una superfice piana. Inserire la tramezza (4) sul
fianco, infilando i perni (18) nei rispettivi fori. Inserire ora due schiene (8)
facendole scorrere nelle guide poste sul fianco sx. Inserire sopra le schiene, nei
fori posti sulla tramezza (4) le due tramezze (5) come indicato in figura.
Put the Lh side (3) on a flat surface. Insert the partition shelf (4) on the side by
inserting it into the holes on the side with the cam bolts (18). Insert now two
backrests (8) by sliding them in the guide located on the Lh side. Insert up the
backrests, into the holes on the partition shelf (4) the two partition shelves (5) as
shown on figure.
10 16
15 20
13
18
12
11
17
14 19
La parte senza fori
verso la tramezza (4)
The one without holes
to the partition (4)

Istruzioni di montaggio / Assembly Instructions
E
G
I
M
F
H
N
I piedi possono essere fissati sulla base nella posizione che desiderate.
Utilizzare la sagoma ritagliata precedentemente e posizionarla su un angolo
della base. Fare dei fori nei centri con un punteruolo per agevolare la
penetrazione delle viti. Ripetere l’operazione sugli altri angoli. Posizionare ora
il piede (14) sui fori segnati sull’angolo della base. Fissare il piede con le viti
3x16 (15) (4 viti per piede). Ripetere l’operazione sugli altri angoli. Il restante
piedi va fissato centralmente sulla base.
You can fix the feet on the base at the positions that you prefer.
Use the shape cropped previously and turning on the corners of the base flush
with the sides. Mark the holes in the centers with an awl to facilitate the
penetration of the screws. Repeat the operation on the other corners. Support
the foot (14) on the holes marked on the corner of the base. Fix it using screws
3x16 (15) (4 screws for foot). Repeat the operation on the other corners. The
remaining foot should be placed centrally on the base.
Ruotare ora in senso orario gli eccentrici (16 e 17) posti sui fianchi e sulla
tramezza. Coprire quindi gli eccentrici con i tappini (19).
Turn the cams (16 and 17) located on the sides and partition shelf, in a
clockwise direction. Cover now the cams with the caps (19).
Inserire ora le altre due schiene (8) sulle tramezze (5) facendole scorrere nelle
apposite guide. Inserire ora il fianco dx (2) sul telaio così ottenuto.
Insert now the other two backrests (8) on the partitions (5) by sliding them in tthe
guides. Insert now the Rh side (2) on the frame thus obtained.
Inserire il ripiano inclinato (9) sui reggipiani (20) inseriti precedentemente sui
fianchi, quindi riportare in posizione orizzontale il ripiano.
Slip now inclined shelf (9) above the supports (20) previously inserted on sides,
tilting between the sides in the area above the supports, then back in a
horizontal position.
Posizionare 2 ante (7) adiacente al fianco sx (3) con i fori delle cerniere ai
rispettivi fori sul fianco. Inserire e fissare le cerniere (10) nei fori posti sull’anta e
sul fianco ed avvitare come mostrato in figura. Capovolgere il mobile e ripetere
l’operazione con le altre ante sul fianco dx (2).
Place two doors (7) near the left side (3) with the hinges holes at the respective
holes on the side. Insert and fix the hinges (10) into the holes on the door and
the screw them both on the door, as shown in the figure. Turn the cabinet and
repeat this operation with the other doors on the Rh side (2).
Chiudere il telaio così ottenuto con il coperchio (1) e la base (6), infilandoli nei
rispettivi fori posti sui fianchi e sulla tramezza con i perni per eccentrico (19).
Attenzione: non rompere i bordi alle estremità della fresata.
Close the frame thus obtained with the cover (1) and base (6), by inserting the
cam bolts (19) in the respective holes on the sides and the partition shelf.
Warning: do not break the edges at the ends of the milled.
Se l’apertura/chiusura delle ante non è perfetta, è necessario agire con il
cacciavite sulla vite posta al centro delle cerniere, avvitando e/o svitando
leggermente. In relazione al senso di rotazione della vite sulla cerniera, l’anta si
avvicina o allontana dal fianco del mobile.
If the opening/closing of the doors is not perfect, it is necessary to act with a
screwdriver on the screw in the center of the doors hinges, with short turn
screwing/unscrewing. According to the direction with which turns the screw of
the hinge, the door is appoaching or farther away from their side of cabinet.
Attenzione
Warning
L
Aprire le ante, ed inserire i push-pull (13) facendoli scorrere nelle guide poste
sulle piastre (12). Chiudere le ante e verificare che tutti i frontali siano allineati.
Eventualmente agire sui push-pull, avvitanto o svitando il supporto per
regolarne l’apertura. Per spostare le ante verso l’esterno o l’interno del mobile,
allentare gire sulla vite indicata in figura e spostare leggermente la cerniera
verso l’interno o l’esterno.
Open the doors, and insert the screw-on push latch (13) by sliding them into the
guides placed on the plates (12). Close the doors and check that all fronts are
aligned. If necessary, act on the screw-on push, screwing or unscrewing the
support to adjust its opening. To move the doors towards the outside or inside of
the cabinet, loosen the screw indicated on the figure and move the hinge
slightly inwards or outwards.
Base
ATTENZIONE
Il mobile va appoggiato su superfici perfettamente piane ed addossato ad una parete. Per evitarne ribaltamenti accidentali va fissato ad
una parete verticale stabile. Se al momento dell’apertura della confezione dell’imballo si evidenziassero anomalie delle parti strutturali
occorre contattare il fornitore prima del suo utilizzo.
WARNING
The cabinet must be supported on surfaces perfectly flat and leaned against a wall. To avoid accidental overturning which should be
fixed to a vertical wall stable. If at the time of the opening of the packaging, it yields anomalies of structural parts you need to contact the
supplier before its use.
Product Sheet
PRODOTTO
PRODUCT
COMPONENTI
COMPONENTS
TIPOLOGIA E MATERIALI PER
LA STRUTTURA
TYPOLOGY AND MATERIAL
FOR THE STRUCTURE
TIPOLOGIA E MATERIALI DI
RIVESTIMENTO SUPERFICI
TYPOLOGY AND COATING
MATERIAL SURFACES
TIPOLOGIA E MATERIALI PER
I BORDI
TYPOLOGY AND MATERIAL
FOR THE EDGES
Mobile multiuso
Multiuse cabinet
Fianchi e Tramezza
Sides and Partition Shelf
Truciolare nobilitato
Engineered wood
Carta impregnata come resine
melaminiche
Paper impregnated with
melanine resins
Carta impregnata con resine
termoplastiche e termoindurenti
o PVC
Paper impregnated with
thermoplastics and
thermosetting resins or PVC
Top
Base
Ante
Doors
Schiena
Backrest
Pannello fibrolegnoso
Panel wood fiber
Trattamento superficiale
idrofobizzante con paraffina
Surface treatment
hydrophobicizing with paraffin
Scheda Prodotto / Product Sheet
ALTRE CARATTERISTICHE
OTHER CHARACTERISTICS
USO
USE
PULIZIA
CLEANING
SMALTIMENTO
DISPOSAL
Materiale di classe E1: bassa emissione di formaldeide.
Questi pannelli possono essere utilizzati senza causare una
concentrazione di equilibrio nell’aria della camera di prova (definita
nella norma UNI EN 717-1) maggiore di 0,1 ppm, limite raccomandato
all’Organizzazione Mondiale della Sanità per gli ambienti di vita e
soggiorno.
Material class E1: low formaldehyde emissions
Class E1 panels can be used without causing an equilibrium
concentration in the air in the test chamber (defined in the UNI EN 717-
1) greater than 0.1 ppm, limit recommended by the World Health
Organization for life and living environments.
Mobile multiuso
Multiuse cabinet
Utilizzare panno inumidito con
alcool diluito o con prodotti per
la pulizia delle superfici lavabili,
purché privi di abrasivi e/o
solventi.
Use cloth moistened with
alcohol diluted or with cleaning
products for the washable
surfaces, if they are free of
abrasives and/or solvents
Al termine del ciclo di vita, il
prodotto può essere conferito
alla raccolta differenziata o
speciali piattaforme RSU
At the end of the life cycle the
product may be conferred on
the differentiated collection or
special platforms RSU
Via Pizzamiglia, 7
42016 S.Girolamo di Guastalla (RE) - Italy
www.sarmog.com
Web
E-mail
Tel
Fax
+39 0522 228058
+39 0522 228442
SARMOG s.r.l.
Other SARMOG Indoor Furnishing manuals

SARMOG
SARMOG 772 User manual

SARMOG
SARMOG Db625kdx User manual

SARMOG
SARMOG Db774k User manual

SARMOG
SARMOG Db359k User manual

SARMOG
SARMOG Db804k User manual

SARMOG
SARMOG 623 User manual

SARMOG
SARMOG 718k User manual

SARMOG
SARMOG 729k User manual

SARMOG
SARMOG Db802k User manual

SARMOG
SARMOG Db808k User manual
Popular Indoor Furnishing manuals by other brands

Herman Miller
Herman Miller Canvas Vista Credenza Installation and Disassembly for Recycling Instructions

Vintage view
Vintage view CC2-DOOR installation instructions

HOMEDEPOT
HOMEDEPOT TV1134 Assembly instructions

Thermarest
Thermarest MATTRESS SNAP KIT instructions

HAMPTON BAY
HAMPTON BAY BASE CABINET B12 Use and care guide

babymod
babymod W6926 Assembly and operation manual